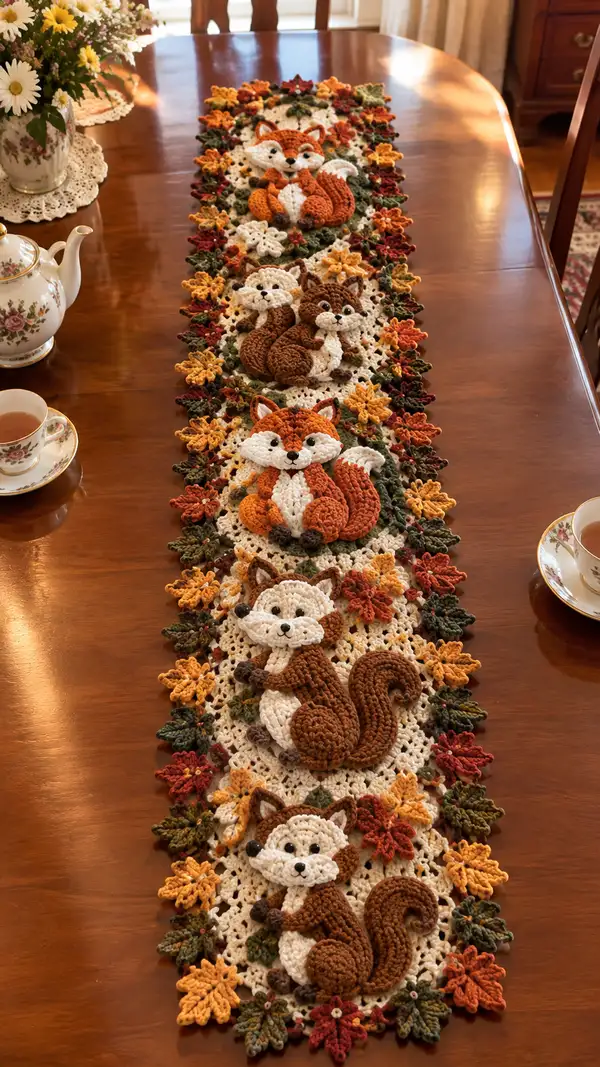
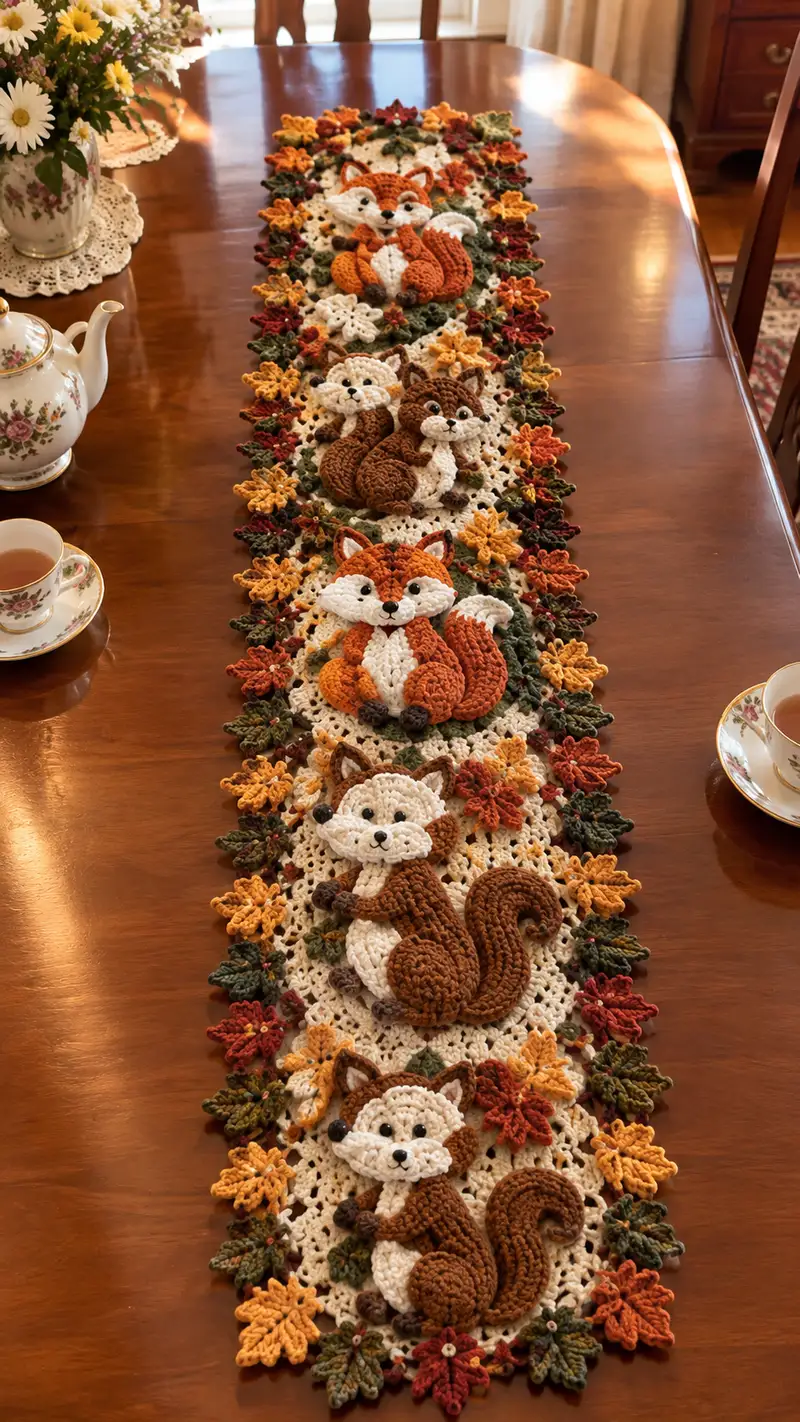
Create a charming autumn table runner featuring three dimensional fox appliques in pumpkin orange and chestnut brown set on a creamy medallion background with leafy fall edging. This pattern uses small motifs—fox head, body, tail, paws and leaves—assembled into a long runner rich with texture and color. Ideal as a seasonal centerpiece, it brings cozy woodland charm to any dining table. Detailed stitch-by-stitch rounds and assembly notes guide you through every step.
Progress Tracker
0% Complete
— Notes & Gauge :
Info :
Suggested gauge is not critical for this decorative runner but aim for approximately 16 sc x 16 rows = 4 inches using worsted weight and 3.5mm hook for appliques to achieve similar scale. Use tighter tension for 3D applique pieces so stuffing does not show through.
— Fox Head (Make 3 large, 3 small as shown) :
Round 3 :
(1 sc, inc) x 6 (18)
Round 4 :
(2 sc, inc) x 6 (24)
Round 5 :
(3 sc, inc) x 6 (30)
Round 6 :
(4 sc, inc) x 6 (36)
Round 7 :
(5 sc, inc) x 6 (42)
Round 8 :
(6 sc, inc) x 6 (48)
Round 9-12 :
1 sc in each st around (48)
Info :
Place eyes between rounds 11-12, spacing approx 10-12 sts apart for large heads (8-10 for small heads). If using safety eyes, insert and fasten washers now before further shaping. For embroidered eyes, mark placement with contrasting yarn.
Round 13-16 :
1 sc in each st around (48)
Info :
Begin very light stuffing at round 14; aim for slightly domed head. Do not overstuff; heads are appliqued onto medallion and should be slightly flexible.
Round 17 :
(6 sc, dec) x 6 (42)
Round 18 :
(5 sc, dec) x 6 (36)
Round 19 :
(4 sc, dec) x 6 (30)
Round 20 :
(3 sc, dec) x 6 (24)
Info :
Check placement of muzzle area: keep top of head slightly fuller (do not flatten). Finish stuffing gradually as you work rounds 17-20 to maintain roundness.
Round 21 :
(2 sc, dec) x 6 (18)
Round 22 :
(1 sc, dec) x 6 (12)
Info :
Fasten off leaving 10-12in tail for sewing head to medallion. Close hole with yarn needle or leave open slightly if you will sew a separate muzzle over the lower face area.
— Fox Muzzle / Face Patch (Make 3 large, 3 small) :
Round 3 :
(1 sc, inc) x 5 (15)
Round 4 :
(2 sc, inc) x 5 (20)
Round 5 :
1 sc in each st around (20)
Round 6 :
1 sc in each st around (20)
Info :
Place muzzle over lower portion of head aligning center with the head’s center. Sew in place with whip stitch, leaving small gap at top for nose embroidery or small safety nose application.
Round 7 :
Optional: embroider a small vertical nose and mouth with dark brown yarn; or attach a 4-5mm black bead nose by sewing through muzzle and backing inside.
— Fox Ears (Make 6 sets) :
Round 3 :
(1 sc, inc) x 6 (18)
Round 4 :
1 sc in next 6 sts, ch 1, turn to make ear point: sl st in next 3 sts, hdc next 2 sts, sl st to base - finish first ear. Repeat on second half of circle to form pointed ear shape (this creates two ear points from the round)
Info :
Sew ears to top of head at rounds 5-6, 8-10 sts apart center-to-center depending on head size. Slightly roll ear forward when sewing for a natural look.
— Fox Body (Flat Applique Base) :
Round 3 :
(1 sc, inc) x 8 (24)
Round 4 :
(2 sc, inc) x 8 (32)
Round 5-6 :
1 sc in each st around (32)
Round 7 :
(3 sc, inc) x 8 (40)
Round 8-10 :
1 sc in each st around (40)
Info :
Shape the body into a slightly flattened teardrop: after round 10, work a few shorter rounds on one side to create a tapered neck and wider lower belly. Place stitch marker at center top to align with head.
Round 11 :
Along first 10 sts of round: 1 sc in each st, then dec across next 4 sts to create slight slope, 1 sc remaining (36)
Round 12-14 :
1 sc in each st around (36)
Round 15 :
(3 sc, dec) x 6 (30)
Round 16 :
1 sc in each st around (30)
Info :
Sew body to medallion so that head will sit slightly overlapping the top edge of the body. Leave room for tail to curl around the side or over the body as pictured.
— Fox Tail (Curled, Make 3) :
Round 3 :
(1 sc, inc) x 6 (18)
Round 4 :
(2 sc, inc) x 6 (24)
Round 5 :
(3 sc, inc) x 6 (30)
Round 6-7 :
1 sc in each st around (30)
Round 8 :
(3 sc, dec) x 6 (24)
Round 9 :
1 sc in each st around (24)
Round 10 :
Work 1 sc in next 6 sts, then create a long chain of 18-22 ch (this chain forms the curled spiral foundation), sl st back along chain then continue to sc along remaining tail base for a textured spiral. End with 1 sl st and fasten off, leaving tail long for positioning.
Info :
Use light stuffing only in the thick base of the tail (rounds 1-7) to keep tail plush but flexible; avoid overstuffing so it can be sewn into a spiral shape and flattened slightly on the medallion.
— Fox Paws (Make 6 small front/back paws) :
Round 3 :
1 sc in each st around (10)
Round 4 :
Optional small toe details: embroider 2-3 short bars to simulate toes or attach small 2-3mm dark brown beads for paw pads
Info :
Sew front paws overlapping the lower edge of the body with a little forward tilt; rear paws sit against the body underside and help fix tail in place.
— Facial Embroidery & Details :
Info :
With dark brown or black embroidery thread: stitch small nose centered on muzzle, then stitch a tiny vertical line then two short diagonal mouth lines. Add small satin-stitched eyebrows or eyelids if desired. Use cream yarn to highlight inner ear by sewing a small triangular patch inside ear points.
— Small Fox Variant (Make 3 small foxes) :
Info :
Follow the same rounds as large fox but reduce final head rounds by two increases (stop at 42 sts instead of 48) and reduce body rounds proportionally: start body Round 1 with 6 sc in mr, increase pattern scaled down: 6 inc (12), (1 sc inc)x6 (18), (2sc inc)x6 (24) then 1-3 rounds even and shape with decs to produce a smaller teardrop.
— Leaf Motif (Make many for border) :
Round 1 :
Ch 10, sl st in 2nd ch from hook, sc in next, hdc in next, dc in next 2, tr in next, dc in next, hdc next, sc next, sl st to base (this makes one leaf)
Round 2 :
Work a second row around the leaf: sl st into each stitch along the underside: sc, hdc, dc, tr, dc, hdc, sc to thicken leaf; fasten off and weave ends (this creates a sturdier leaf)
Info :
Make leaves in olive, mustard, burgundy and pumpkin orange. Cluster and pin leaves around medallion edges before sewing to plan color balance.
— Small Star/Flower Accent (Make many) :
Round 1 :
6 sc in mr, sl st to join (6)
Round 2 :
(ch 3, sl st in next st) x 6 to create six tiny petals; fasten off leaving tail for sewing (this forms a tiny star-flower)
Info :
Sew small flower centers onto clusters of leaves or medallion surface. Add a tiny bead or French knot for center if desired.
— Medallion Base (Make repeat medallions — 6 medallions for pictured runner) :
Round 3 :
(1 sc, inc) x 6 (18)
Round 4 :
(2 sc, inc) x 6 (24)
Round 5 :
(3 sc, inc) x 6 (30)
Round 6 :
(4 sc, inc) x 6 (36)
Round 7 :
1 sc in each st around (36)
Round 8 :
*Ch 3, skip 2 sts, sc in next st* repeat around to create airy lacy round; adjust to end with sc and join (36 sl st spaces approx)
Round 9 :
In ch-3 spaces: (2 dc, ch 2, 2 dc) to create little shells around (count 12 shells) - join with sl st
Round 10 :
Between shells, sc 3 then ch 5, sc in next shell center to create larger openwork ring; repeat around forming 12 open arches
Info :
This medallion serves as background for each fox. Block medallions flat after finishing to ensure consistent sizing before assembly.
Round 11 :
Work 1 sc evenly around each arch spacing 48 sc around (48)
Round 12 :
1 sc in each st BLO to create a subtle raised edge (48)
Round 13 :
Optional border: *(sc, ch 2, sc) in next 6 sts, sc in remaining* repeat to form scalloped edge; fasten off
Info :
Make six medallions for the runner length shown. You can make more or fewer depending on your table length. Keep medallions uniform by blocking all to same dimensions.
— Assembling Fox Applique to Medallion :
Info :
Pin body centrally on medallion with top of body aligning with medallion top arc. Pin head slightly overlapping body top so fox looks naturally joined. Place tail next to body curling inward. Arrange ears, muzzle and paws and pin them in place before sewing.
Round 1 :
Sew body to medallion using whip stitch with matching color yarn, taking small stitches through both layers for an invisible seam. Sew around entire body edge.
Round 2 :
Sew head to medallion through base of head (round 23 tail) and through the upper edge of the body to secure. Add extra stitches across the neck for stability (approx 6-8 secure stitches).
Info :
When sewing tails, shape them into a slight spiral and tack in three points to hold curl: base, mid, and tip. Sew paws under body so they peek forward—place a small stitch through medallion to hold each paw position.
— Decorative Join Motifs (Linking medallions together) :
Round 1 :
Once two medallions are blocked and all appliques attached, place medallions right sides together overlapping approx 6-8 sts along adjoining edges where leaves will conceal seams.
Round 2 :
Using cream yarn, sl st through adjacent stitches of both medallions to join with a neat ladder seam. Work 1 sl st per stitch for about 6-8 sts then change to joined-edge decorative round.
Round 3 :
With green or contrasting fill yarn, work crab stitch (reverse sc) along join to create a decorative ridge. Add leaves and small flowers over the seam to hide ends and to enhance autumn effect. Attach each leaf by sewing through both medallion layers and knotting securely on inside.
Info :
Stagger joins so foxes are centered on alternating medallion centers, giving the runner the pattern of diamonds of fox/space/fox as pictured. Plan placement before permanent seaming.
— Runner Edge Border (Work along full joined length) :
Round 1 :
Work 1 sc evenly around entire outer edge of joined medallions (approx 220-260 sc depending on number of medallions) to give a clean edge
Round 2 :
*(ch 3, skip 1, sc in next) repeat around to create even scallops for leaf placement
Round 3 :
Attach leaves and small flowers into each ch-3 space: sew leaf base into ch-3, with small star-flower sewn at leaf junction. Alternate colors for a rich border effect.
Info :
If you prefer a more uniform finished edge, work a round of slip stitches in cream after leaf placement to tack them down and give slightly flatter border.
— Finishing & Blocking :
Info :
Block runner flat by spritzing with water and pinning edges neat on blocking board. Allow to dry completely. Weave in all ends at least 2 inches into the back of medallions, then trim. Ensure all applique pieces are securely sewn with no loose stitches.
Round 1 :
Check safety of all beads and eyes: if runner is used where children may access, embroider eyes instead of using beads/safety eyes.
Info :
Optional: lightly starch or spray fabric stiffener to help runner lie perfectly flat on table for special occasions. Store flat or rolled to avoid permanent creases.
— Estimated Round Totals & Scaling Notes :
Info :
This pattern contains many small motifs; across all components you will work approx 140-180 rounds total (counting each small leaf/paw/head round as rounds). If you make more medallions for a longer runner, expect to repeat the medallion and join rounds for each additional panel. Keep spare yarn for edge work and leaves, colors vary by taste.
Completing this pumpkin-orange fox table runner turns everyday tables into warm, autumn gatherings full of personality and texture. Each medallion and applique comes together as a charming tapestry of fall colors and cute foxy faces, perfect for seasonal decor or a handmade gift. I hope making this brings you peaceful stitching moments and a table centerpiece you'll cherish. 🍁🧶