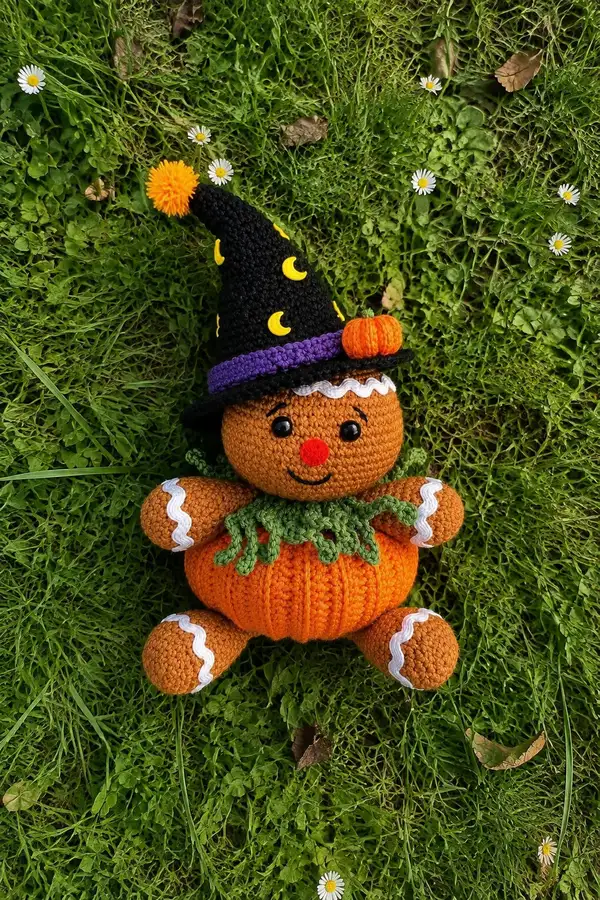
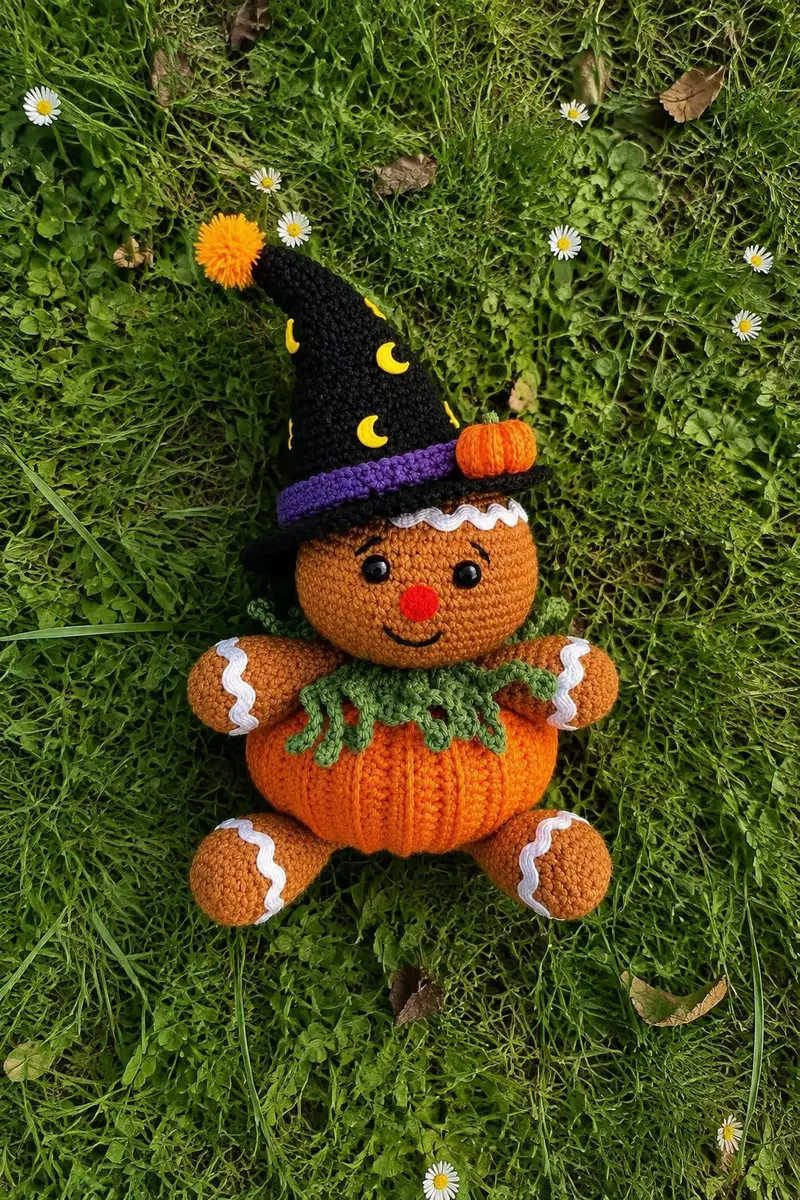
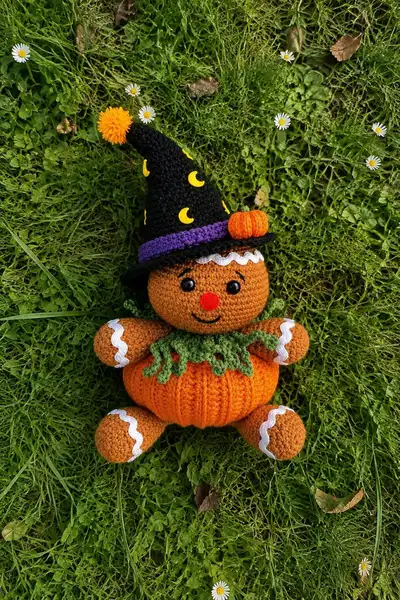
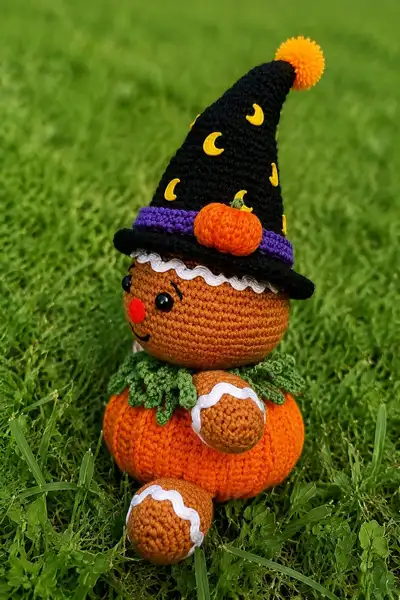
A sweet Halloween/Christmas crossover amigurumi — a pumpkin-bodied gingerbread friend wearing a tall witch hat decorated with moons and a tiny pumpkin. Features rickrack icing details, button-like safety eyes, a pompom hat tip, and a leafy green collar. Compact, cuddly, and full of seasonal charm — perfect for holiday decor or a handmade gift.
Progress Tracker
0% Complete
— Head :
Round 1 :
6 sc in magic ring (6)
Round 3 :
(1 sc, 1 inc) x 6 (18)
Round 4 :
(2 sc, 1 inc) x 6 (24)
Round 5 :
(3 sc, 1 inc) x 6 (30)
Round 6 :
(4 sc, 1 inc) x 6 (36)
Round 7 :
(5 sc, 1 inc) x 6 (42)
Round 8 :
(6 sc, 1 inc) x 6 (48)
Round 9-12 :
1 sc in each st (48)
Info :
Place safety eyes between rounds 10-11, approximately 10-12 stitches apart depending on desired expression. Mark the round start with a stitch marker. Position eyes centered horizontally; typical spacing for 8mm eyes is 10 stitches apart on 48 circumference.
Round 13-16 :
1 sc in each st (48)
Info :
Embroider small eyebrow arches with black yarn now if you want to secure them before stuffing. Use simple backstitch or surface slip stitch for tiny brows.
Round 17 :
(6 sc, 1 dec) x 6 (42)
Round 18 :
(5 sc, 1 dec) x 6 (36)
Info :
Begin stuffing head lightly but evenly. Use small amounts of fiberfill and push into eye sockets and top of head to achieve roundness. Add more stuffing as you decrease.
Round 19 :
(4 sc, 1 dec) x 6 (30)
Round 20 :
(3 sc, 1 dec) x 6 (24)
Round 21 :
(2 sc, 1 dec) x 6 (18)
Info :
Place the nose (red yarn small felt circle or pompom) between rounds 17-19 centered 4-6 stitches below the eyes. Sew or glue in place. Continue stuffing firmly but not overstuffed.
Round 22 :
(1 sc, 1 dec) x 6 (12)
Info :
Fasten off leaving a long tail for sewing to the neck. Finish closing the head hole using a yarn needle and sew through remaining stitches; weave in tail inside the head. If you will add a hat that sits over the head, leave a slightly open neck edge to attach hat brim later.
— Body (Pumpkin Skirt & Torso) :
Round 1 :
6 sc in magic ring (6)
Round 3 :
(1 sc, 1 inc) x 6 (18)
Round 4 :
(2 sc, 1 inc) x 6 (24)
Round 5 :
(3 sc, 1 inc) x 6 (30)
Round 6 :
(4 sc, 1 inc) x 6 (36)
Info :
Change to bright pumpkin orange yarn now. Carry the previous color inside or fasten off and join the orange with a slip stitch in the first stitch of the round. Working in the round creates a pumpkin-shaped base.
Round 7-10 :
1 sc in each st (36)
Round 11 :
1 sc in each st BLO (36)
Info :
Working this round in BLO creates a narrow ridge which we will use as the top of the pumpkin ribbing. Switch back to normal sc in following rounds to form the body beneath the ribbed top.
Round 12-16 :
1 sc in each st (36)
Round 17 :
(4 sc, 1 inc) x 6 (42)
Round 18-20 :
1 sc in each st (42)
Info :
To create vertical pumpkin ribs, we will make 12 vertical segments. Use 12 stitch markers spaced evenly around round 18 marking each 3rd stitch. Later we will use slip-stitch channels to emphasize ribs.
Round 21 :
(5 sc, 1 inc) x 7? (ERROR)
Correction Info :
Apologies — maintain mathematically consistent increases. Adjust Round 21 to (5 sc, 1 inc) x 7 would create an odd repetition. For consistent 42 sts use (5 sc, 1 inc) x 6 = 48 if increasing. Instead we will shape downward. Use Round 21: (5 sc, 1 dec) x 6 (36)
Round 21 (revised) :
(5 sc, 1 dec) x 6 (36)
Round 22-25 :
1 sc in each st (36)
Info :
Now work vertical ridge shaping: for each previously marked rib marker, work slip stitch columns down the body to create visible ribs. Insert hook into the FLO of the stitch directly below the BLO row and work a slip stitch down for 6-8 rounds to create a channel. Repeat at each marker to create 12 ribs.
Round 26 :
(3 sc, 1 dec) x 6 (24)
Round 27 :
(2 sc, 1 dec) x 6 (18)
Info :
Stuff the pumpkin skirt moderately — the pumpkin needs to sit stable but not rock. Focus stuffing in each rib valley so the ribs remain pronounced. Leave the top opening large enough to sew the torso/head neck in place.
Round 28 :
(1 sc, 1 dec) x 6 (12)
Info :
Fasten off leaving long tail to sew the torso base closed or to attach to a flat felt disc for stability. If attaching legs separately, leave bottom open enough to sew a toeless joint into place.
— Torso (neck area, attached to pumpkin) :
Round 1 :
Join gingerbread brown at top center of pumpkin opening: 6 sc in magic ring (6)
Round 3 :
(1 sc, 1 inc) x 6 (18)
Round 4 :
(2 sc, 1 inc) x 6 (24)
Round 5-8 :
1 sc in each st (24)
Info :
Work a short neck approximately 4 rounds high to raise the head. Stuff the neck lightly to keep it flexible. Use a marker to align the head when sewing it on to ensure it faces forward.
Round 9 :
(2 sc, 1 dec) x 6 (18)
Round 10 :
(1 sc, 1 dec) x 6 (12)
Info :
Fasten off leaving long tail to sew the torso to the inside of the pumpkin opening. Reinforce seam with back-and-forth stitches for durability and alignment with pumpkin ribs.
— Arms (Make 2) :
Round 1 :
6 sc in magic ring (6)
Round 3 :
(1 sc, 1 inc) x 6 (18)
Round 4 :
1 sc in each st (18)
Info :
This small rounded end will act as the gingerbread arm hand. If you want a flat palm, stuff lightly and do not overstuff the tip.
Round 5 :
(3 sc, 1 inc) x 4 + 2 sc (22) — alternate explanation: increase evenly to 22
Round 6-9 :
1 sc in each st (22)
Round 10 :
(3 sc, 1 dec) x 4 + 2 sc (18)
Info :
At this point begin forming the arm shaft. Crochet evenly for 4 rounds to set the length you prefer. Stuff hand end firmly, arm shaft lightly; gingerbread arms should remain slightly flexible for sewing.
Round 11-14 :
1 sc in each st (18)
Round 15 :
(2 sc, 1 dec) x 4 + 2 sc (14)
Round 16-18 :
1 sc in each st (14)
Info :
Finish stuffing the arm lightly. Fasten off leaving long tail for sewing to torso. Repeat for second arm. Add white rickrack icing by sewing a narrow white chain or use pre-made trim around round 4-6 of the hand area.
— Legs (Make 2) :
Round 1 :
6 sc in magic ring (6)
Round 3 :
(1 sc, 1 inc) x 6 (18)
Round 4 :
(2 sc, 1 inc) x 6 (24)
Round 5-7 :
1 sc in each st (24)
Info :
Create the foot shape by working a slightly wider round and then tapering for the ankle. Stuff the foot firmly so the amigurumi sits upright.
Round 8 :
(3 sc, 1 dec) x 6 (18)
Round 9-12 :
1 sc in each st (18)
Round 13 :
(2 sc, 1 dec) x 6 (12)
Round 14-18 :
1 sc in each st (12)
Round 19 :
(1 sc, 1 dec) x 4 + 4 sc (8)
Round 20-22 :
1 sc in each st (8)
Info :
Fasten off leaving long tail. Sew legs to bottom of the pumpkin skirt at opposite sides so the amigurumi can sit. Decorate foot tops with a wavy white rickrack as shown in the photos — either sew trim or crochet a chain and stitch it in a wave along the foot round 5-7.
— Leaf Collar (Green, make 1) :
Round 1 :
Chain 40, join to first chain with sl st to form loop (40 ch loop)
Round 2 :
Ch1, 1 sc in each ch around (40)
Round 3 :
*Ch5, skip 1, sl st in next; rep from * around to create loops (approximately 8-10 loops)
Round 4 :
For each loop: (sc, hdc, 3 dc, hdc, sc) into loop to form a leaf. Repeat for each loop to create leafy collar
Info :
Sew the collar into the neck seam between head and torso, spacing leaves evenly. Use green yarn tails to tack leaves down so collar sits flared like in the images.
— Tiny Pumpkin Accent (Make 1) :
Round 1 :
6 sc in magic ring (6)
Round 3 :
(1 sc, 1 inc) x 6 (18)
Round 4-5 :
1 sc in each st (18)
Round 6 :
(1 sc, 1 dec) x 6 (12)
Info :
Before closing completely, add a tiny amount of stuffing and pull yarn tight. Use a separate length of green yarn to add 4-6 surface stitches from top to bottom to create pumpkin ridges — pull slightly to indent and form a realistic small pumpkin. Make a small stem with green yarn by chaining 4 and slip stitching back; sew to top.
— Hat Cone (Black) :
Round 1 :
6 sc in magic ring (6)
Round 3 :
(1 sc, 1 inc) x 6 (18)
Round 4 :
(2 sc, 1 inc) x 6 (24)
Round 5-6 :
1 sc in each st (24)
Round 7 :
(3 sc, 1 inc) x 6 (30)
Round 8-10 :
1 sc in each st (30)
Round 11 :
(4 sc, 1 inc) x 6 (36)
Round 12-14 :
1 sc in each st (36)
Round 15 :
(5 sc, 1 inc) x 6 (42)
Round 16-18 :
1 sc in each st (42)
Info :
Continue to shape the cone by working even for several rounds. The cone should taper slowly. If you prefer a taller hat, keep in mind increases earlier set the cone base circumference for the brim.
Round 19 :
(8 sc, 1 dec) x 4 + (rest to equal 42) — simplified: work 6 decreases evenly across round to reduce to 36 (36)
Round 20-24 :
1 sc in each st (36)
Round 25 :
(3 sc, 1 dec) x 9 (27)
Round 26 :
1 sc in each st (27)
Round 27 :
(2 sc, 1 dec) x 9 (18)
Round 28 :
1 sc in each st (18)
Round 29 :
(1 sc, 1 dec) x 6 (12)
Info :
Stuff the cone lightly to prevent it from collapsing, especially at the base. Finish by closing the top and weaving tail through to secure. Sew small orange pompom to hat tip. Attach yellow moon appliques around cone with small stitches or fabric glue at even intervals to mimic the photo.
— Hat Brim & Band :
Round 1 (Brim) :
With black yarn, ch 26, join to first ch with sl st to form a loop (26)
Round 2 :
1 sc in each ch around (26)
Round 3 :
(1 sc, 1 inc) x 13 (39)
Round 4 :
1 sc in each st (39)
Info :
Work one or two rounds in BLO on the brim's last round to give a thin raised edge that helps the brim hold shape. Block or stiffen brim if you prefer a flat, firm look.
Round 5 (Band) :
With purple yarn, join at inside edge and work 1 sc in each st around for 3-4 rounds to create a raised band. Fasten off and sew band to brim. Sew tiny orange pumpkin to band as an accent.
— White Rickrack Icing (Detail) :
Method :
With white yarn and smaller hook or use pre-made trim, crochet a narrow wavy chain: ch 30, (sc, ch2, sl st in next) repeat across to form wave, adjust length to fit head circumference. Sew to head above eyes and to arms/legs along the hand/foot round to mimic icing.
Info :
Sew rickrack with small whip stitches; block gently to set shape. For crisp waves, embroider a dashed line with white yarn and then add loops for volume.
— Assembly & Final Touches :
Info :
Before final assembly, block and shape brim and hat, embroider mouth curve and eyelashes with black yarn on head, and secure safety eyes with washers. Use picture as reference for proportions. Pin pieces in place before sewing to ensure symmetry and balance.
Extra Finishing :
Add tiny yellow moon buttons or appliques to hat with secure stitches. Add wool/fabric blush to cheeks for rosy look if desired. Weave in all tails and trim close.
This pumpkin witch gingerbread friend combines playful shapes and tiny seasonal details to make a lovable keepsake! Each section is designed to be stitched with care, then assembled into a character that’s full of personality and charm. Follow the rounds, add your favorite color touches, and you’ll finish with a cozy handmade companion ready for display or gifting. 🧶🎃✨