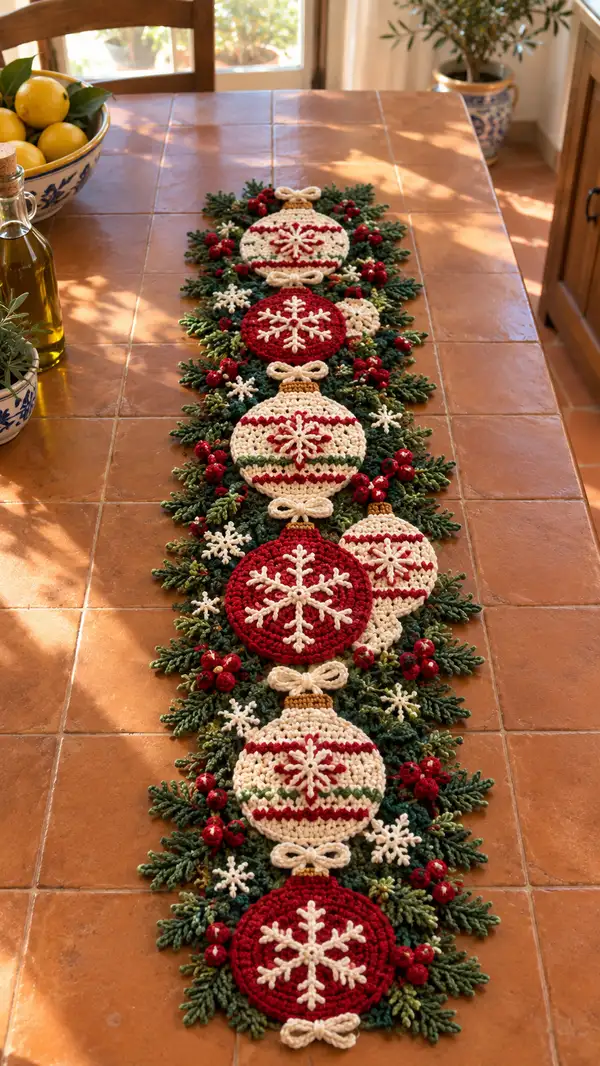
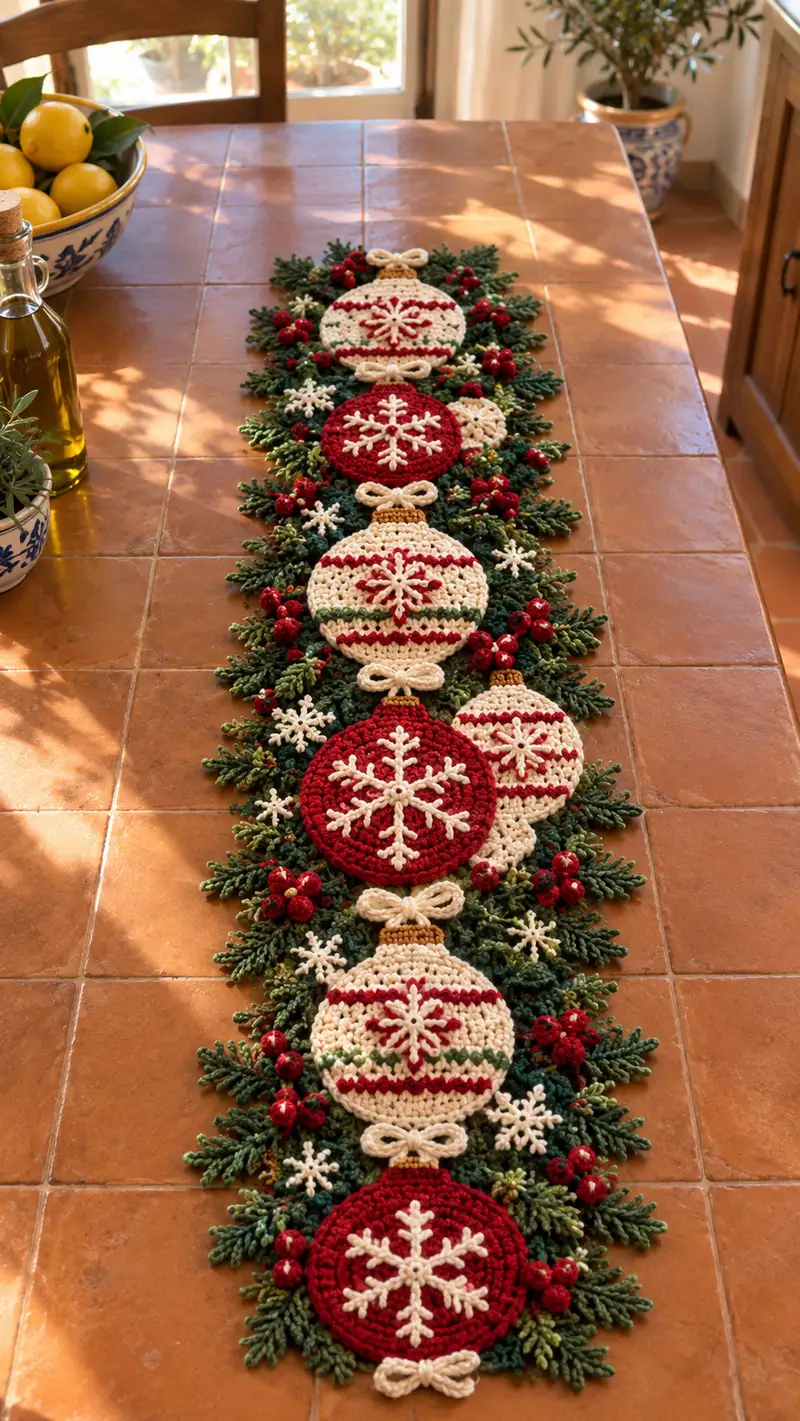
Create a festive centerpiece with this Red and Cream Ornament Snowflake Table Runner. The runner pairs crocheted ornament medallions, delicate snowflake appliques, tiny bows, bright berry clusters and evergreen sprigs to create a layered holiday display. Textured stitches, color striping and surface snowflakes give the runner depth and charm. Designed to be assembled into a long runner, this pattern is ideal for gifting or dressing a holiday table.
Progress Tracker
0% Complete
— Large Round Ornament (Make 3 Red, 3 Cream - Base Circle) :
Round 1 :
6 sc in magic ring (6)
Round 3 :
(1 sc, 1 inc) x 6 (18)
Round 4 :
(2 sc, 1 inc) x 6 (24)
Round 5 :
(3 sc, 1 inc) x 6 (30)
Info :
At this point your circle is expanding evenly. Keep tension consistent and place a marker at the first stitch of each round to track increases.
Round 6 :
(4 sc, 1 inc) x 6 (36)
Round 7 :
(5 sc, 1 inc) x 6 (42)
Round 8 :
(6 sc, 1 inc) x 6 (48)
Round 9 :
1 sc in each st (48)
Round 10 :
1 sc in each st (48)
Info :
For the large ornament, rounds 9-12 create the flat face. If you prefer a slightly puffier ornament, add two more even rounds before surface decoration.
Round 11 :
1 sc in each st (48)
Round 12 :
1 sc in each st (48) - Fasten off and weave in ends if you will appliqué snowflake later
Info :
Make 6 large circles total: three in red and three in cream. Block lightly to flatten if needed before adding surface snowflake work.
— Small Round Ornament (Make 2 Red, 2 Cream - Smaller Discs) :
Round 1 :
6 sc in magic ring (6)
Round 3 :
(1 sc, 1 inc) x 6 (18)
Round 4 :
(2 sc, 1 inc) x 6 (24)
Round 5 :
1 sc in each st (24)
Round 6 :
1 sc in each st (24)
Info :
These small discs act as layered ornaments or side accents. Make 4 total and reserve for assembly placement.
— Ornament Cap (Gold) and Neck Ring (Make 5 caps) :
Info :
Use gold or mustard yarn. Caps are small cylinders sewn to top of ornaments for a classic look. Work tightly.
Round 1 :
6 sc in magic ring (6)
Round 3 :
1 sc in each st (12)
Round 4 :
1 sc in each st BLO (12)
Round 5 :
1 sc in each st (12) - Fasten off leaving long tail for sewing (approx 12 caps)
Info :
Sew caps to the top center of each ornament circle. Use the tail to anchor through the ornament face and fasten securely.
— Ornament Bow (Make 6 small bows) :
Round 1 :
Ch 16, sc in 2nd ch from hook and across (15)
Round 2 :
Ch 1, turn, sc across (15)
Round 3 :
Ch 1, turn, sc across (15) - Fasten off leaving long tail for wrapping center
Info :
Pinch the strip to form a bow and wrap the long tail around center several times then stitch to secure and hide the end. Make 6 bows.
— Large Snowflake Applique (Make 3 large snowflakes for center ornaments) :
Round 1 :
Ch 4, sl st to form a small loop, ch 1, 8 sc into loop; sl st to join (8)
Round 2 :
*Ch 6, sl st in next sc; rep from * around to make 8 arms (loops will form arms)
Round 3 :
Work into each ch-6 loop: (sc, hdc, dc, tr, dc, hdc, sc) in each loop; sl st to base (creates padded arm)
Round 4 :
Surface: With contrasting color, use sl st to create a line from center to tip of each arm, then back to center to add raised snowflake ribs (work on right side)
Round 5 :
At arm midpoints, embroider tiny branches: from center sl st 3 small picots (ch3, sl st in 3rd ch) on each side of the arm symmetrically to form a 6-branched snowflake look
Info :
Snowflakes are worked flat and sewn to ornament faces with small invisible whip stitches. Make 3 large snowflakes in cream to overlay the red medallions and 3 in red to overlay cream medallions if desired.
— Small Snowflake Applique (Make 8 small snowflakes for filler) :
Round 1 :
Ch 4, sl st to form ring, ch 1, 6 sc into ring (6)
Round 2 :
*Ch 5, sl st in next sc; rep from * around to make 6 arms
Round 3 :
Into each ch-5 arm: (sc, hdc, dc, hdc, sc); sl st to join. Fasten off leaving a tail for sewing
Info :
These smaller snowflakes are perfect for filling gaps around ornaments and for scattering through the greenery. Make 8-10 depending on runner length.
— Evergreen Sprig A (Full Sprig - Make 18-24) :
Info :
Use forest green; sprigs are worked in a narrow central stem with attached leaves made by picot-like clusters. These are sewn around motifs to simulate evergreen.
Round 1 :
Ch 15, sc in 2nd ch from hook and across to end (14)
Round 2 :
Ch 1, turn. Working along one side: *(sc, ch 3, sl st in next stitch) repeat across to create leaf points; when you reach end, continue on the opposite side mirroring the same leaf picot pattern (14 leaf picots per side)
Round 3 :
Work 1 sc around base through both layers to close and reinforce stem (28)
Round 4 :
Edge row: sl st around the outside edge of the sprig to create a neat finished look. Fasten off leaving long tail for sewing
Info :
Sprig size and number determine the fullness of the runner. For a lush look make 18-24 full sprigs and 30-40 mini sprigs (see next section).
— Evergreen Sprig B (Mini Sprig - Make 30-40) :
Round 1 :
Ch 9, sc in 2nd ch from hook and across (8)
Round 2 :
Ch 1, turn. *sc, ch 3, sl st in next st* repeat across both sides to make 8 leaf points total
Round 3 :
Work 1 sc through base to secure (16) - Fasten off leaving tail for sewing
Info :
Use two shades of green interchangeably to add depth. Stitch base tails to ornament backing leaving leaf tips free to fan outward.
— Berry Cluster (Make 10-12) :
Round 1 :
With red, ch 2, 6 sc in 2nd ch from hook (6)
Round 2 :
Inc in each st around (12)
Round 3 :
1 sc in each st around (12) - Do not stuff heavily; add small amount of fiberfill to make the cluster slightly plump
Round 4 :
Flatten and sl st through opposite stitches to create a small plump berry. Make clusters of 3-5 berries by sewing small berries together before attaching to sprig
Info :
Glue a tiny gold bead or stitch a gold French knot to the top of each berry if you want an extra shine; ensure glue is fully dried before assembly.
— Joining Backing Discs (Make 6 backing discs to sew motifs onto) :
Round 1 :
Ch 2, 8 hdc in 2nd ch from hook, sl st to join (8)
Round 2 :
1 hdc in each st, inc evenly to produce a flat disc comparable to ornament size (work to approx 30-40 stitches dependent on ornament) - Fasten off
Info :
These backing discs provide a surface to sew sprigs and berries onto and act as the structural base when joining ornaments into the runner.
— Assembly: Positioning and Joining Motifs :
Round 1 :
Lay out your ornaments in desired order on a flat surface. Typical layout alternates large cream, large red, small cream offset, large red, large cream to create a visually repeating pattern for the runner length (6 base ornaments pictured)
Round 2 :
Pin backing discs behind each ornament and place sprigs around the edges roughly mirroring the styled photograph. Do not sew yet; this is your mockup stage
Info :
Take a photo of your pinned layout to remember placement. Move pieces to adjust balance — e.g., group berry clusters in 2-3 places around each ornament for symmetry.
Round 3 :
Sew each ornament to its backing disc using the long tail and a yarn needle; use small whip stitches around the edge to secure (approx 20-24 stitches per large ornament)
Round 4 :
After all ornaments are secured to discs, join adjacent discs with slip-stitch join: place pieces right sides up, insert hook through both outer edges and sl st across to create a flat seam. Join pairs along the runner center (this creates a strong seam and leaves the right side looking neat)
Round 5 :
Between each joined ornament add a 6-8 sl st connecting row to create a slight connector and allow space for bows and sprigs; keep tension even
Info :
When joining, leave small gaps for the bows to sit; sew bows with long tail by anchoring center and tacking ends to the backing disc so the bow sits above sprigs.
— Attaching Sprigs, Snowflakes and Berries :
Round 1 :
Use the long tails from backing discs to tack full sprigs along the outer edge of each ornament disc. Arrange sprigs with tips fanning outwards and secure with 6-8 invisible stitches per sprig
Round 2 :
Sew mini sprigs in groups to fill gaps and create a layered effect; vary placement and shade of green to mimic natural foliage (use 2-4 mini sprigs per side of a large ornament)
Round 3 :
Position berry clusters in small groups where sprigs meet and stitch through the backing disc into the sprig base for a secure hold (use 2-3 stitches per berry cluster)
Round 4 :
Center large snowflakes on ornament faces and sew through key points (center and 3-4 arm points) to keep them flat and secure. Stitch small snowflakes around the edges tucked within sprigs
Info :
Always sew through backing disc when possible to avoid pulling the ornament face out of shape. Keep stitches tiny and hidden inside leaf clusters or behind beads.
— Edge and Finishing Row (Border and Secure Seam) :
Round 1 :
With cream, attach to edge of first ornament backing disc and sc evenly around entire runner perimeter, working through both joined edges where discs meet to secure the seam (sc count will vary with runner width)
Round 2 :
Round 2: (ch 2, skip 1 st, sl st in next st) repeat around to create a scalloped decorative edge. Fasten off and weave in ends.
Info :
Scallop spacing is decorative and can be increased or decreased for a tighter or looser scallop. If desired, add gold slip-stitch highlights around the caps and bows with a metallic thread.
— Final Embellishments and Securement :
Round 1 :
Use thin gold or contrasting yarn to add small accent stitches on ornament caps and along stripes; secure ends by weaving into backing disc
Round 2 :
Check all attachments and reinforce with small stitches where needed; add a dab of fabric glue behind heavy berry clusters if they feel loose (allow to dry fully)
Info :
Trim all loose ends closely and weave through 4-6 stitches before cutting to avoid unraveling. Lightly steam block the completed runner to set shape.
— Optional: Extending or Shortening Runner :
Round 1 :
To lengthen: make additional ornament units and backing discs and join in the same manner. Each repeat adds approx 8-10 inches depending on sprig fullness
Round 2 :
To shorten: omit one or more ornament units or remove several full sprigs, rework joining rows so scallop and seam remain symmetrical
Info :
Because the design is modular you can scale width by making larger or smaller base discs. Keep consistent gauge across your motifs for best alignment.
This Red and Cream Ornament Snowflake Table Runner brings joyful holiday ambiance to any table—each ornament medallion and layered sprig adds handcrafted charm. Creating it is a festive and satisfying journey that combines simple rounds with delicate finishing touches. The modular construction means you can make it as long or short as you like. Enjoy stitching details and sharing your finished runner! 🎄🧶