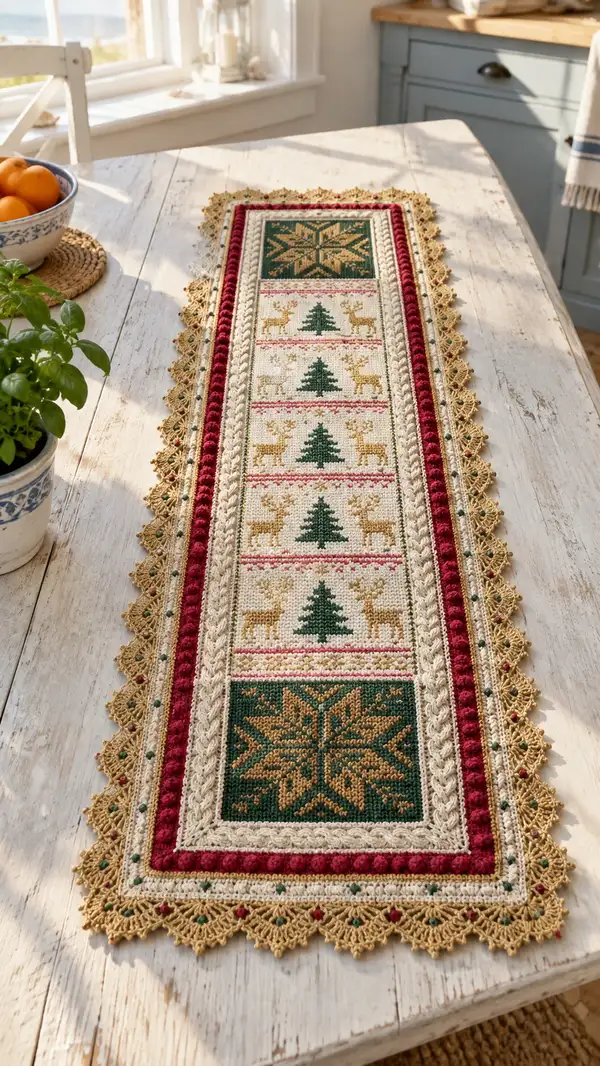
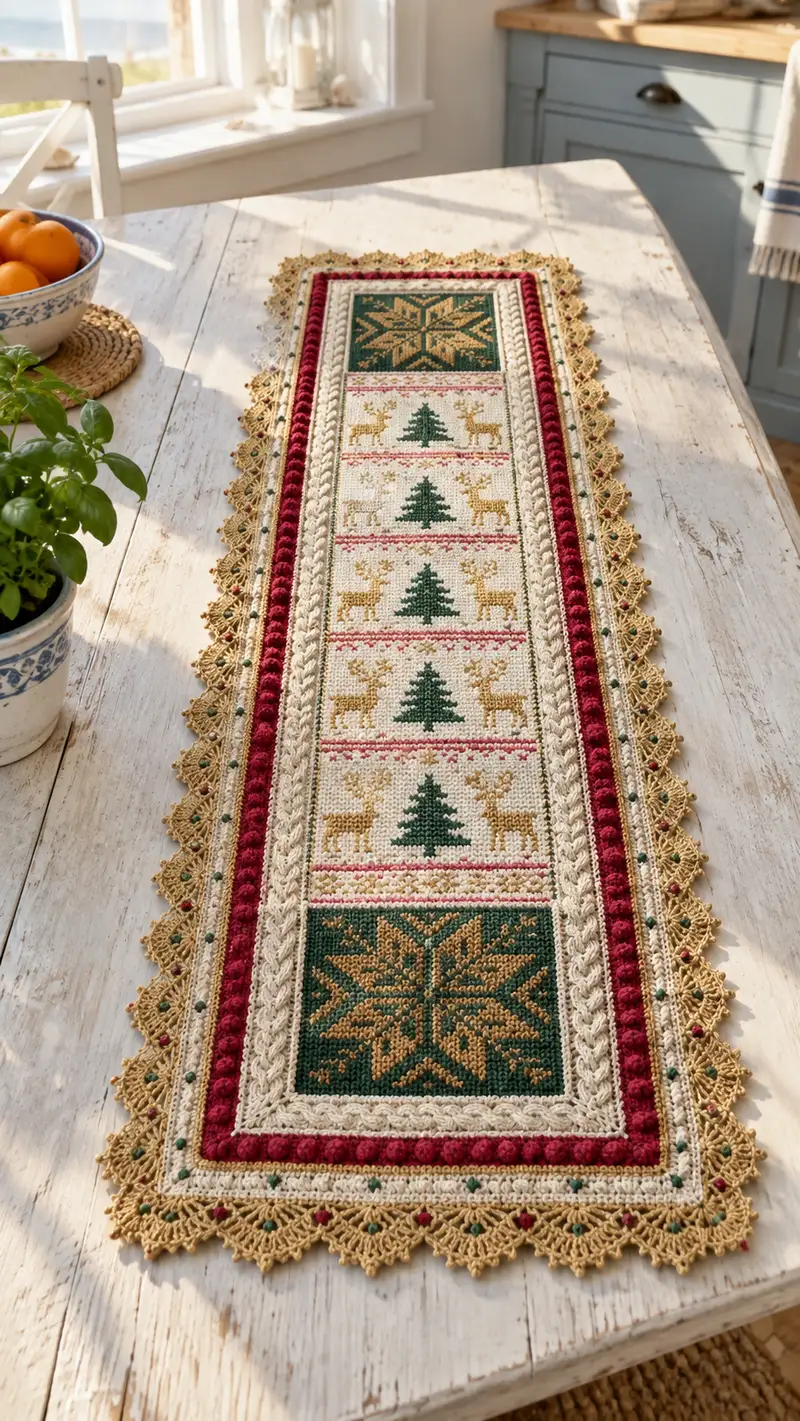
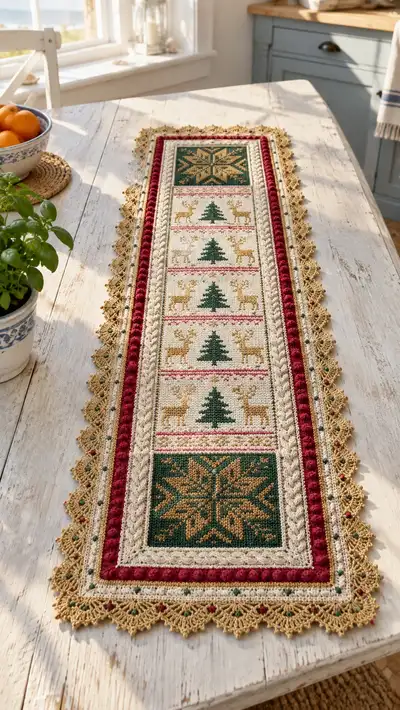
A long, elegant Nordic-inspired table runner worked in tapestry and textured stitch borders. Features stacked deer-and-tree panels, star blocks at each end, a plush berry-red bobble stripe, braided cable band and delicate golden lace edging. Perfect for holiday tables or winter decor, it pairs rich forest green, warm gold and deep red on a creamy background for a traditional, handcrafted look.
Progress Tracker
0% Complete
— Notes & Prep :
Info :
This runner is worked flat in rows using tapestry colorwork for the center pictorial panel. You will maintain a constant stitch count across the rectangular panel (121 sts) until the textured borders are added. Work tightly for neat colorwork but not so tight that it becomes stiff to block.
Info :
Color key used in pattern steps: A = Cream (background), B = Forest Green (motif background and trees), C = Warm Gold/Tan (star and deer), D = Cranberry Red (bobble row and small accents), E = Pale Gold/Beige (lace edging). Keep colors handy and weave in short tails as you go.
Info :
Foundation chain and first row set the width: Chain 122 (122 ch). Begin working single crochet in second ch from hook to create panel 121 sts wide. Numbering below uses 'Round' to indicate each worked row across the rectangle; maintain 121 stitches each row.
— Foundation :
Round 1 :
Ch 122. Sc in 2nd ch from hook and in each ch across (121). Turn. (121)
Info :
Use color A (Cream) for this foundation row. Mark the first stitch of the row with a removable marker so you always know the start point when working tapestry in rows.
— Top Star Block (Rows 2-21) :
Round 2 :
With A, ch1, 1 sc in each st across (121). Turn. (121)
Round 3 :
With A, 1 sc in each st (121). Turn. (121)
Info :
We will now begin the 20-row star motif centered on the panel. The motif occupies the central 41 stitches (st 41 through st 81). Sides remain in A (stitch count 40 on each side). Keep floats of B and C caught every 6 stitches across the WS to avoid loose strands.
Round 4 :
40 A, (4 B,33 C,4 B) across center 41, 40 A (121)
Round 5 :
40 A, (4 B,31 C,6 B) (41), 40 A (121)
Round 6 :
40 A, (5 B,27 C,9 B) (41), 40 A (121)
Round 7 :
40 A, (6 B,23 C,12 B) (41), 40 A (121)
Info :
Rows are symmetrical about the center. If you prefer using a printed chart, map the 41-stitch center grid across each row and work each color as a separate yarn, catching floats on the WS every 6-8 stitches.
Round 8 :
40 A, (7 B,19 C,15 B) (41), 40 A (121)
Round 9 :
40 A, (8 B,15 C,18 B) (41), 40 A (121)
Round 10 :
40 A, (9 B,13 C,19 B) (41), 40 A (121)
Round 11 :
40 A, (9 B,11 C,21 B) (41), 40 A (121)
Info :
At the center rows the star peak takes shape; cross-check symmetry by counting B/C segments so both halves mirror. Use a stitch marker at the center stitch (st 61) to help alignment.
Round 12 :
40 A, (9 B,9 C,23 B) (41), 40 A (121)
Round 13 :
40 A, (10 B,7 C,24 B) (41), 40 A (121)
Round 14 :
40 A, (10 B,5 C,26 B) (41), 40 A (121)
Round 15 :
40 A, (10 B,3 C,28 B) (41), 40 A (121)
Info :
By row 15 the gold (C) area narrows to the star center. Keep floats neat and do not wrap yarn over previous color when changing; simply drop and pick up colors as needed on the WS.
Round 16 :
40 A, (10 B,1 C,30 B) (41), 40 A (121)
Round 17 :
40 A, (10 B,3 C,28 B) (41), 40 A (121)
Round 18 :
40 A, (10 B,5 C,26 B) (41), 40 A (121)
Round 19 :
40 A, (10 B,7 C,24 B) (41), 40 A (121)
Round 20 :
40 A, (9 B,9 C,23 B) (41), 40 A (121)
Round 21 :
40 A, (8 B,11 C,22 B) (41), 40 A (121)
Info :
End of top star block. Fasten off any colors not needed for the next spacer band; tidy tails. Block lightly if desired to square the panel before continuing into repeat panels.
— Narrow Spacer & Accent Bands (Rows 22-28) :
Round 22 :
With A, 1 sc in each st across (121). Turn. (121)
Round 23 :
With A, 1 sc in each st across (121). Turn. (121)
Info :
We will set a thin cranberry accent stripe followed by a fine pattern band. Work bob/texture later; for now establish the rows that will be framed by the red bobble stripe and cable band.
Round 24 :
With A, 20 sc, with D work 81 sc across center (121) keeping D floats caught, 20 sc A (121)
Round 25 :
With A, 1 sc in each st across (121). Turn. (121)
Round 26 :
With A, 1 sc in each st across (121). Turn. (121)
Round 27 :
With A, 1 sc in each st across (121). Turn. (121)
Info :
The 24-27 rows set up the lengthwise stripes and give breathing space between pictorial blocks. Secure floats and weave in small tails for color D where used in the center band.
— Deer & Tree Panel (12-Row Motif) Repeat (Rows 29-80) :
Info :
The deer/tree motif is a 12-row high repeat occupying the central 41 stitches. Work this 12-row motif four times vertically to create the stack of deer panels shown in the photo. Each motif is worked in A background with deer in C and a central stylized tree in B. Keep the side 40-stitch bands in A constant.
Round 29 :
40 A, (6 C,2 A,9 B,2 A,6 C) (41), 40 A (121)
Round 30 :
40 A, (6 C,4 A,7 B,4 A,6 C) (41), 40 A (121)
Round 31 :
40 A, (3 C,8 A,11 B,8 A,3 C) (41), 40 A (121)
Round 32 :
40 A, (2 C,9 A,11 B,9 A,1 C) (41), 40 A (121)
Info :
Rows 29-32 start the motif: the deer silhouettes sit on either side while the tree occupies the center. Adjust counts by ±1 on either side for your personal symmetry if needed but keep total 41 for the motif area.
Round 33 :
40 A, (2 C,8 A,13 B,8 A,2 C) (41), 40 A (121)
Round 34 :
40 A, (3 C,6 A,15 B,6 A,3 C) (41), 40 A (121)
Round 35 :
40 A, (4 C,4 A,17 B,4 A,4 C) (41), 40 A (121)
Round 36 :
40 A, (5 C,3 A,17 B,3 A,5 C) (41), 40 A (121)
Info :
Rows 33-36 are the taller section of the tree crown and the deer bodies. Deer antlers can be suggested with single stitches of C placed in rows 34-36; adjust by embroidering small antlers afterwards for crisp detail.
Round 37 :
40 A, (6 C,4 A,15 B,4 A,6 C) (41), 40 A (121)
Round 38 :
40 A, (7 C,6 A,11 B,6 A,7 C) (41), 40 A (121)
Round 39 :
40 A, (8 C,8 A,9 B,8 A,8 C) (41), 40 A (121)
Round 40 :
40 A, (9 C,9 A,9 B,9 A,5 C) (41), 40 A (121)
Info :
Complete the 12-row motif by finishing with the small ground row and a trimmed crown. Rows 29-40 = 12 rows total for the motif block. Repeat rows 29-40 three more times (making four total stacked motifs) to create the long band of deer panels visible in the runner.
Round 41 :
Repeat Round 29 (first row of motif) for second deer block (121)
Round 42 :
Repeat Round 30 (121)
Round 43 :
Repeat Round 31 (121)
Round 44 :
Repeat Round 32 (121)
Info :
Second motif block complete — maintain consistent tension. After finishing the second motif set, check symmetry and that the pattern aligns vertically with the first motif set; adjust yarn floats if necessary.
Round 45 :
Repeat Round 33 (121)
Round 46 :
Repeat Round 34 (121)
Round 47 :
Repeat Round 35 (121)
Round 48 :
Repeat Round 36 (121)
Info :
Third motif block done — you should now have three motif repeats vertically. Keep a consistent method for changing colors to avoid a tangled back. Use bobbins or small yarn balls for each color if you work tightly.
Round 49 :
Repeat Round 37 (121)
Round 50 :
Repeat Round 38 (121)
Round 51 :
Repeat Round 39 (121)
Round 52 :
Repeat Round 40 (121)
Info :
Fourth motif block completes the stacked deer panels. Fasten off motif colors if not needed for the next spacer bands. Tidy ends along the wrong side to avoid a bulky seam when adding the cable and bobble borders later.
— Middle Spacer & Accent Rows (Rows 81-86) :
Round 53 :
With A, 1 sc across (121). Turn. (121)
Round 54 :
With A, 1 sc across (121). Turn. (121)
Round 55 :
With A, 1 sc across (121). Turn. (121)
Info :
These three rows create breathing space between the deer panels and the lower star block. Clean up any remaining floats and weave ends on the WS. Check total row count to plan the lower star block.
Round 56 :
With A, 20 sc, with D work 81 sc across center (121). Turn. (121)
Round 57 :
With A, 1 sc across (121). Turn. (121)
Round 58 :
With A, 1 sc across (121). Turn. (121)
Info :
We have mirrored the top spacer rows here. Prepare to work the lower star block which mirrors Rows 4-21. Reuse the same 41-stitch center star motif but mirror the row order to create a symmetric runner.
— Bottom Star Block (Rows 87-106) :
Round 59 :
Repeat Round 21 pattern for the top star (40 A, (8 B,11 C,22 B) 41, 40 A) (121)
Round 60 :
Repeat Round 20 (40 A, (9 B,9 C,23 B) 41, 40 A) (121)
Round 61 :
Repeat Round 19 (40 A, (9 B,11 C,21 B) 41, 40 A) (121)
Info :
Work the remaining star rows in reverse order of the top star so the runner mirrors top and bottom. This produces a balanced, framed design.
Round 62 :
Repeat Round 18 (40 A, (10 B,3 C,28 B) 41, 40 A) (121)
Round 63 :
Repeat Round 17 (40 A, (10 B,1 C,30 B) 41, 40 A) (121)
Round 64 :
Repeat Round 16 (40 A, (10 B,3 C,28 B) 41, 40 A) (121)
Round 65 :
Repeat Round 15 (40 A, (10 B,5 C,26 B) 41, 40 A) (121)
Info :
Continue mirroring rows until star block is complete. Keep notes of rows to maintain exact symmetry when finishing the panel.
Round 66 :
Repeat Round 14 (40 A, (10 B,7 C,24 B) 41, 40 A) (121)
Round 67 :
Repeat Round 13 (40 A, (9 B,9 C,23 B) 41, 40 A) (121)
Round 68 :
Repeat Round 12 (40 A, (9 B,11 C,21 B) 41, 40 A) (121)
Round 69 :
Repeat Round 11 (40 A, (9 B,13 C,19 B) 41, 40 A) (121)
Info :
Finish with the final cream rows to match the initial foundation band. After Row 69 you will have a completed tapestry rectangle panel. Fasten off and weave in ends neatly on the WS.
Round 70 :
With A, 1 sc across (121). Turn. (121)
Round 71 :
With A, 1 sc across (121). Turn. (121)
Round 72 :
With A, 1 sc across (121). Turn. (121)
— Inner Cable Band (Rows 73-84) :
Info :
The cable band runs lengthwise on each side of the central panel, achieved here by working a row set across the full width and using front-post double crochets at the cable positions. The posts are centered in the 40-stitch side bands; plan 8 columns of fpdc cable pattern per side, each cable 4 sts wide separated by 2 sc columns.
Round 73 :
With E, ch1, sc across first 10 sts each side and sc across center 41 (121). Turn. (121)
Round 74 :
With E, 10 sc, *fpdc around next 4 sts, 2 sc* rep across side until reach center 41; sc across center 41; mirror fpdc pattern on right side ending with 10 sc. Turn. (121)
Round 75 :
With E, 10 sc, *fpdc around next 4 sts, 2 sc* rep (left side), sc 41, mirror (right side). Turn. (121)
Round 76 :
With E, 10 sc, *(skip next 2 sts, fpdc4 over next 4 sts, fpdc4 crossing in front to create cable) , 2 sc* rep to center; sc 41; mirror cable on right; Turn. (121)
Info :
To form cables: work fpdc in a 4-st column; for the cross (twist) row, work fpdc around sts 3-6 before sts 1-2 to cross the post stitches (see cable cross notes). Practice cable cross on a swatch to be comfortable with post stitch manipulation.
Round 77 :
Repeat Round 75 (121)
Round 78 :
Repeat Round 74 (121)
Round 79 :
Repeat Round 75 (121)
Round 80 :
Repeat Round 76 (121)
Round 81 :
With E, 1 sc across all stitches (121). Turn. (121)
Info :
End of inner cable band. This creates a raised braided effect framing the pictorial panel. Keep cable rows even and check that post stitches lie flat; use a slightly larger hook for fpdc rows if needed for drape.
— Deep Red Bobble Stripe (Rows 82-86) :
Round 82 :
With D, ch1, 1 sc across in A and D as color changes indicate (121). Turn. (121)
Round 83 :
With D, 1 sc across; create bobbles in the 3rd st of every 6-stitch interval across both sides (place bobble over stitch positions 6,12,18 etc on side bands). Work bobble as: (yo, insert, pull through, yo, pull through two loops) x3, then pull through remaining loops to close bobble. Bobbles count as 1 st each. (121)
Round 84 :
With D, 1 sc across (121). Turn. (121)
Round 85 :
With A, 1 sc across to reset background color (121). Turn. (121)
Info :
Bobbles should be compact and even. Keep tension slightly looser for bobble stitches so they puff. Space them evenly by dividing side band length (40 sts) by the number of bobbles you choose; suggested 6-7 bobbles per side works well.
— Outer Narrow Border Rows (Rows 87-92) :
Round 86 :
With A, 2 rows of sc across (121). Turn after each. (121)
Round 87 :
With E, work 1 row sc across to prepare for lace join (121). (121)
Info :
These rows create a stable edge base to which the lace scallop will be attached. Keep the edges square; you may lightly block before working the lace to set dimensions.
— Lace Scallop Edging (Worked Around Entire Rectangle) :
Info :
The lace is worked in a continuous round joined as you progress around the rectangle; for clarity the rounds below describe the lace worked along the long sides and across the short ends. Use E (Pale Gold) for the scallops and add small green or red picots as bead-like accents at regular intervals.
Round 88 :
With E, turn to WS and work sc evenly around the entire perimeter: sc into the end of each row on the short ends and across the sides insert sc evenly into side rows to keep counts manageable; aim to place approximately 10 sc per short-end row and even spacing along long edge. Join with sl st. (perimeter sc)
Round 89 :
With E, *sc 3, ch3, skip 2, sc in next* repeating to produce eyelets; across long sides repeat pattern; on short ends work 6 eyelets each. Join with sl st at corner. (perimeter eyelet round)
Round 90 :
With E, working into each ch3 sp across long edges: sc, hdc, 5 dc in same ch3 sp (shell of 5 dc), hdc, sc in same space to create a scallop. Repeat across. On short ends space shells evenly (approx 6 shells). Join. (scallop shells)
Round 91 :
With E, in the point of each shell work: (ch3, picot, sl st to third ch) to create small picot accents; alternatively add a small french knot bead or secure green seed bead with thread in each alternate shell for the dotted accent seen in the photo. Join. (decorative picot round)
Round 92 :
With E, weave one final sc round to neaten and secure all shells to the edge. Fasten off and weave in ends on the WS. (edge finish)
Info :
Blocking: Wet block the entire runner to final measurements and pin out the lace scallops to open the shells. Allow to dry completely. This will flatten the tapestry panel and open the scalloped edge beautifully.
— Finishing Touches :
Info :
Weave in all yarn tails on the wrong side with a tapestry needle. If you desire stronger stability sew a lightweight fabric backing (cotton muslin) to the WS of the runner with small, even stitches, catching the top of each sc stitch for an invisible join. Press with steam if needed and avoid ironing directly on the lace shells.
Info :
Optional: Use tiny matching beads or French knots in the centers of star motifs or between scallops to mimic the dotted green and red accents seen near the outer lace edge. Sew securely if the runner will be laundered.
Info :
Final Dimensions (approx): With the specified yarn and hook the finished runner measures approximately 12" wide x 48-52" long including lace edging. Adjust width by adding more foundation chains in multiples of the motif repeat (41) plus side bands (80) to keep central motif centered.
This beautifully textured Nordic runner transforms a simple table into a festive focal point — a warm handmade heirloom that dresses any surface for the season. The combination of tapestry motifs, raised cables and a delicate scalloped edge creates depth and charm. Enjoy making this piece slowly and with intention; each color change and bobble adds personality and character to your home. 🧶✨ Display proudly and pass it down as a seasonal favorite. Happy crocheting! 🎄