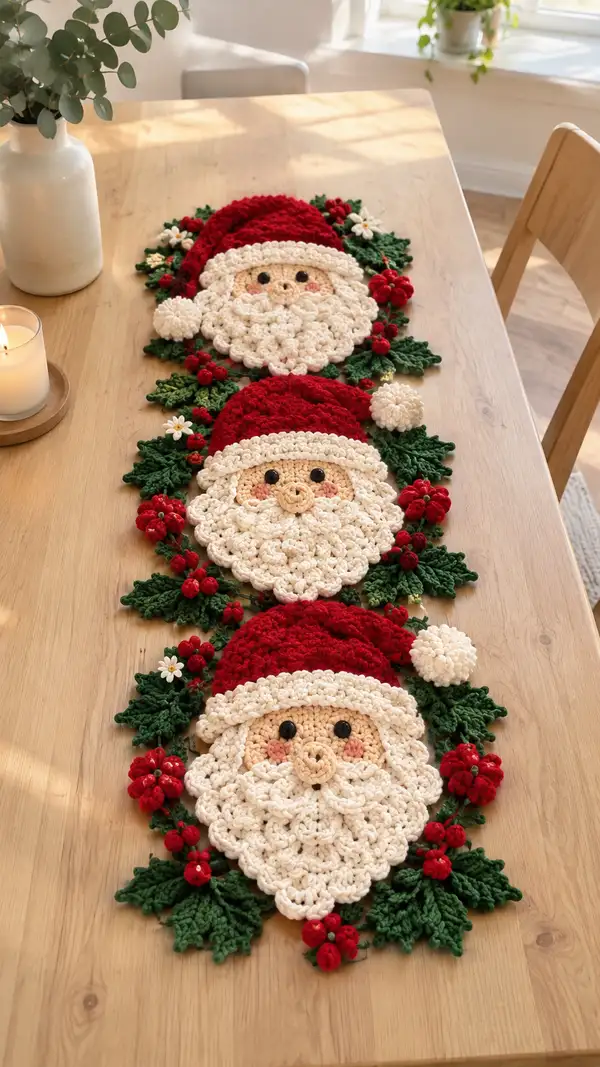
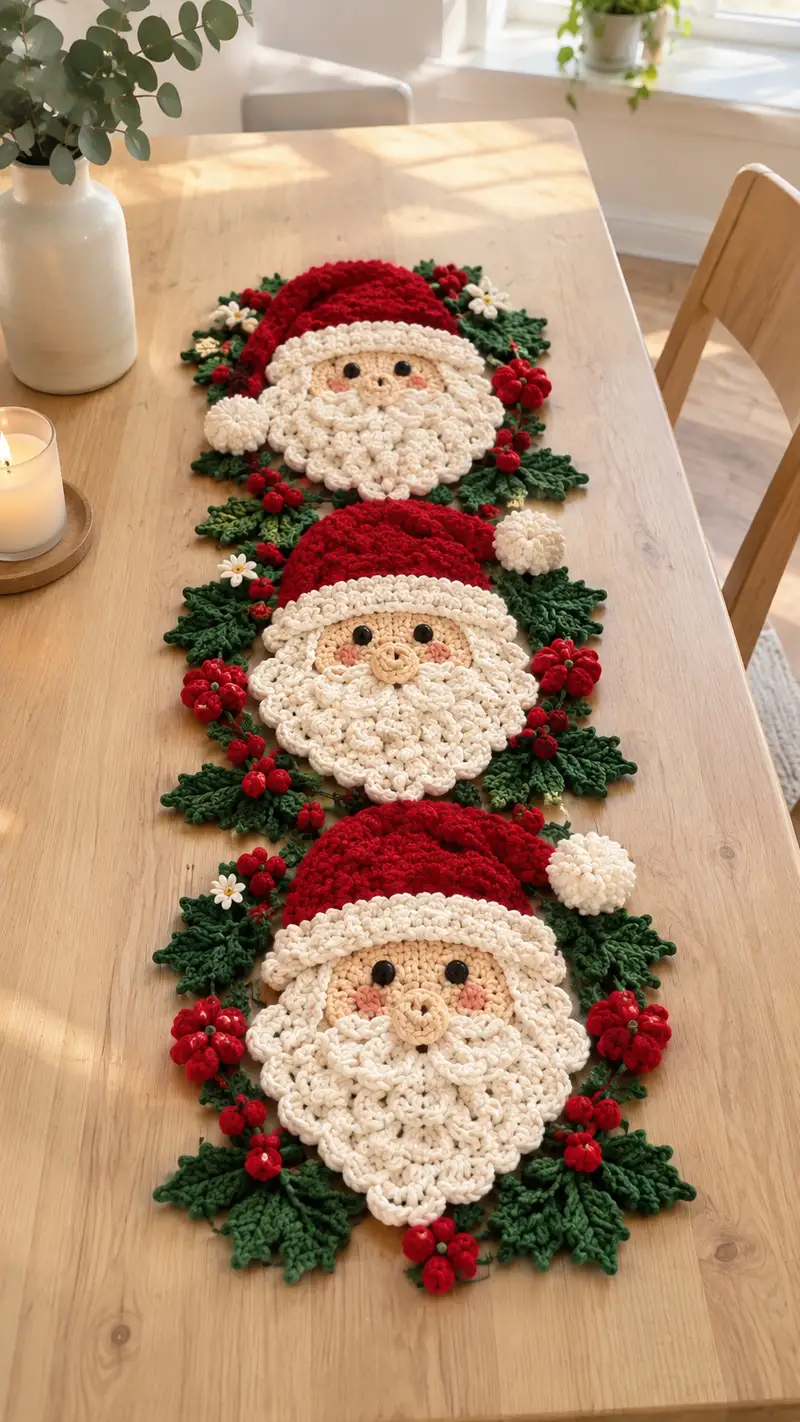
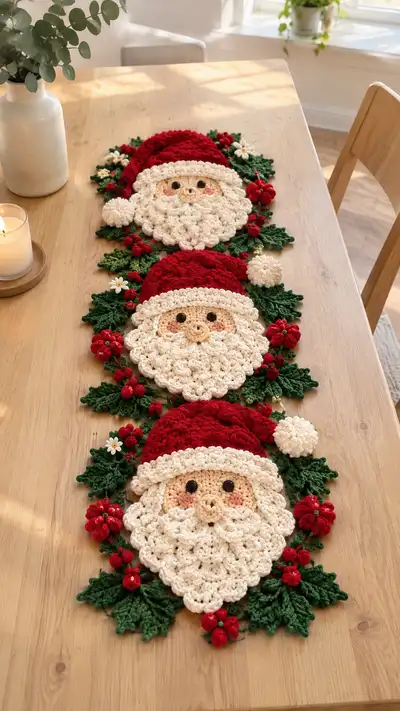
Create a festive table runner made of three adorable Santa faces linked with holly leaves, berries and tiny daisies. This pattern uses textured puff clusters for Santa's beard, a cozy red hat with a cream brim and pom, and layered green holly to frame each face. The finished runner is decorative, flat, and perfect for holiday tabletops or mantle displays. Clear step-by-step rounds and assembly notes guide you through making each motif and joining them into a beautiful seasonal centerpiece.
Progress Tracker
0% Complete
— Santa Face (Make 3 identical motifs) :
Round 1 :
Using skin/peach yarn. 6 sc in mr (6)
Round 3 :
(1 sc, inc) x 6 (18)
Round 4 :
(2 sc, inc) x 6 (24)
Round 5 :
(3 sc, inc) x 6 (30)
Round 6 :
(4 sc, inc) x 6 (36)
Round 7-9 :
1 sc in each st (36)
Info :
Place or mark eye placement at the end of Round 9. For a friendly expression put the centers of the eyes between rounds 6-7 visually but mount buttons/safety eyes between rounds 7-8 on the face disc. Eye spacing: 8-10 stitches apart depending on desired expression; for this pattern aim for 9 stitches apart (count across the round) so features align with beard and nose placement.
Round 10 :
(5 sc, inc) x 6 (42)
Round 11 :
1 sc in each st (42)
Info :
Stop and check round: the face disc should measure approximately 8-9 cm across when using worsted weight yarn and a 4.5mm hook. Adjust hook size if necessary to match gauge with hat and beard motifs.
Round 12 :
(6 sc, inc) x 6 (48)
Round 13-14 :
1 sc in each st (48)
Round 15 :
(6 sc, dec) x 6 (42)
Info :
Embroider lightly blushed cheeks now or mark positions: cheeks sit roughly one stitch to the outside of each eye and two rounds below. Use pink yarn or blush with a tiny bit of craft chalk later for gradient blush effect.
Round 16 :
(5 sc, dec) x 6 (36)
Round 17 :
1 sc in each st (36)
Info :
If using safety eyes, insert them between rounds 7-8 before Round 12 increases; secure backs. If embroidering eyes, use black embroidery thread and a yarn needle to stitch French knots or small satin-stitched ovals centered between the marked positions.
Round 18 :
1 sc in each st (36)
Round 19 :
(4 sc, dec) x 6 (30)
Round 20 :
(3 sc, dec) x 6 (24)
Round 21 :
(2 sc, dec) x 6 (18)
Round 22 :
(1 sc, dec) x 6 (12)
Info :
Fasten off and weave in tail, leave long tail if you plan to sew the face disc to a backing or to the underside of the beard later. Face disc should be a slightly domed disk that will sit behind beard clusters.
— Nose (Make 3) :
Round 1 :
Using skin/peach yarn. 6 sc in mr (6)
Round 3 :
1 sc in each st (12)
Info :
Optional: To create a small spiral nose, add Round 4 with surface spiral by working a continuous sc spiral around a 1.5cm disc, then stuff lightly and sew centered on the face between the eyes and above the beard peak.
Round 4 :
(1 sc, dec) x 4 (8)
Info :
Stuff lightly, fasten off leaving long tail to sew nose onto face. Sew through the center of the nose into the face disc with a few stitches to secure. Use a couple of embroidery stitches at base for nostrils if desired.
— Beard (Textured scalloped beard) :
Info :
The beard is worked in layered puff clusters and scallops to create the full, curly look seen in the photo. Work the beard flat in rounds/rows that form a triangular/rounded triangle shape that will overlay the lower half of the face disc. Use cream yarn. You will create a central upper row that attaches under the hat brim and expand outwards to create three overlapping scallop tiers.
Round 1 :
Ch 4, sl st to form small loop. Work 6 sc into loop (6) — this forms the top center base of beard
Round 2 :
Inc in each st around (12)
Round 3 :
(1 sc, inc) x 6 (18)
Round 4 :
1 sc in each st (18)
Round 5 :
Start first scallop tier: *ch 2, 5-loop puff in next st, sl st in next st, ch1, sc in next st* rep across to create 6 puff clusters; end with sc to anchor (18 total base positions)
Info :
Puff stitch technique: yarn over, insert hook, pull up loop; repeat 4-5 times to have 5 loops on hook, yarn over, pull through all loops, ch 1 to close puff. Keep tension loose enough to create a soft round puff; consistent loop counts ensure uniform puffs.
Round 6 :
Working behind puffs, sc evenly across back to secure puffs (18)
Round 7 :
Increase for wider tier: (2 sc, inc) x 6 (24)
Round 8 :
Repeat puff pattern across this row making 8 puff clusters spaced evenly; sc anchor stitches between puffs (24)
Info :
Place the top of the beard so it will sit just under Round 11 of the face disc. The central top of beard should be slightly narrower than the face width; you will expand the tiers downward to create full coverage.
Round 9 :
Work behind clusters with a row of sc to create a stable base (24)
Round 10 :
(3 sc, inc) x 6 (30)
Round 11 :
Third scallop tier: make 10 large puff clusters across, each puff anchored with sc between clusters (30)
Round 12 :
1 sc in each st behind clusters (30)
Round 13 :
(4 sc, inc) x 6 (36)
Round 14 :
Working the final outer scallop: make 12 puff clusters, spaced so the bottom edge forms a soft scalloped triangular point (36)
Info :
To achieve the pointed scalloped beard shape, place slightly larger puffs in the center column and reduce puff size towards the sides. Use 5 loops per puff in center rows and 4 loops per puff on outermost rows to maintain shape and consistent thickness.
Round 15 :
1 sc in each st behind clusters (36)
Round 16 :
Edge finish: *sc, ch2, sc* across bottom edge to create small loops for decorative outline; 12 loops across (36)
Round 17 :
Fasten off leaving long tail for sewing. Pin beard over the lower half of the face disc, aligning the top edge of Round 5 of beard to sit under Round 11 of face disc.
Info :
Sew beard to face by aligning and using whip stitch through base row only (Rounds 3-6 on beard to Rounds 10-12 on face). Secure with small, tight stitches so the beard looks naturally attached and sits flat on the table when assembled into the runner.
— Hat Crown (Make 3) :
Info :
Hat is worked in red with a cream brim. Work in joined rounds to create a slightly relaxed slouchy hat that will be appliqued to the top of the face disc. Begin with a magic ring and expand to the width of the face disc, then shape top slouching form.
Round 1 :
Using red yarn. 6 sc in mr (6)
Round 3 :
(1 sc, inc) x 6 (18)
Round 4 :
(2 sc, inc) x 6 (24)
Round 5 :
(3 sc, inc) x 6 (30)
Round 6 :
1 sc in each st (30)
Round 7 :
(4 sc, inc) x 6 (36)
Round 8-11 :
1 sc in each st (36)
Info :
Try on the hat crown over the face disc temporarily to check that the crown width is slightly narrower than the face disc diameter (so brim will fit around face evenly). Adjust by adding a round of increases if needed.
Round 12 :
(5 sc, inc) x 6 (42)
Round 13-16 :
1 sc in each st (42)
Round 17 :
Start slouch shaping: (6 sc, dec) x 6 (36)
Round 18 :
(5 sc, dec) x 6 (30)
Round 19 :
(4 sc, dec) x 6 (24)
Info :
At this point the crown should be a shallow dome. If you prefer a more slouched hat, stop and fasten off leaving the top open for pom-pom placement. If you want a taller crown, add an extra even round of sc before beginning decreases.
Round 20 :
Optional: continue shaping to a small peak by decreasing to 12 stitches then close and use tail to pull closed. Otherwise fasten off leaving tail to sew to brim.
— Hat Brim (Make 3) :
Round 1 :
Using cream yarn. Join to base of hat crown round 11 with sl st. Ch1. Work 1 sc in each around across 42 sts (42)
Round 2 :
Work 1 sc in each st BLO to create a ridged brim (42)
Round 3 :
Work another round of 1 sc in each st (42)
Info :
The BLO round gives the brim a folded, textured look that sits like a cuff. If you want a thicker brim, work two rounds in BLO and one round in normal sc to finish.
Round 4 :
Fasten off leaving long tail to sew brim to face disc. Position brim so it covers Rounds 10-13 of face disc and sits above beard top. Sew evenly by whip stitch through base of brim to face disc.
— Pom-pom (Make 3) :
Info :
Use cream yarn. Make a fluffy pom-pom approximately 3–4 cm in diameter. You can use a pom maker or wrap yarn around cardboard circle. Alternatively make a tightly packed bobble by creating 12-15 small puff stitches joined into a ball and stuffing lightly.
Method :
Wrap yarn 80–120 times around pom maker or cardboard, tie tightly, cut loops, trim to round shape. Sew pom securely to the tip of hat crown with strong knots and weave ends through several stitches inside the crown to lock in place.
— Eyes and Facial Details :
Info :
Eyes may be 10mm safety eyes or buttons; place them between Rounds 7-9 of face disc approximately 9 stitches apart. If embroidering, stitch small satin-stitched ovals and add a tiny white yarn knot highlight to mimic light reflection. For rosy cheeks use a small dab of pink yarn embroidery or fabric-safe chalk.
Round 1 (Embroidery) :
Using pink or coral yarn, make small lazy-daisy stitch clusters for cheeks, one stitch each placed two rounds below each eye and one stitch to the side for a blush feel. Keep stitches short.
— Holly Leaf (Make 12-16) :
Round 1 :
Using forest green. Ch 6, sl st to form ring. Work 6 sc into ring (6)
Round 2 :
Inc in each st (12)
Round 3 :
(1 sc, inc) x 6 (18)
Round 4 :
1 sc in each st (18)
Round 5 :
Switch to leaf shaping: *ch 3, in next st work (sc, hdc, dc, tr, dc, hdc, sc) all in same st; sl st to next base stitch and repeat* for 6 points forming a holly leaf cluster (6 points)
Info :
Each leaf is a small motif formed of six lobes to mimic holly serration. When sewing to runner, slightly flatten the leaf and use short whip stitches at the base to secure. Make clusters of 3-4 leaves per Santa motif to create framing.
Round 6 :
Fasten off leaving tail for sewing. Block leaves gently to shape the serrated edges; pin out to hold shape until dry if desired.
— Berry Cluster (Make 18-24 small berries + 6 larger clusters) :
Small Berry Round 1 :
Using red yarn. 6 sc in mr (6)
Small Berry Round 2 :
1 sc in each st (6)
Small Berry Round 3 :
Work 6 single crochet bobbles around to make it slightly rounded, stuff very lightly before closing; finish with (1 sc, dec) to close loosely (4)
Info :
Group 3-5 small berries with a bit of green sewing thread to form a clustered berry sprig. For the larger berries (like the clusters seen in the photo), make 6-8 small berries and sew them together in a small round cluster. Sew clusters to be slightly raised for dimensional look.
— Daisy Flower (Make 6 small daisies for accent) :
Round 1 :
Using cream, ch 6, sl st into ring, ch1. *dc, ch1* repeat 6 times to create petals (6)
Round 2 :
Join center with yellow French knot or small round of yellow yarn (6)
Info :
Sew daisies sparingly onto holly clusters as small bright accents. Use white seed beads in center if desired to mimic tiny daisy centers and secure with thread.
— Runner Backing / Connector Panel :
Info :
The backing panel is optional but recommended for stability and to keep the runner flat. This panel will be a long oval or rectangular chain foundation into which you will sew the three Santa motifs and foliage. Work in green or matching background color to blend with holly leaves for a seamless look.
Round 1 :
Using forest green. Ch 85 (adjust length to match three motifs and spacing; roughly 85–95 chains for a medium table). Join to form a long loop if you want continuous edging, or work row by row for a flat panel.
Round 2-4 :
1 sc in each ch across and around ends to create a 3-row thick panel (85)
Info :
Alternatively use a narrow crocheted strip (like a decorative rope) to anchor motifs and sew motifs on top rather than joining them directly. Make sure the panel width is 6-8 cm so it provides support but remains unobtrusive beneath the faces.
Round 5 :
Work decorative border: *sc, ch2, sc* across each long edge to provide loops for sewing holly and berries in later assembly (85)
Round 6 :
Fasten off. Block panel flat to accurate width and length before attaching motifs.
— Edge Finishing and Decorative Border :
Round 1 :
Attach cream yarn to edge stitches. Work crab stitch (reverse sc) around whole runner to give a neat finish; 1 crab st in each st (approx 300 sts around entire runner depending on size)
Info :
Crab stitch creates a twisted rope-like edge that looks professional and helps the runner sit flat. Work slowly and keep tension even. If you prefer a scalloped edge, work groups of (5 dc in one st, skip 2) around instead.
— Assembly and Placement Guide :
Info :
Layout the three Santa faces evenly along the backing panel before sewing. Position holly leaves so they overlap slightly between motifs; tuck berries and daisies in the overlapping seams for a continuous garland effect.
Step 1 :
Arrange motifs: place central Santa in exact middle of panel, then place top and bottom Santas with equal spacing (approximately 25 cm between motif centers for a standard table runner; adjust as necessary to fit your table length).
Step 2 :
Pin motifs lightly to the panel, then sew using mattress or whip stitch around the seam where hat brim and beard base meet the panel. Use the long tails left from these parts to make tidy invisible stitches on the underside.
Info :
When sewing puff clusters and textured areas, avoid stitching through the centers of puffs. Instead, anchor into the base row behind the puffs to maintain their fluffiness and dimensional look.
Step 3 :
Sew holly leaves in clusters of 3-4 around each Santa on the outside edges and between motifs. Overlap leaves slightly and secure them with whip stitches at the base only so they flange outward like natural foliage.
Step 4 :
Sew berry clusters in the spaces between leaves and along the runner edges, placing larger clusters near each motif apex and smaller clusters as connectors between leaves.
Step 5 :
Attach daisies and any small accents last, using a couple of tiny stitches through center only. Tuck yarn tails to underside and weave in securely.
Info :
Block the entire finished runner lightly after assembly: pin edges flat on blocking board and steam or spray until uniform. This helps flatten seams and settle the textured elements into a cohesive runner that will lay flat on your table.
— Alternative Decorative Variations :
Info :
Change color palette for a different holiday vibe: swap cream for white and red for burgundy for a vintage look, or use soft pastels for a whimsical, nontraditional variation. You can also replace safety eyes with embroidered closed eyes for a sleepy Santa expression.
This festive table runner turns three adorable Santa faces, holly leaves and berries into a charming holiday centerpiece that will brighten any table setting. Each motif's textured beard and fluffy pom give a handcrafted, cozy feel that makes hosting seasonally delightful. Sewing the pieces together feels like creating a holiday mosaic—each small part adding warmth and personality. 🎅🧶 Spread cheer with this decorative runner and enjoy the process as much as the finished piece! 🎁