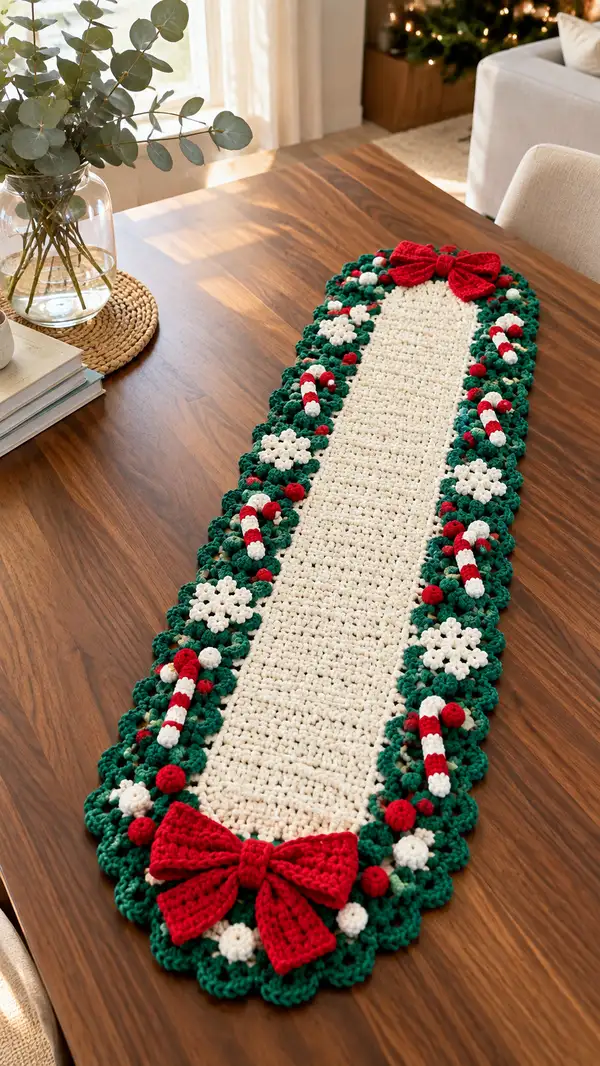
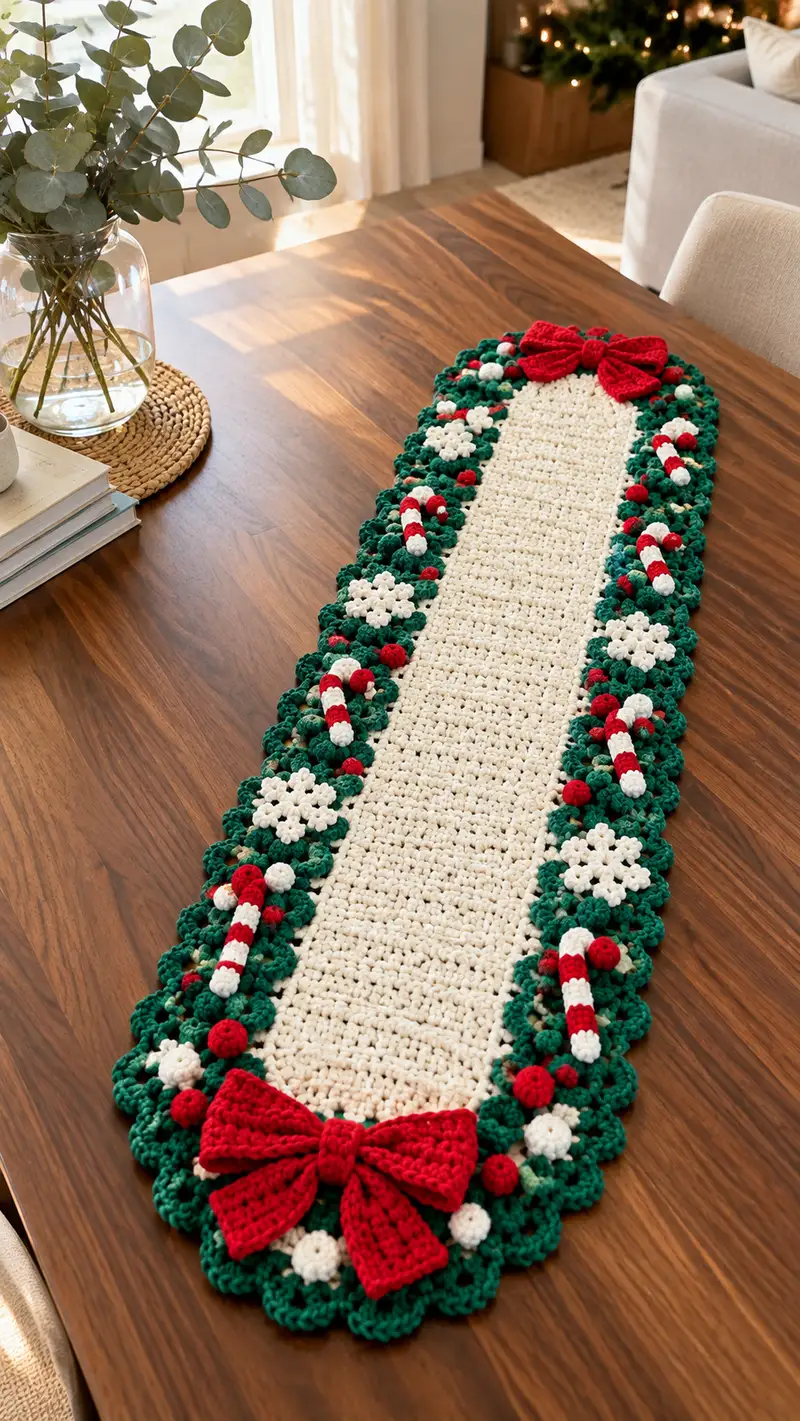
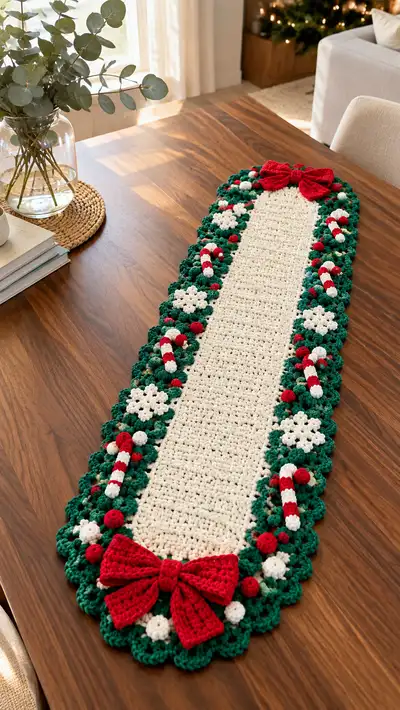
Bring cozy holiday charm to your table with this festive crochet table runner featuring a creamy central panel, scalloped evergreen border, red bows, candy cane accents, white snowflake motifs and tiny pom-pom berries. Designed to sit long and narrow on a dining table, the runner uses simple repeats and motif assembly techniques to create a rich, layered appearance. The pattern includes step-by-step instructions for the center strip, scalloped motifs, candy canes, snowflakes, puffs and bows, plus joining and finishing tips.
Progress Tracker
0% Complete
— Center Panel :
Round 1 :
Foundation chain 61. Sc in 2nd ch from hook and in each ch across. (60)
Round 2 :
Ch 1, turn. Sc in each st across. (60)
Round 3 :
Ch 1, turn. Sc in each st across. (60)
Round 4 :
Ch 1, turn. Sc in each st across. (60)
Info :
Work center panel in continuous rows; place stitch markers at every 10th stitch along one long edge to help align scallops later. Maintain consistent tension—this panel sets the foundation for the entire runner.
Round 5 :
Ch 1, turn. Sc in each st across. (60)
Round 6 :
Ch 1, turn. Sc in each st across. (60)
Round 7 :
Ch 1, turn. Sc in each st across. (60)
Round 8 :
Ch 1, turn. Sc in each st across. (60)
Info :
For a neat edge, work the first and last stitch of each row through both loops; for a slightly ridged edge that helps grip scallops, work the last stitch of the row in BLO every 8th row.
Round 9 :
Ch 1, turn. Sc in each st across. (60)
Round 10 :
Ch 1, turn. Sc in each st across. (60)
Round 11 :
Ch 1, turn. Sc in each st across. (60)
Round 12 :
Ch 1, turn. Sc in each st across. (60)
Info :
If you'd like a wider runner, add more foundation chains in multiples of 2 before starting; make sure to keep total stitch count even so scallops align evenly on both sides.
Round 13 :
Ch 1, turn. Sc in each st across. (60)
Round 14 :
Ch 1, turn. Sc in each st across. (60)
Round 15 :
Ch 1, turn. Sc in each st across. (60)
Round 16 :
Ch 1, turn. Sc in each st across. (60)
Info :
Measure as you go—if you want a longer runner, continue repeating rows until you reach desired length. The sample photographed uses 40 rows total for a runner approximately 36–40 inches long with this yarn and hook.
Round 17 :
Ch 1, turn. Sc in each st across. (60)
Round 18 :
Ch 1, turn. Sc in each st across. (60)
Round 19 :
Ch 1, turn. Sc in each st across. (60)
Round 20 :
Ch 1, turn. Sc in each st across. (60)
Info :
When you reach around the halfway point, check gauge and width—if the panel cups or waves, try dropping one hook size and redo a small test to match tension to the scallop motifs.
Round 21 :
Ch 1, turn. Sc in each st across. (60)
Round 22 :
Ch 1, turn. Sc in each st across. (60)
Round 23 :
Ch 1, turn. Sc in each st across. (60)
Round 24 :
Ch 1, turn. Sc in each st across. (60)
Info :
At this point, you can add subtle texture by alternating a row of hdc every 8th row; in the photographed sample the center is all sc for a smooth look that contrasts with the scallops.
Round 25 :
Ch 1, turn. Sc in each st across. (60)
Round 26 :
Ch 1, turn. Sc in each st across. (60)
Round 27 :
Ch 1, turn. Sc in each st across. (60)
Round 28 :
Ch 1, turn. Sc in each st across. (60)
Info :
Fasten off the center panel when you reach desired length, leaving a long tail (approx 30–40 in / 75–100 cm) for joining to scallops at both ends and sides. Block lightly if desired to flatten and square edges.
Round 29 :
Optional: If you prefer a finished edge before attaching scallops, join cream yarn and work 1 round sc evenly around entire perimeter, placing 3 sc in each corner. (approx 124 sts perimeter depending on length)
Info :
This single round border helps create a solid base to which you can attach scallop motifs either by slip-stitch or sewing. If you choose to skip this, make sure to align scallops carefully to the center stitches when joining.
Round 30 :
Weave in the working end on the wrong side for a neat finish if you won't be joining immediately. Keep the perimeter stitched edge live if you prefer slip-stitch joining.
— Scalloped Border Motif (make 24 for both sides and ends) :
Round 1 :
With green yarn, make a magic ring. Ch 1, 6 sc in MR. (6)
Round 2 :
2 sc in each st around. (12)
Round 3 :
(1 sc, inc) x 6. (18)
Round 4 :
(2 sc, inc) x 6. (24)
Info :
These form the small round base that gives the scallop a little thickness. Make 24 identical rounds for a full runner (12 per side + 2 for each end). You can change count to match your runner length.
Round 5 :
Ch 2 (counts as hdc), turn. Hdc in same st, hdc in next 23 sts. (24)
Round 6 :
Ch 2, turn. Hdc in each st across. (24)
Round 7 :
Ch 1, turn. *(Sk 1 st, 5 dc in next st, sk 1)* rep around to create 6 small shell petals. Slip stitch to join. (6 shells)
Round 8 :
Ch 1, work 1 sc between each shell and 3 sc across the top of each shell to stabilize. Finish off leaving long tail for sewing. Approx (36) surface stitches.
Info :
Scallops are worked flat and then sewn to the center panel. When sewing, place scallops edge-to-edge with slight overlap so outer scallop ridges look continuous around the runner. Use the long tail and whip stitch through both the scallop foundation and the center panel edge or the sc perimeter you added.
Round 9 :
Optional extra textured row: Join green and work 1 round of picot edging over shell tips: *(ch 3, sl st into 3rd ch)* into each shell tip to create a delicate picot finish. Finish off.
— Candy Cane Motif (make 8–10) :
Round 1 :
Ch 9. Sc in 2nd ch from hook and across (8). Turn. (8)
Round 2 :
Ch 1, turn. Sc in each st across. (8)
Round 3 :
Change to red (Info before round: Change to red yarn now). Ch 1, turn. Sc in each st across. (8)
Round 4 :
Change to white. Ch 1, turn. Sc in each st across. (8)
Info :
Alternate stripes of red and white every row for a classic candy-cane stripe. Carry the unused color up the short side or weave in ends as you go for a neater finish. Each stripe is one row high in this narrow rectangle.
Round 5 :
Change to red. Ch 1, turn. Sc in each st across. (8)
Round 6 :
Change to white. Ch 1, turn. Sc in each st across. (8)
Round 7 :
Change to red. Ch 1, turn. Sc in each st across. (8)
Round 8 :
To shape hook: Fold rectangle lengthwise and sc through both layers along one long edge for 6 sts, leaving one short end (the cane tip). When you have 6 sc across, continue single crocheting around the folded rectangle closing the short tip with decreases: (sc2tog) twice across the tip to create a rounded end. Finish off leaving a long tail for sewing. Final assembled cane approx 24–28 sts in circumference depending on joining.
Info :
Sew the candy canes along the scalloped border, tucking the rounded tip under a scallop for a natural look. Add a small red pom-pom near the base as shown in photo for extra dimension.
— Snowflake Motif (make 6) :
Round 1 :
With white yarn, make a magic ring. Ch 2 (counts as hdc). Work 11 hdc in MR. Sl st to join. (12)
Round 2 :
Ch 3 (counts as dc), *ch 2, sl st into next st; ch 2, 2 dc in next st* rep around to form 6 points. Sl st to top of starting ch-3. (6 points)
Round 3 :
Into each point: *(sl st into space, ch 3, dc, ch 3, sl st into same space)* Repeat for each point to form petal loops. Finish off and leave long tail for sewing. Each snowflake measures approx 2.5–3 inches across depending on yarn tension.
Info :
Block snowflakes lightly by pinning them to shape while damp to open the points. This helps them sit flat on the scallop border and look crisp.
— Mini Puff Berry (make 24–30 in various colors) :
Round 1 :
With red or white, make a magic ring. Ch 1. Work 6 sc into ring. (6)
Round 2 :
Make a small puff cluster: *(yo, insert hook, pull up loop) x 3, yo and pull through all 4 loops, ch 1 to secure* Repeat in each st around to form tiny puffs if you want extra texture; alternatively, work 1 rnd of 6 sc and pull ring tight to create a small bead. Finish off leaving long tail for sewing.
Info :
Use just a small dab of fiberfill inside each larger puff if you want a round berry; most photographed mini berries are lightly stuffed or no-stuff for a flatter look. Sew berries onto scallops randomly to mimic holly clusters.
— Red Bow (Make 2 for each end) :
Round 1 :
Ch 20. Row 1: Sc in 2nd ch from hook and across (19). Turn. (19)
Round 2 :
Ch 1, turn. Sc in each st across. (19)
Round 3 :
Ch 1, turn. Hdc in first and last st, dc in center 15 sts to add body and slight curve. (19)
Round 4 :
Repeat Round 2. Fasten off leaving long tail for wrapping center. Fold the rectangle in half widthwise and sew the short ends together to make a loop, then squeeze the loop in the middle and wrap the long tail around tightly to create the bow center. Make bow tails: Ch 12, sc back across to create two tails (make 2 tails). Finish off and attach.
Info :
For a fuller bow, make two rectangles and stack them, offset slightly, before wrapping the center. Secure with hidden stitches. Attach bows to the end scallops, centering them on the end scallop rubrics as in the photo.
— Joining & Assembly :
Round 1 :
Lay center panel flat with right side up. Position scallops around both long edges and both ends. Space scallops evenly—sample uses 12 scallops per side and 2 at each end for a total of 28 including corners. Pin scallops in place with small sewing pins.
Round 2 :
Use the long tail from each scallop and whip stitch through the center panel edge (or the sc perimeter round) and through the foundation ring of scallop—sew through every 2–3 sts to create an even attachment. Keep stitches small and snug but not puckering. Repeat on both sides.
Info :
When sewing, work from the wrong side of the center panel and bring your needle through the scallop foundation to create a secure seam. Check alignment frequently to avoid twisted scallops; use your stitch markers placed earlier to match spacing.
Round 3 :
Sew candy canes into position: tuck cane tips just under scallop shells and stitch through the back of the cane into the scallop foundation. Place one candy cane approximately every 3rd scallop along each side. Sew small red or white puff berries near each cane for accent.
Round 4 :
Sew snowflakes centered on selected scallops—alternating with candy canes—to achieve the festive scattered placement seen in the photo (approx every 4th scallop). Use the long tails to stitch through the inner ring and center of snowflake and through the scallop foundation.
Round 5 :
Attach bows at each end: position large bow centered over the terminal scallop cluster. Use strong sewing yarn and hidden stitches across the folded center band to anchor bow firmly. Tuck bow tails slightly under scallops and secure to underside for a clean top view.
Round 6 :
Embellish with extra little puff berries in red and white randomly between candy canes and snowflakes to mimic clusters. Step back and adjust placement until visually pleasing—symmetry down the runner length gives a balanced look.
Info :
Keep all attaching stitches on the underside when possible to preserve the clean finish on top. Use tiny stitches and weave ends through a few times before trimming to secure attachments for laundering or gift use.
Round 7 :
Optional final edging: With green yarn, sc around the outside edge of all scallops to tie motifs together. Work 2 sc in each space between scallops to create continuous scalloped border. Finish off and weave in ends.
Round 8 :
Block finished runner lightly on a flat surface to even out motifs and ensure it lays flat. Use steam or damp cloth and pins to set shape. Allow to dry completely before photographing or gifting.
Info :
Care instructions: hand wash cold on gentle cycle or spot clean, reshape while damp. Avoid high heat in dryers; lay flat to dry to preserve shape.
Your completed table runner will bring a warm festive glow to the table and become a holiday favorite for years to come. Each small motif adds personality—those striped candy canes and bold red bows make a playful seasonal statement. The modular construction means you can adapt the length and motifs to suit any space or color scheme. Enjoy the cozy satisfaction of a handmade centerpiece and share your creation with loved ones! 🎁🧶