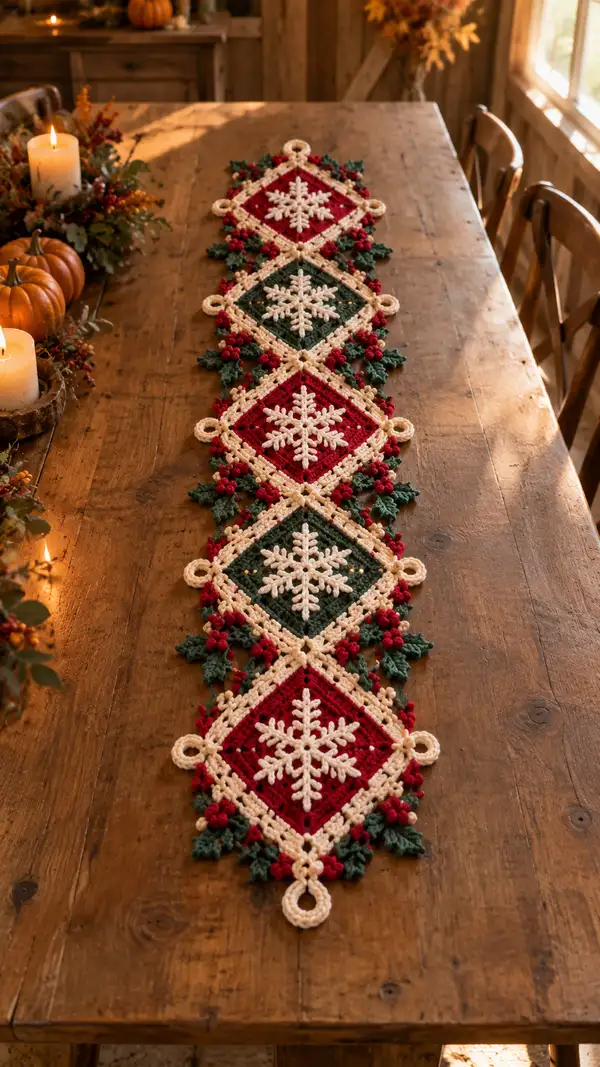
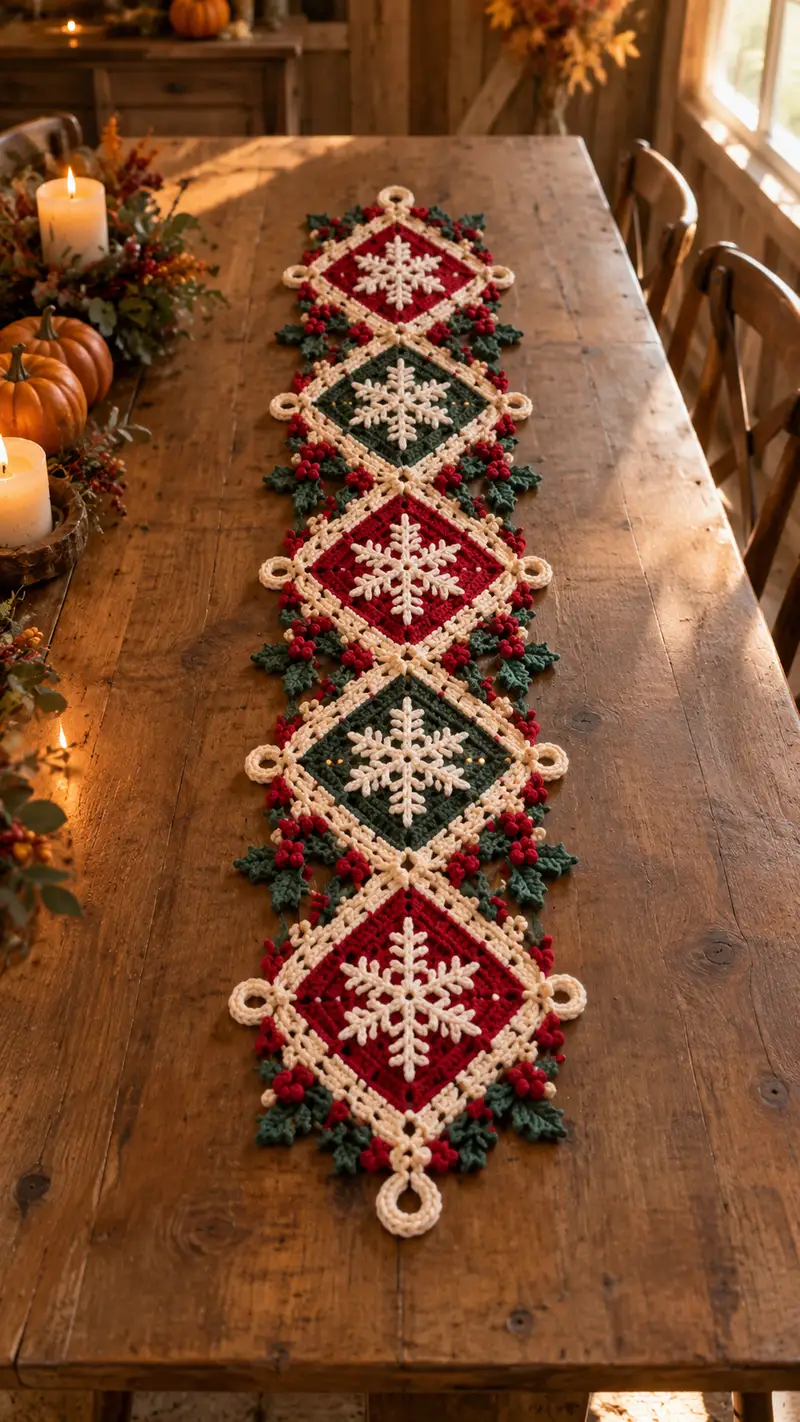
Create a festive table runner featuring linked diamond motifs with center snowflake appliques, holly leaves and clustered berries. This richly textured runner uses deep red, forest green and warm cream yarns to evoke a classic holiday palette. Each diamond is finished with a looped corner and leafy edging for a vintage, heirloom look. Detailed instructions guide you through motifs, appliques and finishing so you can recreate the exact layered effect shown.
Progress Tracker
0% Complete
— Finished Size Estimate :
Info :
As shown with 4 diamonds and the described yarn/hook, finished runner measures approximately 42-48" long by 8-10" wide. Exact size depends on yarn tension. Blocking will change final dimensions slightly.
— Notes & Techniques :
Info :
Work in continuous rounds unless a round end is specified. Use stitch marker to mark the first stitch of each round. Join motifs with surface slip stitch join and secure with whipstitch where necessary. Carry color only when neat; otherwise fasten off and weave tails.
— Diamond Motif (Make 4; alternate color per motif) :
Round 1 :
6 sc in magic ring (6)
Round 3 :
(1 sc, 1 inc) x 6 (18)
Round 4 :
(2 sc, 1 inc) x 6 (24)
Round 5 :
(3 sc, 1 inc) x 6 (30)
Info :
Change to main diamond color (red or green) now if you started the center in a different yarn. Carry tail inward and weave later if you prefer a tidy center.
Round 6 :
(4 sc, 1 inc) x 6 (36)
Round 7 :
(5 sc, 1 inc) x 6 (42)
Round 8 :
(6 sc, 1 inc) x 6 (48)
Round 9-11 :
1 sc in each st (48)
Info :
Rounds 9-11 build the flat square face area that will read as the interior of the diamond when rotated. Maintain even tension to keep the panel flat.
Round 12 :
*Ch 2, skip 1 st, dc in next 5, ch 2, skip 1 st, sc in next 4, rep from * around to create a subtle openwork grid (48)
Round 13 :
1 sc in each st and ch-sp around (48)
Info :
At the end of Round 13 the square has a stable edge. From here we will form a thicker cream frame that will rotate the motif into a diamond when joined later.
Round 14 :
Join cream yarn in any corner st. (2 sc, ch 1, 2 sc) in each corner marker to create a corner cluster, 1 sc in each st along sides (increase count to 56 with corner clusters counted as extra loops)
Round 15 :
1 sc in each st around working evenly over previous clusters and stitches; when you come to corner ch-1 spaces work (2 sc, ch1, 2 sc) to maintain corners (56)
Round 16 :
Work in BLO: 1 sc in each st BLO around to create a defined ridge (56)
Info :
BLO round creates a raised inner frame that helps the cream border sit as a contrasting edge. This ridge will later serve as the attachment base for holly leaves and berries.
Round 17 :
(3 sc, 1 inc) x 14 (70) — evenly space increases to begin forming the diamond corners and give a slightly larger border
Round 18 :
1 sc in each st around (70)
Round 19 :
Work decorative corner loops: in each corner work (sl st to midpoint of corner, ch 6, sl st to same point) to form a small hanging loop; sc around remainder (70)
Round 20 :
Fasten off leaving long tail for weaving. Block motif flat and orient as a diamond (point up) before appliques are attached.
Info :
Make 4 diamond motifs total, alternating the center color between red and forest green as seen in the photo. Block all motifs before attaching snowflakes and edging for consistent joins.
— Snowflake Applique (Make 4; cream) :
Round 1 :
Make magic ring, ch 1, 6 sc into ring; pull tight (6)
Round 3 :
(1 sc, 1 inc) x 6 (18)
Round 4 :
1 sc in each st (18)
Info :
These first rounds build a small central hub. The snowflake will have six identical arms worked into specific spokes; place temporary markers at six evenly spaced points (every 3rd st).
Round 5 :
*Ch 3, (dc, ch 2, dc) into next marked st to form arm base, sl st back into hub, rep from * for six arms. End with sl st to join to hub. (6 arms)
Round 6 :
Working down each arm individually: join yarn at base of an arm, ch 1, sc in base, hdc in next ch-2 space, 3 dc in center loop, hdc in next ch-2, sc at tip, sl st back to hub. Repeat for each of 6 arms.
Round 7 :
Embellish arms: along each arm work picots for spiky branch look: at midpoints work (dc, picot, dc) in center loop. Repeat across all arms.
Round 8 :
Round of connecting slip stitches between arms to flatten: sl st across base loops and around hub, adjust so snowflake lies flat.
Info :
For a raised snowflake, use a slightly smaller hook (3.5mm) and pull loops tight. If you prefer a flatter applique, use same hook as motif color and work loosely.
Round 9 :
Optional decorative eyering: ch 6 between two adjacent outer arm points and sl st to secure, repeat three times to add delicate chains between arms for contrast.
Round 10 :
Fasten off leaving a 10" tail for sewing. Block lightly keeping the arm spikes pointed and straight.
Info :
Sew snowflake to motif center: place snowflake centered on diamond square and use the tail to stitch through the center hub only so the arms remain slightly raised.
— Detailed Snowflake Arm Expansion (optional for extra texture) :
Round 1 :
Rejoin cream yarn at hub, ch 1, sc into hub then ch 4, sl st into arm tip to create an additional small spine on each arm, repeat for all six arms.
Round 2 :
For each added spine work (sc, picot, sc) in the ch-4 loop then sl st back to hub. This creates little satellite branches that resemble snowflake complexity.
Info :
These added arms add significant stitch detail and make the snowflake look more ornate. Work them only if you want a very textured applique like the photo.
Round 3 :
Finishing round: weave in all ends on the back. Block carefully to keep the sixfold symmetry.
— Holly Leaf (Make 24 or as needed) :
Round 1 :
Ch 8, sc in 2nd ch from hook, sc, hdc, dc, hdc, sc, sc across to end (7 sts along chain)
Round 2 :
Working down the opposite side of foundation chain: sc, sc, hdc, dc2tog (work decrease over 2 dc), hdc, sc, sl st to join at base. Shape leaf slightly by tugging edges.
Info :
Use dark forest green for leaves. Make 6-8 leaves between each pair of diamonds for a lush edge like in the photo. Vary leaf direction as you sew them on to mimic natural holly.
Round 3 :
Optional ridge: work 1 sc in BLO around the leaf to give a folded midrib effect.
Round 4 :
Fasten off leaving long tail for sewing. Block lightly holding the pointed tip so the leaf lays flat.
— Berry Bobble (Make many; cluster size 3-4 per junction) :
Round 1 :
Make magic ring, ch 1, 6 sc into ring (6)
Round 2 :
Bobble round: in each st work a bobble stitch (yarn over, insert, pull up loop x5 then finish off) to make a small berry bump; if bobble technique unfamiliar: work (5 dc cluster) in each st, close cluster and sl st to next st. End with sl st and pull ring closed.
Round 3 :
Fasten off leaving long tail for sewing. Make clusters of 3-5 bobbles and sew together at the base for berry clusters.
Info :
Sew berries in clusters near leaf bases. Keep them slightly firm by stuffing a tiny nub of fiberfill into the bobble center if you wish.
— Connecting Edging & Join (Surface Join and Decorative Links) :
Round 1 :
Lay two blocked diamonds side-by-side with cream border touching. With cream yarn and 4.0mm hook, join in a corner st and ch 1, sc through both edge stitches to whip join across seam for 6 stitches (counts vary by join length).
Round 2 :
For a decorative interlink between adjacent diamonds, work chain loops from matching corner loops described in motif Round 19: join loops together with sl st, then secure with a small ring of sc around the junction (approx 8 sc per ring).
Info :
Join all four diamonds in a straight line. Keep joins flat and symmetrical; pin motifs first to ensure loops and corner points align. Use whipstitch with tapestry needle to reinforce joins after surface crochet if desired.
Round 3 :
Once motifs are joined, work a connecting cream round across the midline where motifs touch: sc through one motif edge, ch 1, sc through next motif edge, repeat to make a lattice that stitches them together while leaving small gaps for holly to be sewn in (stitch count depends on join points).
Round 4 :
Along the outer edges work a picot edged cream scallop: *sc in next 3 sts, picot, sc in next 3 sts, sl st in next st* rep around the entire runner perimeter to create a delicate framed edge.
Info :
If you prefer a heavier edge, substitute dc scallops (dc3 in same st, skip 2, sl st) for a pronounced border.
— Decorative Loops & Corner Finish (Make 5 end loops) :
Round 1 :
At both ends and between each motif was a small cream loop made earlier; reinforce each: join cream yarn at loop base, ch 12, sl st to base, sc around chain loop with 12 sc (or nearest even number) to make a solid loop ring.
Round 2 :
Work 2 more rounds of sc around the loop for thickness (12 sc, 12 sc) then fasten off securely and sew tail tightly into the back of motif.
Info :
These loops both stabilize ends and provide hanging points or decorative tassel attachments. Keep them proportionate to motif size.
— Full Runner Edge Finish (Final rounds to tidy and unify) :
Round 1 :
With cream yarn join at one end seam and work 1 sc in each visible outer edge st around the entire runner, working around loops and seams (approx 220-260 sc overall depending on spacing)
Round 2 :
Work BLO 1 sc around to create a ridge that frames the runner (same st count as previous round)
Round 3 :
Decorative final: *ch 3, sl st in 3rd ch from hook to form small chain loops, skip 2, sc in next 2, rep across; when at a junction with holly, leave the loop open for sewing on leaves/berries*
Info :
Weave in ends and block the whole runner again to relax joins and set the final shape. Use pins to position holly clusters and berries before sewing so placement matches the photo: clusters sit where motif corners meet.
— Placement & Sewing of Appliques :
Round 1 :
Position the cream snowflake centrally on each diamond. Using the long tail left on the snowflake, sew through the hub only with small invisible stitches, taking care not to pull arms flat. Secure and weave tail on the back of the motif.
Round 2 :
Arrange holly leaves in small groups of 3-5 along seams where diamonds meet and at outer edges—place clusters of 3 berry bobbles adjacent to leaf bases. Sew leaves first then sew berry clusters into the negative space between leaves using the long tails. Fasten off and weave ends thoroughly on the back.
Info :
Make symmetrical clusters for a balanced look. On each seam between diamonds place one smaller cluster and one larger cluster alternately for the layered effect shown.
— Final Blocking & Care :
Round 1 :
Lay runner flat on blocking board, pin points and loops into crisp diamond points. Spray lightly with water or use a steamed iron on low (cover with pressing cloth) and allow to dry fully.
Round 2 :
Once dry, remove pins. Store flat or rolled to preserve shape. Spot clean gently; hand wash in cool water if needed and reshape immediately while damp.
Info :
The blocking step is essential to bring out the snowflake arms and the crisp diamond points, so do not skip blocking before gift-giving or display.
This festive runner brings an heirloom holiday vibe to your table with layered snowflakes, holly leaves and berry clusters. The warm cream border ties deep red and forest green squares together, creating a classic seasonal centerpiece. Working the appliques and textured stitches is both meditative and rewarding — the finished runner will be a showpiece you’ll love to display each winter. 🎄🧶