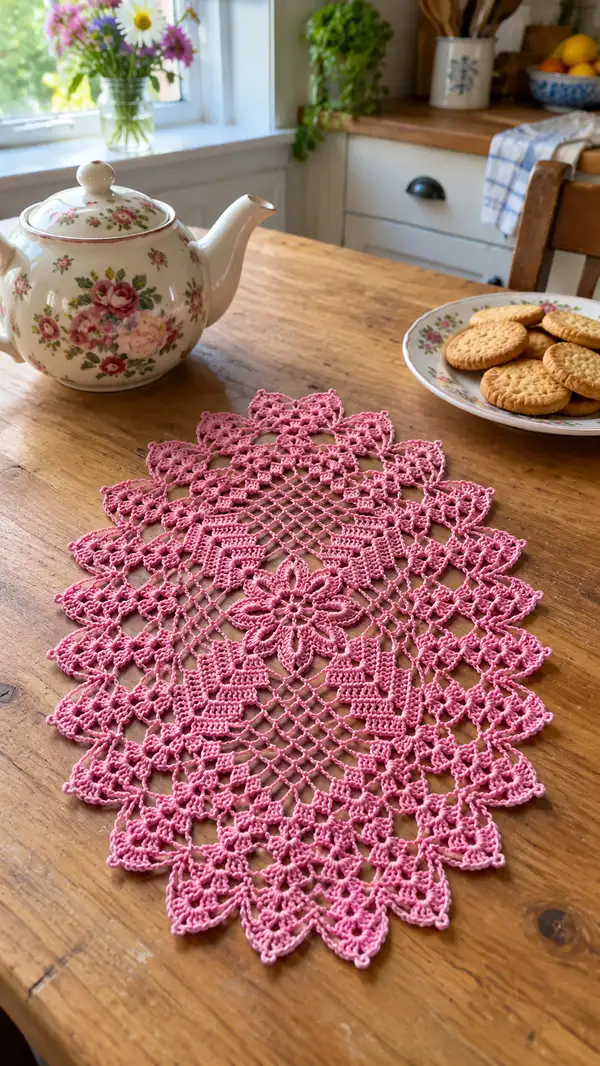
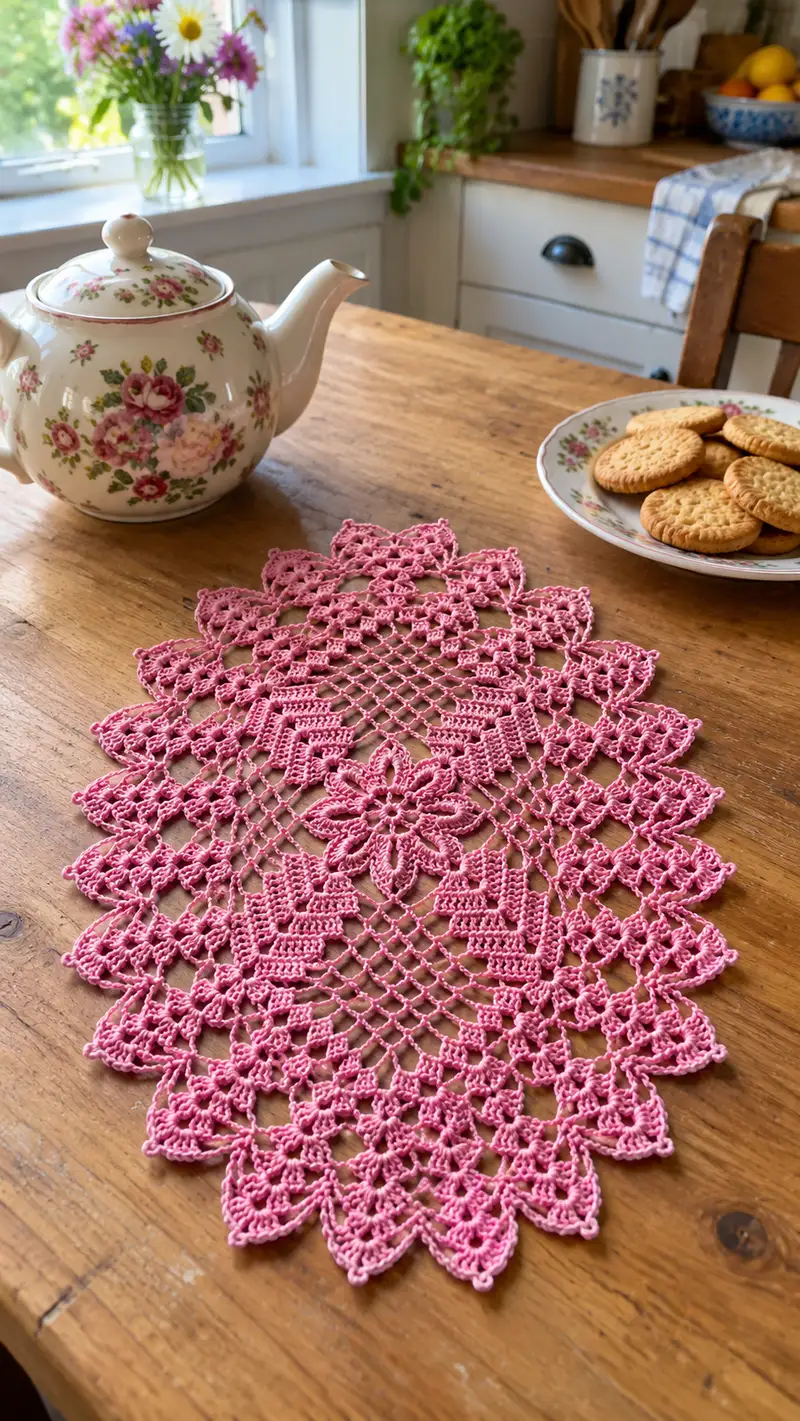
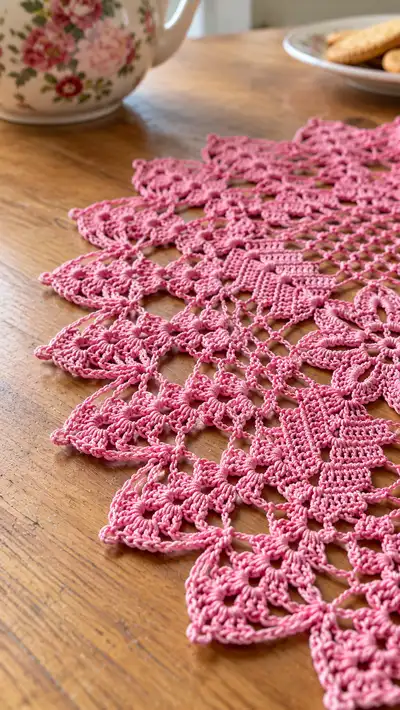
This vintage-inspired pink lace table runner features an openwork diamond mesh, layered pineapple motifs and a scalloped floral edging. Worked in fine cotton thread, it creates a delicate, heirloom look perfect for a tea table. The runner in the photo has an elongated oval shape with a central floral medallion and mirrored lobes at each end. Detailed stitch sequences and frequent tips guide you through each lace round and the finishing blocking for a flat, crisp result.
Progress Tracker
0% Complete
— Notes :
Info :
Worked in continuous rounds (do not join with sl st unless specified) for a seamless lace look. Use stitch markers to mark the start of each round and to identify motif anchor points. The pattern is written for an 8-petal central medallion with symmetrical expansion along the long axis; adjust repeats in multiples of 8 to alter width. Measurements after blocking: approximately 14-16cm wide and 55-65cm long depending on hook and tension.
— Center Floral Medallion :
Round 1 :
8 dc in magic ring; tighten ring (8)
Round 3 :
(1 dc, inc) x 8 (24)
Round 4 :
(2 dc, inc) x 8 (32)
Info :
Place a stitch marker at the first stitch of this round and every 8th stitch to identify the eight petal points for later placement of clusters.
Round 5 :
(3 dc, inc) x 8 (40)
Round 6 :
(4 dc, inc) x 8 (48)
Round 7 :
1 dc in each st (48)
Round 8 :
*(ch4, sk 2 sts, sc in next st) around to create shallow chain loops between petals. Complete 12 chain loops evenly around (48 anchor sts remain)
Info :
This round forms the base for the petal clusters. If your loops look too loose, reduce ch4 to ch3 for a firmer look; if too tight, increase to ch5 for more openness. Keep consistent.
Round 9 :
In each ch-4 loop: (sc, ch3, 7 dc cluster in loop, ch3, sc) — work 8 petal clusters evenly aligned to the eight anchors (each cluster sits over 6-7 of the previous dc stitches). Count after completing: visible petals = 8 (st count measured in anchors remains 48)
Round 10 :
1 sl st to join clusters, ch1, sc in same st, *(ch5, sc in next cluster base) repeat around to form long chain arches (8 arches) (48 anchors)
Info :
Mark the top of each petal cluster — these eight points will become anchors for the first mesh expansion rows. If a cluster seems larger, tug gently to even tension before moving on.
Round 11 :
Working into ch-5 arches: *(sc, ch6, sc) into each ch-5 arch around (8 arches) then sc across the small in-between anchors to stabilize. Net effect: 8 larger arches. (48 anchor points)
Round 12 :
Into each ch-6 arch: (sc, ch9, sc) to elongate arches, forming long chain spaces that will connect to the diamond mesh; sc in each anchor between arches to keep structure (48)
Info :
Keep the arches flat by holding the work on a flat surface as you make these long chain spaces; adjust chain length +/−2 chains if your fabric is too tight/loose. The number of chains affects later mesh counts, so mark adjustments.
— Transition to Diamond Mesh :
Round 13 :
Working across long arches: *sc in base anchor, ch5, sk to next anchor, sc in anchor; repeat around creating five-chain bridges between anchors (48 sc anchors, plus chain bridges)
Round 14 :
Into each ch-5 bridge: (dc, ch3, dc) forming small arch bridges. Work sc in anchors between arches (48 anchors remain)
Round 15 :
Begin lattice foundation: *ch7, sl st into the 4th ch of next ch7 from previous repeat to form a net join, [this creates a diamond mesh] repeat around resulting in 24 diamonds across the circumference equivalent (count measured in diamond points: 24)
Info :
When forming the first diamond net round, keep tension loose enough so the diamonds sit open rather than pulling into the center. If diamonds are too closed, increase ch by 2 in subsequent mesh rows.
Round 16 :
Work one round of chain-net stabilization: In each diamond point: sc, ch5, sc to anchor points, forming a steady grid. Diamond count remains 24
Round 17-20 :
Repeat mesh stabilization rounds: 1 sc in each anchor and ch-5 chain loops to build a stable lattice (diamond count 24, overall anchor stitch count visually increases as new chain-join points are established)
Info :
Mark the four principal axis points (top, bottom, left, right) with removable stitch markers; these help keep the runner symmetrical as you work the elongated repeats for the oval shape.
— First Pineapple Layer (Begin Lobes) :
Round 21 :
At each of the 8 petal-axis anchors, work: (sc into anchor, ch3, 7 dc cluster worked over the next three diamonds' chains, ch3, sc) — form 8 small pineapple bases. Overall diamond count increases to 32 visually as you join into chains
Round 22 :
Between each pineapple base work two chain-bridges: *(ch5, sc in next net join) repeat around to separate pineapples and maintain diamond mesh (visual repeats 32)
Round 23 :
On pineapple bases: *(sc, ch4, dc5 cluster, ch4, sc) in each pineapple base to expand petals outward (32 net anchors)
Info :
These rounds form the first visible lobes that alternate with diamonds. Keep stitches even and avoid pulling clusters too tight; they should sit proud but not pucker the mesh.
Round 24 :
Round of connecting mesh: 1 sc in each join, ch7 across larger openings, sl st into mid-diamond joins to secure (anchor structure increases to 40 visual joins)
Round 25 :
Work elongated pineapple shaping: into each pineapple base: *(sc, ch5, tr3 cluster, ch5, sc) to increase height of lobes (structure now shows alternating 8 lobes and wide diamonds)
Round 26 :
Mesh consolidation round: sc in anchors and in chain joins; create working chains of ch9 in selected diamond centers to prepare for the long center lattice (count: maintain 40 anchor points)
Info :
At this stage the runner begins to elongate. The long chain spaces in the mesh will later be mirrored to create the length. Use your markers at axis points to keep the top and bottom ends aligned.
— Middle Lattice & Length Extension :
Round 27 :
Begin center longitudinal expansion: Along the top-to-bottom axis, replace alternate diamond spaces with ch11 loops to create a central long-mesh panel. Across the rest of circumference maintain ch7 diamonds (total diamond columns: center column expanded to 6 long diamonds; side columns remain shorter)
Round 28 :
Stabilize center long-mesh: sc in anchors, *(ch11, sc) in long chain points; ch7 in side diamonds (visual anchor points: 48)
Round 29 :
Repeat mesh row building: In long-mesh columns: sc, ch13, sc to elongate center axis. Side columns: sc, ch7, sc. Maintain symmetry on both sides (anchor count 48)
Info :
These long-mesh rounds add length to the runner. Count the number of long chain loops; they must be equal on top and bottom halves. Use markers to mark the center of the runner to ensure mirroring.
Round 30-36 :
Work 7 rounds repeating the long-mesh expansion sequence: each round work sc in anchors and extend long chain loops by +2 chains on every odd round (e.g., ch13 → ch15 → ch17) to gradually open the central lattice. Side diamonds remain ch7 repeats for structure. After Round 36, center column shows long chain loops of ch17 and side columns are stable.
Round 37 :
Introduce ladder stabilizing rounds: sc in each anchor, ch5 between anchors, sl st into chain centers to firm the lattice. This prevents stretching during blocking. Anchors counted visually: 56.
Info :
If your center lattice has begun to sag, add an extra stabilization round using dc in anchors rather than sc to give more body. Always work evenly on both long sides.
— Second Pineapple Layer (Stacking Motifs) :
Round 38 :
At intervals along the long-mesh column, establish secondary pineapple shells: *sc at chosen anchor, ch4, (5 tr cluster, ch4, sc) repeat 8 times spaced along both halves of the center, creating stacked pineapple motifs that echo the central medallion (visual count: 16 small pineapples)
Round 39 :
Between stacked pineapples: connect with (ch9, sc) joins to integrate them into the lattice; work sc in side diamond joins to keep the overall round even (approx anchor points 64)
Round 40 :
Work a stabilization round: sc in each anchor and in every ch9 join sc, ch5, sc to maintain rhythm. Check symmetry: same number of pineapple repeats on both long sides.
Info :
These stacked pineapples form the elongated lobes seen near the center in the photo. Vary the height by working extra tr in the pineapple clusters if you want a taller motif, or reduce for a flattened effect.
Round 41 :
Begin shaping the lateral scalloped wedges that will become the outer shell points: into every 3rd diamond across the outer columns work: (sc, ch3, 3 dc bobble, ch3, sc) creating 16 wedge bases evenly spaced (visual anchors ~64)
Round 42 :
Expand wedge bases with: *(sc, ch5, 5 dc shell, ch5, sc) at each wedge base, forming pronounced scalloped lobes around the perimeter (anchor count maintained visually, structure widens)
Round 43 :
Mesh consolidation: sc in each anchor, ch7 in open spaces, sl st to previous row to flatten shells. If shells puff too much, reduce ch5 to ch3 next round.
Info :
At this stage you should see the scalloped pointed edge forming. If your runner looks too narrow, add two extra ch7 mesh repeats in the widest section and compensate by adding two sc anchors opposite to keep symmetry.
— Outer Lattice & Shell Refinement :
Round 44 :
In each shell valley alternate between two treatments: (A) ch11 arch bridged to adjacent anchor; (B) small sc picot chain (sc, ch3, sl st) to create texture. Repeat pattern around creating alternating tall and short scallops (visual points 32)
Round 45 :
Stabilize shells: in taller arches work (sc, ch7, sc) anchored into tip of shells; in short picot chains work (sc, picot, sc). This creates the pointed scalloped outline seen in the photo.
Round 46 :
Work a decorative cluster round between shell tips: *(ch3, 3 tr cluster, ch3, sc in mid-anchor) repeating around to add height to each point (resulting in 32 visible scallop tips)
Info :
Count the scallop tips after this round; there should be an even number that aligns with earlier markers. If one side has more, use the markers to find and correct the missing or extra repeat before proceeding.
Round 47 :
Begin the pointed edging: *in tip sc, ch5, (3 dc cluster, ch5) sc in next valley; repeat around forming a row of raised points (32 tips)
Round 48 :
On each raised point: (sc, picot, sc, ch7, sc) to elongate the tip and prepare for final shell shaping. Ensure equal tension on all picots for a uniform look.
Round 49 :
Create detailed shell loops: *(ch3, (5 dc into same st) x2 separated by ch2 to form a layered shell) repeat at every tip. This builds the layered floral edging seen in the photo.
Info :
If your layered shells look crowded, reduce the number of dc in each shell to 4. If too small, increase to 6 dc. Keep each tip identical for symmetry.
— Final Petal Detail & Picot Edge :
Round 50 :
At each shell outermost point work: (sc, ch3, 7 dc cluster, ch3, sc) to make deep petal points. There will be 32 outer petals after this round.
Round 51 :
Round of stabilization: sc into anchors and in the mid-shell loops; ch5 to connect petals smoothly. This avoids sharp puckering during blocking.
Round 52 :
Decorative row: in each petal point work (picot, sc) three times around the rim to build delicate tiny points on each petal edge.
Info :
Examine the runner's overall outline now. If the ends (long axes) are not as elongated as you want, add an extra repetition of Rounds 27-36 (one or two) before completing the outer rounds. Always mirror the same number of rounds on both halves.
Round 53 :
Begin the final edging: *sc across rim anchor, ch3, picot (ch3, sl st into same st) for a neat corded picot rim around each petal (approx 128 small picots)
Round 54 :
Finish edging by working a single crochet round through the back loops of the last round to create a subtle ridge: 1 sc in each st BLO around (count equals total rim stitches, approx 256 depending on your tension)
Info :
This BLO round gives a tidy definition to the outer edge and helps the runner lay flat. If you prefer a softer edge, skip BLO and weave in ends invisibly instead.
Round 55 :
Optional decorative topstitch: with a needle and matching thread, make a sewn running stitch through the chain joins inside the outermost scallop to emphasize the pattern. This is not structural but adds visual crispness.
Round 56 :
Final check: Work a final pass of sl st into the base to secure any remaining loops and fasten off. Weave ends into the body using a tapestry needle and trim close to work.
Info :
At completion the runner will appear relaxed. Do not skip blocking — wet-block into shape using measured pins to make the scallops pointy and the mesh open. Use light starch if you prefer a more rigid finish.
— Additional Decorative Variations (Optional Rounds 57-130) :
Info :
The pattern above creates the photographed runner. For extra ornamental detail, follow the optional rounds below to increase motif layering, add square filet inserts, or add an extra lace fringe. These optional rounds are modular: choose only those you want and stop when the desired length/ornamentation is reached.
Round 57 :
Optional: Insert a filet square panel along each side: use ch7 grids and dc blocks to form a 10x4 block; repeat for both sides. This increases width and visual interest (grid insertion will add 16-24 anchors per side)
Round 58 :
Optional: Work additional pineapple rows between shell tips: build 2 rounds of extra tr clusters and ch9 loops to deepen lobes (adds +2 rounds of height to outer shell)
Round 59 :
Optional: Add a lace fringe by working ch12 loop fringe points every 3rd scallop valley then finishing each loop with a small bead or picot; secure with sl st. This decorative fringe adds several small loops around the perimeter (approx 40 fringe loops)
Round 60-130 :
Advanced customization ideas: repeat mesh expansion rounds, add twin-shell layers, or insert contrasting color rows every 10 rounds to create subtle stripes. Each repeat of 10 rounds roughly adds 1.5–2cm to the length. If you add many optional rounds be sure to rebalance scallop counts at the end so the edging aligns evenly.
Info :
Use blocking pins to measure exact final dimensions and to match the scalloped points on both sides of the runner. Keep notes of any optional sequences you used so you can reproduce the design later.
This pink lace runner brings a touch of vintage warmth to any table and is a lovely slow-stitch project to savor. Each round reveals a new texture—from the central floral medallion to layered pineapple lobes and a delicate scalloped border. Block with care and enjoy the satisfying transformation as it blooms flat and crisp. 🧶✨ Perfect for teatime displays and gifts, this runner adds handcrafted elegance to your home. Happy stitching and may your scallops be perfectly even! 🌸