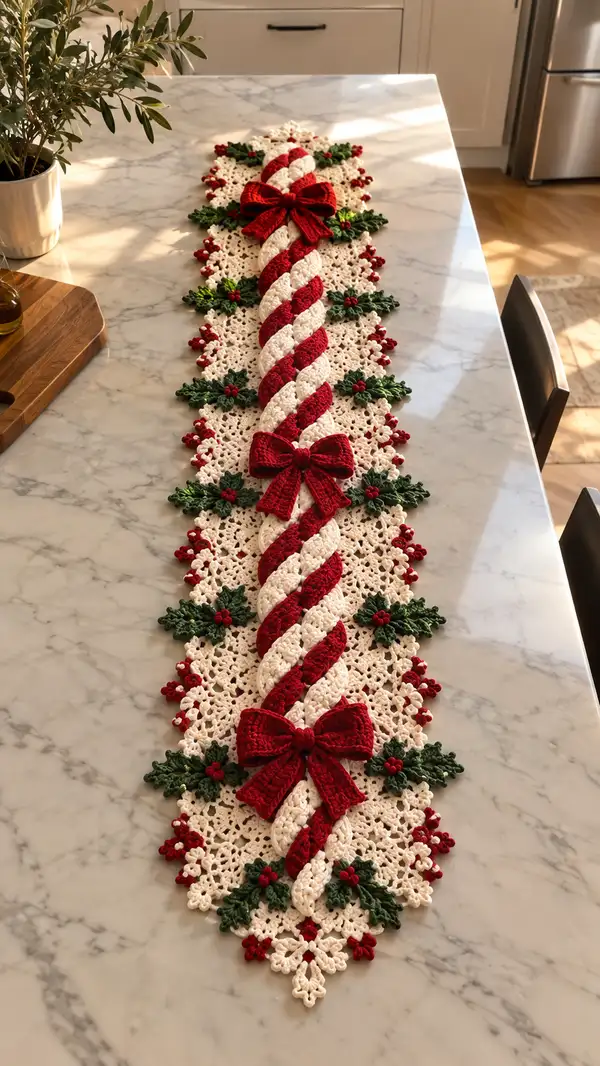
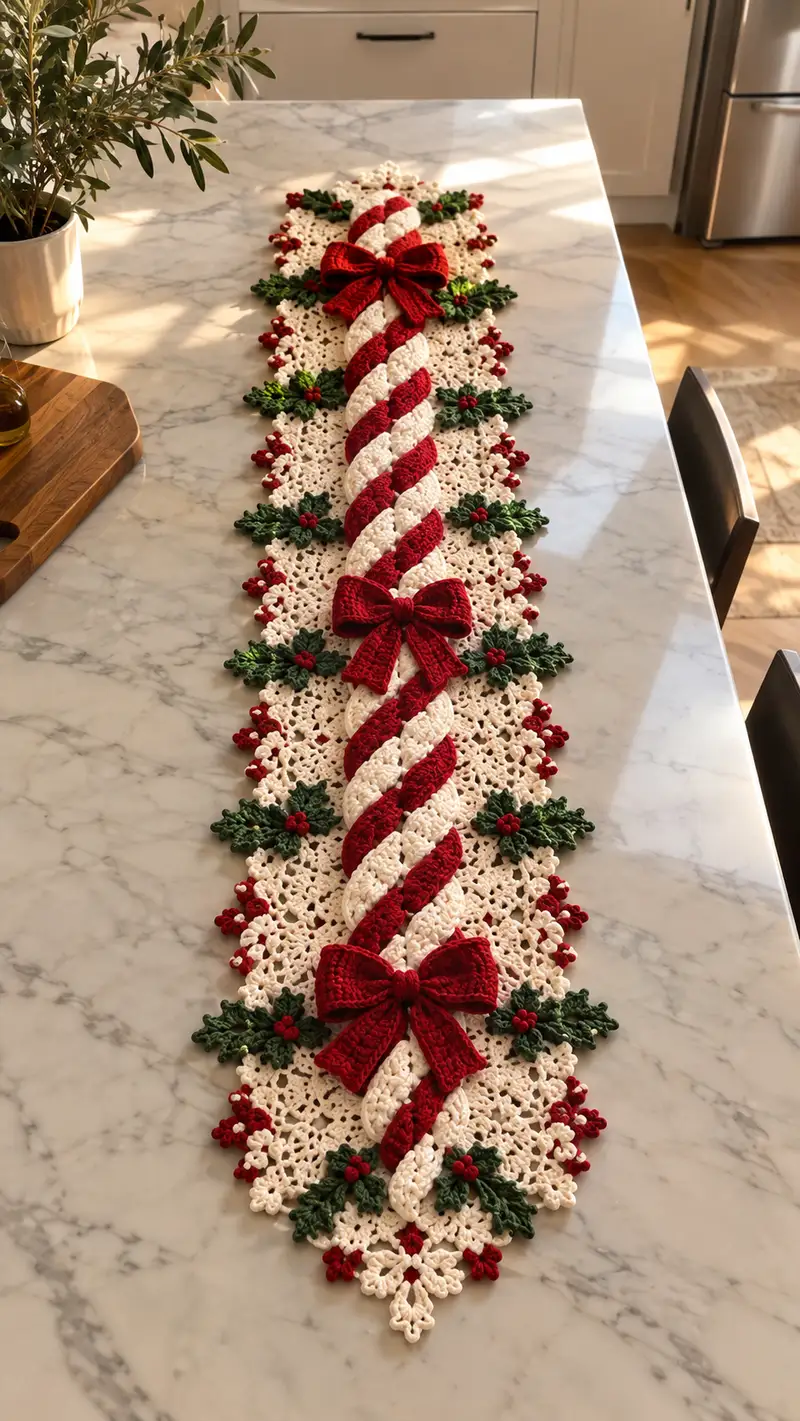
Create a festive Red and Ivory Candy Cane Lace Table Runner with twisted candy-stripe center, delicate ivory lace panels, holly leaves, berry clusters, and three plush bows. This decorative runner combines crochet tubes, lace motifs, and appliqued greenery for a seasonal centerpiece. The pattern includes step-by-step instructions to crochet tubes for the candy-spiral, repeat lace motifs for the base, and make leaves, berries and bows to embellish. Perfect for holiday tables or gifting to someone who loves handmade décor.
Progress Tracker
0% Complete
— Materials & Gauge :
Info :
Gauge is flexible for this decorative runner but consistent tension matters. With worsted weight and 4.0mm hook, 10cm of height in lace motifs = approx 12 dc rows blocked. Keep hook size the same throughout main pieces unless noted.
— Candy Stripe Tubes (Make 2 in Red and 2 in Ivory, or longer single tubes as desired) :
Info :
Each 'stripe' is a crocheted tube worked in continuous rounds. Tubes are stuffed lightly and then twisted together to create the candy-cane spiral. Work tightly to avoid stuffing showing through. Use a stitch marker at the beginning of the round.
Round 1 :
6 sc in magic ring (6)
Round 3 :
(1 sc, inc) x 6 (18)
Round 4 :
(2 sc, inc) x 6 (24)
Round 5 :
(3 sc, inc) x 6 (30)
Round 6 :
(4 sc, inc) x 6 (36)
Round 7 :
(5 sc, inc) x 6 (42)
Round 8 :
(6 sc, inc) x 6 (48)
Info :
If you prefer a slightly narrower tube for a smaller candy cane, stop increasing at Round 6 (36 sts). For the runner pictured, 48 sts creates a substantial, plush tube.
Round 9-60 :
1 sc in each st (48) - work even until tube measures approximately 38-45cm from start (or desired length for one stripe segment)
Info :
Start stuffing lightly after Round 16, adding small amounts of fiberfill every 4-6 rounds. Aim for a firm but slightly flexible tube. Avoid overstuffing which prevents clean twisting.
Round 61 :
(6 sc, dec) x 6 (42)
Round 62 :
(5 sc, dec) x 6 (36)
Round 63 :
(4 sc, dec) x 6 (30)
Round 64 :
(3 sc, dec) x 6 (24)
Round 65 :
(2 sc, dec) x 6 (18)
Round 66 :
(1 sc, dec) x 6 (12)
Info :
Fasten off leaving a long tail. Close the opening by sewing through front loops to create a neat closure. Repeat to make two red tubes and two ivory tubes (or as many stripes as required for length). Tubes can be made longer and joined later if you need a runner longer than these segments.
— Tubular Stripe Variation: Flat Strip Method (Optional) :
Info :
If you prefer to crochet a flat ribbed strip and fold/join to create a tube, work a foundation chain equal to desired tube circumference approx 48 sts, then work hdc or dc rows until desired length, fold and whip stitch or sc around edge to form tube. This method creates a flatter braided look.
— Candy Rope Assembly (Twist & Secure) :
Info :
Lay two red and two ivory tubes straight and gently twist them together in alternating order to form the large candy-spiral. For the pictured runner, twist order is: red, ivory, red, ivory (counterclockwise spiral). Pin in place at ends and at third points to keep twist even.
Round 1 :
Align 4 tubes side by side. Using an upholstery needle and matching yarn, baste stitch through the center of each tube at both ends to hold them together for final crocheting.
Round 2 :
With smallest hook 3.5mm and matching color (use red or ivory at edge), sc through adjacent stitches of neighboring tubes where they meet (approx every 6th round) to tack the tubes together along the seam. Continue along full length, spacing tacks every 3-4 cm to ensure a unified rope shape.
Info :
Do not fully stitch tubes together; the visible spiral should remain three-dimensional. Keep sewing limited to occasional tacks for shape stability and shipping durability.
— Lace Motif (Make repeat motifs to match runner length; pictured runner uses 9 main motifs per side, adjust as needed) :
Info :
The lace panel is built from an individual floral/snowflake-style motif that joins seamlessly to neighbors. Block motifs flat before assembly for consistent joins. Each motif is worked flat in rounds.
Round 1 :
Ch 6, sl st to form ring, ch 3 (counts as dc), 11 dc into ring, sl st to top of ch-3 (12 dc) (12)
Round 2 :
Ch 1, sc in same st, *ch 3, sk next dc, sc in next dc; rep from * around ending with sl st to first sc (12 ch-3 sps)
Round 3 :
Sl st into first ch-3 sp, (ch 3, 2 dc, ch 3, sl st) into same sp to form picot petal, *(sl st into next ch-3 sp, (ch 3, 2 dc, ch 3, sl st) into that sp) rep around (12 petals)
Round 4 :
Working behind petals: sl st to back loop of petal base, ch 5, sl st to space between petals, *ch 5, sl st between next petals; rep around (12 ch-5 loops)
Info :
These chain loops will become the openwork that reads as the background of the runner. Keep tension open but even for lace effect.
Round 5 :
In each ch-5 loop: (sc, ch 3, 3 dc, ch 3, sc) - this forms a small fan. Repeat in each loop around (12 fans)
Round 6 :
Ch 1, sc in top of each fan space across, work ch-3 sps as decorative spacing: *(sc, ch 3, sc) across fan top; rep around creating scalloped join points
Round 7 :
Form corner points for joining: In every third fan rep, work (sc, ch 5, sc) to create a larger loop; in other fans work (sc, ch 3, sc) (12 larger loops and 24 small loops total)
Round 8 :
Ch 1, sl st across to position for decorative chain cluster and then *(3 dc cluster, ch 2, sl st) into indicated loops to create delicate lacy texture. Work evenly around.
Info :
Each motif should measure approximately 18-20cm in diameter blocked. Make a chain of motifs by joining the larger loops on edge of one motif to the larger loops of the next motif with slip stitches or whip stitch when motifs are blocked and pinned for accurate placement.
Round 9 :
Final lace edging around motif: *Ch 2, (2 dc, ch 2, 2 dc) in each larger loop; rep around to create scalloped edges and points for joining (count depends on motif circumference)
Round 10 :
Fasten off leaving long tail for joining motifs. Make required number of motifs and block flat.
— Joining Lace Motifs into Two Long Side Panels :
Info :
Runner pictured shows two continuous side panels made by joining motifs into a long strip on either side of the central candy rope. Plan number of motifs so that total length + candy rope length + overlap equals desired table runner length.
Round 1 :
Lay two motifs side by side right sides up. Align larger loops. Use long tail and yarn needle to mattress-stitch the large loop points together through back loops only to create a flat seam. Join with 6-8 stitches per join point for stability.
Round 2 :
Continue joining motifs into a long strip, checking alignment frequently. On corners at ends of runner, shape the last motif so the point extends slightly beyond the candy rope for a neat tapered finish.
Info :
Blocking joined panels on foam board ensures clean, even edges — block before attaching candy rope.
— Holly Leaves (Make 12-18 as pictured) :
Info :
Holly leaves are worked flat and shaped with increasing height and reverse decreases to create pointed lobes and serrated edges. Use holly green yarn. Make enough leaves to tuck under candy rope at regular intervals.
Round 1 :
Ch 9. In 2nd ch from hook: sc, hdc in next, dc in next 3 chs, hdc in next, sc in last (7 sts excluding turning ch)
Round 2 :
Ch 1, turn, sc in first, sc in next, hdc in next, (2 dc in each of next 3), hdc, sc, sc (increase across center) (11)
Round 3 :
Ch 1, turn, sc in first 2 sts, hdc in next, dc in next 5 sts, hdc, sc in last 2 sts (13)
Round 4 :
BLO: ch 1, sc in each st BLO to create raised midrib ridge (13)
Round 5 :
Edge picots: Work single crochet around leaf edge with 3-4 picots: *(sc, ch 3, sl st into same st) to create serrated tips. Space picots evenly to create 5-7 sharp points depending on leaf size. Finish and fasten off leaving tail for sewing.
Info :
Make some leaves slightly smaller — omit Round 3 on a few to produce visual variation like in the photo.
— Holly Berry Clusters (Make many small clusters) :
Round 1 :
With berry red, ch 3, 6 sc into 2nd ch from hook, join (6)
Round 2 :
In same round work: ch 1, *(hdc in next st, dc in next) around to create a slightly larger cluster; or work 1 round of 6 bobble sts: (yo, insert, pull up loop x4, yo and pull through 8 loops) to form a 3D berry. Fasten off leaving long tail for sewing.
Info :
Sew clusters in groups of 3 for a realistic holly look. Add embroidered tiny veins or french knots with a few stray stitches of darker red for depth if desired.
— Bows (Make 3 large bows matching pictured placement) :
Info :
Each bow is constructed from a rectangle worked in hdc or sc, folded and cinched into bow shape. A narrow band wraps around center to form a knot. Stuff center lightly for fullness if desired.
Round 1 :
Ch 36. Row 1: hdc in 2nd ch from hook and in each ch across (35)
Round 2-12 :
Ch 2, turn, hdc in each st across (35) — work 11 rows total or until rectangle measures approx 12cm x 6cm.
Info :
Block rectangle flat and sew short sides together to form a tube. Turn right side out so seam is hidden inside. Fold tube into pleats to resemble bow loops, then cinch center with yarn and wrap a narrow band around center. Add a small stuffed centre knot for fullness if desired.
Round 13 :
Make 1 narrow band: ch 6, hdc in 2nd ch and across (5), work 12 rows, fasten off, wrap around bow center and sew ends together at back.
Round 14 :
Cut two tails from same rectangle by folding and sewing seam down center to create two hanging tails, shape ends by angling a dovetail cut or slanted trim. Fasten off and weave ends.
Info :
Lightly stuff the knot if you want the bows to hold shape. Use small, hidden stitches to secure loops to tails and to the runner later.
— Edge Berry Picot Trim (Worked directly onto lace panel edges) :
Round 1 :
With contrasting berry red held singly, attach in a small loop point along the lace edge. *Ch 3, sl st into same space to form picot; skip 2 chs then sl st into next point; rep across entire edge to create small berry-like picots
Round 2 :
At evenly spaced points (approx every 6-8 cm), crochet a cluster of 3-5 small berry bobbles (as described in Berry Clusters) into the edge loops and secure by sewing on the back for stability.
Info :
These picots give the delicate dotted trim shown along both edges. Add as many or as few as you like depending on how dense you want the border.
— Decorative Stitching Along Candy Rope Sides :
Info :
To disguise joins and integrate the rope with the lace background, use small slip-stitch tacks in matching-color yarn to the rope along the seam edges, worked into the junction between lace and rope every 4-6cm.
Round 1 :
From the underside, with matching yarn and tapestry needle, weave through rope center and through lace join points to create staggered tacks every 10-12 sts. This is decorative and functional.
— Final Assembly & Positioning (Comprehensive Steps) :
Info :
Assemble on a clean table or blocking board. Lay the two long lace panels parallel and place the twisted candy rope down the center. Pin in place at regular intervals before sewing. Work from center outward so tension and placement remain symmetrical.
Round 1 :
Use long yarn tails from motif joins to baste the lace panels to the underside of the rope at every motif join. Use a mattress stitch for an invisible finish, stitching into the center holes of the lace motifs and around the rope's base so stitches are hidden.
Round 2 :
Position holly leaves beneath the rope at regular intervals (approx every 3rd motif) and tack them in place with small whip stitches using green yarn. Sew berry clusters on top of leaf bases using matching red tails, attaching clusters of three berries per leaf group.
Round 3 :
Attach bows at three evenly spaced points along the rope (ends and center). Tuck bow base under rope and sew through the knot area into rope and lace foundation for stability. Reinforce with an extra wrap of yarn around bow center if needed.
Info :
Secure all appliques with multiple passes of yarn - the runner will be handled and possibly moved frequently during the season so secure attachments are essential.
— Finishing Touches :
Round 1 :
Weave in all loose ends by threading through multiple interior seams, trimming close but not too close to avoid slipping out. Use a drop of fabric glue on a few back-side knots if giving to non-children recipients for extra security.
Round 2 :
Lightly steam-block finished runner placing a clean cloth between iron and yarn. Do not press directly; use steam and gentle shaping. Allow to dry fully on blocking board pinned flat to maintain scalloped edges.
Info :
Check each attachment from both sides for visible stitches. Tidy the back so the runner can be used on either side if desired (or place on table with better-looking side up!).
— Care Instructions :
Info :
Spot clean where possible. For full wash, hand wash gently in cool water with mild detergent, reshape and dry flat away from direct sunlight. Avoid machine washing to preserve shape and appliques.
This beautiful candy-cane lace table runner brings classic holiday charm to any table, pairing bold seasonal color with delicate handwork. Each element—from the plush twisted candy rope to the lacy panels and holly appliques—comes together to create a show-stopping centerpiece. Working this pattern is a satisfying mix of crochet techniques, perfect for savouring the making process. 🧶🎄 Add your own twists and colors to make it uniquely yours. Happy stitching and enjoy your festive creation! ✨