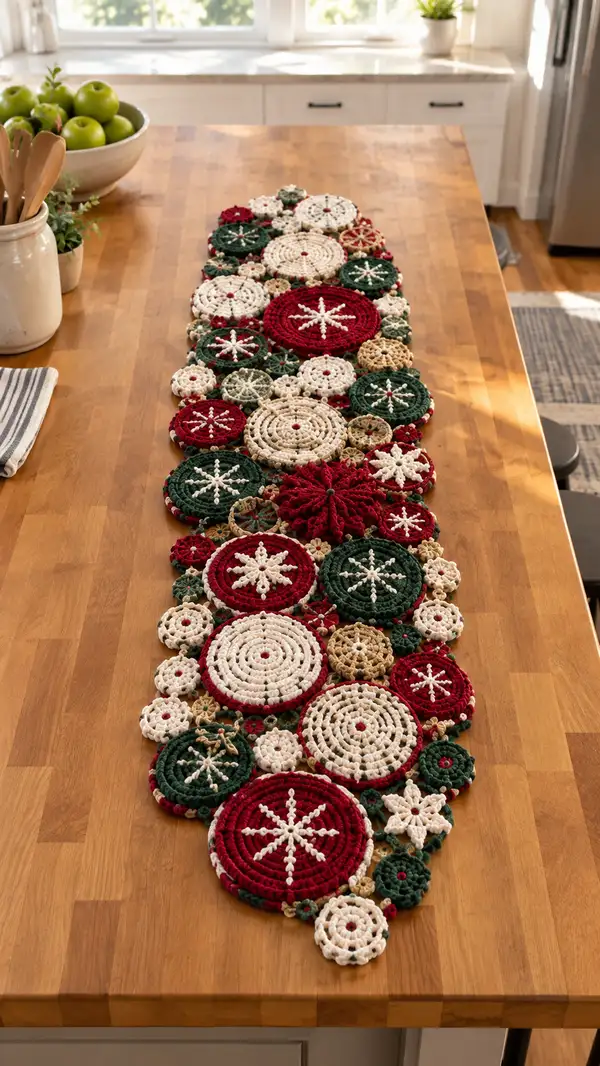
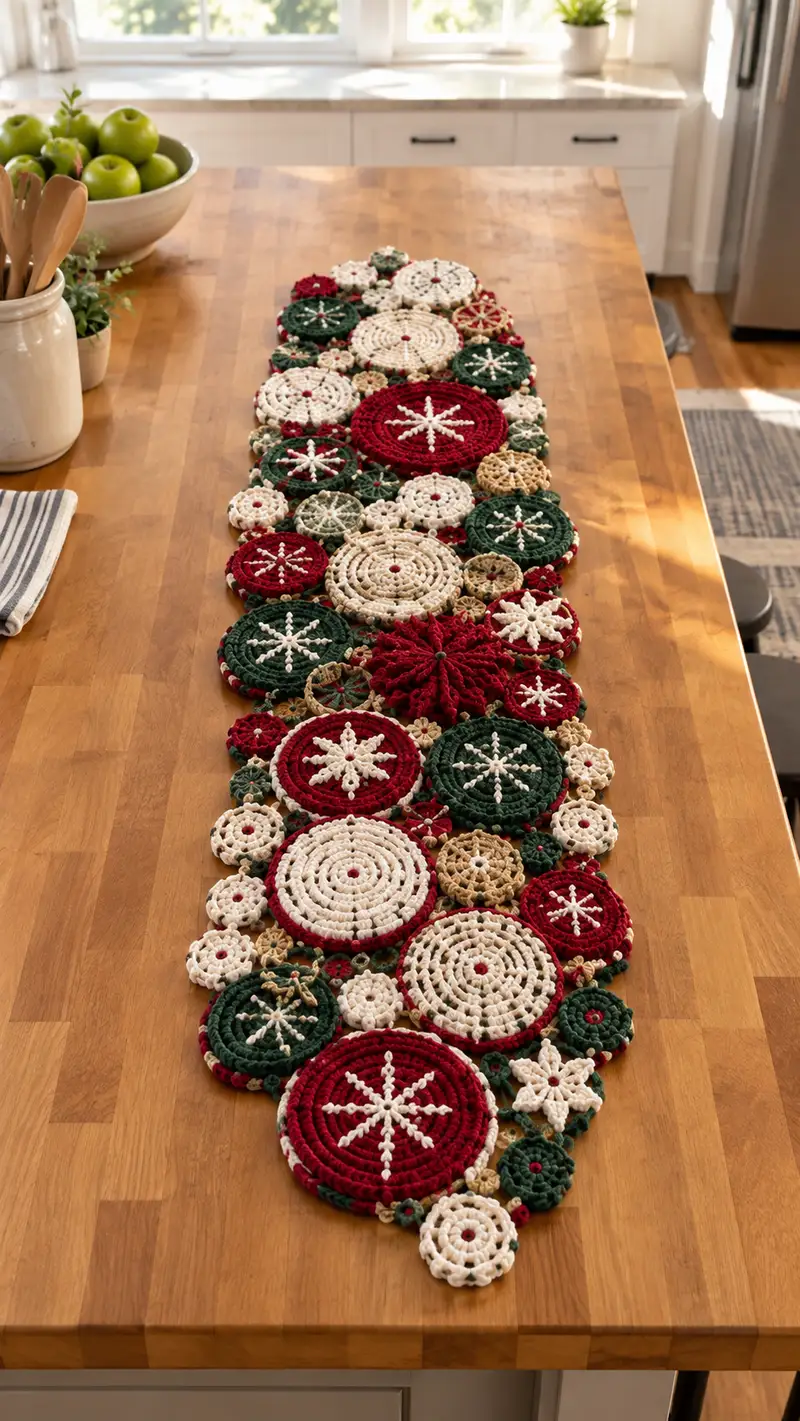
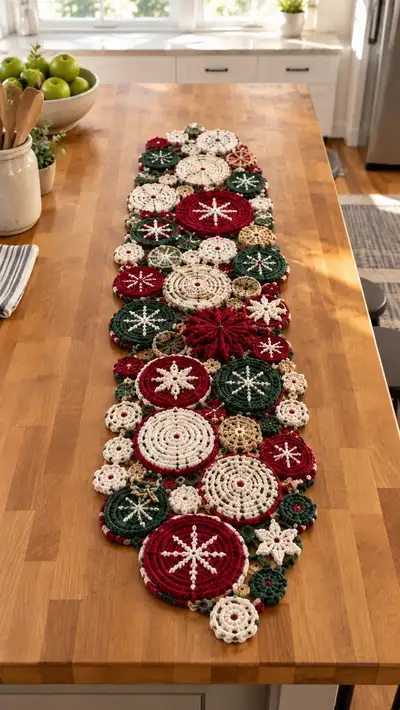
A festive table runner composed of crocheted circular motifs in rich red, deep evergreen and warm cream, joined into an elongated snowflake-studded runner. Texture comes from puff stitches, raised snowflake overlays and openwork rings for a handcrafted vintage-meets-modern look. Designed to lie flat across a dining or kitchen table, this runner brings holiday charm through mix-and-match motifs and cozy yarn thickness.
Progress Tracker
0% Complete
— Notes & Gauge :
Info :
Gauge is not critical for this table runner since motifs are joined into a free-form cluster. Using the suggested 4.5mm hook with worsted weight yarn yields large motifs approximately 10-12cm (4-4.5in) across. Adjust hook size to increase or decrease motif diameter to suit your table. Work tightly enough that motifs lay flat.
— Tools & Abbreviations (quick) :
Info :
Use stitch markers for round starts. When changing colors, fasten off and weave ends or carry color loosely on the back for short runs. Puff stitches are worked into same stitch and counted as 1 stitch for subsequent rounds.
— Large Circular Disc (Make 6–8 primary large motifs) :
Round 1 :
6 sc in magic ring (6)
Round 3 :
(1 sc, 1 inc) x 6 (18)
Round 4 :
(2 sc, 1 inc) x 6 (24)
Round 5 :
(3 sc, 1 inc) x 6 (30)
Round 6 :
(4 sc, 1 inc) x 6 (36)
Info :
At this size you can change to a second color for a banded look. Carry unused yarn on the inside if making stripes; otherwise fasten off and join new color with a sl st at the start of next round.
Round 7 :
(5 sc, 1 inc) x 6 (42)
Round 8 :
(6 sc, 1 inc) x 6 (48)
Round 9 :
1 sc in each st (48)
Round 10 :
1 sc in each st BLO (48)
Info :
The BLO round creates a subtle ridge that helps the motif sit visually raised when joined. This is a great place to change to contrasting color for the snowflake overlay later.
Round 11 :
(6 sc, 1 puff) x 6 (54)
Info :
Puff stitch: yarn over, insert hook, pull up loop, repeat 3 times total in the same st, yarn over and pull through all loops, ch1 to close puff. Count each puff as 1 st for the round count.
Round 12 :
1 sc in each st (54)
Round 13 :
(5 sc, 1 inc) x 9 (63)
Round 14 :
1 sc in each st (63)
Info :
If you desire a thicker disc for the center (as pictured in some large red discs), work Round 14 in FLO to create texture. Otherwise skip and continue in standard sc.
Round 15 :
(6 sc, 1 inc) x 9 (72)
Round 16 :
1 sc in each st (72)
Round 17 :
1 sc in each st BLO (72)
Round 18 :
Join contrasting cream now: sl st into a stitch to join and ch1, *sk 2 sts, sc in next 2 sts, ch2; rep around; sl st to join (creates small decorative chain loops) (24 loops)
Info :
This decorative loop round will anchor the snowflake overlay. Make sure loops are evenly spaced—use 24 loops as guideline for a 72-st round.
Round 19 :
In each chain-2 loop: (work 3 dc, ch2, 3 dc) to create mini-shells in contrasting color, sl st to join (24 shells)
Round 20 :
1 sc in each st around shell bases to tidy edge (72)
Round 21 :
Star foundation: with same contrasting color, move to center with surface sl st from shell base toward center at 6 evenly spaced points; attach yarn at center and ch6 per point for star spokes
Round 22 :
Snowflake spokes: For each ch6, (tr in 3rd ch from hook, dc in next, tr in next) then sl st back to center. Repeat across 6 points to form a star overlay.
Info :
When adding star spokes, work on the RS and anchor each spoke securely at the center — either pull center yarn tail through and knot or sew with a yarn needle from WS to secure the overlay.
Round 23 :
Fasten off and weave in ends. If you plan to join now, leave a long tail for sewing. Block motif flat to exact diameter.
— Medium Circular Disc (Make 10–12) :
Round 1 :
6 sc in magic ring (6)
Round 3 :
(1 sc, 1 inc) x 6 (18)
Round 4 :
(2 sc, 1 inc) x 6 (24)
Round 5 :
(3 sc, 1 inc) x 6 (30)
Info :
Medium discs are ideal for green motifs with a snowflake in contrasting cream. Consider changing to green at the start of Round 5.
Round 6 :
1 sc in each st (30)
Round 7 :
1 sc in each st BLO (30)
Round 8 :
(2 sc, 1 inc) x 7 + 1 sc (37)
Round 9 :
1 sc in each st (37)
Info :
To add a snowflake, create 6 anchor stitches evenly spaced—count stitches and place markers at every 6th stitch approximately, adjusting slightly to distribute evenly across 37 sts.
Round 10 :
Mark 6 anchor points: sc in next 5 sts, mark next st, rep around (37, with 6 markers)
Round 11 :
At each marker: attach cream yarn, ch6, sl st back to marker to form loop (6 loops)
Round 12 :
Working into each loop: (tr, ch1, tr) then sl st to base. Repeat for all 6 loops to form pointed snowflake arms.
Round 13 :
Surface detail: with contrasting color, add small picots or sl st along each arm for crystalline look. Fasten off and weave ends.
Info :
Trim long tails or weave them under the snowflake arms to keep the center tidy. Block motif, taking care not to flatten the raised snowflake arms if you want a dimensional look.
— Small Circular Motif / Mini Rosette (Make many) :
Round 1 :
6 sc in magic ring (6)
Round 3 :
(1 sc, 1 inc) x 6 (18)
Round 4 :
1 sc in each st (18)
Round 5 :
Switch to cream or tan: *ch3, skip 1 st, sc in next; rep around to create tiny openwork ring (18 loops)
Round 6 :
Into each ch3 loop: (dc, ch1, dc) then sl st to base—gives small floral petals (18 petals)
Round 7 :
Fasten off and leave long tail for joining. Block lightly to open petals.
Info :
Small motifs act as connectors between large discs. Vary center colors to create visual interest and alternate red/cream/green centers when assembling.
— Puff Cluster Motif (Make 6–10) :
Round 1 :
6 sc in magic ring (6)
Round 3 :
1 sc in each st (12)
Round 4 :
(*puff in next st, sc in next st) x 6 (12 puff clusters + 6 sc)
Info :
Puff: yarn over, insert, pull up loop, repeat 3 times, yarn over and draw through all loops, ch1 to close. Puff counts as 1 stitch. Work tightly so cluster is defined.
Round 5 :
1 sc around to secure puffs (12)
Round 6 :
Optional: ch3 and sl st around outer edge to create small picot border. Fasten off and leave long tail.
— Connector Ring (Make many for joining edges) :
Round 1 :
ch4, sl st to first ch to form small ring, ch1, 6 sc into ring (6)
Round 2 :
(1 sc, inc) x 6 (18)
Round 3 :
1 sc around (18)
Round 4 :
Fasten off leaving a long tail for sewing as connector between two adjacent discs. Make many in contrasting tan for subtle highlights.
Info :
These tiny rings are handy to place between larger motifs to stabilize and maintain spacing. Sew through back loops only of both joined motifs for a neat join.
— Snowflake Overlay (Standalone - Make for some motifs) :
Round 1 :
Start on the motif RS: attach cream yarn at center with sl st and ch1
Round 2 :
Create 6 spacing loops: *ch6, sl st to base 6 times to create spokes (6 loops)
Round 3 :
Work into each loop: (tr, ch2, tr) then sl st to center. Repeat for each loop to form arms.
Round 4 :
Between arms: attach small picots or ch3 loops to add crystalline details. Fasten off and weave tail through center to secure overlay.
Info :
Snowflake overlays can be worked from center outward or created separately and sewn on. For perfect symmetry, mark 6 equal anchor points on motif edge before starting overlay.
— Assembly & Joining (Layout then join) :
Info :
Arrange all motifs on a large flat surface or blocking board in the desired runner layout. The picture shows an elongated organic cluster with large motifs staggered, medium motifs filling gaps, and small rosettes and connectors in the seams. Pin pieces in place before joining.
Step 1 :
Begin by joining the largest motifs first where they will be focal points. Use long tails and whip stitch or mattress stitch to create invisible seams; a ladder stitch through the last round is neatest.
Step 2 :
For many joins, slip-stitch join in contrasting yarn provides decorative join lines: hold two motif edges together RS to RS and sl st through both loops alternately around the shared edge section only—do not join complete circles into a ring.
Info :
When joining, remember motifs are not all the same diameter. Stagger joins so smaller motifs sit slightly overlapping the edge of larger discs to mimic photographed organic layout.
Step 3 :
Use connector rings at narrow gaps. Position connector ring between two motifs, sew through ring rounds and through both motif edges with the long tail. Tie off and weave in ends securely.
Step 4 :
Continue adding mediums and smalls to fill spaces, pinning then joining each with small mattress stitch joins or a few securing sl sts for stability. Alternate join directions (front-to-front and back-to-back) to reduce bulk.
Info :
Leave some motifs only partially joined (e.g., connected at three or four spots) to allow the runner to drape and lay flat. Overjoining creates stiffness and prevents the organic silhouette from forming.
— Final Edge & Border (Finishing the silhouette) :
Round 1 :
With contrasting green or red, work a joining round of sc along motif edges where motifs meet, using sc in both motif edges to flatten joins and create a unified look.
Round 2 :
Work decorative picot edging where outermost motifs create scallops: *sc 3, picot (ch3, sl st to last sc), sc 3; rep around the outer perimeter only.
Round 3 :
For a more defined border, add a final round: 1 sc in each st BLO to create a raised rope around the outer edge. Fasten off and weave in all tails.
Info :
Take care not to create a continuous closed border if you prefer natural edge; instead, work edging selectively around outermost curves only.
— Care & Blocking :
Info :
Block the entire runner flat on a blocking mat, pinning motifs into place to preserve the assembled shape. Hand wash gently in cool water and reshape while damp. Do not wring; lay flat to dry.
Final Info :
Weave in all yarn ends at least 4cm along several rounds on the WS and trim. For durability, add small even stitches across heavy-traffic seams on the underside to reinforce joins.
This holiday runner brings together cozy texture, classic colors and handmade charm into a single beautiful statement for your table. Each motif is a little work of art, and the assembly step lets you play with layout for a personalized final shape. The finished runner feels homey, layered and festive—perfect for seasonal dinners or everyday warmth. 🧶✨ Spread it down your table and enjoy the little details you crocheted yourself! 🎄