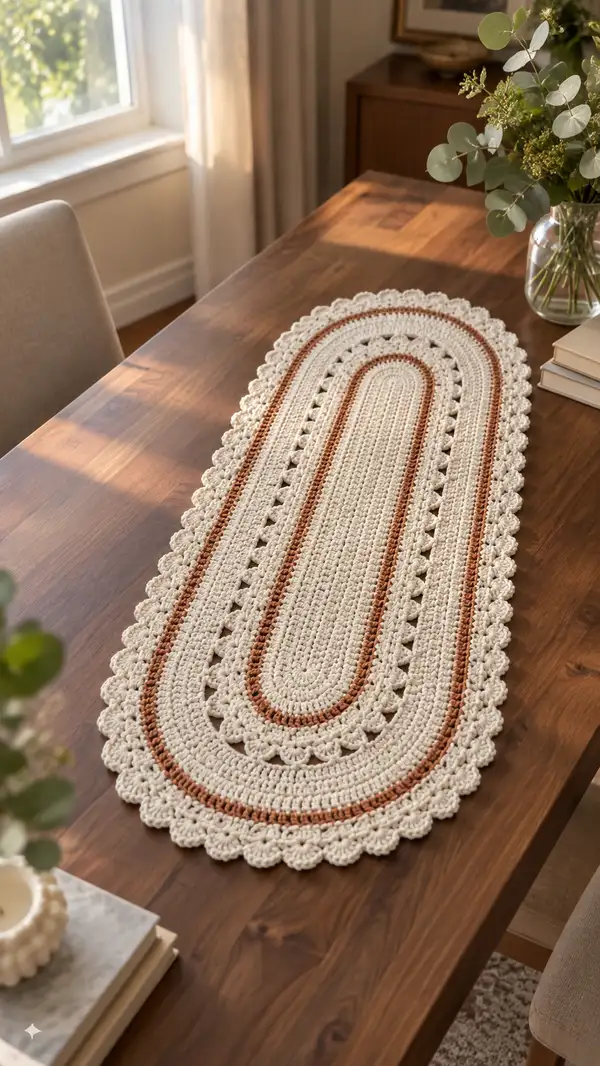
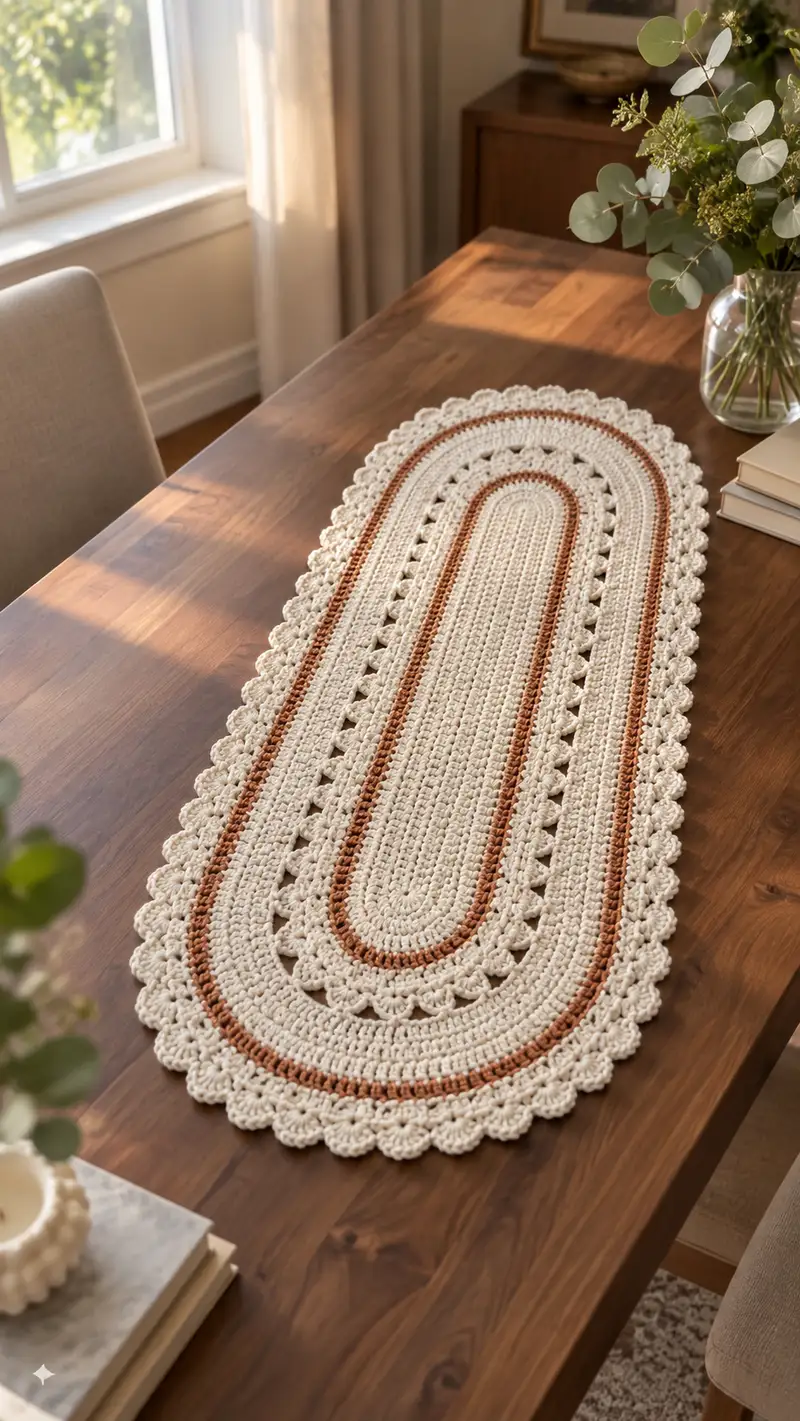
— Foundation Chain & Round 1 (Establish Oval) :
Round 1 :
Ch 36. 1 sc in 2nd ch from hook and in each ch across until you have worked 1 sc in last chain (35 sc). Work 3 sc into last chain (corner). Working along opposite side of foundation chain, 1 sc in each chain (35 sc). Work 3 sc into first chain (corner). Join with sl st to first sc. Total: 76 sc (2(36-1)+4 = 76)
Info :
Place a stitch marker in the first sc of the round to mark the round start. The four places with 3 sc indicate the rounded ends of the oval and will be the only places we increase in the early shaping rounds.
— Shaping Rounds (Rounds 2-6) : Gradual Width Increase
Round 2 :
From now on work in continuous rounds without turning, or join and ch 1 and continue - your choice. Working evenly, sc in next 18 sts, inc (2 sc in next st), sc in next 18 sts, inc, sc in next 18 sts, inc, sc in next 18 sts, inc. Total: 80 sc.
Round 3 :
Sc in next 19 sts, inc, sc in next 19 sts, inc, sc in next 19 sts, inc, sc in next 19 sts, inc. Total: 84 sc.
Round 4 :
Sc in next 20 sts, inc, sc in next 20 sts, inc, sc in next 20 sts, inc, sc in next 20 sts, inc. Total: 88 sc.
Round 5 :
Sc in next 21 sts, inc, sc in next 21 sts, inc, sc in next 21 sts, inc, sc in next 21 sts, inc. Total: 92 sc.
Info :
These increases are evenly spaced to round the short ends of the runner without making the piece significantly wider down the sides. Place markers at each inc location for the next few rounds if it helps with counting.
Round 6 :
Sc in next 22 sts, inc, sc in next 22 sts, inc, sc in next 22 sts, inc, sc in next 22 sts, inc. Total: 96 sc.
— Main Body: Even Rounds for Length (Rounds 7-26) :
Round 7-26 :
1 sc in each st around (96). Repeat for rounds 7 through 26 inclusive. Total after each round: 96 sc.
Info :
These rounds build the central length of the runner. Work evenly and keep tension consistent. If you prefer a longer runner, add more even rounds here in multiples of two to maintain balance when later adding accent stripes and borders.
— Accent Stripe: Rust Contrast (Rounds 27-28) :
Info :
Change to Rust/Terracotta yarn with a standing sc or on the last pull-through of Round 26, drop Cream and pick up Rust. Carry yarn if you plan to use the accent again soon, or fasten off and weave in ends later.
Round 27 :
1 sc in each st around (96) using Rust. Total: 96 sc.
Round 28 :
1 sc in each st around (96) using Rust. Total: 96 sc. Fasten off and join Cream for next round if you prefer a crisp join.
Info :
Two rounds of Rust create a neat, bold stripe. If you'd like a thinner or thicker stripe, adjust the number of Rust rounds. Carry cream yarn up the inside for only a few rounds to avoid long floats; otherwise fasten off each time.
— Return to Main Color & Texture Rounds (Rounds 29-40) :
Round 29 :
Change to Cream. 1 sc in each st around (96). Total: 96 sc.
Round 30 :
1 sc in each st BLO (back loops only) around (96). Total: 96 sc.
Info :
Working in BLO on Round 30 creates a subtle ridge that helps visually separate the stripe area from the main body. Keep the same tension; BLO rounds use a slightly different feel but do not change stitch count.
Round 31-34 :
1 sc in each st around (96). Work rounds 31 through 34 maintaining 96 sc each round.
Round 35 :
To introduce light openwork, *sk next st, hdc in next st, ch1* repeat around, slipping over the skipped stitches as you go. For counting purposes, work 1 hdc into every other base stitch while the skipped stitches remain as the spaces. Total base repeats: 48 hdc + 48 skipped = 96 positions maintained.
Info :
When using skipped-stitch patterns, remember stitch count refers to base positions. Chains and skipped stitches create decorative holes but do not change the underlying repeat count. Keep your count by marking the first skipped position.
Round 36-40 :
1 sc in each st around (96). Work rounds 36 through 40 maintaining 96 sc each round to stabilize the eyelet round.
— Eyelet Lace Row (Rounds 41-44) :
Round 41 :
*Ch 3 (counts as dc), sk next st, dc in next st, ch1* repeat around. This creates elongated eyelets spaced evenly around the oval. Work consistently so eyelets align along the sides and round ends. Total base positions remain 96.
Round 42 :
1 sc in each st around (96). Work into the bases and chains as needed to achieve a neat finish; place sc across chains for a tidy line.
Info :
If eyelet placement looks uneven, gently tug each eyelet while the yarn is still warm to even spacing, or block later to open and align holes uniformly.
Round 43-44 :
1 sc in each st around (96). Repeat to stabilize before the next accent stripe.
— Second Accent Stripe (Optional Rust Repeat) Rounds 45-46 :
Round 45 :
Change to Rust. 1 sc in each st around (96). Total: 96 sc.
Round 46 :
1 sc in each st around (96). Total: 96 sc. Fasten off and return to Cream for the outer border.
Info :
Adding the stripe in the same place as the center gives a balanced look from both ends of the runner. If you prefer symmetry, place stripes an equal number of rounds from each end.
— Wide Body Stabilization Rounds (Rounds 47-68) :
Round 47-68 :
1 sc in each st around (96). Work rounds 47 through 68 maintaining 96 sc each round. This long even section gives the runner a substantial middle length and ensures the stripes and decorative rows are centered on the runner.
Info :
Check flatness often. If slight cupping or ruffling occurs, add or subtract an even number of rounds or adjust tension. Blocking at the end will correct most minor undulations.
— Decorative Shell Row Preparation (Rounds 69-72) :
Round 69 :
1 sc in each st around (96).
Round 70 :
1 sc in each st BLO around (96). This builds a ridge that defines the base for the forthcoming shell scallop edge.
Round 71 :
1 sc in each st around (96).
Info :
Use a slightly smaller hook (e.g., 4.5 mm) for the first shell foundation round if you want tighter scallops that sit neatly on the edge. Swapping hooks here is optional.
Round 72 :
1 sc in each st around (96). Prepare to work the shell motif by lining up repeats: this pattern will work in groups of 4 base sts.
— Shell/Scallop Border (Rounds 73-84) :
Info :
The scallop border will be worked in a repeating 4-base-stitch pattern: the repeat is (sc, sc, shell in next base st, sc) where the shell is 5 dc worked into a single base stitch (or 5 dc cluster depending on desired height). Because 96 divides evenly by 4, you will have exactly 24 repeats for a uniform scallop edge.
Round 73 :
*Sc in next 2 sts, (5 dc) in next st (shell), sc in next st* repeat 24 times around. Join with sl st to first sc. Total base positions remain 96; 24 shells along the oval edge.
Info :
Work the shells gently on the rounded ends so they sit evenly. If a shell appears too tight, ease it with your fingers or careful blocking after finishing.
Round 74 :
Ch 1, sc in each st and in each dc of the shells around (this gives a neat base for the next shell row). Count: 96 base positions plus shell dcs counted as worked into, resulting in a tidy edge line.
Round 75 :
*Sc in next st, shell (5 dc) in next st, sk next st* repeat 24 times around. This staggered shell placement creates a layered scallop feel. Work carefully at the rounded ends to avoid large gaps.
Round 76 :
1 sc in each st around (work into shells and base stitches as needed) to stabilize the shell row. Total base repeats: 96 positions.
Round 77 :
*Sc in next 3 sts, shell (7 dc) in next st* repeat 24 times around. This builds a larger outer scallop. Because our base repeat is 4, this pattern sits neatly along the oval. Work shells taller on the rounded ends slightly looser to keep the shape flat.
Info :
Working taller shells (7 dc) creates more pronounced scallops. If you want a gentler edge, keep to 5 dc shells. Always ensure repeat counts remain integer multiples of 4 to avoid shifting placement.
Round 78 :
Ch 1, sc in each st and each dc around, working 2 sc into the center dc of each 7-dc shell to give stability (total base positions remain 96 with supportive stitches around shells).
Round 79 :
*In the valley between shells work (sl st, ch 3, sl st) to create a small picot-like decorative join*, then sc across the shell bodies. Repeat around. This little spacer adds a lacy finish to scallops.
Round 80-84 :
1 sc in each st around (96). Repeat five rounds to even and secure the scallop border, tucking in any loose points and evening shells with gentle blocking if necessary.
— Final Decorative Picot and Cleanup Rounds (Rounds 85-94) :
Round 85 :
*Sl st in next 2 sts, (ch 3, sl st) in next st to form picots spaced between scallop peaks* repeat 24 times around aligning picots at shell centers. This creates a delicate little decorative point between scallops.
Round 86 :
1 sc in each st around (96). Work evenly into picots and shell stitches to tidy finish.
Info :
Take time to count picot repeats so they align with scallop centers. If counts go off by one, remove the last picot and adjust spacing so you have 24 even picots around the oval.
Round 87-90 :
1 sc in each st around (96). Four rounds to firm up the edge before final finishing.
Round 91 :
Optional: With Rust, surface slip-stitch one round into the base of the scallops to echo the center stripes. Join Rust, sl st evenly in the base of shells around (24 sl st joins). Fasten off and weave in ends.
Round 92-94 :
Using Cream, 1 sc in each st around (96) for three rounds to finish the border and bury any loose ends under the edge.
— Final Blocking & Finishing (Rounds 95-100) :
Info :
Wet block the runner by pinning it to blocking mats, shaping each scallop and smoothing the oval edges. Allow to dry completely. If you prefer a crisper scallop, use a light fabric-safe spray starch and press gently once dry.
Round 95 :
After blocking, if you notice any small gaps or uneven shells, unpick the last sc round and rework with a slightly smaller hook to tighten the border. Otherwise, use a final round of sl st in BLO to create a neat edge: sl st in each st BLO around (96).
Round 96-100 :
Finishing rounds reserved for optional trims, additional surface slip stitches, or to adjust length. Work 1 sc in each st or use decorative stitches as desired. Fasten off and weave in all ends securely.
Info :
Weave ends into the border and inner rounds. Use mattress stitch or weaving through multiple rounds to secure ends invisibly. Trim yarn tails and give a final gentle steam-block to set shape.
— Notes on Scaling & Customizing :
Info :
To lengthen the runner, add extra even rounds in multiples of two to keep border alignment. To widen the runner, increase the starting chain by increments of 2 and adjust early shaping increases so that the base circumference divides evenly by 4 (or change the shell repeat to match your new division). For multiple stripes, repeat the accent stripe sequence wherever you like, ensuring symmetry by placing stripes the same distance from each end.
Completing this oval table runner is so satisfying — each round builds length and texture until the scalloped edge gives it that finished heirloom look. The combination of creamy base and warm rust stripe feels cozy and elegant on a wooden table. Blocking opens the eyelets and defines shells beautifully so the runner lays perfectly flat. 🧶✨ Display it with seasonal decor or keep it as a staple centerpiece — either way, it's a lovely handmade touch for your home. Happy stitching! 😊