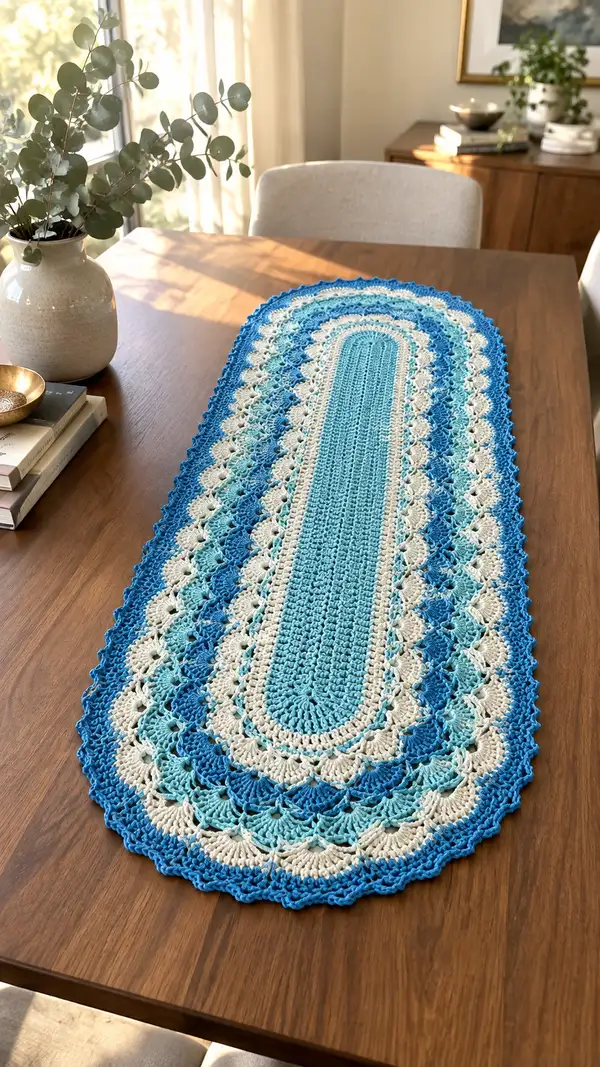
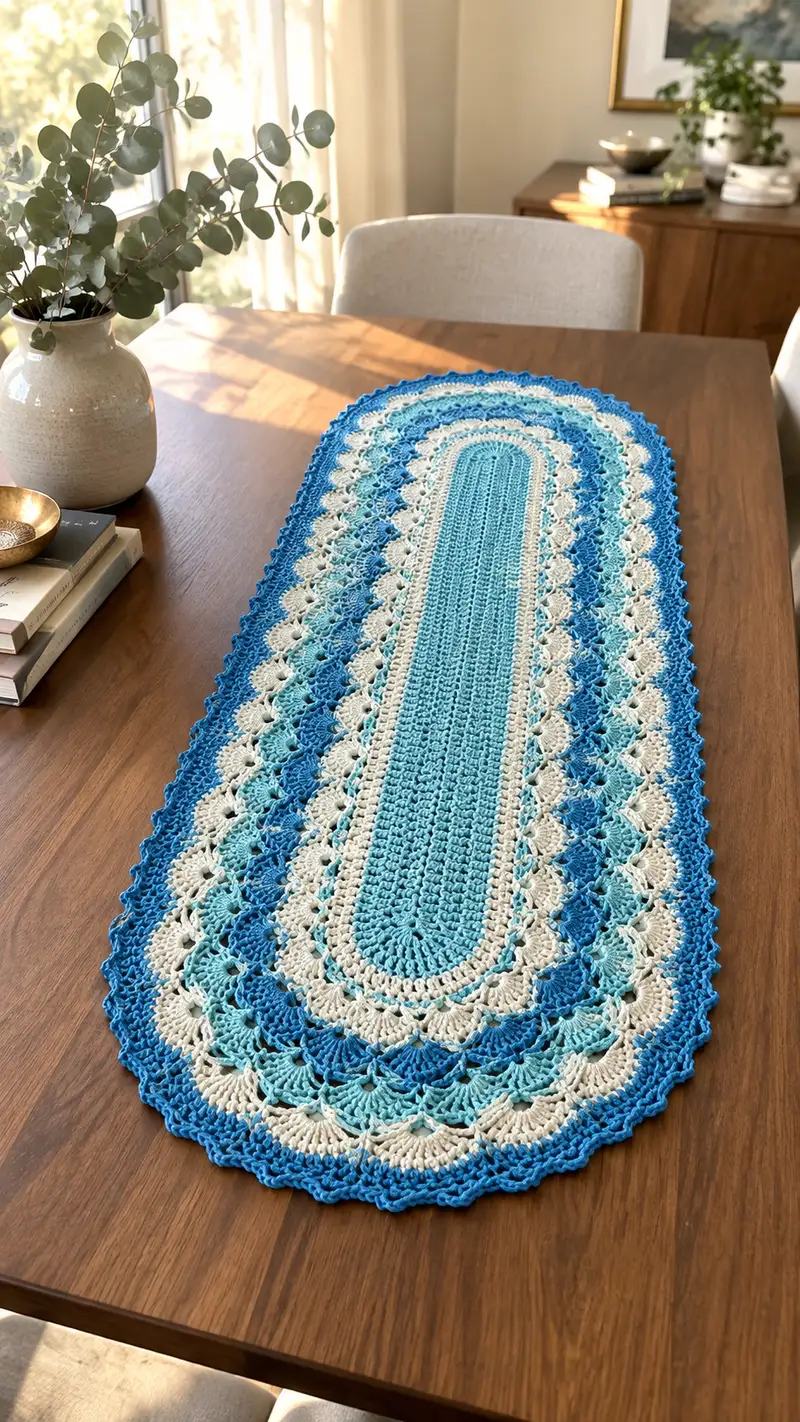
A long, elegant oval table runner worked in airy lace shells and textured rows. This pattern features a solid center strip framed by alternating shell and fan motifs in cream, seafoam and two tones of blue. The scalloped picot edge gives a refined finish that lies beautifully flat on a dining table.
Progress Tracker
0% Complete
— Center Oval Base :
Materials & Gauge :
Use worsted weight cotton and a 3.5mm hook. Gauge is not critical for length but affects width; for this runner sample, center rounds measure approximately 12 cm wide after first 30 rounds. Adjust hook size if your center measures wider or narrower.
Info :
Work in continuous rounds or join and ch1 at end of each round. I recommend using stitch markers to mark the beginning of each round for counting. This pattern is written in rounds; counts shown are number of base stitch positions on that round.
Foundation Row :
Ch 60. This chain determines the long central length of the runner. If you want a longer/shorter runner, change the chain by increments of 2-4 stitches and ensure later repeats will accommodate the new count.
Round 1 :
Starting in 2nd ch from hook, 1 sc in each ch across (59 sc). When you reach the last ch, work 3 sc in same ch to form rounded end. Working along the underside of the starting ch, 1 sc in each ch (59 sc). In the original first chain (the turning ch), work 3 sc to close the round. Join with sl st to first sc (Total = 124).
Round 2 :
1 sc in each st around (124)
Round 3 :
1 sc in each st around (124)
Info :
Keep tension even through these first rounds. The 3-sc clusters at each oval end remain as three separate stitches; they create the semi-circular cap that gives the runner rounded ends.
Round 4 :
1 sc in each st around (124)
Round 5 :
1 sc in each st around (124)
Round 6 :
1 sc in each st around (124)
Info :
We will now create a textured center strip to add body to the runner. Work tightly enough that there are no big gaps between stitches; the lace border will be worked on top of this stable center.
— Center Panel (Textured strip) :
Round 7 :
Ch1, 1 sc in each st around working in BLO for a subtle ridge (124)
Round 8 :
Ch1, 1 sc in each st around (124)
Round 9 :
Ch2 (counts as hdc), *skip next st, hdc in next st; repeat from * across entire round, placing hdc into top of sc where needed to maintain 62 evenly-spaced hdc groups along each long side and across ends (124)
Info :
This creates a subtle ribbed texture; the ch2 at start counts as the first hdc. Adjust the skip pattern slightly so your rib aligns centered on the long sides.
Round 10 :
Ch1, 1 sc in each st around (124)
Round 11 :
Ch1, 1 sc in each st around in FLO to create a faint ridge (124)
Round 12 :
Ch1, 1 sc in each st around (124)
Round 13 :
Ch2, 1 dc in each st around (124)
Info :
If you prefer a taller center, substitute additional dc rows here. The combination of sc and dc keeps the center stable yet slightly raised to contrast with lace edges.
Round 14 :
Ch1, 1 sc in each st around (124)
Round 15 :
Ch1, 1 sc in each st around (124)
Round 16 :
Ch2, 1 dc in same st, *ch1, sk 1 st, dc in next st; repeat from * around to create a lacy mesh across center (124 base points)
Info :
Use this ch1-mesh row as visual transition between solid center and open border. If your dc count feels off, adjust by adding or removing 1 dc in the underside chains so the pattern lines up with 124 base points.
Round 17 :
Ch1, 1 sc in each st around (124)
Round 18 :
Ch1, 1 sc in each st around (124)
Round 19 :
Ch1, 1 sc in each st BLO around (124)
Info :
We finish the center panel with a few stable rounds to anchor the forthcoming shell repeats. If you'd like a narrower runner, you can reduce the number of center rounds before starting the border; to lengthen, increase foundation chain in multiples and continue center rounds until desired length.
— Transition to Lace Border :
Round 20 :
Change to Color D (Cream). Ch3 (counts as dc), *sk next st, (dc, ch2, dc) in next st (shell base), sk next st, dc in next 3 sts; repeat from * around carefully spacing shells so that you place 31 shell bases evenly around the oval (31 shells) (124 base points)
Info :
We will work the shell pattern in repeats across the long sides; 124 base points divides evenly into 4 so plan shell placement to maintain even spacing. If your initial chain was different, recalculate so shell repeats match the base count.
Round 21 :
Change to Color C (Seafoam). Sl st into the ch2 space of first shell, ch3, (2 dc, ch2, 3 dc) in each ch2 space across the round (this creates full 3-dc shells perched on the ch2 spaces) (31 shells)
Round 22 :
Change to Color B (Aqua). Sl st to center of first shell, ch1, 1 sc in center of each shell and in each intervening dc to create anchor round: 1 sc in each shell center and 1 sc in the 3-dc shell points (124)
Info :
This sc anchor round redefines stitch placement and prepares for a second row of shells worked between the first. Keep your sc count equal to the original base points (124) for even shaping.
Round 23 :
Change to Color A (Deep Turquoise). Into the spaces between the 3-dc shells, work *ch3, 5 dc cluster in the space, ch3; sl st to next space; repeat across to create tall fan shells between the first shell row (31 fans)
Round 24 :
Change to Color D (Cream). Sl st to top of each fan, ch1, 1 sc in each dc and ch-sp across the round to tidy fan bases (124)
Info :
Use stitch markers to note shell centers on long sides for placement of the fan shells; it's easy to drift if you have long rounds. The fan shells create that layered ripple effect seen in the photographs.
— Shell Border Series I (Alternating Shell Bands) :
Round 25 :
Change to Color C. Sl st to first shell center, ch3 (counts as dc), 2 dc in same space, *sk next 3 sts (these were the 3 dc points of previous shells), (3 dc, ch2, 3 dc) in the ch2 spaces between previous shells; repeat around (31 larger shells)
Round 26 :
Ch1, 1 sc in each st across to even out and prepare for next fan; (124)
Round 27 :
Change to Color B. Into each ch2 space of the larger shells work (ch3, 7 dc cluster, ch3) to form deep fans; place fans evenly around (31 fans)
Round 28 :
Change to Color D. Sc in each dc and across each ch-sp to anchor fans to base (124)
Info :
If your fans sit lopsided at ends, gently adjust spacing by shifting where you place the sl st at the start of the round; blocking later will also help even them out. Work slowly across the oval ends to make sure fans line up symmetrically.
Round 29 :
Change to Color A. Sl st into the center of the first fan, ch2, 1 hdc in same sp, *ch2, sk to next fan center, (1 hdc, ch2) in that fan center; repeat around to create chain arches linking fans (124 arches)
Round 30 :
Ch1, 1 sc in each st and in each ch2 arch to give a tidy border base (124)
Info :
At this stage the runner will clearly show a layered lace banding in alternating colors; feel free to repeat Rounds 25-30 again if you desire a taller border before the scallop edging. Each repeat increases visual height but keeps base stitch positions constant.
— Shell Border Series II (Deeper Lace Rows) :
Round 31 :
Change to Color C. Sl st to ch2 arch, ch4 (counts as tr), 6 tr into same ch2 arch to make a tall shell, sl st to next ch2 arch; repeat to make 31 tall tr-shells (31 tall shells)
Round 32 :
Change to Color B. Sl st to top of shell, ch1, 1 sc in each tr around to flatten shell bases and make the next round easier to work into (124)
Round 33 :
Change to Color A. *In the top of the tall shell work (ch3, 5 dc cluster, ch3), sl st to next shell top; repeat around (31 clusters)
Round 34 :
Ch1, 1 sc in each st and ch space around to anchor (124)
Round 35 :
Change to Color D. Sl st to first shell top, ch3, 3 dc in shell top, *ch1, sl st into the ch3 space between clusters, ch1, 3 dc in next shell top; repeat around (31)
Info :
Rounds 31-35 add height and texture; take care with tension on the tr and dc clusters, since they can pull the fabric if made too tight. Blocking after finishing will coax these shells into an even wavy border.
Round 36 :
Ch1, 1 sc in each st around (124)
Round 37 :
Change to Color B. Working in FLO, 1 sc in each st around to form a subtle ridge just inside the scallop line (124)
Round 38 :
Ch3, *skip next st, (2 dc, ch2, 2 dc) in next st, skip next st, dc in next 2 sts; repeat around making 31 medium shells (124)
Info :
If you prefer a more open look, increase ch2 spaces to ch3 and place 3-dc clusters accordingly. For a denser runner, use hdc in place of dc in the shell points.
— Lace Rows & Link Rows :
Round 39 :
Ch1, 1 sc in each st and ch-space to settle the shell bases (124)
Round 40 :
Change to Color D. Sl st to first shell ch-space, ch1, 1 sc into each shell center and each dc point around (124)
Round 41 :
Change to Color C. In the small spaces between shells work *(ch4, sc in next space) repeat around forming chain arches of ch4 between shell groups (124 arches)
Round 42 :
Ch1, 1 sc in each st and into each ch4 arch to tidy (124)
Info :
Alternate the color order across these lace link rows to emphasize stripes. The runner in the photo shows alternating bands of cream, seafoam, aqua and deep turquoise; plan color changes at the start of rounds for clean joins.
Round 43 :
Change to Color A. Sl st to top of next arch, ch3, 2 dc in same arch, *sk arch, (3 dc in next arch) repeat across to create smaller decorative fans nested within the larger shells (124)
Round 44 :
Ch1, 1 sc in each st around (124)
Round 45 :
Change to Color B. Sl st to chain space between fans, ch3, (3 dc, ch1, 3 dc) into ch-space; rep in each ch-space to create delicate double fans (31 double fans)
Round 46 :
Ch1, 1 sc in each st around (124)
Info :
At this point the runner has a strong layered lace look. If you want additional width, you may optionally add another repeat of Rounds 31-36 before moving on to the final scallop edge.
— Decorative Picot Scallops (Final Edge) :
Round 47 :
Change to Color D. Sl st to outermost shell top, ch1, sc in same, *ch3, picot (ch3, sl st into first ch) into next chain loop, sc in the next shell top; repeat around, placing picots in the small outer ch-spaces between shells (124 picots/points)
Round 48 :
Ch1, 1 sc in each st and into the picot bases to secure and neaten the edge (124)
Round 49 :
Change to Color A. For the final scallop, *in the picot space work (ch4, 5 dc, ch4), sl st to base of next picot; repeat around to create rounded scallops (31 scallops)
Round 50 :
Ch1, 1 sc in each dc and ch-space, sl st to join (124)
Info :
Work the final scallop loosely to avoid pulling the edge inward. After this round the runner will have a pronounced scalloped border; blocking will set the shape.
Round 51 :
Change to Color C. Sl st to center top of each scallop, ch3, 2 dc in center of scallop, ch3, sl st to next scallop center; repeat around to accentuate each scallop (31 accent shells)
Round 52 :
Ch1, 1 sc in each st and ch-space to tidy (124)
Round 53 :
Change to Color B. Sl st to top of scallop, ch2, (1 hdc, ch2, 1 hdc) across scallop tops to add short arches; repeat around (31)
Round 54 :
Ch1, 1 sc in each st around to anchor (124)
Info :
If you like a delicate edge, end here and weave in ends. For a pronounced finished look (as in the photo), add the final decorative edging rounds below to make a decorative bobble/loop edge.
— Final Decorative Edge (optional bold scallop) :
Round 55 :
Change to Color A. Sl st to first arch, ch5 (counts as tr+ch2), (5 tr cluster) in arch, sl st to base; repeat to form raised tr-clusters around outer edge (31)
Round 56 :
Ch1, 1 sc in each st and into tr cluster tops to anchor (124)
Round 57 :
Change to Color D. *In the outermost ch loop work (picot, sc) pairs across the round by: (ch3, sl st into first ch to make picot), sc into next loop; repeat around to make a delicate picot fringe (approximately 124 picots)
Round 58 :
Ch1, 1 sc in each st to finish and even out edge (124)
Info :
Fasten off and weave all tails through to the back, trimming close after weaving. Wet block or steam block the entire runner: pin it flat on a blocking board or towel, stretching gently so scallops even out and lay flat. Allow to dry completely before use.
— Notes on Scaling and Color Changes :
Info :
To lengthen the runner: increase foundation ch by multiples of 2-4 and work the center textured panel until desired length before starting border rounds. To change color placement, begin color changes at the start of a new round to avoid carrying yarn along the edge; carry yarn inside only if you are comfortable hiding floats beneath surface stitches.
Info :
All shell and fan rounds are described by their repeat units and intended base stitch distribution (31 shells/fans across the oval). If your foundation chain was different, recalculate the number of shells by dividing your base point count by 4. Aim for evenly spaced shells for symmetry.
Info :
Blocking tip: Use rust-proof pins and spray water evenly. For a firm edge, mist with light spray starch before pinning and allow to dry fully. For softer drape, block without starch. Press gently if steaming, do not flatten raised shells.
Round 59-110 :
Optional repeats: Many crocheters will repeat band sets (Rounds 25-36 and Rounds 38-54) to build a more dramatic layered border. Each full band set (two shell rows + two anchor rounds + fan row + anchor) is roughly 12 rounds. Repeat chosen sets until you reach the desired border height; counts will remain based on the base points (124) and shell count (31). Always finish with finishing anchor rounds and the final scallop/picot rounds above.
Final Info :
Weave all ends to the wrong side; check that all scallops are even. If any scallops pull inward, block again and pin them slightly wider. Your runner is complete!
This coastal-inspired runner brings texture and tranquil color to any table — a perfect mix of structure and airy lace. The layered shells and fans create a mesmerizing ripple that looks beautifully handmade but refined. I hope making it brings you the same calm satisfaction I felt while designing it; every scallop and color band is a small moment of joy. 🧶🌊✨