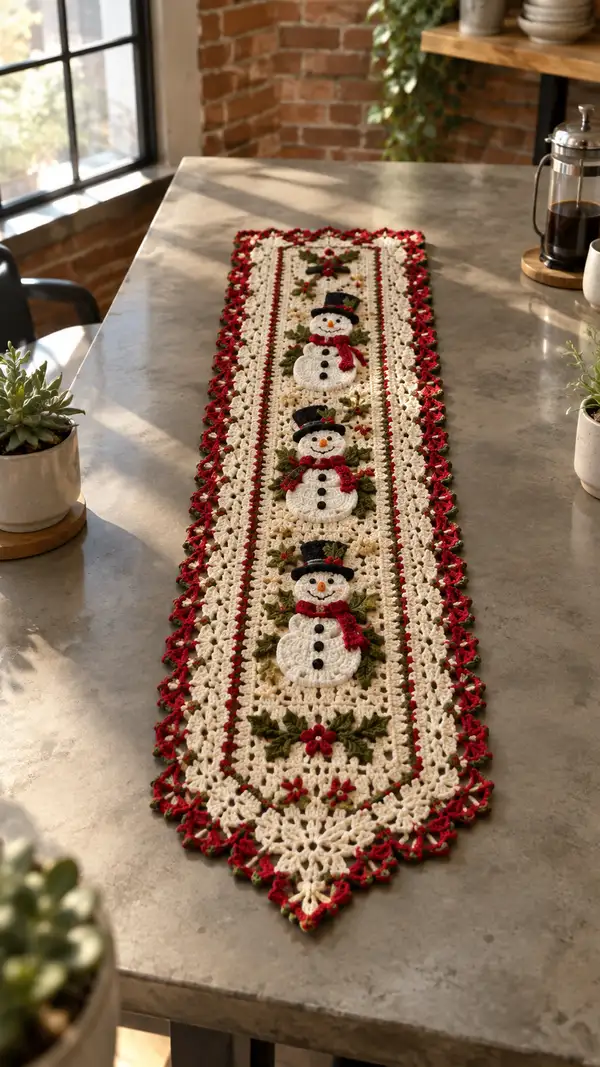
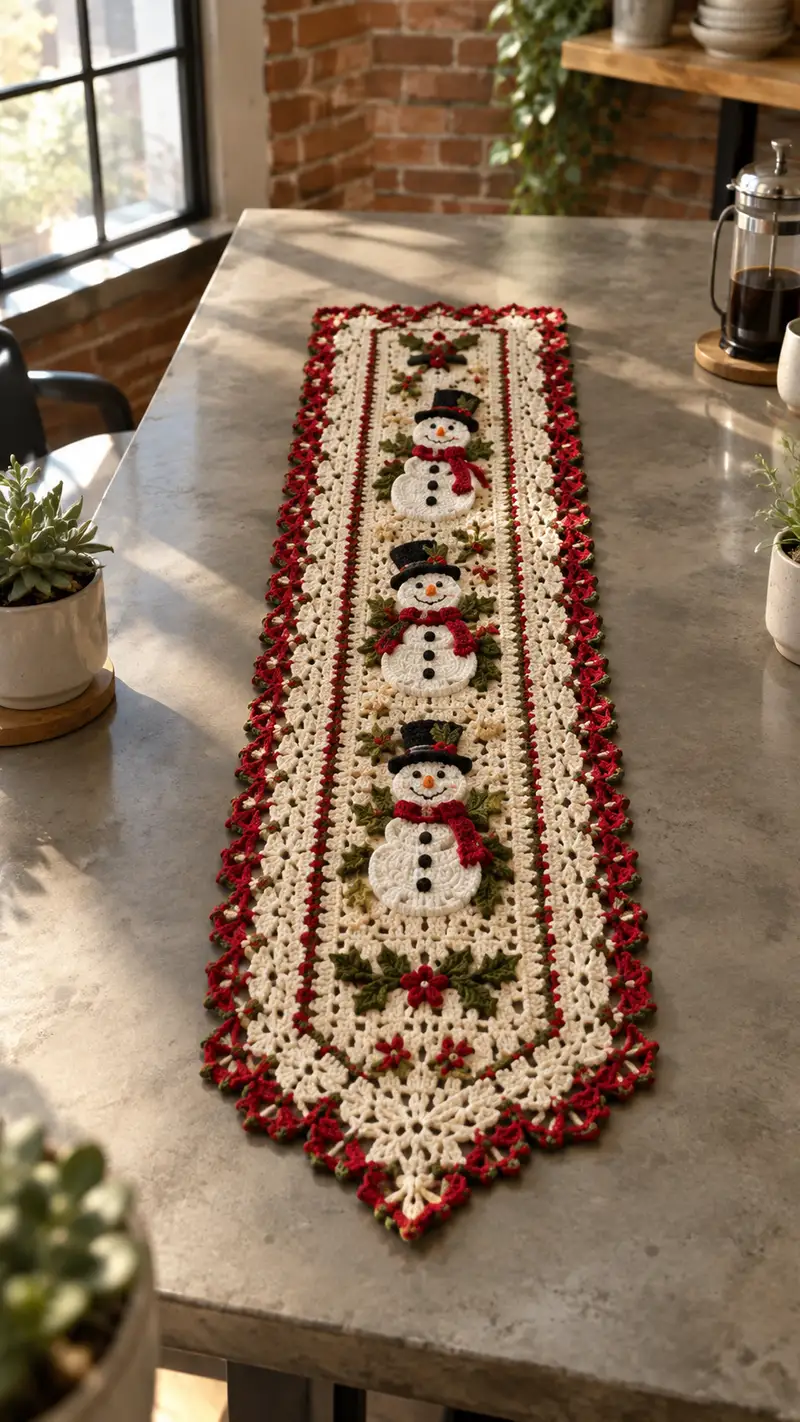
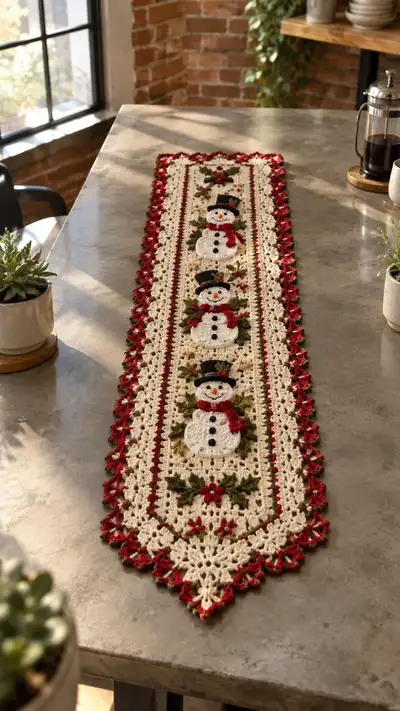
A festive, vintage-inspired lace table runner featuring three cheerful snowman appliquE9s framed by holly and red scalloped edging. Worked in warm ivory with rich red and green accents, this runner adds handcrafted holiday charm to any table. The pattern uses lace stitches, layered appliquE9 details, and a decorative picot scalloped border for a timeless seasonal centerpiece.
Progress Tracker
0% Complete
— Snowman Head (Make 3) :
Round 3 :
(1 sc, inc) x 6 (18)
Round 4 :
(2 sc, inc) x 6 (24)
Round 5 :
(3 sc, inc) x 6 (30)
Round 6 :
(4 sc, inc) x 6 (36)
Round 7 :
(5 sc, inc) x 6 (42)
Round 8 :
(6 sc, inc) x 6 (48)
Info :
Use ivory yarn. These first eight rounds form a slightly domed circle for the snowman head. Work tightly so the applique is firm. Use 3.0mm hook for denser fabric if desired.
Round 9-14 :
1 sc in each st (48)
Info :
Place eyes on Round 12: space eyes 8-10 sts apart centered horizontally. For an intact look, use black embroidered french knots or 6mm black beads sewn on. Mark eye positions with pins.
Round 15 :
(6 sc, dec) x 6 (42)
Round 16 :
(5 sc, dec) x 6 (36)
Info :
Start a very light flattening if you want a slightly concave applique by making 2 decreases rounds. Do not stuff much; applique remains flat when sewn to panel.
Round 17 :
(4 sc, dec) x 6 (30)
Round 18 :
(3 sc, dec) x 6 (24)
Round 19 :
1 sc in each st (24)
Round 20 :
1 sc in each st (24)
Info :
Fasten off leaving 12-18" tail for sewing to runner. Weave tail to wrong side and leave for assembly. Embroider mouth with red or dark thread across Round 13-14 area, and attach an orange french-knot nose centered between eyes on Round 12-13.
— Snowman Upper Body (Chest Circle) (Make 3) :
Round 3 :
(1 sc, inc) x 6 (18)
Round 4 :
(2 sc, inc) x 6 (24)
Round 5 :
(3 sc, inc) x 6 (30)
Round 6 :
(4 sc, inc) x 6 (36)
Round 7-9 :
1 sc in each st (36)
Info :
This upper-body disc will sit under the head. Use the same ivory and keep the piece flat; if it cups, add one or two even rounds to flatten out.
Round 10 :
(4 sc, dec) x 6 (30)
Round 11 :
(3 sc, dec) x 6 (24)
Round 12 :
1 sc in each st (24)
Info :
Leave a long tail for sewing. Pin this disc so it nests under the head with two stitches overlap for a small shoulder effect.
— Snowman Lower Body (Base Circle) (Make 3) :
Round 3 :
(1 sc, inc) x 6 (18)
Round 4 :
(2 sc, inc) x 6 (24)
Round 5 :
(3 sc, inc) x 6 (30)
Round 6 :
(4 sc, inc) x 6 (36)
Round 7 :
(5 sc, inc) x 6 (42)
Round 8-11 :
1 sc in each st (42)
Round 12 :
(5 sc, dec) x 6 (36)
Round 13 :
(4 sc, dec) x 6 (30)
Round 14 :
1 sc in each st (30)
Info :
Lower body should be slightly larger than the upper body and slightly domed. Leave long tail for assembly and pin layers together to check alignment with head and upper body.
— Hat (Make 3) :
Round 1 :
6 sc in MR using black (6)
Round 3 :
(1 sc, inc) x 6 (18)
Round 4 :
1 sc in each st (18)
Info :
Work a short cylinder for the top hat crown. Switch to dark brown or green for a hat band on Round 5 if desired.
Round 5 :
Change to dark brown, 1 sc in each st (18)
Round 6 :
Change back to black, 1 sc in each st (18)
Round 7 :
Work a brim: ch1, sc in next st and 2 sc in following, *sc in next 3, 2 sc in next* repeat around to produce 24 sts total (24)
Round 8 :
1 sc in each st (24)
Info :
Flatten brim slightly and leave long tail for sewing. You can shape the brim by sewing a shallow running stitch around brim edge and drawing slightly.
— Scarf (Make 3) :
Round 1 :
Using red, ch 30, join with sl st to form a small loop (30)
Round 2-3 :
1 sc in each ch around (30)
Round 4 :
BLO: 1 sc in each st (30)
Info :
Fold scarf in half so it can drape around neck. For fringe, cut 6-8 small strands and knot into scarf ends. Leave long tails to stitch scarf under head between upper and lower body.
— Buttons and Facial Details :
Round 1 :
For buttons, using black yarn embroider or sew three small French knots vertically along lower body center between Rounds 8-12. Space around 4-6 sts apart depending on your body size
Round 2 :
For nose, using orange yarn, make a small cone by ch3, 2 sc in 2nd ch from hook, 1 sc in last ch. Fasten off and sew centered on head between eyes.
Info :
Embroidered eyes using 6mm beads give a classic look. Secure beads with thread at least twice and backstitch through center of applique for durability.
— Holly Leaf (Make 6 or as needed) :
Round 1 :
Using green, ch 8; sc in 2nd ch from hook, hdc in next, dc in next 2, hdc in next, sc in next, sl st to join to first sc (7)
Round 2 :
Work picot points: ch3, sl st in base of previous dc to create a point, *sc in next, ch3, sl st into base of next dc* across leaf to create 3 points; fasten off
Info :
Make leaf pairs and position three leaves around each snowman base—one pair on either side to mimic a holly spray. Sew leaves under lower body with leaf tips angled outward.
— Small Five-Petal Flower (Make as many as shown) :
Round 1 :
MR, ch1, 5 sc into ring, sl st to first sc and pull ring tight (5)
Round 2 :
*Ch4, sl st in next st to form a petal* repeat 5 times around. Fasten off leaving tail to sew flowers onto panel centers. Optionally add small bead in center.
Info :
Flowers are used as small accent around holly and along panel borders. Use red yarn and secure each flower with a few stitches through center on wrong side.
— Center Lace Panel (Foundation Rows) :
Round 1 :
With ivory, ch 81, join to form a long loop (81)
Round 2 :
Ch3 (counts as dc), *sk 1, dc in next, ch1* repeat across, join with sl st to top of ch3 to create foundation lattice
Round 3 :
Ch3, dc in each dc across, ch1 in each ch1 space from previous round. Join (81)
Info :
This foundation sets the runner width. Adjust stitch count to make a wider or narrower runner; keep motif repeats centered. The ch81 is a starting point for a long narrow runner sized roughly 12-14" wide depending on yarn and tension.
Round 4 :
Ch1, sc in each dc and sc in ch1 spaces across to create a tidy edge (81)
Round 5 :
Begin lace shell pattern: *ch4, sk2, 5 dc in next st, sk2* repeat across, ending with ch4, join (pattern repeat forms shells)
Round 6 :
Ch1, sc in each shell center and ch4 spaces to anchor shells, join
Round 7-10 :
Repeat Rounds 5-6 two more times to elongate lace field and create height for applique attachment
Info :
Work center panel with even tension so snowman appliquE9s sit flat. On Rounds 9-10 place markers where center motifs will be attached; measure equal spacing for three snowmen down the runner, allowing about 6-8" between centers depending on size.
Round 11 :
Change to olive green for a narrow stripe: ch1, sc in each st across (81)
Round 12 :
Change to red, ch1, sc in each st (81)
Info :
These narrow color stripes frame the central lace area and echo the border. Carry color along wrong side or fasten off and sew in ends depending on preference.
Round 13-20 :
Return to ivory and continue lace shells pattern (R5-R6) for eight rounds to create vertical space between motif rows (81)
Round 21 :
Ch1, sc in each st across to stabilize before placing appliquE9s (81)
Info :
Before attaching snowmen, block center panel flat. Position three snowmen centered horizontally, at equal vertical intervals: measure and mark centers at approx 6.5-7" from each short end for outer snowmen and one centered for middle.
— Attaching Snowman AppliquE9s :
Round 1 :
Pin lower body to designated area, next pin upper body overlapping lower by 3-4 sts, then pin head overlapping upper. Ensure scarf covers seams.
Round 2 :
Sew applique in place using matching yarn and whip stitch through the backside edge only: stitch every 2-3 sts to secure firmly. Tie off and weave tails through wrong side.
Info :
Attach holly leaves under lower body by sewing leaf centers to panel with a few small stitches. Sew small red flowers at leaf centers and where the snowman rests on panel for visual balance.
— Inner Border Rows (Ivory and Color Accent) :
Round 1 :
After all appliquE9s are attached, work 1 round in ivory sc around entire runner edge: *3 sc in corner (to turn), sc evenly along sides* (count will vary with blocking and size)
Round 2 :
Change to green, work 1 round of sc evenly around to create grout line. Keep stitches even by marking every 10th st.
Round 3 :
Change to red, ch3, *sk1, 3 dc cluster in next st, ch1, sk1* repeat around to create small picotlike decorative strip. Join.
Info :
Keep stitch counts consistent around corners by adding 3 sc in outside corner spaces. Adjust cluster spacing if necessary to maintain pattern repeat symmetry.
— Outer Scalloped Picot Border :
Round 1 :
With red, *sc in next st, ch3, sl st into same st to create a picot, skip 2 sts, shell in next (5 dc in same st)* repeat around. At corners work extra shell to turn evenly.
Round 2 :
Change to green, 1 sc in each st and into shell centers to outline scallops (this makes a delicate green edge between red scallops)
Round 3 :
Return to red, *in each shell work ch2, picot, sl st and single
Assembly Instructions
- Attach head, upper body and lower body layers by overlapping edges slightly; pin pieces first and sew using whip stitch through the back loops only of each applique edge to keep the front smooth
- Position three snowmen evenly along the center panel: measure from each short end and mark centers before sewing. Recommended spacing: outer snowmen centers 7" from ends, center snowman center in middle
- Sew holly leaves under each snowman lower body: arrange leaves in groups of three, stitch leaf bases to panel using hidden whip stitches
- Attach hats to heads by sewing along brim with small whip stitches; tuck brim under slightly for a natural look
- Secure scarves over the join between head and upper body; use ladder stitch to create an invisible seam and anchor fringe ends with a few small stitches
- Embroider eyes and mouths before final sewing for precise placement; use small beads for buttons and backstitch thoroughly to secure
- When seaming the outer border, match scallop repeats to corners; pin heavily and use mattress stitch to keep scallops flat
- Block the entire runner flat after assembly: gently wet block or steam lightly, pin scallops to final shape and allow to dry completely for a professional finish
Important Notes
- 💡Use stitch markers consistently at the beginning of each repeat round to avoid counting errors and maintain proper shaping
- 💡Stuff applique pieces minimally; appliquE9s should be almost flat so they sit smoothly on the lace panel
- 💡For color changes, carry yarn on wrong side for a clean look or fasten off and weave ends securely; carrying is quicker but can bulk edges
- 💡When sewing beads or buttons, use strong thread and secure with multiple passes; knot and weave ends through stitches to hide
- 💡Block panel and appliquE9s separately for best results; pin shapes to prevent skewing as they dry
- 💡Keep a tape measure handy to ensure evenly spaced motifs; symmetry is key for table runners
- 💡For best lace definition, use a hook slightly larger than recommended for worsted if you want airy lace, or a tad smaller for denser fabric
- 💡Work evenly around corners adding extra stitches only where needed to avoid ripple in scallops
Finishing this Red Ivory Snowman Lace Table Runner is truly rewarding — each stitch adds warm, festive charm to your home. The layered appliquE9 snowmen bring whimsical personality while the lacy background and scalloped edges create heirloom quality. Display it proudly at holiday gatherings or gift it to someone special. 🎁🧶 Wishing you joyful stitching and a beautifully cozy table!