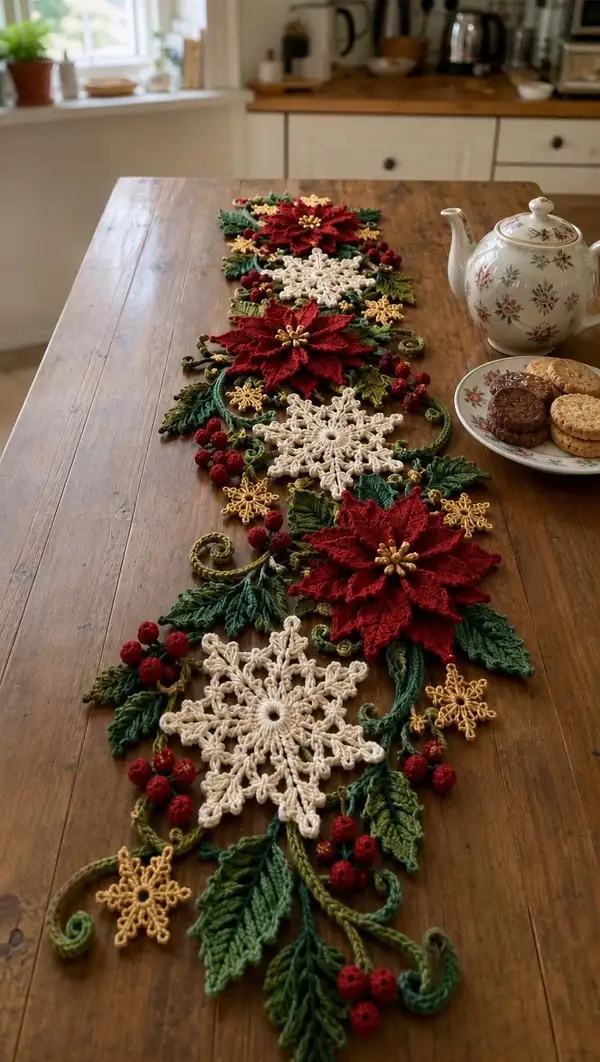
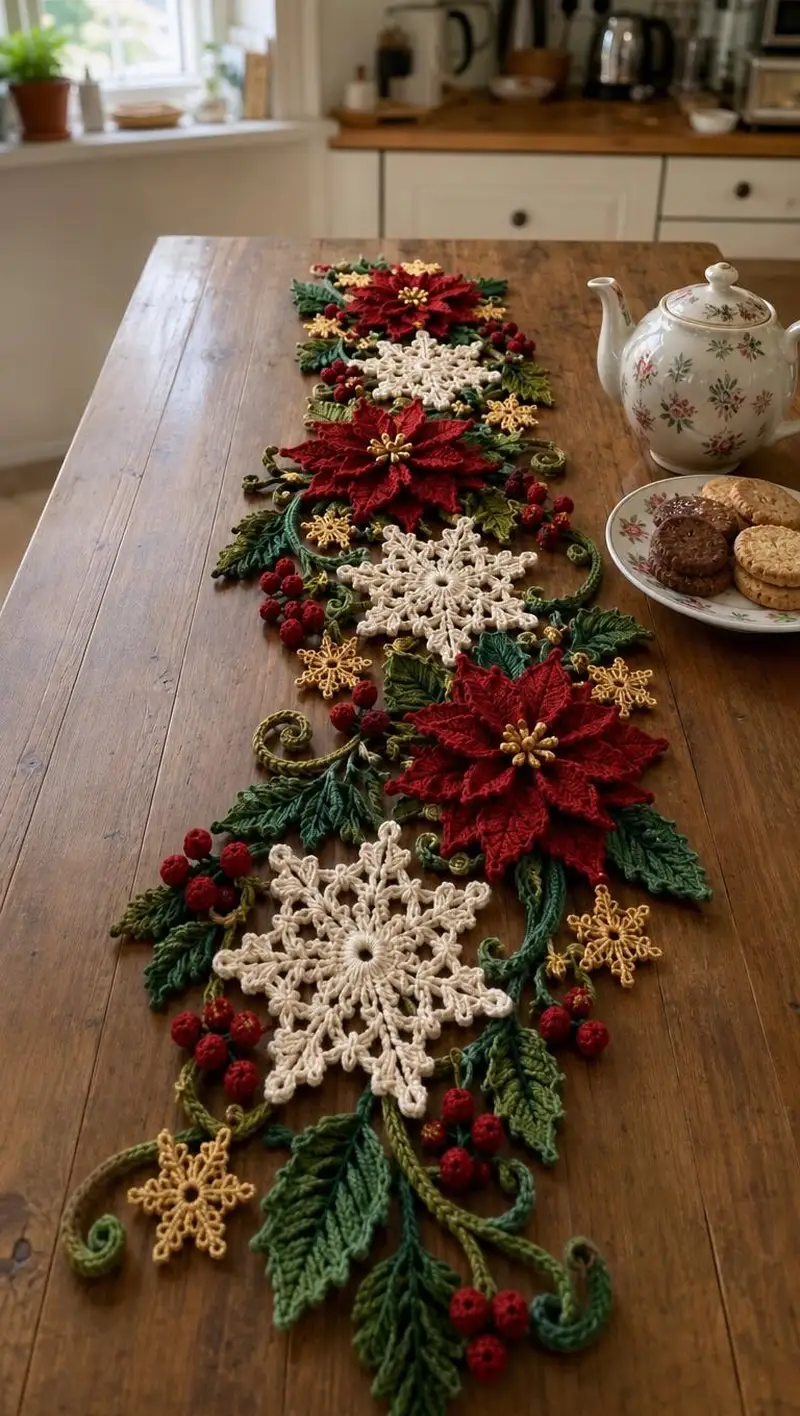
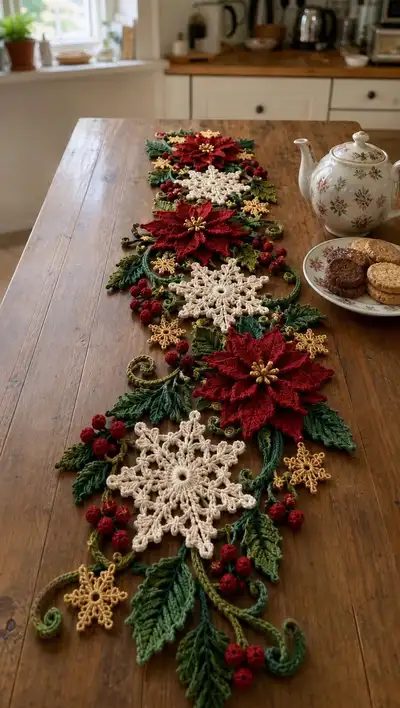
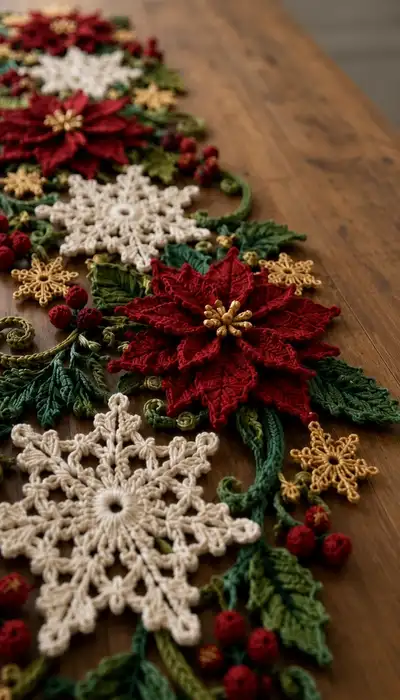
Create a stunning holiday table runner composed of layered crochet poinsettias, lacy snowflakes, curled vines, textured leaves and berry clusters. This pattern uses worsted-weight yarn to build rich red flowers, cream snowflakes, deep green foliage and golden accents for a warm, traditional centerpiece. Each motif is crocheted separately and joined with decorative spirals and leaves to create a flowing runner that lays beautifully on a dining table.
Progress Tracker
0% Complete
— Materials & Gauge :
Info :
Gauge is not critical for this decorative runner but consistent tension is important for motif matching. Using worsted yarn and a 4.0mm hook, 10 double crochets x 6 rows = approximately 4" x 4" in a blocked swatch. Adjust hook if your motifs grow or shrink relative to pictures.
— Overview :
Info :
This runner is built from repeat motifs: Large Poinsettia (make 3), Lacy Snowflake (make 3), Gold Mini Snowflake (make 6), Large Leaf (make 12), Small Leaf (make 18), Berry (make 24), and Curled Vine/Connector Cords (make 8). All motifs are joined using whip stitch and sewn connectors to create the flowing layout shown.
— Poinsettia (Make 3 large flowers) :
Round 1 :
Make a magic ring, ch1, 10 sc in ring, sl st to first sc to close (10)
Round 2 :
Ch3 (counts as first dc), dc in same st, ch2, *2 dc in next st, ch2; rep from * around, sl st to top of ch3 (10 petal loops)
Info :
Each ch-2 loop will become the base of a petal. Place a marker at the joining point of round 2 to help keep petals in order.
Round 3 Petal (worked in each loop) :
Attach yarn in first ch-2 loop, ch1, sc, hdc, 3 dc, tr, 3 dc, hdc, sc, sl st to join at base of loop. Repeat for each of the 10 loops to make the first layer of 10 pointed petals. Fasten off and weave end.
Info :
After completing layer one, block petals slightly downward to create separation between layers. Use a light spray of water and pin into place.
Round 4 (Second layer base) :
Rejoin yarn to back side center between petals, ch6, sl st into space behind next petal base; rep around to create 10 ch-6 loops that will hold larger outer petals. Sl st to base to secure (10 loops)
Round 5 Outer Petal :
In each ch-6 loop: join, ch1, sc, hdc, 5 dc, tr, 5 dc, hdc, sc, sl st. Repeat for all 10 loops to create larger outer petals. Fasten off and weave ends.
Info :
Create a slight stagger between inner and outer petals by offsetting outer petals between inner petals. Pin and steam block if desired to get a crisp layered effect.
Round 6 Raised Petal Veins (Surface Slipstitch) :
Using a stranded contrast yarn (slightly darker red) or same red held doubled, work surface slipstitch lines: Begin at petal base, surface sl st up the center of each petal and back down to create vein. Repeat for all 20 petals (10 inner + 10 outer). No change to perimeter stitch count.
Round 7 Poinsettia Center Beads :
With gold yarn or by sewing beads: Make 12 small beads by threading beads onto yarn and wrapping each with a few sl sts, or crocheting 12 tiny 4-sc clusters in a small MR (mr, 4 sc, pull tight, leave tail). Arrange and sew into center, spacing evenly. Fasten off securely.
Info :
Center beads can be sewn individually with a yarn needle. If using small wooden or seed beads, secure with a drop of fabric glue on the knot for extra hold.
Round 8 Petal Edge Definition :
With same red, join at the tip of a petal and work 6 sc around edge of each petal (sc evenly distributed), sl st into next petal edge and repeat to give a defined raised edge. This adds subtle texture and works as a tidy outer border.
Info :
Make sure to maintain 6 sc per petal for even edge; this does not change overall motif count but gives a consistent silhouette for each poinsettia.
— Lacy Snowflake (Make 3 large snowflakes) :
Round 1 :
With cream yarn, make mr, ch3, 12 dc into ring, sl st to top of ch3 to close (12)
Round 2 :
Ch4 (counts as tr), *ch3, sl st into next dc, ch4; rep from * around for 6 points, sl st to base (6 loops)
Info :
Work loosely for lacy effect. Place small blocking pins at the end of each loop to keep points uniform during blocking.
Round 3 Point Formation :
In each ch4 loop: sl st, ch1, 1 sc, 1 hdc, 3 dc, 1 tr, 3 dc, 1 hdc, 1 sc, sl st back into the loop to form a pointed cluster. Repeat for all 6 points.
Round 4 Openwork Lace Rows :
Join in gap between points, ch8, sl st in center of next point to create connecting arches. Repeat around to form 6 large arches.
Round 5 Lace Tips :
In each ch8 arch: sl st into arch, ch1, sc, *ch3, sl st back into arch for delicate picot; rep 3 times across arch, sc to close. Repeat for all arches for a frosty lacy edge.
Info :
Blocking is essential for snowflakes. Pin each point out to a flat star shape and spray with water. Allow to dry completely so motifs stay flat when joining.
Round 6 Additional Picot Layer :
Optional: Add a small picot ring by working ch3 picots at the top of each point (ch3, sl st back into base) to create crisp star tips. Fasten off and weave ends.
— Gold Mini Snowflakes (Make 6) :
Round 1 :
With metallic gold, mr, ch3, 8 dc into ring, sl st to join (8)
Round 2 :
*Ch4, sl st into next dc; rep from * around to make 8 loops, sl st to base (8)
Round 3 :
In each loop: sl st, ch1, sc, ch3, sl st into loop for tiny picot points around the tiny star. Fasten off and weave ends.
Info :
These small snowflakes act as highlights. Make them with a slightly smaller hook (3.5mm) for crisp tiny points and light metallic shine.
— Large Leaf (Make 12 textured leaves) :
Round 1 :
Ch 18 for leaf foundation (or adjust for desired length), sc in 2nd ch from hook and in next 7 ch (8)
Round 2 :
Continue working along foundation: hdc, dc, tr (center tip), dc, hdc, sc across to end, turn and work along opposite side of foundation: sc, hdc, dc, tr, dc, hdc, sc into last ch. Do not join, work continuous to form single leaf (total symmetrical stitches across both sides).
Round 3 Vein Definition :
Using BLO only on one side, work sc across side to create a slight ridge; on return, use FLO to create matched texture. This adds a raised vein effect. Fasten off and weave ends. Repeat for all large leaves.
Info :
For pronounced veins, work a center row of fpdc down the middle of the leaf after forming shape: insert hook around the center and work fpdc across then bpdc for the back side to create ribbed center vein.
— Small Leaf (Make 18) :
Round 1 :
Ch 12, sc in 2nd ch from hook and next 4 ch, hdc, dc (tip), hdc, sc across remaining ch, then work back along opposite side mirroring the first side. Fasten off (smaller but with same vein technique)
Info :
Alternate small leaves to be attached under poinsettia petals and along vine edges for natural fullness. Use lighter and darker greens for depth.
— Berry (Make 24 small berries) :
Round 1 :
With burgundy yarn, mr, 6 sc in ring (6)
Round 2 :
Inc in each st around (12)
Round 3 :
1 sc in each st around (12)
Round 4 :
(1 sc, 1 dec) x 4 then 4 sc (8) — start closing
Info :
Stuff lightly through the gap before final decreases; berries should be small and firm but not overfilled. Use polyester fiberfill and a small stuffing tool or blunt pencil.
Round 6 :
2 dec (2), fasten off leaving tail. Use tail to stitch closed and weave through the berry a couple times to secure. Repeat to make 24 berries.
Round 7 :
Optional surface embroidery: With a small strand of gold, stitch a single long stitch across berry center as highlight. Secure and weave ends.
— Curled Vine / Cord (Make 8 connectors) :
Round 1 :
Ch 60 (or desired length for your runner spacing). Sl st into 2nd ch from hook and each ch across to create a cord. Do not fasten off; leave long tail for joining.
Round 2 :
To create a spiral curl: working in the round along the cord edge, insert hook into the side of the cord and sc around each chain, turning every 6-8 sts into 3 sc in same st occasionally to encourage curl. Repeat to form a spiral structure along the cord.
Info :
Alternatively make an I-cord by using a small double-ended hook or knitting a 3-st i-cord then sew onto runner for a flexible vine. Wire insertion can add shape; if using wire, thread before final stitching.
Round 3 :
For tendril tips, make small ch 6 loops at intervals, then tighten into spiral by pulling tail and sewing down to secure curl shape. Make 2-3 tendrils per cord.
— Assembly Preparation & Joining Basics :
Info :
Layout: Arrange motifs on a table or blocking mat in the pattern: start with a large poinsettia, attach a snowflake below and slightly offset, then another poinsettia, alternating until you have all three poinsettias and three snowflakes in sequence. Fill gaps with leaves, berries and gold snowflakes as pictured.
Info :
Use pins to hold pieces in position. Join with mattress stitch or whip stitch using the green or matching yarn when attaching leaves to vines; sew poinsettia centers to leaves using long tails left from rounds to avoid visible seams.
— Joining Motifs (detailed steps) :
Round 1 :
Start by positioning the first poinsettia at runner top. Use a tapestry needle and a doubled strand of green yarn to sew small leaves along underside of petals at the indicated positions (usually rounds corresponding to petal bases). Use 6-8 evenly spaced stitches per leaf to secure without puckering.
Round 2 :
Attach the nearest snowflake by aligning its edge with the poinsettia's open petal valley and whip stitch through front loops only to create discrete joins. Use small stitches to mimic natural overlap — 10-12 stitches per join area.
Info :
When joining thick motifs (like layered poinsettias), sew through the back petals and base rounds to avoid flattening the outer petals. Keep stitches hidden between layers for a neat finish.
Round 3 :
Sew vine cords into position behind the flower groups. Fasten cord ends to underside of motif bases with a figure-eight pass, then run the cord along the runner and pin tendrils into place. Sew through cord and motif edge every 1-2 inches to secure.
Round 4 :
Attach berries in clusters of 3-6: use a single stem yarn tail to anchor each berry to the underside of a leaf or to the vine. Space clusters symmetrically along runner for balance. Use small back-and-forth stitches to hold each berry firmly.
Info :
Leave some motifs only partially stitched so you can adjust curvature and spacing before final sewing. Sew gradually and step back to view overall balance frequently.
— Edge & Final Border :
Round 1 :
With green yarn, join to edge of furthest leaves and work 1 round of sc around entire runner perimeter to create a tidy edge. Work 3 sc in concave corners or gaps to even the border.
Round 2 :
Work 1 round of 1 sc, 1 hdc, 1 sc into alternating spaces to create a scalloped decorative edge. Optionally stitch tiny gold picots (ch3, sl st) at scallop peaks for sparkle.
Info :
Take care to maintain consistent spacing and tension on the border so it lays flat. Pin edge during final round to keep runner straight and even.
— Finishing Touches :
Round 1 :
Sew gold mini snowflakes and any remaining beads into place using gold yarn, positioning them as small focal points between motifs.
Round 2 :
Weave all yarn tails through the underside of the runner, knotting when necessary and trimming close to the fabric. Lightly steam-block the finished runner to settle joins and smooth the overall piece.
Info :
To give added stiffness for a formal table, consider ironing with steam over a towel and then spraying a light starch solution. For a softer, drapey runner, avoid starch and allow to remain supple.
— Variations & Sizing :
Info :
To lengthen the runner, repeat the motif sequence (poinsettia + snowflake) before finishing edges. To shorten, remove a motif group and rearrange. You can also create a round centerpiece version by arranging motifs in a circular layout and joining accordingly.
Info :
Try different yarn weights for different effects: DK weight yields a lighter lace runner; bulky yarn creates a bold, more sculptural centerpiece. Adjust hook size accordingly.
This festive runner combines classic holiday motifs and layered crochet technique to create a show-stopping table centerpiece. Each poinsettia and snowflake is a small project on its own, and assembling them into the flowing runner is a deeply satisfying finish. The rich reds, cream laces and gold accents give it an heirloom quality that will be treasured year after year. 🧶✨ Set aside a cozy afternoon, brew tea, and enjoy stitching this seasonal favorite! 🎄