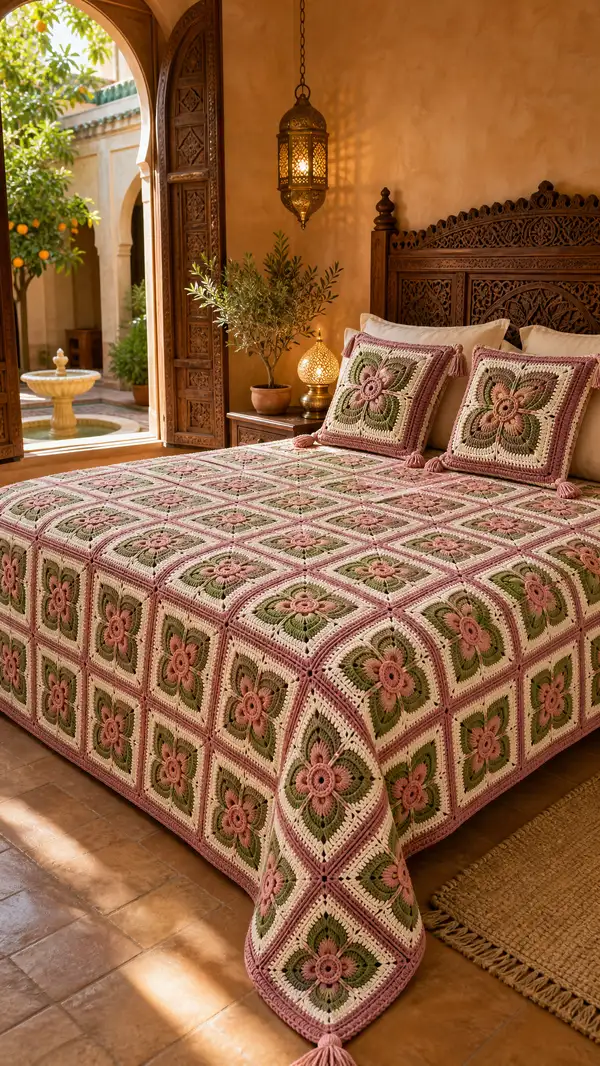
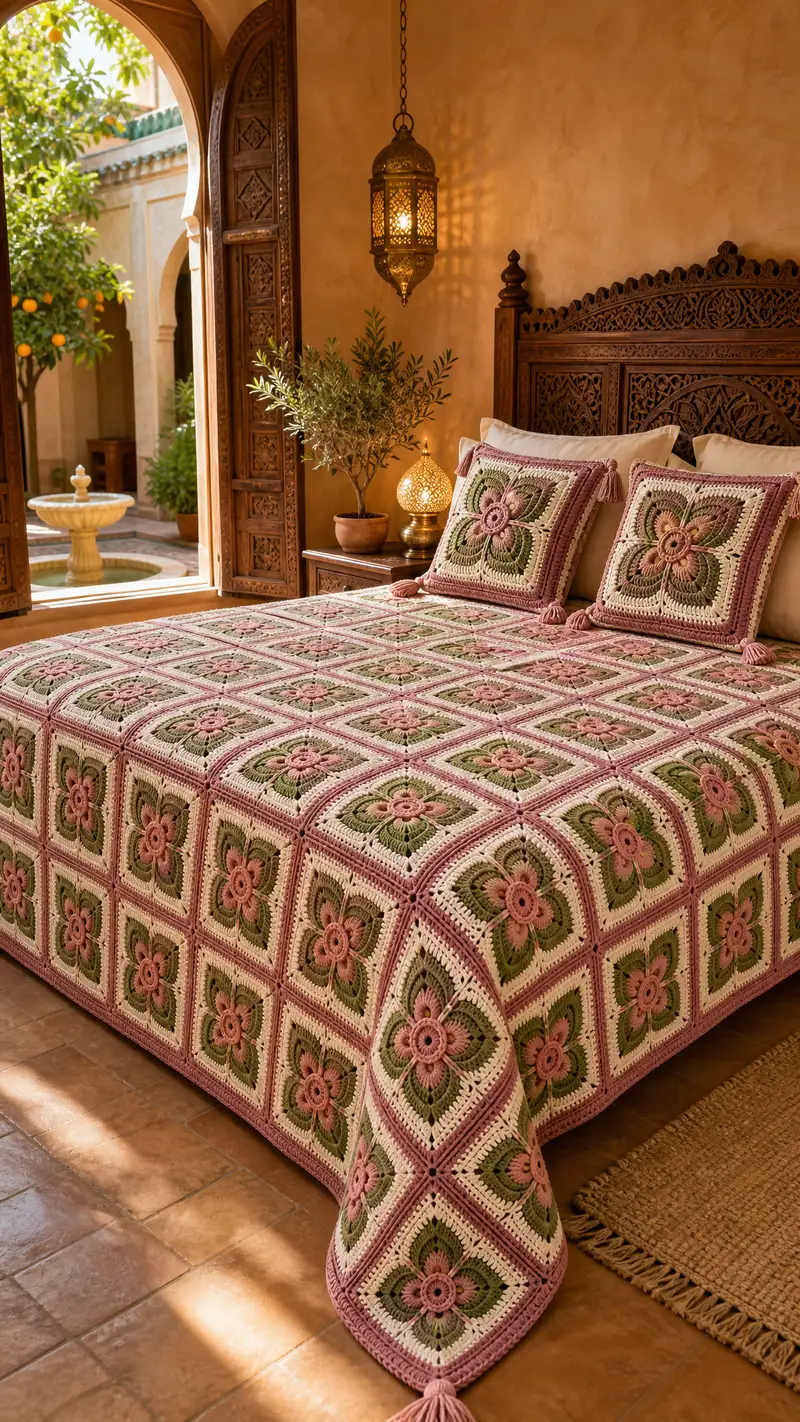
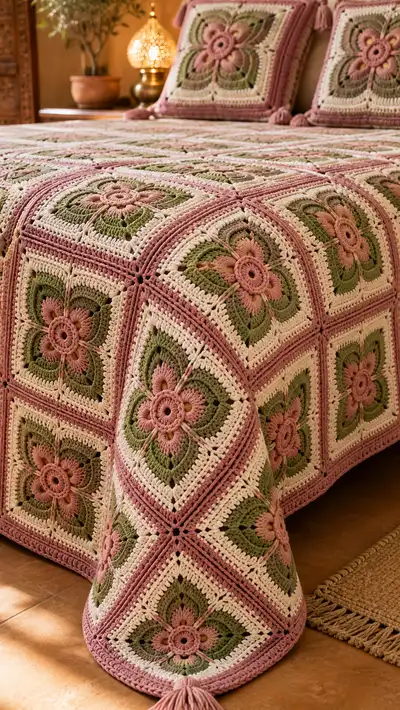
Create a romantic Rose Olive Floral Granny Bedspread inspired by vintage florals and boho-chic styling. This richly textured bedspread is made from repeating floral granny squares worked in rose pink, olive green and warm cream tones with a soft dusty-rose joining and finished with tasselled corners. The finished set in the photos includes matching square pillow covers and a deep framed border for a luxurious layered look.
Progress Tracker
0% Complete
— Motif (Rose Olive Floral Granny Square) :
Round 1 :
Using Rose yarn. Make a magic ring. Ch3 (counts as first dc), work 11 dc in magic ring. Join with sl st to top of ch3. (12 dc)
Round 2 :
Ch1, *sc in next dc, ch5; rep from * around 12 times, join with sl st to first sc. You will have 12 ch-5 loops around the center for petal bases. (12 sc, 12 ch-5 loops)
Info :
Keep tension loose for round 2 so petals sit proudly. If your ch-5 loops look tight, go up a hook size for this round only and return to main hook for round 3.
Round 3 :
Change to Rose or use same Rose. In each ch-5 loop: (sc, hdc, 3 dc, hdc, sc) in loop. Join with sl st to first sc. (Each petal = 7 sts; total 12 x 7 = 84 sts)
Round 4 :
Ch2, *1 dc in next 6 sts, inc (dc2 in next st); rep from * around. Join with sl st to top of ch2. (96 dc)
Info :
Round 4 converts circular petals into a fuller circle; count sets carefully — there should be 12 increases in total (one in each petal area).
Round 5 :
Change to Olive. Ch2, *1 dc in next 7 sts, inc; rep around. Join. (108 dc)
Round 6 :
Ch2, *1 dc in next 8 sts, inc; rep around. Join. (120 dc)
Round 7 :
Change to Warm Cream. Ch1, sc in each st around. Join. (120 sc)
Round 8 :
Ch3 (counts as dc), *dc in next 11 sts, (2 dc, ch2, 2 dc) in next st to form a corner; rep from * twice more to form 4 corners, end dc in remaining sts, join with sl st to ch3. After working corners you should have produced 4 corner spaces and an expanded square edge. (See Info for count)
Info :
Round 8 begins the conversion to a square. Work the corner (2 dc, ch2, 2 dc) into the stitch that sits near every 3-petal group so you get evenly spaced corners. If needed, move the corner placement slightly to keep petals centered.
Round 9 :
Ch1, sc into each dc and sc across to next corner space, in corner work (sc, ch3, sc) into ch2 space; repeat around. Join. This creates a neat little corner chain to expand the square. (st count variable but maintain even edges)
Round 10 :
Change to Olive. Ch2, dc in each st across until corner, in corner work (2 dc, ch2, 2 dc) in ch3 corner space; rep around. Join. This makes each side a row of dc and reinforces corners. (st count increases by 12 total compared to previous round)
Info :
From round 8 onward, you will build the square by placing four corner clusters at the four even gaps. Count petals and stitches to make sure corners are evenly spaced so motifs align when joined.
Round 11 :
Ch1, sc in each st around, placing (sc, ch3, sc) in each corner ch2 space. Join. (Square now stabilized; stitch count approx 132–140 depending on exact previous counts)
Round 12 :
Change to Rose. Working in BLO, ch1, sc in each st around; place (sc, ch3, sc) in corners. Join. (This BLO round creates a subtle ridge for texture and a small step between colors)
Info :
Working the BLO for a side round creates a defined ridge that helps petals stand away from the background. If you prefer a flatter square, work both loops normally instead.
Round 13 :
Change to Warm Cream. Ch3, *dc in next 10 sts, (2 dc, ch2, 2 dc) in corner; rep around. Join. (This adds bulk and skirts the floral center with a lighter frame)
Round 14 :
Ch1, sc in each st and in ch2 corner spaces work (sc, ch3, sc). Join. (Even round to tidy edges)
Round 15 :
Change to Olive. Ch3, *dc 1 in next 12 sts, inc (dc2 in next st) at quarter points to broaden the square; rep around. Join. (expect ~156 sts after this and future increases)
Info :
Rounds 15-18 add fullness to each side; distribute increases evenly to maintain a flat square. If you see buckling, remove one increase per side on the next round.
Round 16 :
Ch1, sc in each st around. Join. (flat, tidy row; stitch count same as previous)
Round 17 :
Change to Rose. Ch3, dc around placing (2 dc, ch2, 2 dc) in each corner space; join. (This further squares the motif)
Round 18 :
Ch1, sc in each st around placing (sc, ch3, sc) in corners; join. (prepares for textured rounds)
Round 19 :
Change to Dusty Rose (joining color if desired). FPdc around entire round: ch2, *fpdc around next dc, repeat; join. This creates a raised ridge on the face. (st count unchanged)
Info :
Front post double crochets add dramatic texture that helps squares read as sculpted tiles when joined. Work evenly and keep posts tall and consistent.
Round 20 :
Ch1, sc in each st around in Dusty Rose, placing (sc, ch3, sc) in corners. Join. (tidies the FPdc round and readies square for outer edging)
Round 21 :
Change to Warm Cream. Ch3, dc in each st until corner, (2 dc, ch2, 2 dc) in corner; rep around. Join. (This soft frame helps petals breathe)
Round 22 :
Ch1, sc in each st around in Warm Cream; join. (clean edged round)
Round 23 :
Change to Dusty Rose. Ch2, *1 hdc in next 2 sts, 1 dc in next 6 sts, shell (3 dc) in center of each side to define; rep around placing shells centered on each side, corner (2 dc, ch2, 2 dc). Join. (shell placement will create a slight decorative ripple)
Info :
If your shell placement falls off-center, frog back one round and adjust where you plant the first shell so each side is balanced. Consistency is more important than exact numerical stitch count for ornamental shells.
Round 24 :
Ch1, sc in each st around in Dusty Rose; join. (stitch count stable)
Round 25 :
Change to Rose. Work one round of BLO sc to create a thin ridge: ch1, sc in each st BLO; join. (adds a soft framed ridge in rose)
Round 26 :
Ch3, dc in each st around, placing (2 dc, ch2, 2 dc) in each corner; join. (this begins the outermost shaping for consistent square size; expect ~200–220 sts depending on shell placement)
Round 27 :
Change to Warm Cream. Ch1, sc in each st around; join. This evens the outermost edge. (stitch count unchanged)
Info :
At this stage your motif should measure approximately 12–13cm (5"–5.25") across unstretched; blocking will bring it to consistent square size closer to 14cm / 5.5" depending on your yarn and tension.
Round 28 :
Change to Dusty Rose. Ch3, *dc in next 8 sts, (2 dc, ch2, 2 dc) in corner; rep around. Join. This rounds off the motif preparing it to match with neighboring squares.
Round 29 :
Ch1, sc in each st around, placing (sc, ch3, sc) in corners. Join. Fasten off leaving a 20–25cm tail for mattress joining if using join-as-you-go. (final tidy round)
Round 30 :
Optional decorative picot edge: attach Dusty Rose in any sc, *(ch3, sl st in 3rd ch to form picot, skip 1 sc, sl st in next sc); rep around for a delicate scalloped finish. Fasten off and weave ends. (picot count equals number of desired scallops)
Info :
Make as many motifs as needed for your bed size. For the sample bedspread approximately 8 x 10 motifs (80 motifs total) were used for a queen-size with drape. If you prefer denser drape or larger scale, adjust motif count. Block each motif lightly and arrange on blocking mat to consistent size before joining.
— Join-As-You-Go (JAYG) Method & Joining Rounds :
Info :
We recommend join-as-you-go for a neat, sturdy seam that blends Dusty Rose joining color with the motif frame. Join in the final round (Round 29) of each motif by alternating slip stitches and single crochets into the neighbor motif's outer sc round. The following rounds detail an explicit JAYG join sequence and reinforcement rounds after all motifs are placed.
Join Round 1 :
Position first motif face up. Attach Dusty Rose in any corner sc. Ch1, sc in same stitch, *sc in next 3 sts, sc through corresponding st on adjacent motif (if joining), sc in next 3 sts; when you reach corner ch3 space, work (sc, ch3, sc) across both motifs. Repeat around as motifs are attached. Join with sl st to first sc. (st count will match motif edge)
Info :
When joining two motifs side-by-side, align squares and join into the outer sc rounds of both motifs. Use a stitch marker to mark the beginning of each side so joins remain even. Work slowly across corners so you match the ch3 corner spaces precisely.
Join Round 2 :
Ch3, dc in each st around across joined rows (dc in one motif st, dc in joining stitch where applicable). At corners work (2 dc, ch2, 2 dc) over joined corner ch3s. Join. This reinforces the seam. (st count rises slightly depending on seam stitches)
Join Round 3 :
Ch1, sc in each st around placing (sc, ch3, sc) in corners. Join and fasten off. This neatens the seam and hides the slip stitches.
Info :
If you prefer ladder stitch sewing, you can whip-stitch adjoining motifs from the WS using the long tail left from Round 29 instead of JAYG. Both methods are durable; JAYG creates a flatter face-side seam, while sewing produces a slightly raised seam on the WS.
Join Round 4 :
After joining motifs into panels, work an allovery Dusty Rose reinforcement row: join Dusty Rose, ch2, *hdc in next 2 sts, sc in next 4 sts; rep across whole bedspread edge to tidy internal joins. Join and fasten off. (used to lock seams and create uniform texture between tiles)
Info :
Work reinforcement rounds with consistent tension; if seams pull slightly, block spread after completing the reinforcement round and before outer border.
— Full Spread Border (worked after all motifs joined) :
Border Round 1 :
Attach Dusty Rose at any outer join point. Ch3, dc evenly around entire bedspread placing (2 dc, ch3, 2 dc) in each outside corner to maintain square corners. Place 2 dc clusters at each former motif corner seam for continuity. Join. (st count large and depends on final motif layout)
Border Round 2 :
Ch1, sc in each st and (sc, ch3, sc) in corner ch3 spaces to square off. Join. This reduces bulk before adding textured rows.
Info :
Measure bedspread at this stage; borders can be widened or narrowed depending on desired drop. Add or omit rounds of dc to achieve the desired border depth.
Border Round 3 :
Change to Warm Cream. Ch2, *fpdc around next dc for a raised ridge effect, rep around; join. This creates a subtle raised rib around the edge. (st count unchanged)
Border Round 4 :
Ch1, sc in each st around; join. Tidy up the FPdc row and create a flat base for subsequent shell rows.
Border Round 5 :
Change to Rose. Ch3, *dc in next 2 sts, skip 1 st, shell (3 dc) in next st; rep around placing shells evenly spaced across each motif join line. Join. This produces a decorative band that reads as a secondary motif frame. (shell count depends on width)
Info :
Spacing shells evenly is critical if you want a balanced border. Count total stitches per side and divide by number of shells you want to arrive at spacing (i.e., place a shell every 8 or 10 sts as needed).
Border Round 6 :
Ch1, sc in each st around. Join. This smooths the shell round for the final framing.
Border Round 7 :
Change to Dusty Rose. Ch3, dc in each st around working (2 dc, ch2, 2 dc) in corners; join. This is the main border round that adds depth. (st count steady)
Border Round 8 :
Ch1, sc in each st around; join. Prepare for multi-row decorative final edge.
Border Round 9 :
Change to Warm Cream. Ch2, *1 hdc in next st, 1 dc in next 3 sts, 1 hdc in next st; rep around placing corner sequences as (hdc, ch3, hdc) in corners; join. This creates a padded rib that sits nicely over mattress edges.
Info :
Add extra border rounds if a deeper bed drop is desired. For a dramatic drop add 6–8 more rounds of dc in Dusty Rose and finish with a picot or tassel trim for weight at the hem.
Border Round 10 :
Change to Rose. Ch1, sc in each st around. Join. Fasten off and weave all ends in neatly. Your large border is now complete and should present a continuous frame around the joined motifs.
— Pillow Covers (Make 2 matching square pillow covers) :
Info :
Pillow covers are made by working one motif for the front and a second motif for the back, then joining them with a simple sc seam leaving a small opening for insertion of pillow form. Or create front motif and work a simple granny-back panel for an envelope back — both methods are shown here.
Pillow Round 1 :
Follow Motif Rounds 1–19 exactly to create the floral center and square frame. After Round 19 proceed with the following rounds for a larger pillow face size.
Pillow Round 2 :
Round 20: Change to Dusty Rose. Ch3, dc in each st around placing (2 dc, ch2, 2 dc) in corners; join. (Use same counts as motif; this gives the face a framed look)
Pillow Round 3 :
Round 21: Ch1, sc in each st around; join. (tidy)
Pillow Round 4 :
Round 22: Change to Warm Cream. Ch3, *dc 1 in next 10 sts, shell in center of each side if desired; join. This expands pillow face to desired measurement (~45cm/18" square for the pictured cushions).
Pillow Round 5 :
Round 23: Ch1, sc in each st around; join. Fasten off leaving long tail. Make a back panel either as: (A) full motif as front, or (B) a solid panel of dc rows to form an envelope back—work dc rows until match front size and stop 12cm short, fold and stitch to create overlap.
Info :
For the pillow shown in the photo the cover uses one motif front and a dc panel back with matching tassels at the corners. If you prefer a zippered cover, sew zipper into one side of the motif panel before joining the final seam.
Pillow Round 6 :
Join front and back panels by placing RS together and working sc around the perimeter, inserting a pillow form mid-join or leave a small opening for insertion then sc closed. Make sure tassel positions match at four corners. Fasten off and weave in ends.
Info :
Use a slightly smaller hook for joining the pillow covers to create a neat, firm seam that will hold the pillow form securely.
— Tassels & Finishing Touches :
Tassel Step 1 :
Use Dusty Rose yarn. Wrap yarn around a 7–8cm cardboard template for 60–80 wraps for a full tassel (adjust wraps for desired fullness). Tie tightly at one end with a short length of yarn and cut the looped edge to form the tassel fringe.
Tassel Step 2 :
Create a small head by wrapping yarn about 12–15 times near the top and tying off to secure; trim ends evenly. Attach a long loop for sewing through motif corner.
Tassel Step 3 :
Sew tassels to each of the four outer corners of the bedspread and to each pillow corner, reinforced with a small knot behind the corner. Use a tapestry needle and double-thickness yarn for security.
Info :
Tassels add weight and visual closure—secure them firmly. If the bedspread will be washed frequently, reinforce tassel attachments with a few extra stitches and an extra knot on the underside.
Tassel Step 4 :
Block final spread: Lay bedspread flat on blocking mats, pin corners and sides to desired measurements and lightly steam or wet-block until dry. This evens motif joins and relaxes the cotton yarn for a consistent drape.
Info :
Use rust-proof pins and breathable blocking mats. Allow complete drying time before removing pins to preserve the shape and keep seams secure.
— Optional Decorative Embroidery & Finishing Detail Work :
Embroidery Detail 1 :
Use a tapestry needle and a strand of darker rose to add a small French knot in the center of each flower for added dimension. Work through the front only and secure on the WS with a small knot and weave-in.
Embroidery Info :
Work a small test sample to make sure French knots sit proportionally on each motif — too many rows of wrapping will create large, heavy knots that can distort the motif.
Edge Finishing :
If you prefer a heavier weighted hem, work two rounds of reverse single crochet (crab stitch) in Dusty Rose around the outermost border to create a twisted rope edge that resists curling.
Info :
Reverse single crochet works left to right for right-handed crocheters; if your edge looks twisted, work a trial line and adjust tension until it lies flat.
Final Care :
Wash gently by hand in cool water with mild detergent or use a delicate cycle in a mesh bag. Reshape while damp and dry flat. Avoid tumble drying as the cotton may shrink slightly and tassels may tangle.
Info :
Block after first wash if needed to relax and even the bedspread; re-block lightly if the spread loses shape over time due to use and washing.
Completing this Rose Olive Floral Granny Bedspread is a slow, satisfying journey from floral centers to a grand, framed bedcover. Each motif is a tiny tile of craft and care that comes together into a luxurious, layered whole — perfect for cozy mornings and elegant bedrooms. Add matching pillow covers and tassels to elevate the look and show off your patience and skill. 🧶🌿 Enjoy every stitch — your handmade heirloom will be treasured for years to come! ✨