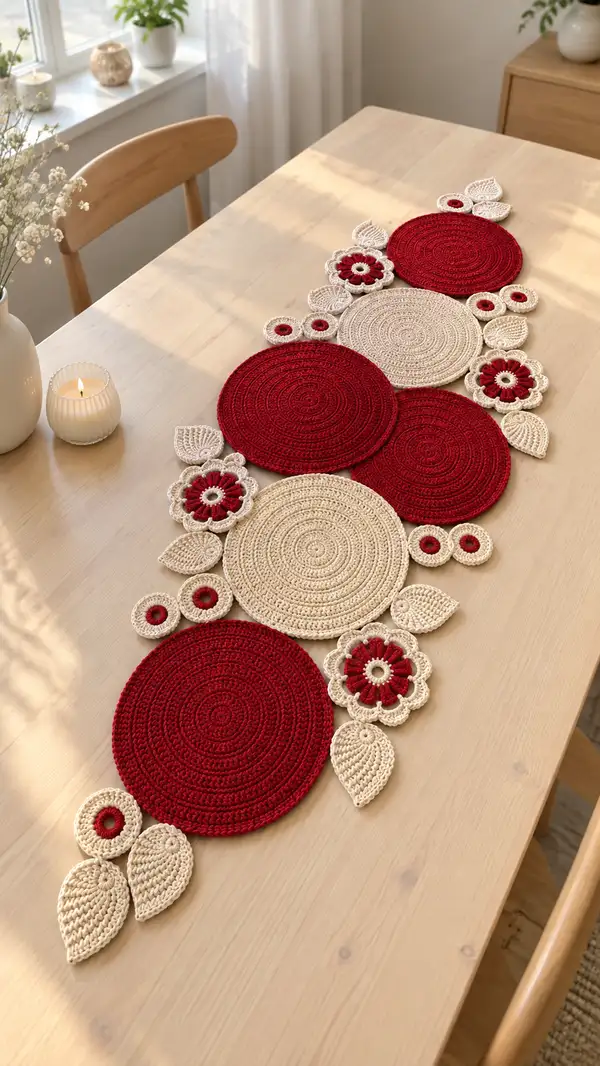
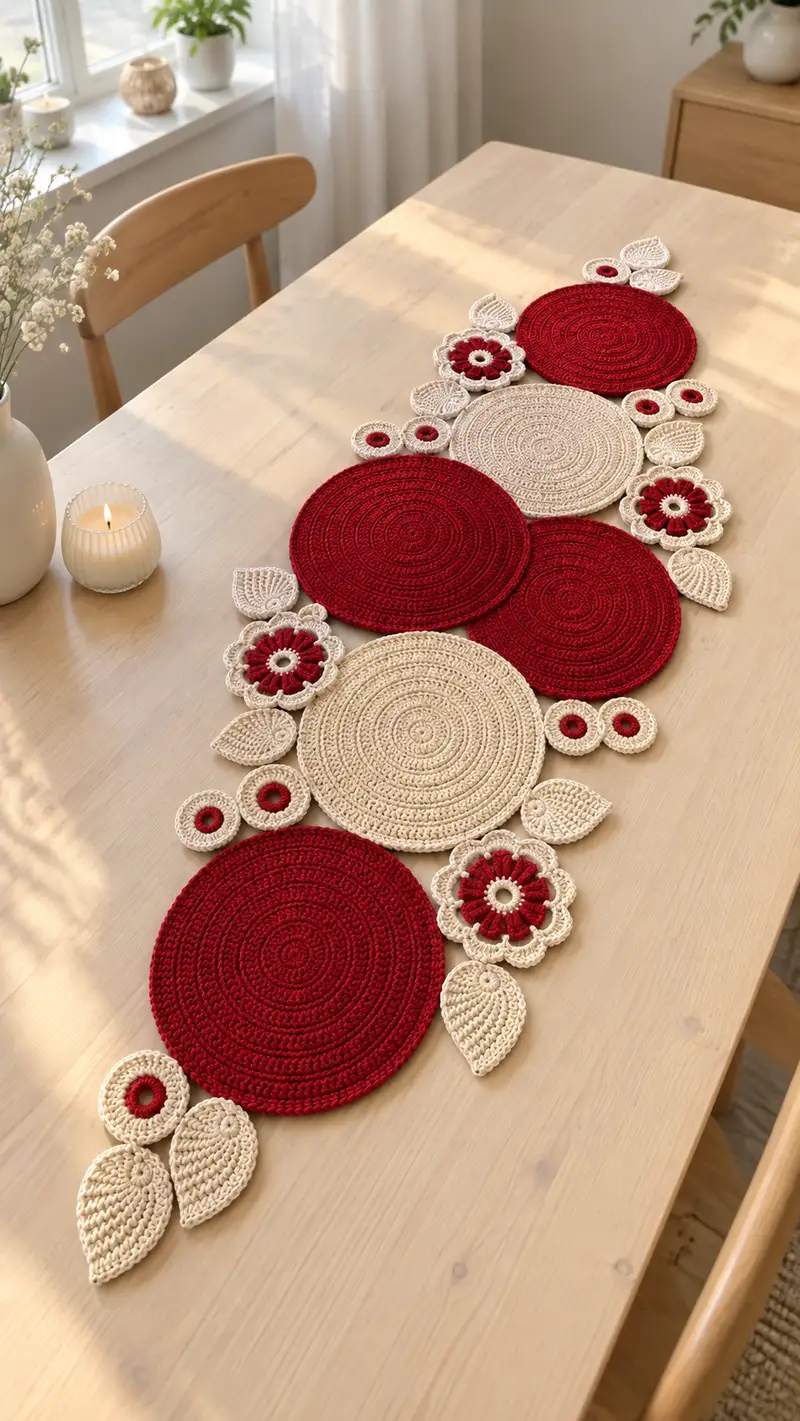
Create a stunning roses table runner made of interlocking crochet circles, floral motifs and delicate leaves. This runner combines deep red and soft cream tones to form an elegant, modern centerpiece. Motifs are made separately and joined with simple join-as-you-go or sewn seams for a handmade heirloom finish. The modular design allows you to add or subtract repeats to fit any table length.
Progress Tracker
0% Complete
— Large Disc Placemat (Make 4 - Red) :
Round 1 :
6 sc in magic ring (6)
Round 3 :
(1 sc, inc) x 6 (18)
Round 4 :
(2 sc, inc) x 6 (24)
Round 5 :
(3 sc, inc) x 6 (30)
Round 6 :
(4 sc, inc) x 6 (36)
Info :
Begin with a tight magic ring; using cotton yarn helps the disc lie flat. Place a marker in the first stitch to track rounds if you prefer working joined rounds.
Round 7 :
(5 sc, inc) x 6 (42)
Round 8 :
(6 sc, inc) x 6 (48)
Round 9 :
(7 sc, inc) x 6 (54)
Round 10 :
(8 sc, inc) x 6 (60)
Round 11 :
(9 sc, inc) x 6 (66)
Round 12 :
(10 sc, inc) x 6 (72)
Info :
Check your disc for cupping: if the center curls up, add 1–2 extra increase rounds evenly. If it ruffles, skip the next increase round and work even rounds until flat.
Round 13 :
1 sc in each st (72)
Round 14 :
1 dc in each st (72)
Round 15 :
1 sc in each st BLO (72)
Round 16 :
1 sc in each st (72)
Info :
Rounds 13–16 create a subtle ridge and texture; use BLO on round 15 to make a defined edge that helps motifs sit nicely when joined.
Round 17 :
1 hdc in next 72 sts (72)
Round 18 :
(5 sc, inc) x 12 (84)
Round 19 :
1 sc in each st (84)
Round 20 :
1 dc in each st (84)
Info :
If your runner needs slightly larger discs for scale, work an additional increase round at this stage: (11 sc, inc) x 6 to reach 90 sts; otherwise continue even rounds to build the flat surface.
Round 21 :
1 sc in each st BLO (84)
Round 22 :
1 sc in each st (84)
Round 23 :
1 hdc in each st (84)
Round 24 :
1 dc in each st (84)
Round 25 :
1 sc in each st (84)
Round 26 :
1 sc in each st FLO (84)
Info :
Work round 26 in FLO to give a finished, decorative rim; this helps when you join to adjacent motifs by creating a clean edge to stitch through.
Round 27 :
Sl st into next st and fasten off leaving a 25cm tail for sewing; weave tail to the wrong side (84)
Info :
Make 4 large red discs. Block them flat if desired: pin to blocking mat, mist lightly and allow to dry to ensure uniform size before assembly.
— Medium Disc Placemat (Make 2 - Cream) :
Round 1 :
6 sc in magic ring (6)
Round 3 :
(1 sc, inc) x 6 (18)
Round 4 :
(2 sc, inc) x 6 (24)
Round 5 :
(3 sc, inc) x 6 (30)
Round 6 :
(4 sc, inc) x 6 (36)
Info :
These discs are slightly smaller to create layered contrast in the composition. Keep tension consistent with the red discs for best joining alignment.
Round 7 :
(5 sc, inc) x 6 (42)
Round 8 :
(6 sc, inc) x 6 (48)
Round 9 :
(7 sc, inc) x 6 (54)
Round 10 :
1 sc in each st (54)
Round 11 :
1 hdc in each st (54)
Round 12 :
1 dc in each st (54)
Info :
To give the cream discs a softer border, on round 13 work 1 sc in each st BLO which creates a small ridge that complements surrounding flower petals.
Round 13 :
1 sc in each st BLO (54)
Round 14 :
1 sc in each st (54)
Round 15 :
1 hdc in each st (54)
Round 16 :
1 dc in each st (54)
Round 17 :
1 sc in each st (54)
Round 18 :
Sl st and fasten off leaving 20-25cm tail for joining (54)
Info :
Make 2 cream discs. Block flat and measure across to ensure all discs are approximately the same diameter; adjust rounds if needed to match the red discs for balanced visual flow.
— Flower Rosette (Make 4 - Cream with Red Center) :
Round 1 :
6 sc in magic ring with cream (6)
Round 3 :
(1 sc, inc) x 6 (18)
Info :
Switch to red yarn for the central contrast on round 4. You can carry the cream inside the center and pull through the red to avoid extra tails.
Round 4 :
Join red and ch1; 1 sc in each st around (18)
Round 5 :
(1 sc, inc) x 6 (24)
Round 6 :
1 sc in each st (24)
Round 7 :
(1 sc, ch3, skip 1) x 8 forming petal arches around the center (24)
Info :
Petal arches on round 7 create foundation for textured petals worked into each ch3 space. Keep tension slightly looser on ch spaces so petals puff neatly.
Round 8 :
In each ch3 space work: (sc, hdc, 3dc, hdc, sc) to form a rounded petal. Repeat around (8 petals)
Round 9 :
1 sc around petals to anchor and define shape; pick up the top loops of each petal to create uniform outer edge (48)
Round 10 :
Sl st into next st and fasten off; weave in ends leaving 25cm tail for sewing (48)
Info :
Make 4 flower rosettes. To create a layered look, sew the rosettes slightly overlapping the edges of large discs so petals sit on top of adjacent discs.
— Small Donut Motif (Make 8 - Two-color accent) :
Round 1 :
Ch 6, sl st to first ch to form a small ring, ch1, 8 sc in ring (8)
Round 2 :
1 sc in each st (8)
Info :
Switch to cream on round 3 for a rim: you can carry the inner color or cut and join as preferred. These small donuts give visual punctuation between larger pieces.
Round 3 :
Join cream and (1 sc, inc) x 4 (12)
Round 4 :
1 sc in each st (12)
Round 5 :
1 sc in each st BLO (12)
Round 6 :
Sl st and fasten off leaving 15cm tail for joining (12)
Info :
Make 8 small donut motifs. These are great to tuck into gaps and create the appearance of buds in the runner composition.
— Large Flower with Hollow Center (Make 3 - Cream with Red Inner Petals) :
Round 1 :
6 sc in magic ring (6)
Round 3 :
(1 sc, inc) x 6 (18)
Round 4 :
Sl st to join and switch to red; ch1, 1 sc in each st around (18)
Round 5 :
(1 sc, inc) x 6 (24)
Round 6 :
1 sc in each st (24)
Round 7 :
Ch 3, skip next st, sl st into next st; repeat around to create 12 small loop spaces (24)
Info :
Petal loops on round 7 act as foundation for cream outer scallops. Keep loops even by pulling same yarn length for each ch3.
Round 8 :
Switch to cream and in each ch3 space work (sc, hdc, 3dc, hdc, sc) to form a larger scallop petal (12 petals)
Round 9 :
1 sc around petals to stabilize edge; pick up both loops to make petals lie flat (48)
Round 10 :
Work a decorative crab stitch (reverse sc) around outer edge for a neat, slightly raised rim (48)
Round 11 :
Sl st and fasten off leaving a 25cm tail for sewing (48)
Info :
Make 3 of these larger floral rosettes and place them centrally between discs to create an organic arrangement of flowers and discs.
— Leaf Motif (Make 12 - Cream) :
Round 1 :
Ch6, sc in 2nd ch from hook, sc next, hdc next, dc next, tr next — work along one side of chain and then mirror back down the other side to create a teardrop leaf base; join to form flat leaf (6 sts each side)
Round 2 :
Working around edge of leaf: 1 sc in each st for neat edge; total approx (14-16) depending on chain length
Round 3 :
In the central line work: ch1, sc down center spine to create definition; fasten off with long tail for sewing
Info :
Alternatively, work leaves in rounds for a sturdier leaf: start with mr6, increase out to 12 and then shape with decreases to form point. These leaves are tapered to tuck under petals and discs.
Round 4 :
For a larger, textured leaf: mr6, (inc) x6 (12), (1 sc, inc) x6 (18), 1 sc each st for two rounds (18), (1 sc, dec) x6 (12), sl st and fasten off leaving long tail
Info :
Make 12 leaves; vary their sizes slightly for a more natural look. Use BLO on final round for a ribbed effect if desired.
— Tiny Accent Petals and Fillers (Make 10-14) :
Round 1 :
Ch4, sl st to form ring, 6 sc in ring (6)
Round 2 :
(1 sc, inc) x 3 (9)
Round 3 :
Work a small scallop: (sc, hdc, 2dc, hdc, sc) in each third stitch space to make tiny decorative petals (3 small petals)
Info :
These tiny pieces are useful to fill awkward gaps and stabilize joints when sewing motifs together. Make 10–14 and keep extras for adjustments during assembly.
— Join-As-You-Go & Assembly Prep :
Info :
Decide your layout before joining: suggested order is Red large disc, Cream medium disc, Red large disc, Cream medium disc, Red large disc—arrange flowers and leaves into gaps as shown in the photo and pin pieces in place on a blocking mat.
Step 1 :
Place two motifs right sides up with edges overlapping about 1.5–2.0cm where petals or rims meet. Align decorative rims (FLO/BLO edges) so you will stitch through similar thicknesses.
Step 2 :
Using a 25cm tail left from motifs, use a yarn needle and whipstitch through corresponding stitches at the rim approx every 3–4 stitches to create an invisible seam. Alternatively, do join-as-you-go by working slip stitches through both motif edges while finishing final round of one motif — see detailed instructions below.
Info :
When using join-as-you-go: on the final round of the motif being added, when you reach the targeted overlap stitch, sl st into the next st of the positioned motif (on the table) then continue the round. Repeat each time you reach an overlap position so the motifs lock together as you finish the edge.
Step 3 :
Sew flower rosettes to discs by placing them offset over the seam lines so petals overlap the large disc edge; sew through the centers and a few outer petals to secure. Weave ends inside motifs to hide them.
Step 4 :
Attach leaves by sewing only the base into a seam or onto the wrong side of a flower so they extend outward and sit flat. Anchor leaves with 2–3 secure passes of yarn at the base and discard excess yarn tails inside motif.
Info :
Use small donut motifs to fill spaces between large discs and flowers—place them in groups of two or three and sew through both the rim and the adjoining motif to stabilize the structure.
Step 5 :
Once all motifs are joined, check the runner for gaps. Use tiny accent petals or additional small donuts to fill spaces and sew them flat to the faces of motifs, keeping the back as flat as possible for table stability.
Info :
Weave all tails securely to the wrong side and trim. For extra durability, anchor seams with a few stitches of matching sewing thread tied on the wrong side and covered with a small dab of fabric glue if necessary.
— Finishing Touches & Blocking :
Info :
Block the assembled runner: pin to a blocking mat to maintain gentle curves of petals and leaves, mist with water or use a steam iron at safe distance for cotton yarn, and allow to dry fully. This will make all motifs lie flat and create a professional finish.
Step 1 :
Trim any long ends and check seams for loose stitches. If edges shift after washing, re-block and adjust seams where needed.
Info :
For machine-washable ease, use mercerized cotton and pre-wash the yarn to reduce shrinkage. Hand-wash the runner gently as needed and re-block after each wash to restore shape.
Final Note :
Arrange your motifs to echo the photo or create your own organic shape—this design is intentionally modular so you can personalize length, color distribution, and density of floral accents.
Completing this roses table runner is such a rewarding project — watching each disc, flower and leaf come together into a lush, flowing centerpiece is pure joy. The bold red and cream palette creates a gorgeous focal point for special dinners or everyday warmth. Pin your motifs, sew them with care, and take a moment to block and finish — the result will be an heirloom-quality runner you’ll reach for year after year. 🧶🌹✨