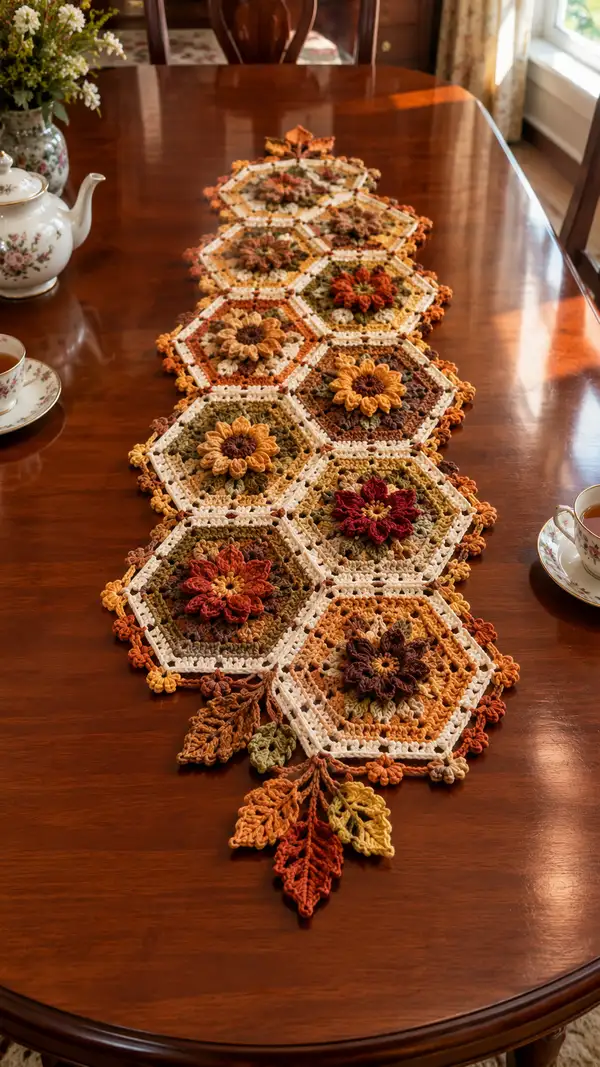
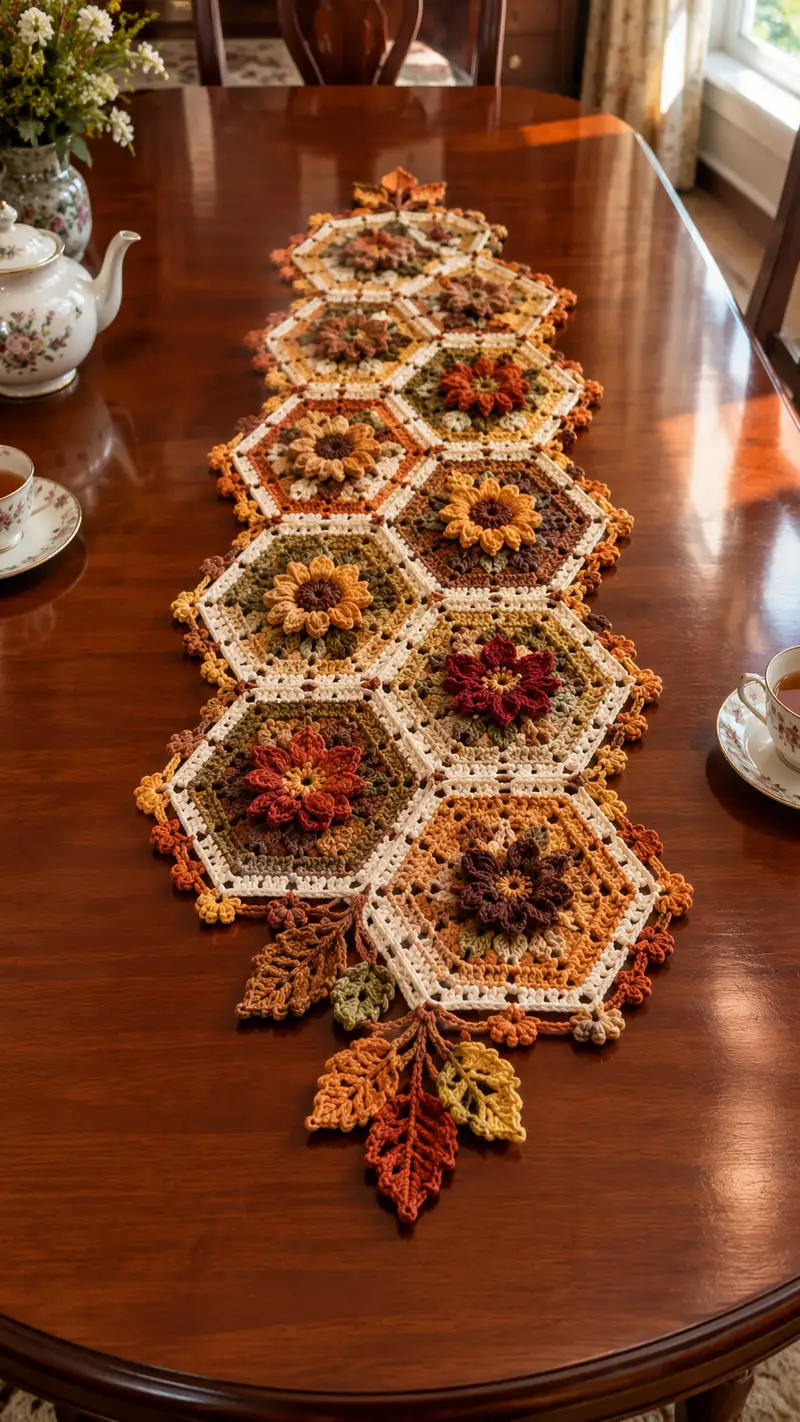
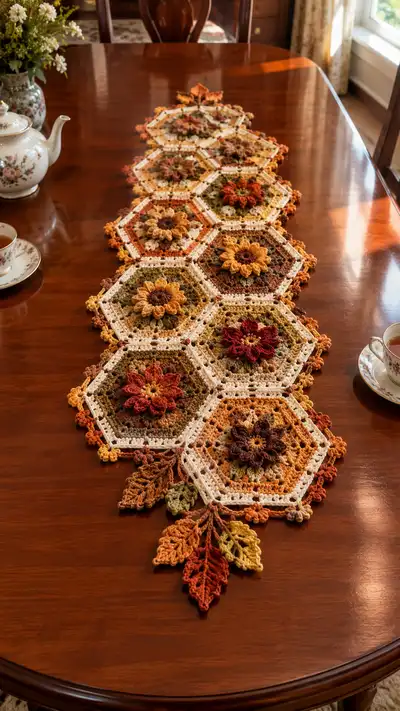
A warm, autumn-inspired table runner made from sunflower hexagon motifs in rust, mustard, olive and cream. The design features layered 3D sunflower centers, textured hexagon frames, and elegant leafy tassel ends. Perfect for a fall table setting or cozy dining room accent.
Progress Tracker
0% Complete
— Overview :
Info :
This pattern builds a long table runner from modular sunflower hexagon motifs (12 motifs pictured), each with a raised sunflower center, framed hexagon rounds and decorative picot edging. Make the number of motifs you need for your table length; the instructions below create a runner layout similar to the photo (approx 10-12 hexagons linked in a zig-zag column). The pattern is written for worsted weight yarn and a 3.5mm hook. Gauge is not critical but affects final size.
Info :
Motif construction is divided into: Sunflower center (3D petal layers), Hexagon rounds (to create six sides), Joining rounds (cream frame and join-as-you-go instructions), Edge picots and decorative leaves. All stitch counts are given per round and are mathematically consistent for six-sided hexagon shaping.
— Sunflower Center (Make one for each motif) :
Round 2 :
inc in each st around (12)
Round 3 :
(1 sc, inc) x 6 (18)
Round 4 :
(2 sc, inc) x 6 (24)
Round 5 :
(3 sc, inc) x 6 (30)
Info :
These first rounds form a firm circular disk for the sunflower center. Work tightly to avoid gaps. Change to the center color (chocolate/burgundy) before Round 6 if you want a contrasting core.
Round 6 :
(4 sc, inc) x 6 (36)
Round 7 :
1 sc in each st around (36)
Info :
Round 7 is the last flat disk round. If you want a slightly domed center, place a few dp in the center by tightening the mr earlier or add an extra overall sc round. Decide petal placement: we'll make 12 petals, spaced every 3rd stitch around the 36-st round.
Round 8 :
Change to petal color A (mustard or rust). *Ch 1, in next st work (yo, insert, pull up loop) 4 times to create a 4-loop puff, yo and pull through all loops, ch 1, sl st in same st, sk 2* repeat around to make 12 puff petals (12 petals, base spacing consumes 36 sts)
Info :
How to make the puff for Round 8: yarn over, insert hook into stitch, pull up a loop (repeat as many times as instructed), yarn over and pull through all loops remaining on hook, ch 1 to secure. Keep each puff consistent in tension and similar height for a uniform petal ring. Fasten off petal color if your next round uses a different shade.
Round 9 :
Attach contrast color and sl st around base of each puff to secure (36 sl st around, 3 per petal base on average to distribute; work evenly) (36)
Round 10 :
Work 1 sc in each st around across the base (36) to stabilize the petal ring
Round 11 :
Change to petal color B (deeper rust). For a second, longer petal layer: *ch 2, in base space between puff petals work a 5-dc cluster over 3 base sts: (yo, insert, pull up) x3, yo pull through 7 loops; ch 2, sl st in next base st* repeat 12 times to create 12 larger outer petals. Space evenly (centered between inner petals)
Info :
When making the 5-dc clusters, ensure you pull loops to a consistent height so outer petals lie above inner petals. These clusters create that layered sunflower look. After this round, secure and weave in ends from petals neatly at the reverse side of the disk.
Round 12 :
Turn motif base to the reverse and work 1 sc around the base stitches to secure larger petals and tidy the back (36)
Info :
Trim and weave in ends for the center. The sunflower disk is complete and measures about 4.5-5 cm across at this stage (depending on yarn and hook). Set aside for attachment to the hexagon frame; we will build the hexagon around this center in the next section.
— Hexagon Frame Rounds (Attach around sunflower; make 1 per motif) :
Info :
We create a hexagon frame by working rounds of dc clusters and corner chain spaces. Each round adds a new layer; increases occur at six corner points. Stitch counts reflect whole-round totals. Be careful to place increases symmetrically: each corner increase adds extra sts so keep track carefully.
Round 13 :
With background color (olive/green), join to any sc on Round 12 back, ch 1, sc around the back base stitches for 36 sc (36)
Round 14 :
Change to midtone shade (brown). *Work (1 dc, ch 1, 1 dc) in the same stitch to form a decorative picot-corner starter, sk 2, 3 dc in next 3 sts; rep from * around placing these corner groups every 6th cluster. This round yields 6 corner clusters and side clusters; approximate count (36 + corner increases) => work evenly so the round finishes approximately 42 sts but keep corners as (dc, ch2, dc) to form hexagon corners.
Info :
Round 14 establishes the first corner shaping. To calculate stitch counts, think in side segments. For a 6-sided hexagon, we aim to create 6 side panels separated by corner groups. If you used 36 sts previously and want 6 side panels with 6 sts each, add corner ch2 spaces to expand each side proportionally.
Round 15 :
Change to cream. For shaping, work across each side: *(3 dc in next 3 sts), (dc, ch 2, dc) in next st to form corner* repeat x6. Count: each side has 9 dc clusters + corner groups; overall approximate stitch total 54 plus ch spaces used for corners (work evenly).
Round 16 :
1 sc in each st and 2 sc in each ch-2 corner space to maintain a neat edge (total depends on earlier counts; ensure corner spaces are reinforced with 2 sc) (approx 60)
Info :
At the conclusion of Round 16 you should see a clear hexagon shape with six defined corners. If your sides look unequal, review where your corner grouping is placed and adjust by moving one or two stitches so each side is visually balanced. The cream round will become the joining frame so keep it tidy.
Round 17 :
Change to accent rust. In BLO of next round, work 1 sc in each st BLO to create a ridge that helps the petal ring sit proudly above the hexagon (approx 60)
Round 18 :
Work a decorative cluster round: *ch1, sk1, (fpdc around next st) x3, ch1, sk1, sl st into corner space* repeat around to create subtle textured fill between petals (maintain corner ch-2 spaces) (approx 60)
Info :
Front post double crochet (fpdc) around stitch creates vertical texture. Use this round to add color variation by alternating rust and mustard within side segments, following the color scheme in your photo. Carry small tails and weave later or change colors at the corner for cleaner joins.
Round 19 :
Change to cream for joining frame: work (3 dc, ch 2, 3 dc) in each corner space; between corners work (3 dc in side, ch1) across each side evenly to form a more open lacy band. This creates the visual white frame seen between hexagons (final count approx 78 including chains)
Info :
Round 19 is crucial — this cream frame is the border used to join motifs together. Keep corner ch-2 spaces clear and even; they will be alignment points when joining motifs together. If you prefer a thicker frame, repeat a dc round in cream to add width.
Round 20 :
1 sc in each st and 2 sc in each ch-2 corner to reinforce the frame and tidy edges (approx 84)
Info :
At this stage, block your hexagon motif lightly to shape the six sides, ensuring the corners open evenly. Lay motifs flat and check that the sunflower center sits centered within the hexagon window. Make adjustments by shifting a stitch or two if necessary before producing multiples.
— Motif Decorative Edge and Picot (Optional accent rounds) :
Round 21 :
Change to a darker accent (chocolate). *In sc round work (sc, ch 3, sl st in 3rd ch to form picot) every 6-8 sts along each side and place a small picot cluster at each corner (3 picots per corner evenly spaced).* Work evenly around to create decorative bobbles. Final stitch count approx 84 (picots are chain spaces)
Info :
Picots and small chain loops add the delicate floral edge you see in the photograph. Keep them small and uniform. If you prefer a plainer edge, skip this round and finish with sc only.
Round 22 :
Fasten off and weave in ends on the back. Block motif to square up hexagon sides if necessary.
Info :
Repeat Sunflower Center and Hexagon Frame for each motif. The pattern pictured uses motifs in alternating colorways; plan color placement before making all motifs so you can alternate rusty sunflower motifs with mustard-centered motifs for balanced visual flow.
— Join-As-You-Go Joining (JAYG) — Linking motifs into the runner :
Info :
This join uses cream frame round (Round 19) as the joining band. Attach new hexagon by aligning its cream frame to the installed motif's cream frame, slip-stitching through corresponding dc stitches and corner ch-2 spaces. Work in a zig-zag column: attach adjacent motifs along two edges to create the staggered honeycomb arrangement seen in the photo.
Round 23 :
With motif A completed and motif B ready, place B wrong side up aligned to A. Join B at a side: join yarn in the cream frame stitch where the two motifs will meet, ch1, *sl st through both corresponding sc/dc on A and B across the side* repeat until side is joined. Fasten off and weave end. Repeat for the second edge to form the staggered chain join.
Info :
When joining, ensure motifs lie flat and the center flower on each motif sits centered. If you need slight curvature in the runner, ease the join tension accordingly. Use pins to hold motifs in place while joining multiple motifs in sequence.
Round 24 :
When joining a corner intersection (where three or more motifs meet), use slip stitches to secure all overlapping cream frame stitches: *sl st in motif A, sl st in motif B, sl st in motif C (if three meet), then sl st back into motif A* to create a tidy triple-joint. Adjust counts carefully to avoid pulling corners out of shape.
Info :
Work slowly through corner joins to avoid making the runner sit twisted. Use a blunt-end tapestry needle and a few hidden mattress stitches afterward to reinforce any weak spots on high-traffic surfaces.
— Runner Layout & Order :
Info :
The photographed runner is arranged as a vertical column of hexagons with the motifs offset to create a diamond-like chain. The number of motifs determines length: 10 hexagons yield an approximately 100-110 cm runner depending on gauge. Plan to make 10-12 motifs for a medium dining table; adjust as desired.
Round 25 :
As you join, periodically check alignment: count stitches along joined edges to confirm they match. If a mismatch occurs, unpick the last few joins and re-space the joins across the side until edges align evenly.
Info :
If you prefer a continuous cream join, you can crochet a continuous join-seam by working a row of sc across the seam on the right side after all motifs are joined; this adds extra stability and a unified border line.
— Decorative Leaves & Tassel Ends (Make sets for each runner end) :
Info :
The leafy tassel clusters at the ends of the runner are worked separately and sewn to the last motif(s). Use gradient greens, rusts, and mustard to echo motif colors. Leaves use elongated stitches and decreasing picot tips to approximate the natural shape in the photo.
Leaf Round 1 :
With olive yarn, ch 10, sc in 2nd ch from hook, hdc, dc, tr, tr, dc, hdc, sc, do not turn; work down the opposite side of chain: sc, hdc, dc, tr, tr, dc, hdc, sc. Fasten off. (Leaf length ~4-5 cm)
Leaf Round 2 :
Attach mustard highlight yarn to base; *work picot tip at leaf tip: ch 3, sl st in 3rd ch to form small tip* then work sc around leaf edges in contrasting color to emphasize veins. Fasten off. (leaf edges reinforced)
Info :
For larger leaves, increase foundation chain to 14 and repeat mirrored stitches on both sides for fuller leaves. Create multiple sizes to layer for a natural fall cluster look.
Leaf Round 3 :
For veining detail, with contrasting brown color, embroider 1 or 2 center vein stitches along the leaf using backstitch or surface slip-stitch on the right side after blocking.
Leaf Cluster Assembly :
Sew leaves in small clusters of 3-5 onto the edge of the final hexagon using cream or invisible thread, arrange pointing outward from runner center. Secure tightly with multiple passes of thread if runner will be frequently moved.
Info :
The photo shows three layered leaves per tassel cluster in varying colors and sizes. Arrange leaves so larger leaves sit behind smaller ones for depth, and always secure at the leaf base into the motif corner.
— Final Edge Embellishments & Reinforcement :
Round 26 :
With cream yarn, work a final tidy round of sc around the entire runner perimeter (working across joins) to unify the edge and make a neat border. Where leaves are attached, work extra sc stitches into the motif corner to anchor clusters (approx counts vary by runner size)
Round 27 :
Optional decorative loop round: *ch 4, sl st in next st* repeat along the edge to create decorative chain loops. Work 2-3 loops at each corner for symmetry. Fasten off and weave ends cleanly.
Info :
If you prefer a lacy edge like the photograph, alternate single crochet and picot clusters: *sc in next 2 sts, ch 3, sl st in third ch to picot, sc in next 2 sts* which forms tiny floral clusters along the edge. Make placement uniform for a professional finish.
Round 28 :
Lightly steam-block or wet-block the entire runner into final shape: pin straight edges and fan leaves, allow to dry fully. This ensures motifs lie flat and the runner looks balanced on the table.
Info :
For heavier use, consider reinforcing joins with a few hidden mattress stitches on the back using matching thread. This will help avoid seam splits over time and is nearly invisible from the top.
— Stitch Math & Placement Notes (Key Technical Info) :
Info :
Hexagon increases occur at 6 consistent corner points. If you start Round 13 with 36 stitches and add corner cluster increases of 2 extra stitches per corner on Round 15, your stitch count grows predictably: 36 + (6 corners x +2) = 48. Each subsequent round can add additional stitches if you add corner clusters or dc groups—track the added stitches per corner to keep sides even.
Info :
When placing petals, the inner puff round used 12 petals across 36 base sts — spacing every 3rd st. If you change the number of petals, adjust base round stitch count accordingly to keep spacing uniform (e.g., 9 petals across 36 stitches = every 4th stitch spacing).
Info :
Color changes: carry color across the back where convenient for small two-round stripes. For large color blocks, break yarn and weave in ends. Secure color changes at corner points to hide tails within corner ch-2 spaces for neater joins.
Round 29 :
Carefully weave in all ends using a yarn needle; hide ends along post stitches and back of petals to maintain an immaculate front appearance. Trim ends close to fabric after weaving through several stitches.
Info :
Check the runner on the table and nudge motifs to create gentle curves if desired. This runner is decorative and should drape naturally. For a firm runner, block flat and lightly starch if you want a more structured look.
— Additional Small Decorative Motifs (Optional) :
Round 30 :
Create small 3-4 petal flowers to add sporadically between hexagons if desired: mr, ch1, 6 sc in mr (6), ch2; in next round make 6 small petal puffs around the circle, secure and sl st into a small chain loop, Fasten off. Sew into gaps for extra texture.
Info :
These small fillers are optional but add variety to the runner surface and break up negative space in the cream frames. Use spare yarn colors for these tiny accents.
Round 31 :
Final quality check: inspect each join, verify leaf clusters are secure, and that picots are uniform. Re-block if needed and add an extra reinforcing stitch to any loose seam.
Info :
Enjoy your finished runner and photograph it in natural light to capture the rich autumn palette. The pattern and modular construction allow you to increase or decrease length, and to substitute colors for any seasonal theme.
This Rust and Mustard Sunflower Hexagon Runner brings autumn warmth to any table with layered sunflowers, delicate picot edges, and leafy tassel accents. Each hexagon is a small work of art that joins together into a long, eye-catching centerpiece. The modular construction makes it easy to customize length and colors. I hope this pattern inspires a cozy afternoon of crochet and a beautiful seasonal finish for your home! 🍂🧶