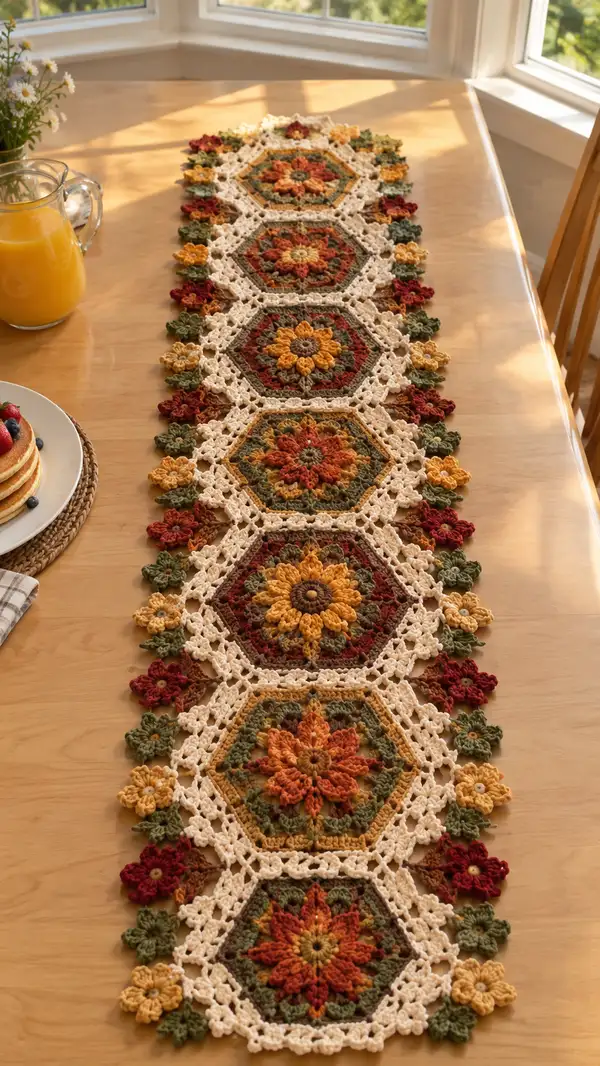
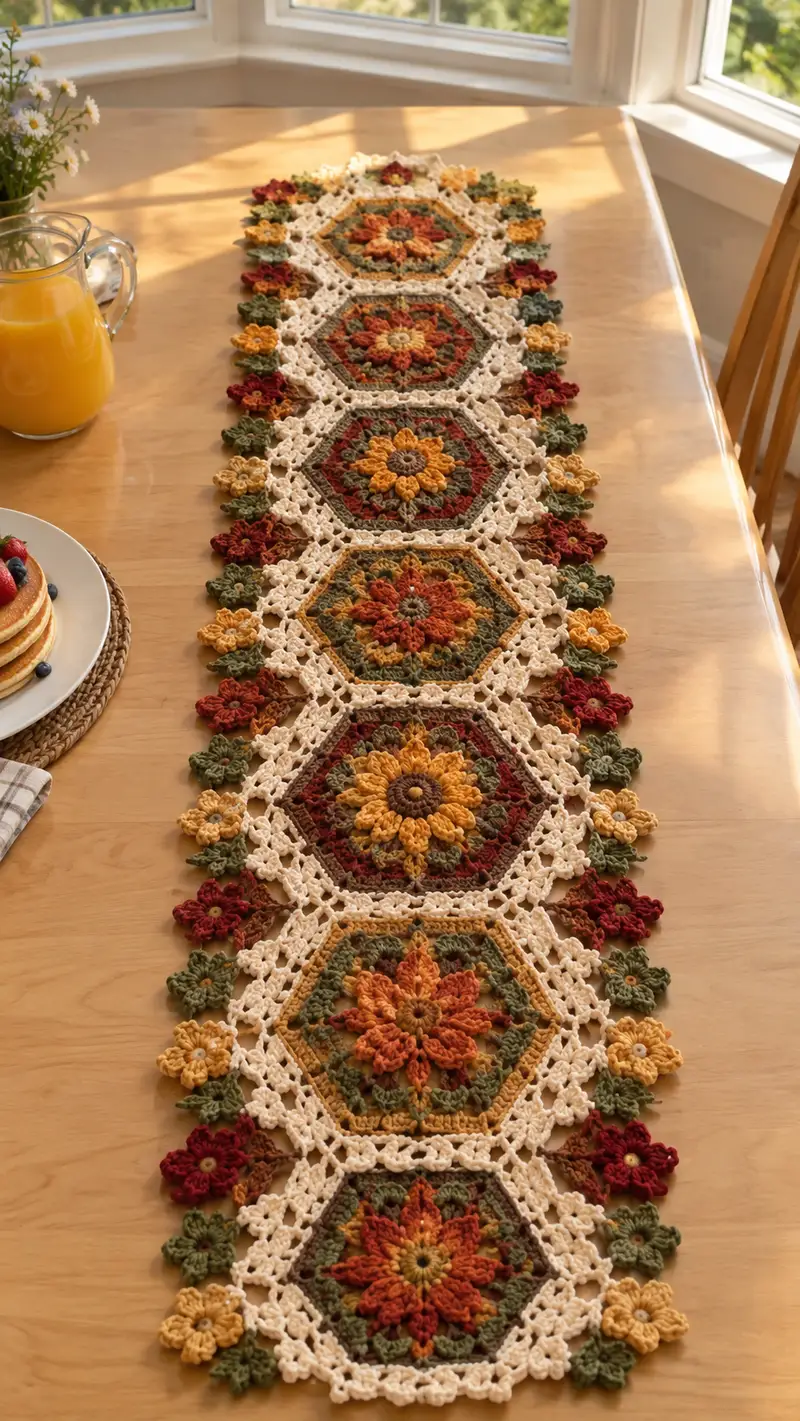
A warm, autumn-inspired hexagon flower table runner worked in rich rust, mustard, olive and cream. This long, decorative runner is composed of floral hexagon motifs joined with a lacy cream border and finished with tiny 3D flowers along the edges. The finished piece creates a cozy, layered texture perfect for dining tables or sideboards and showcases layered petals, puff clusters, and openwork joins.
Progress Tracker
0% Complete
— Hexagon Flower Motif (Make 6 motifs) :
Round 1 :
With color A (dark brown for center) make a mr, ch1, 6 sc into ring; pull tight (6)
Round 2 :
Ch2 (counts as first hdc), hdc in same st, 2 hdc in each st around (12)
Round 3 :
Change to color B (mustard). Ch3, (puff stitch in next st, ch1) x6 working evenly around to create petal bases. Join with sl st to top of ch3. Puff: yarn over, insert hook, pull loop through, yarn over, insert hook in same st, pull up loop; repeat 3 times so 7 loops on hook, yarn over and draw through all loops, ch1 to close. (6 puffs/6 ch1 spaces)
Info :
Make puff stitches gently; keep tension slightly loose for full petal texture. Use a 3.25mm hook if petals feel cramped.
Round 4 :
Change to color C (rust). Sl st into next ch1 space, ch2, (3 dc, ch2, 3 dc) in same ch1 space to form a petal cluster; *skip next puff, (3 dc, ch2, 3 dc) in next ch1 space* rep around. Join with sl st to first ch2 (6 petal clusters; petal points now radial)
Round 5 :
Ch1, sc in same st, *ch3, skip to center top of next cluster and sc in same space between clusters* rep around to create small rings between petals. You should have 6 sc and 6 ch3 loops evenly spaced (36 counting ch spaces as loops)
Info :
If your ch3 loops vary, go back and even them out; these will be reference points for the following rounds.
Round 6 :
Change to color D (olive). Work into each ch3 loop: (sc, hdc, 3 dc, hdc, sc) in each ch3 space to create a scalloped round. Join with sl st. This increases stitch count to a round that measures approximately (6 x (1+1+3+1+1)=30 plus joining sts) - treat as 36 structural points for reference.
Round 7 :
Ch3, dc in next 11 sts evenly (work around the scallop curve), ch3, sl st to create small arches that will help shape into a near-circular disc; join to top of ch3.
Round 8 :
Change to color B (mustard). Ch2 (counts as hdc), *hdc in next 2 sts, 2 hdc in next st (inc)* rep 6 times around increasing evenly to expand center (approx. 42 sts)
Info :
From this round forward you are increasing the fabric to reach a hexagon circumference. Keep counts consistent and mark every 7th or 6th repeat to ensure even growth.
Round 9 :
1 hdc in each st around (42)
Round 10 :
Change to color C (rust). Ch1, sc in same st, *ch4, skip 6 sts, sc in next 7th stitch* rep around forming 6 arch points; join with sl st (6 arches)
Round 11 :
Into each ch4 arch: (sc, ch2, 5 dc, ch2, sc) to create raised petal-shaped points along the future corner lines. Join. You will have 6 petals forming beginning of hexagon corner feature.
Info :
These arch clusters change the round count geometry; use stitch markers to denote the center of each corner cluster to keep the hexagon shape consistent.
Round 12 :
Change to color D (olive). Ch1, sc in each st and into the top of each dc of clusters (approx. 60 sc). This creates a solid round framing the petals.
Round 13 :
Ch3, (dc, ch1, dc) in next st to emphasize corner growth; *skip to middle of next petal cluster and work (dc, ch1, dc)* rep around. Join (12 dc clusters separated by ch1)
Round 14 :
Change to color E (cream) for the framing that will become the joining color later. Ch1, sc around working 1 sc in each dc and 2 sc in ch1 spaces (approx. 72 sc). Join.
Info :
Switching to cream here helps later for seamless joining; secure color change behind work and weave in a short tail during the next rounds.
Round 15 :
Ch4 (counts as tr+ch1), *skip 2 sc, tr in next sc, ch1* rep around to create an open lacy net. Join with sl st at top of starting tr (approx. 24 tr)
Round 16 :
Ch3, dc in same st, *ch2, skip ch1 space, (2 dc, ch2, 2 dc) in next tr space* rep around. This begins formalizing hexagon corners: you will have 6 corner shells separated by small lacy chains.
Round 17 :
Ch1, sc in each dc and in ch2 spaces across to tidy the lace (count should be ~96 sc). Join.
Info :
At this stage the motif will look circular; the next rounds add corner shaping to form a true hexagon. Pin motif flat before continuing to ensure even edges.
Round 18 :
Change to color A (dark brown) for a small contrast round. Ch2, hdc in same st, *hdc in next 7 sts, 2 hdc in next st (inc)* rep 6 times. (Approx. 108 sts)
Round 19 :
Ch1, sc in each st around (108). Join. This creates a solid base that will take shaping to hexagon corners by working groups into the next round.
Round 20 :
Change to color C (rust). Working lace conversion: *in next 18 sts work (sc, ch3, sc) as a corner arch; in the following 18 sts work simple sc across* rep 6 times. This divides the round into six equal sections that will make the hexagon sides and corners.
Info :
Counting into groups helps make exact corners. If your counts differ slightly swap 1-2 sts between the corner and side groups to keep hexagon geometry balanced.
Round 21 :
Change to color E (cream). Into each corner arch (sc, ch3, sc) work (sc, ch4, sc) to lengthen corner arches and define the hexagon corner. On side sections work 1 sc in each sc across. Join.
Round 22 :
Ch1, sc around working 2 sc in each corner ch4 space to form secure corner points; sc across sides. After joining you should have a tidy hexagonal outline (count will vary by pattern geometry but maintain evenness across 6 sections).
Round 23 :
For decorative ridge: change to color D (olive). Work 1 sc in BLO across the entire round to create a defined ridge that will sit under the lacy joining later. Join.
Info :
Working BLO here gives a small built-in ridge which shows up nicely against the cream lace when motifs are joined. Keep tension consistent to avoid twisting.
Round 24 :
Change to color E (cream). Ch3, *skip 2 sc, (3 dc, ch2, 3 dc) in next sc* rep 6 times to create six ornate corner shells; between shells work ch5 and sl st into a central side sc to create openwork side arches. Join.
Round 25 :
Ch1, sc around, placing 3 sc in each corner shell's center dc to stabilize. This makes the motif ready to join to neighbors by forming correspondingly shaped join points.
Round 26 :
Edging round: ch5, sl st into the center of each side arch to create small lacy loops; sc into corner top starch to anchor. Finish by fastening off and weaving ends. Block motif to match hexagon shape precisely.
Info :
Block each motif to the same dimensions before joining. Pin corners out to form perfect hexagons and steam or wet-block according to yarn instructions. Let dry fully before joining.
— Small Edge Flower (Make 24–28 for both sides) :
Round 1 :
With mustard (color B) make a mr, ch1, 6 sc into ring (6)
Round 2 :
Ch2, 2 hdc in each st around (12)
Round 3 :
Change to olive (color D). Sl st into next st, ch1, (sc, ch3, sc) into each hdc around to form small petal bases (12 petals). Join.
Round 4 :
Change to rust (color C). Into each ch3 space: work (sl st, ch3, 5 dc, ch3, sl st) forming a full petal. You will have 12 small petals; fasten off and weave in ends.
Info :
Make these flowers slightly smaller by tightening the puff if you want a more subtle edge; for fuller flowers keep loops looser.
Round 5 :
Optional center bead: join a small seed bead with a few stitches into the center with matching thread for contrast. Fasten securely.
— Small Leaf (Make As Needed – 24–28 pairs) :
Round 1 :
With olive (color D) ch6, sc in 2nd ch from hook, hdc next, 3 dc in next, hdc next, sc next; sl st to last ch to create a small leaf shape. Fasten off leaving long tail for sewing.
Info :
Sew a small leaf behind each small flower on the edge to create the olive sprig look shown in the photo. Use two leaves per flower for fullness if desired.
— Joining & Lace Border (Worked after making motifs) :
Info :
Arrange 6 hexagon motifs in a straight row with corners touching as shown in photo. You will join motifs using the cream color (color E) 'join-as-you-go' method or by slip-stitch sewing. This border creates the open lacy lattice linking motifs and forms a uniform runner edge.
Round 1 (on first motif only) :
With cream join at any corner loop: ch1, sc evenly around the outside edge to tidy counts as needed and prepare join points. This round secures the motif before joining to neighbors (count varies; aim for even distribution).
Round 2 :
On first motif: ch3, *dc in next 4 sc, ch3, skip 2 sc* rep around to create lacy arches (approx. 24 arches). On subsequent motifs you will work to match and join into corresponding arches on an adjacent motif.
Round 3 (join step-by-step) :
Place two motifs with right sides facing up and align edges. With cream in hand, work ch3 arch on motif A and when you reach a joining point, insert hook through corresponding ch space on motif B and sl st to join, then complete arch on motif A. Continue around to join two motifs on one side (you will join 2-3 points per side depending on motif spacing). Fasten off and weave ends.
Info :
By joining through the lace arches you get a nearly flat seam with airy negative space between motifs. Use blocking pins to hold motifs in place during joins to avoid stretching.
Round 4 :
Once all motifs are joined in a row, re-join cream at a corner point and work a unifying border: ch4, *skip corner, (sc, ch2, sc) into corner spaces, ch4 across side loops* rep fully around runner to create a continuous lace framework connecting both sides of hexagons.
Round 5 :
Ch1, sc into each sc and into ch2 spaces, placing 3 sc in corner ch2 spaces for stability. This vegan-tidy round unifies the runner's edge and prepares for final decorative flowers and edging loops.
Info :
Check runner width at this point and adjust by adding/removing ch loops or sc counts so the runner lies flat. Small tension adjustments make a big difference across the row length.
Round 6 :
Decorative edge: ch5, sl st into every 4th sc along the side edges to make a scallop loop for attaching small flowers and leaves. Repeat along the opposite edge. Join and fasten off.
Info :
If using join-as-you-go earlier, you will have fewer seams to sew. If sewing motifs together, use mattress stitch with cream yarn working through the same sc and ch spaces described above to produce a uniform join.
— Attaching Small Flowers & Leaves to Runner :
Info :
Position small flowers evenly between motifs along both sides. The photo shows alternation of mustard, rust and burgundy flowers with small olive leaves behind them. Place flowers in pairs at each join or in single positions between arches depending on your taste.
Step :
Using long yarn tails or a tapestry needle, sew each small flower to the runner through the back ring or base stitches. Anchor by stitching through the border lace and a central stitch in the motif so the flower sits flush. Add one or two small leaves underneath each flower and sew securely. Repeat until all edge scallops have a flower and leaf cluster.
Info :
Alternate flower colors to mirror the image: mustard, rust, burgundy, mustard, olive clusters. Keep spacing consistent; measure spacing with a ruler or count arches between flowers to get symmetrical placement.
— Final Border & Finishing Rounds :
Round 1 :
With cream re-join at end of runner corner: ch1, sc in each st around the entire outside edge including around attached flowers to tidy and reinforce joins. Add 2 sc in open spaces to prevent flaring.
Round 2 :
Ch3, (2 dc, ch2, 2 dc) in corner arches to make a final scalloped shell every corner junction; between shells work ch4 and sl st to mid-side. This decorative frame brings a finished elegant edge to the runner.
Round 3 :
Ch1, sc around, placing 3 sc in each shell top to help the shell hold shape. Fasten off and weave in all ends on the wrong side. Trim excess tails close to the work after weaving in securely.
Info :
Final blocking is essential. Lay runner flat, pin to the same dimensions for each hexagon width and length, then steam or wet-block according to yarn care. Allow to dry fully to set lacework.
— Alternate Extra Decorative Rounds (Optional) :
Round 1 :
If you want a denser border, work one more cream round of 1 sc in each st around followed by a picot round: *sc, ch3, sl st in 3rd ch* across to add delicate picot points along the edge.
Round 2 :
Or add small bobble accents: in each scallop shell make 5 bobbles worked as (yarn over, insert, pull up loop) x4, yarn over and draw through all loops, secure with ch1. Space bobbles evenly across the runner's long sides for extra texture.
Info :
These additional decorative rounds add weight to the border; ensure you keep tension loose enough to prevent curling and check alignment with blocking pins.
— Pattern Notes & Measurements :
Info :
Gauge: One completed hexagon motif (measured corner-to-corner) should be approximately 16-18 cm (6.25-7 inches) depending on yarn and hook. A runner with 6 motifs end-to-end will be roughly 95-110 cm (37-43 inches) long excluding fringe flowers. Adjust motif count or yarn weight to achieve different runner lengths.
Info :
Yarn tips: Use smooth worsted yarn for clear stitch definition. If you prefer a chunkier, shorter runner use aran or bulky weight and increase hook size; reduce hook size if you want a more delicate, lacy feel.
Info :
Color swapping: Make each motif identical or vary petals’ colors per motif as shown in the photo. Arrange motifs before joining to balance colors across the length of the runner.
Completing this hexagon flower table runner is a truly satisfying project—each motif is like a small floral tile that comes together into a beautiful whole. The warm palette of rust, mustard and olive paired with cream lace makes it a perfect autumn accent for any table. The modular construction lets you stop and resume without losing track, and the textured petals and tiny edge flowers make each stitch feel special. Enjoy the process and the gorgeous runner that will brighten your home! 🧶🍂