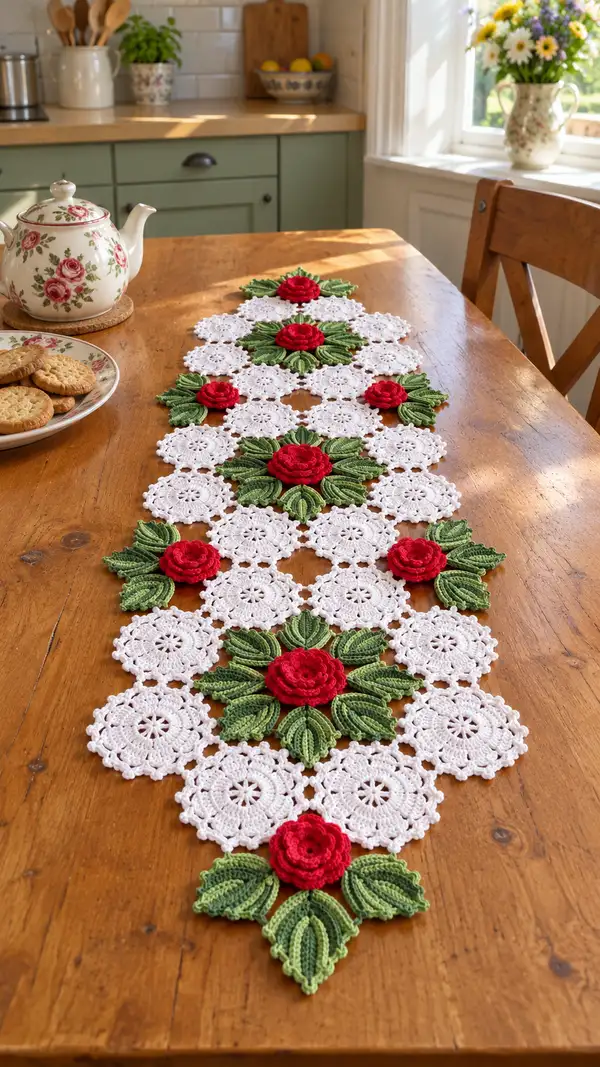
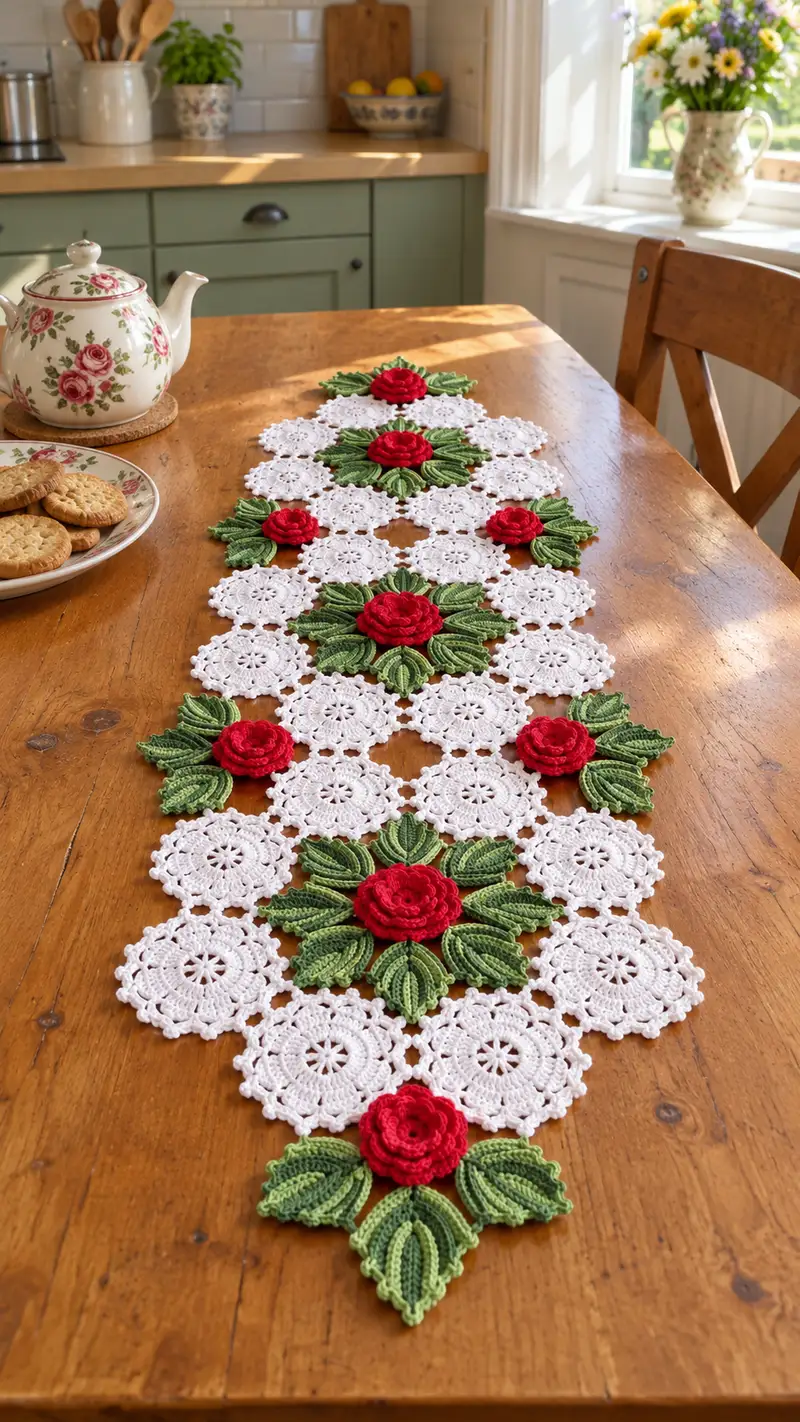
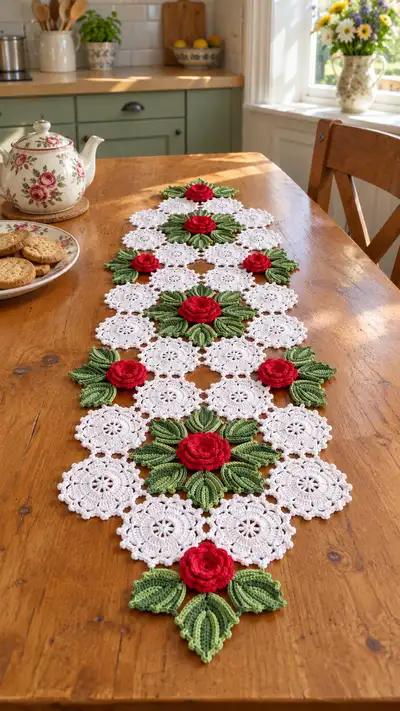
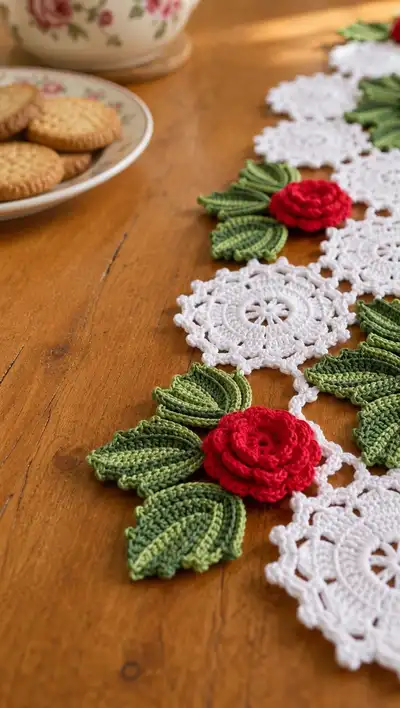
Create a timeless floral table runner with delicate white lace medallions, layered green leaves and dimensional red roses. This elegant runner combines classic crochet motifs joined into a narrow, elongated diamond layout for a romantic centerpiece. The pattern includes complete instructions for the white rosette motif, multi-layered 3D roses, shaded leaves, joining technique and a neat picot edging. Perfect for afternoon crochet sessions and special-occasion table styling.
Progress Tracker
0% Complete
— Rose (Make 6 or desired number) :
Round 1 :
With red yarn, make a magic ring. Ch1, work 6 sc into the ring. Pull tight. (6)
Round 2 :
2 sc in each st around (inc in every st) to form a small disc. (12)
Round 3 :
(1 sc, inc) x6 — work 1 sc in next st, then 2 sc in following st; repeat evenly around. (18)
Info :
Keep tension even. These first rounds form a solid base for petal attachment; do not worry about perfect circularity — slight oval form is fine for a natural-looking center.
Round 4 :
(2 sc, inc) x6 — (2 sc, 2 sc in next st) repeat. (24)
Round 5 :
(3 sc, inc) x6 (30)
Round 6 :
Change to 3.0mm hook if desired. *Ch3 (counts as dc), 2 dc in next st, ch1, sl st in next st; repeat from * around to create a ring of small petal loops. Adjust so you make 10 petal loops evenly across 30 sts (work a few sets of 2 dc into same st to manage spacing). (10 petal loops)
Info :
This is the first petal round — work loose enough stitches so later rounds of petals can be layered and sit above each other. If you prefer larger petals, make ch4 and work 3 trs instead.
Round 7 :
Working into each petal loop: sl st into loop base, (ch3, 4 dc, ch3, sl st) into same loop to form a fuller petal. Repeat into each loop around to form an outer ring of pronounced petals. (10 petals)
Round 8 :
Between each existing petal, create a small filler petal to offset: *sl st between petal bases, ch3, 3 dc, ch3, sl st; rep * between all petals (10 filler petals)
Round 9 :
Ch1, sc in same st, *ch5, sl st around petal tip to create slight ruffle, sc into base between petals; rep * around to create background ruffle and foundation for next petal layer. (20 sc bases including filler bases)
Info :
If petals resist lying outward, use a lightly dampening spray and shape petals around your finger or a small cylinder before they dry. This helps the rose open rather than lie flat.
Round 10 :
Work a spiral row of petals to form the layered rose: *ch2, (dc, tr, dc) into each ch5 ruffle from previous round to create lobed petals; move to next ruffle without joining to maintain a spiral look. Continue until all ruffles are covered. Fasten off leaving a 25cm tail for sewing. (Approx 20 petals)
Round 11 :
Optional: For an even fuller rose, with RS facing, rejoin yarn at base of every other petal and work (ch2, 5 dc, ch2, sl st) to puff the petal tip; alternate petals so you create a layered dome effect. Fasten off and weave tail through the base to pull slightly gathered. (10 puffy petals)
Info :
To make the rose 3D, roll the worked spiral gently from the starting tail and secure the base with running stitches using the long tail. Position petals to form a natural spiral; secure by stitching through the bottom-most layer with a yarn needle and the tail.
Round 12 :
Sew the rose base to a small backing disc if you want a neat underside: make a small 6 sc MR disc in red, fasten off leaving a long tail and stitch the disc to the rose bottom while shaping. This helps when sewing to medallions. (6)
Info :
Make as many roses as your runner design requires (6 shown in photo). Block very lightly if necessary to set petal curves. Use a scrap cardboard ring or a bottle cap to help shape the rose while stitching base closed.
— Leaf (Large Leaf - Make 6 clusters of 5 leaves each) :
Round 1 :
With lighter green (sage) yarn, ch12, sc in 2nd ch from hook and across to end (10 sc). Turn — this is a flat leaf foundation row worked in rows (count each row as a round for clarity). (10)
Round 2 :
Ch1, sc across 10 sts, ch1, turn. (10)
Round 3 :
Ch1, sc2tog over first 2 sts, sc next 6 sts even, sc2tog over last 2 sts (8)
Round 4 :
Ch1, sc across 8 sts. (8)
Info :
These first rows shape the taper of the leaf. Work loosely so the leaf will cup slightly when gathered later. Use slip stitches at ends to avoid sharp corners.
Round 5 :
Change to darker green for central rib effect. Ch1, *sc in next st, hdc in next, dc in next (create subtle ridge) across; leave last st unworked then reverse on WS to shape tip; turn. (8)
Round 6 :
Ch1, sc across 8 sts, make 3 sc in last st to form pointed tip, then continue working down the opposite side of foundation chain: sc along chain base returning to start to form an oval leaf shape (approx 18 sts across both sides including tip increases). (18)
Round 7 :
Ch1, sc around leaf edge in BLO to create a defined border; work (sc, picot, sc) at tip to form scalloped tip. (18)
Round 8 :
Switch back to lighter green and work 1 sc in each st BLO to create a two-tone ridge; then along the leaf center, use surface slip stitch technique with darker green to embroider a central vein: sl st along center chain to create a raised line. Fasten off leaving long tail for assembly. (18)
Info :
Surface slip stitch or tapestry stitch with darker yarn creates a realistic vein. Keep surface stitches snug but not tight to avoid warping the leaf.
Round 9 :
Make 5 leaves per rose cluster. Arrange three leaves at lower half and two at upper half in a radiating star shape. Use the long tails from each leaf to baste them together into a cluster with slightly overlapping bases. Reinforce with a few whip stitches for stability.
Info :
To make leaves curl upward slightly for 3D effect, hold each leaf between finger and thumb then press with a warm iron over a pressing cloth very briefly or apply a very light starch while shaping. Do not over-stiffen; you want a gentle cup.
— White Rosette Motif (Make many; 24+ for a runner of shown length) :
Round 1 :
With white yarn, make a magic ring. Ch3 (counts as dc), work 11 dc into ring. Pull ring tight. (12)
Round 2 :
Ch1, *sc in next dc, ch3; rep from * around to create 12 ch3 loops between scs. Join with sl st to first sc. (12 ch3 loops)
Round 3 :
Work into each ch3 loop: (sc, hdc, 3 dc, hdc, sc) to build small lacy petal. Repeat in each loop for 12 petals. Join. (12 petals)
Info :
Keep petals evenly spaced by counting base stitches carefully. Blocking will help petals lie flat before next rounds.
Round 4 :
Ch1, sc in same st, *ch4, skip over petal top and sc into next petal base; rep around to create larger outer loops. Join. (12 ch4 loops)
Round 5 :
Into each ch4 loop work (sc, dc, 3 dc, dc, sc) to create a larger scalloped round generating a lace doily effect. (12 scallops)
Round 6 :
Ch1, sc into each st around to stabilize (approx 48 sc). (48)
Round 7 :
(5 sc, picot, sc) repeated around in groups created by previous scallops: work 5 sc across scallop body then ch3 sl st into last sc to form a small picot, then continue. This creates a decorative edge. (12 picots)
Info :
For a neater join later, press each motif lightly with steam and pin to blocking board to the same diameter. Aim for consistent size across all motifs.
Round 8 :
Optional: Add a shallow raised ring between rounds 3 and 5 by working one round of BLO sc (1 sc in each st BLO) to form a ridge for leaf attachment. Fasten off leaving long tail for joining. (48)
Round 9 :
Make as many white rosettes required to reach runner length — in the example layout you will need roughly 24 white rosettes for a table runner approx 90-100cm long. You can lengthen or shorten by adding/removing rosettes in the central strip.
Info :
Consistency is key: count stitches and block each motif to ensure join seams align neatly when assembling the runner.
— Small Connector Ring (Make many for spacing) :
Round 1 :
With white yarn, ch6, sl st to form a small ring. Ch1, work 8 sc into ring. Pull tight. (8)
Round 2 :
Ch1, sc in each st around to create a firm connector disc. Fasten off leaving long tail. These small discs hide between medallions and strengthen joins. (8)
Info :
Use these connector rings to link medallions at diamond corners and to maintain even spacing. Place them at planned join points and baste before final sewing.
— Joining & Runner Assembly :
Round 1 :
Layout plan: Arrange white rosettes into a central zig-zag strip three rosettes wide at the center forming a tapered diamond outline from end to end, placing leaf clusters and roses at regular intervals as focal points. Refer to photo for the apex and taper positions. Use blocking pins to hold in place.
Info :
Before joining, pin motifs on a table-sized blocking board to final layout. Use wet-blocking lightly to even shapes. Identify which picot points or outer loops will align and mark matching points with small thread tails so sewing is exact.
Round 3 :
Join motifs using invisible join method: with yarn tail from motif A and a yarn needle, whip-stitch through back loops only of adjacent motif B where outer scs align, making tiny stitches that draw motifs together without bulky knots. Work inner joins first (connect central rosettes), then outer edges. For open loop joins, use a matching slip-stitch join with RS facing and sl st through chain loops of both motifs.
Round 4 :
Attach connector rings at four-corner intersections: stitch through both motif picots and the connector ring's stitches to create a neat corner. Reinforce with an extra pass of thread for stability. Trim tails and weave them on WS over several stitches. Repeat across runner.
Info :
When sewing roses to the runner, position them centrally on clusters of five leaves and stitch through the rose backing disc into the motif center (white rosette) using the long tail from the rose base. Make several stitches through the rose bottom and rosette rounds to anchor securely, then knot on WS and weave in ends.
Round 6 :
For leaves, overlap the leaf bases and tack them to the white rosette motif at the points where the lacy motif has denser stitches (the foundation dc rounds) so stitches catch securely. Use small hidden stitches so the leaf edges remain free to curl naturally. Work clusters around each focal rosette symmetrically.
Round 8 :
Once all motifs, leaves and roses are attached and the central strip is stable, reinforce long joins along the runner center by working a small whip-stitch seam from WS through the connector discs and adjacent motif edges. This prevents the runner from flexing too much when moved.
Round 9 :
Check symmetry: ensure the tapered ends are mirror images and that every rose sits centered within its leaf cluster. If adjustments are needed, unpick a few joining stitches and reposition motifs before final fastening.
Info :
Take frequent breaks and check the runner visually from a standing position to confirm overall layout looks balanced. Small asymmetries are natural in handmade pieces but aim for consistent spacing between white motifs (approx 0.5-1 cm gap or connected by small connector rings as shown).
— Decorative Edge & Picot Finish :
Round 1 :
After all pieces are joined, with white yarn and 3.5mm hook, work 1 sc evenly around the outer edge of the entire runner to create a stable foundation for the decorative border. Place 1 sc for every visible outer sc/picot of base motifs. Fasten off. (Approx count will vary with runner size; target even number evenly spaced)
Round 2 :
Round 2: Working into each sc foundation stitch, *ch3, sl st into same st to form a mini picot loop, skip 1 sc, sc in next st; rep * across entire border to create delicate picoted edging. For corners where leaves protrude, insert (sc, picot, sc) across the leaf scallop to maintain continuity. Fasten off and weave ends. (Approx 100-150 picots depending on runner length)
Info :
Be mindful of maintaining even tension during edging. If the edge ruffles in places, adjust by increasing/decreasing sc foundation placement slightly when needed. Stretch and pin edges during blocking to settle the picots flat.
Round 3 :
Optional: For a slightly ornate finish, add small single crochet scallops between picots: in each skipped stitch, work (sc, hdc, sc) to create a mini scallop. This adds texture and frames the runner elegantly. Fasten off and weave all ends on WS.
Info :
When adding extra scallops, balance the look by working the same treatment on both long sides and both tapered ends. Mirror every special corner treatment to keep overall design consistent.
— Final Blocking & Pressing :
Round 1 :
Lay the finished runner flat on blocking mats. Using rustproof pins, gently pin the edges and shape leaves and petals to desired positions. Use a light mist of water or steam from a distance to relax fibers and set the shape. Do not press directly on petals — lift with pins and steam from above.
Round 2 :
Allow runner to dry completely (several hours or overnight). If additional stiffness is desired for leaves, apply a light spray of diluted fabric starch and reshape while damp. Dry again before removing pins.
Info :
Blocking is the single most important finishing step to make lace motifs sit flat and neat. Treat each petal and leaf with care so your runner keeps a soft, elegant drape but with crisp motif edges.
— Pattern Notes & Variations :
Round 1 :
Color variations: Use soft pinks and mint greens for a spring look, or ivory with deep burgundy roses for a vintage holiday runner. To lengthen runner, add pairs of white medallions symmetrically before adding a new rose cluster.
Round 2 :
Alternative joins: Instead of sewing, motifs may be joined as you go with slip-stitch crochet (join-as-you-go) by crocheting round 8 of white rosette and slip-stitching into adjacent finished motif loops. This saves finishing sewing time but requires careful alignment.
Round 3 :
Lightweight yarns: If using a fingering or lace weight yarn, downsize the hook accordingly (e.g., 2.5mm) and anticipate a significantly longer runner for same number of motifs. Conversely, use aran or dk on larger hooks for a more substantial runner.
Info :
All stitch counts in motif rounds are written to be mathematically consistent; however, human tension varies. If counts do not match exactly, adjust by spreading increases slightly across rounds to achieve the final stitch counts noted in each round.
This floral table runner is a beautiful, tactile centerpiece that brings vintage charm to any table. Each delicate white rosette, shaded leaf and sculpted red rose comes together to form a timeless decorative piece that you can treasure or gift with pride. The modular construction means you can tailor the runner length and color palette to suit any season or celebration. Enjoy the process of crocheting small, repeatable motifs that assemble into a showstopping finish — a true labor of love. 🧶🌹