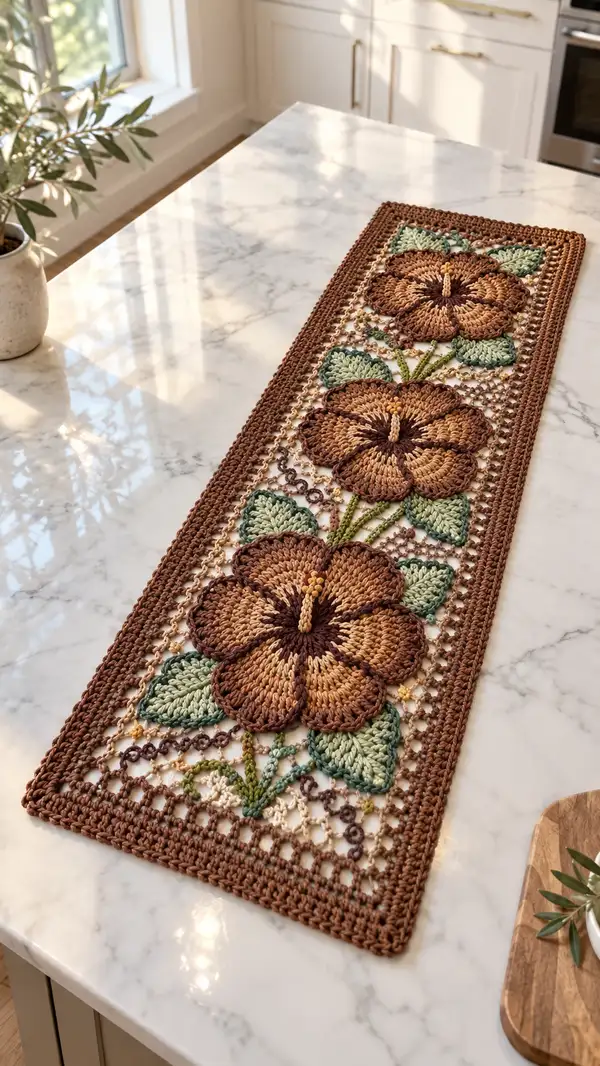
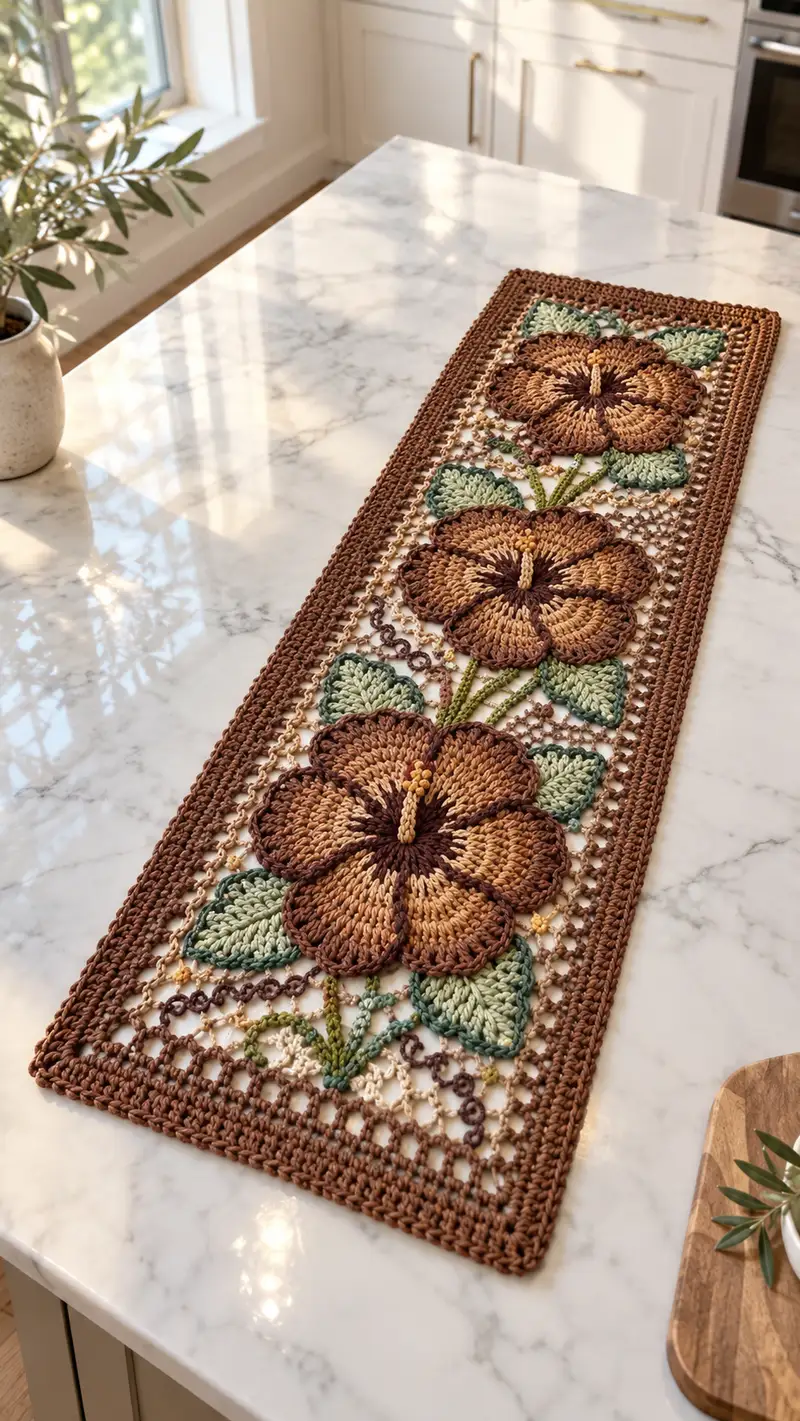
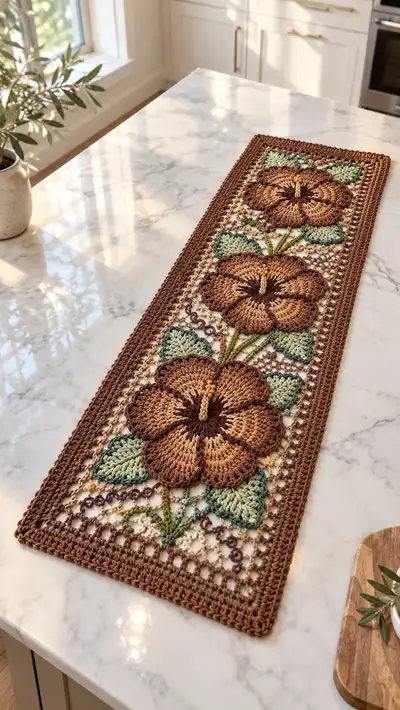
This elegant rectangular table runner features three large raised floral motifs with layered petals, leafy sprigs and an open mesh background framed by a dense crochet border. Warm autumnal browns, soft beige and muted green create a cozy vintage look ideal for a kitchen island or dining table. The pattern uses textured puff and cluster stitches for petals, surface embroidery stems, and a simple filet mesh to let your tabletop show through. Finished piece is decorative and sturdy with a hand-crafted artisan feel.
Progress Tracker
0% Complete
— Overview :
Info :
This pattern is set up as: make 3 large flower motifs, make 6 leaves, crochet a rectangular mesh panel with markers for motif placement, surface-stitch stems, join motifs to mesh and finish with a multi-round border. The pattern provides exact rounds for one flower and one leaf; make multiples as instructed. Gauge and tension will affect final size; the pictured runner measures approximately 10 x 36 inches when made in worsted weight yarn with 4.0mm hook.
Info :
Stitch definitions used: Puff = yarn over, insert hook, yarn over pull through (repeat 3 times) then yarn over and draw through all loops on hook. Count each puff as one stitch. dc2tog and tr2tog are worked as decreases by partially completing stitches and finishing together. Work in continuous rounds where indicated; use stitch marker to mark first stitch.
— Flower Motif (Make 3 identical) :
Round 1 :
6 sc in magic ring (6)
Round 3 :
(1 sc, inc) x 6 (18)
Round 4 :
(2 sc, inc) x 6 (24)
Round 5 :
(3 sc, inc) x 6 (30)
Round 6 :
(4 sc, inc) x 6 (36)
Round 7 :
(5 sc, inc) x 6 (42)
Round 8 :
(6 sc, inc) x 6 (48)
Round 9 :
1 sc in each st (48)
Info :
Change to main petal color now if you began with a dark center. The round 1-9 circle creates a base for petal placement. Marker placement: mark every 8th stitch to define 6 petal anchors (48/6=8). These markers mark the center of each future petal.
Round 10 :
*sl st to next st, ch1, sc in next 4 sts, ch2, skip 2 sts, sc in next 2 sts; rep from * around aligning with markers (48)
Round 11 :
*At marked petal anchor: (ch3, 3 dc cluster worked in same stitch/sp of foundation, ch3, sl st back into anchor) to form a petal base; move to next petal anchor and rep. There are 6 petal bases overall (counts vary by cluster size but anchors held constant)
Info :
Petal bases use clusters to form raised petals. Keep tension steady; clusters create thickness. If you prefer flatter petals, substitute 5 dc worked into petal sp instead of cluster.
Round 12 :
Working into each petal base individually: ch1, 2 sc into base sp, ch2, (puff stitch x4 separated by ch1 anchors) into the ch3 spaces from previous round, ch2, 2 sc into base sp; repeat for each petal (petal count: 6; stitch counts across round will approximate 48 foundation anchors)
Round 13 :
Turn petals outward: in each petal work (sc, hdc, 3 dc, hdc, sc) across the puff row to shape petal edge; join between petals with sl st into adjacent foundation stitches (overall structure remains 6 petals)
Info :
At this stage petals are sculpted. You can adjust height by adding or reducing dc in the center of petals. Keep stitch markers at petal centers for even shaping.
Round 14 :
Working around the entire motif: *ch2, skip 2 sts along petal bases, sl st into next st between petals to create a decorative scallop; rep around to form a neat border (approximately 48 sl st anchors)
Round 15 :
Change to darker accent color for petal veins. Using surface slip stitches or embroidery-style sc: embroider a curved line from the petal center to outer edge on each petal, or work 1 sc in top of petal center, then 1 sc in each 3rd stitch toward edge to create a vein effect (6 veins total)
Round 16 :
Return to petal color: In each petal, work a shallow round of 1 hdc in each st at the very outer edge to stabilize petals (this round is worked into the outermost loops created in Round 13; approximate stitch count per petal 7-9 depending on shaping)
Round 17 :
Join round between petals with ch1, sc in next 6-8 bridging stitches to even out spacing (overall count will normalize around 48 established anchors)
Info :
Optional: For the pronounced raised look, add a 2nd petal layer by repeating a smaller petal worked into the spaces between the first petals. This is decorative and optional.
Round 18 :
If adding second petal layer: change to a slightly lighter/darker brown, *work 3 ch, 5 tr cluster in space between main petals, ch3, sl st into the next space; rep 6 times forming a small ruffled layer (approx 6 clusters)
Round 19 :
Secure second layer by working 1 sc around base of each cluster and sl st into main motif; if skipping second layer, instead work an even sc round around motif (approx 48 sc)
Round 20 :
Change to dark center color. Work 1 sc in each of the inner 12-18 stitches forming a small neat center. You may also embroider vertical stamen using yarn to create the small elongated center seen in photo (approximately 6-8 short embroidery stitches)
Info :
Optional beaded stamen: using golden yellow, sew a small cluster of french-knot like beads or a short wrapped yarn stitch in the center for texture. Sew securely and weave ends into center.
Round 21 :
Fasten off leaving long tail for attaching motif to mesh panel. Weave in any loose ends into back of motif. Block flat so petals lie open and even before assembly.
Info :
Make 3 flower motifs identical in construction and block them to the same dimensions. Use pins and a damp cloth or light steam to shape petals open. This ensures even joining to mesh.
— Leaf (Make 6) :
Round 1 :
ch 8, sc in 2nd ch from hook, sc3, hdc, dc, tr, sl st to create the tip; turn to work along the opposite side of foundation ch: sl st into last ch, tr, dc, hdc, sc3, sc in base stitch (leaf length approx 8-10 sts)
Round 2 :
Along the sided chain work: (sc, hdc, dc) in each side to add a slightly fuller leaf shape; join at base with sl st. Fasten off leaving tail for sewing (leaf is made flat, mirrored sides are symmetrical)
Round 3 :
Edge shaping: With FLO, work 1 sc around leaf edge to create a neat frame; this also helps leaves lay flat when sewn (approx 20-24 sc around per leaf)
Info :
Make 6 leaves in a mix of pale sage and moss green for a realistic look. Vary sizes slightly by making two leaves with ch10 foundation for the larger leaves seen under each flower.
Round 4 :
Surface vein: Using moss green, embroider a center vein with long straight stitches from base to tip and add 2-3 shorter veins on each side. Secure and weave ends to the backside.
Info :
Leaves should be blocked lightly so edges flatten. Pin to desired curve if you want leaves to curl slightly under the petals.
— Stems and Small Sprigs :
Round 1 :
Using moss green, ch 20 (or length to reach between motif centers on your mesh panel), sl st into second ch from hook and each ch to end to create a thin crocheted cord. Fasten off leaving long tail for sewing.
Info :
Create multiple lengths for stems connecting each flower and short sprigs for accents. You can also use surface slip-stitching directly onto the mesh panel after motifs are joined.
— Mesh Panel and Joining Grid :
Info :
The mesh panel is worked as a rectangular fileted mesh that will accept three motifs spaced evenly along the center. The finished mesh interior between the inner border rows measures approximately 8 x 34 inches in the pictured runner. Adjust chain foundation to lengthen or shorten the runner keeping repeats in multiples of 6 or 8 as described.
Round 1 (Mesh foundation) :
With cream/beige yarn ch 66 (for pictured size; change number in multiples of 6 to scale) + 3 turning ch; dc in 4th ch from hook, *ch2, skip 2 ch, dc in next ch; rep from * across (foundation dc count approx 22 dc across row)
Round 2 :
Ch3 (counts as dc), turn, *dc in next dc, ch2, skip next ch2 sp, dc in next dc; rep across to end; end with dc in top of turning ch (mesh row repeats create open squares)
Round 3-10 :
Repeat Round 2 for 8 more rows to create a taller mesh (total mesh depth adjustable; pictured uses 8-10 mesh rows between motif rows)
Info :
Place stitch markers where the centers of each flower will lie along the central axis. For 3 motifs evenly spaced along a 66-ch foundation, mark at approximately 11 ch intervals from each end and center. These markers will guide surface stitching and motif placement.
Round 11 :
Center motif placement row: ch3, turn, dc in next dc, ch2, skip ch2, dc in next dc until you reach marker for first motif center; fasten off or continue working mesh beyond if you prefer to attach motif by sewing later (mesh remains continuous)
Info :
It is easiest to block and lay out the mesh panel flat and pin the three flower motifs into place with their centers aligned to the markers. Sewing is done through back loops of mesh squares and petal bases for a secure join.
— Joining Motifs to Mesh :
Info :
With motifs blocked and mesh laid flat, position first flower centered between short ends and centered on width. Use pins to hold in place. For a neat finish, sew using a matching petal color yarn and a yarn needle through the motif base and into the mesh dc anchors. Use whip stitch or ladder stitch for an invisible join.
Round 1 (Attach first motif) :
Starting at a petal gap, insert yarn needle with long tail through back of petal base and through mesh dc stitch directly beneath; repeat every 4-6 stitches around the petal base to evenly secure the motif. Tie off on backside and weave in ends. Repeat for all 6 petals of the motif.
Round 2 :
Repeat attach process for remaining 2 motifs aligning centers to markers and ensuring consistent spacing between motifs (approx 8-10 inches center-to-center depending on scale)
Info :
When attaching, tip: sew only through a couple of strands of the mesh dc (not the entire mesh row) to allow a slight movement and avoid pulling the mesh too tight. This preserves the open look of the filet grid.
— Accent Chain Loops and Small Motifs :
Round 1 :
To recreate small circular loops visible between flowers, use dark brown yarn: ch6, sl st into 1st ch to make a small ring; join these rings along mesh intersections by sewing through ring and mesh. Repeat pattern of rings alternating sides of motifs as pictured.
Round 2 :
For tiny cream bobble accents across mesh: in selected mesh spaces, make a 3-d bobble: (yarn over, insert, pull up loop) x3, then draw through all loops and secure with sl st into same space. Scatter these symmetrically along both sides of motif row.
Info :
These small accents break the negative space and echo colors from flowers and leaves. Place them carefully and count spaces from motifs for symmetry.
— Border (worked around entire mesh+moti f assembly) :
Round 1 :
With main border color (warm brown), join yarn to any outer corner dc. Ch1, sc evenly along edge working 2 sc in each corner to maintain flat corners. Continue around entire rectangle (stitch count depends on your mesh dimensions; maintain even spacing so corners stay square)
Round 2 :
1 sc in each sc around for neat solid edge. At corners work (sc, ch2, sc) to keep corner open and flat.
Round 3 :
Change to hdc: ch2, turn, hdc in each st around; at corners work 2 hdc, ch2, 2 hdc to form wider corners. This creates a cushioned border frame.
Info :
If you want a thicker and heavier border like in the image, repeat an additional round of hdc or dc to build up a raised rounded frame. Alternate color rounds can emphasize the rustic stacked look.
Round 4 :
Optional decorative ridge: switch to BLO for one round while working sc around; this forms a neat inner ridge that echoes the mesh squares and helps the border sit flat.
Round 5 :
Final finishing round: work sc around with slip stitch joins at end. Weave in ends thoroughly and if you used multiple color rounds, weave tails between mattress stitch layers for invisibility.
Info :
For a squared-off framed look, use blocking wires along straight edges and pin tightly during wet-blocking. For softer rounded corners, ease tension slightly at corners when working 2 sc (or 2 hdc) groups.
— Finishing Touches and Blocking :
Info :
Wet-block the entire runner: pin it flat on a mat in the desired rectangular shape, focusing on straight edges and evenly spaced motif centers. Use steam or a light water spray and allow to dry completely to set stitches. This step is essential for the mesh to lay flat and motifs to integrate smoothly with the background.
Round 1 :
Sew stems and small sprigs: using long tails from stems and sprigs, stitch through back loops of mesh squares and under petal bases to anchor stems in natural curved paths. Tie and weave in ends on backside.
Round 2 :
Attach leaves: position leaves under petals and sew with small invisible stitches through leaf base and mesh dc anchors. Slightly tuck leaf tips under petals for realistic overlap.
Info :
Once all elements are sewn and blocked, give a final inspection for loose ends, trimmed tails and any small tension adjustments. A little steam or pressing with cloth will refine the surface.
— Alternate Scaling and Color Notes :
Info :
Want a longer runner? Repeat the central mesh + motif repeat before adding final border. To make a shorter mat, eliminate one motif and reduce foundation chain by multiples of 6. For color variation, change petal rounds to ombre transitions by carrying two colors and striping every other round.
Info :
If your yarn is slightly heavier, drop to a 3.5mm hook to maintain fabric tightness for the mesh. Conversely, use a 4.5mm hook for a looser lacier mesh look. Always block to size after completing motifs.
Finishing this table runner gives a deeply satisfying result — dimensional flowers, soft verdant leaves, and a delicate open mesh all framed by a warm brown border. Each stitch layers into a timeless accent piece that really elevates a tabletop. Enjoy the tactile pleasure of puff and cluster stitches, and the calm, meditative rhythm of joining motifs and blocking to precision. 🧶 Lay it on your island or dining table and watch it transform the room into a cozy, handmade haven. 🌿✨