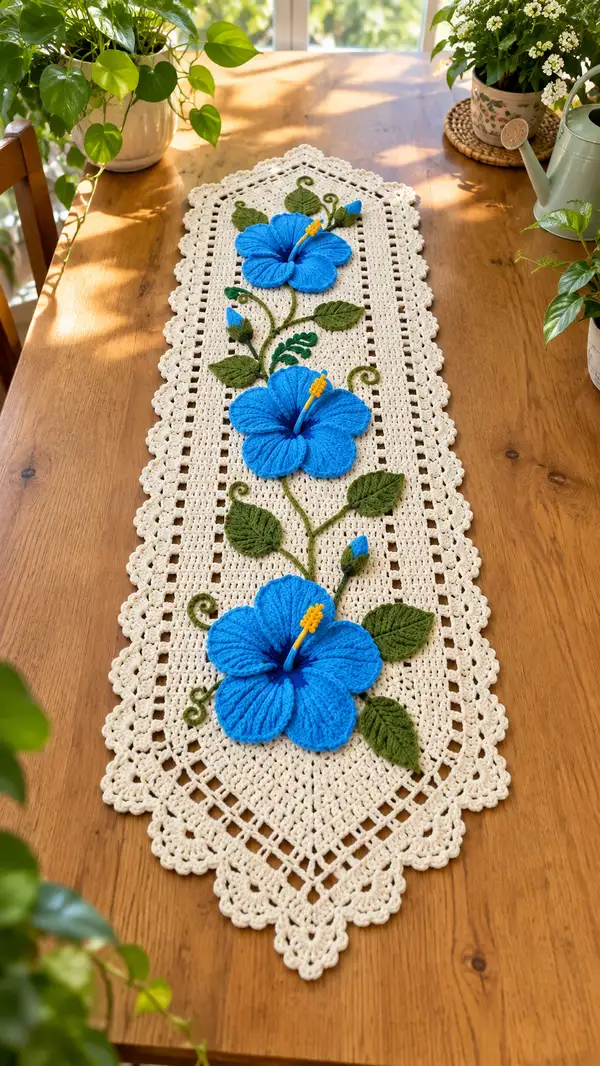
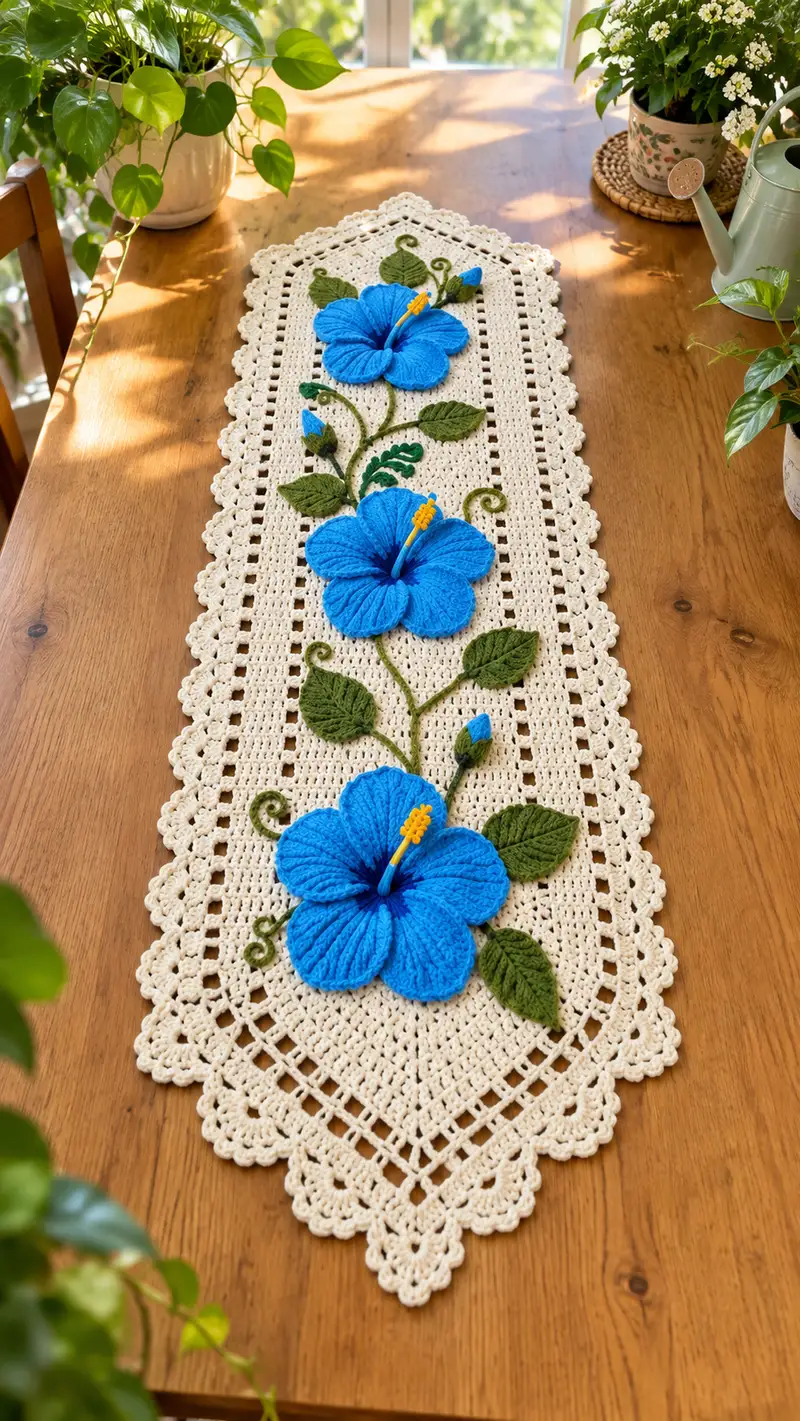
A long, elegant crochet table runner featuring three bold blue hibiscus appliques set on a delicate cream filet background. The runner has scalloped lace edging, leafy green tendrils and buds that create an organic, flowing composition down the center. Worked in lightweight cotton with textured petals and raised stamens, this project combines simple filet work with layered appliques for a stunning table accent. Ideal for brightening a dining table, console or dresser with handmade charm.
Progress Tracker
0% Complete
— Materials & Gauge :
Info :
Gauge: For the cream base with 3.5mm hook, 16 dc x 10 rows = 4 inches (10 cm). Gauge is flexible for a runner; keeping consistent tension is more important than exact gauge. The pattern uses row counts, so adjust foundation chain if you need a wider runner.
— Base Panel (work flat, Rows are worked back and forth) :
Row 1 :
Foundation chain 121 (this yields a workable width of approximately 12-15 inches depending on yarn). Turn, ch3 (counts as first dc), dc in 4th ch from hook and in each chain across. Total dc = 118 (118)
Row 2 :
Turn, ch3 (counts as dc), dc in each st across (118)
Row 3 :
Turn, ch3, dc in each st across (118)
Row 4 :
Turn, ch3, dc in each st across (118)
Info :
Rows 1-4 establish the solid foundation. Keep these rows solid to anchor the filet mesh you will introduce. Place a marker at the beginning of Row 5 to track mesh pattern repeats.
Row 5 :
Turn, ch3 (counts as dc), *dc in next 2 sts, ch2, sk next 2 sts, dc in next st* repeat across, ending with dc in final st. Total dc 79, ch2 spaces 19 (79 + 19 ch2)
Row 6 :
Turn, ch3, *dc in each dc across, work 1 dc in each ch2 space (two dc over each ch2) to maintain grid*, end with dc in final st. Total dc = 118 (118)
Row 7 :
Turn, ch3, *dc in next 2 sts, ch2, sk next 2 sts, dc in next st* repeat across, end as Row 5 (79 dc, 19 ch2)
Row 8 :
Turn, ch3, dc in each st across, placing dc in each ch2 space (118)
Info :
Rows 5-8 create a basic filet motif (mesh row + filling row). Repeat this 4-row filet block to create an airy texture across the runner. When placing dc into ch2 spaces, insert hook under the chain space as a single stitch to stabilize the grid.
Row 9-28 :
Repeat Rows 5-8 five times (this yields 20 rows). Keep consistent tension; the panel will lengthen as you add rows. After Row 28 you should have an even openwork field to apply your appliques. (118 each even rows)
Info :
If you want a denser area under flowers, work two consecutive solid dc rows (ch3, dc across) where the flowers will sit to give more support for sewing appliques later.
Row 29-48 :
Continue repeating filet block (Rows 5-8) for another 20 rows to extend the panel length. This will create the long center area. At the end of Row 48 you will position the three hibiscus placements approximately one-quarter, midpoint, and three-quarter points along the length. Maintain stitch count 118 on all even rows and 79 dc + 19 ch2 pattern on mesh rows when worked.
Info :
Mark the center of the panel at Row 36 with a removable stitch marker -- this will help center the middle hibiscus bloom. Measure and mark the other two placement points so flowers are balanced: approximately 9-10 rows between flower centers for a balanced look.
Row 49-60 :
Repeat filet block Rows 5-8 three more times (12 rows) to reach a total of 60 working rows for the center panel. Fasten off and weave in ends, leaving long tail for connection to border if you plan to crochet the border on. (118)
Info :
Block the panel flat to square the mesh. Pin to desired measurements and gently steam or wet block according to yarn instructions. Blocking evens stitches and helps the lace border sit nicely later.
— Lace Border (work both long sides and both pointed ends) :
Info :
You can either crochet the border directly onto the panel or make the border separately as strips and sew on. This pattern gives instructions for crocheting directly onto the panel. The border creates scalloped edges and diamond points at the ends.
Round 1 :
With right side facing and using 3.5mm hook, join cream yarn at corner with sl st, ch1, sc evenly along the short edge (or long side if starting) placing 1 sc in each row edge for neatness. Work 30 sc along each long side evenly spaced, approximately 118 sc total around each long edge including the short end corners. (count varies to fit panel; aim to maintain even spacing)
Round 2 :
Ch3, *skip 1 sc, dc in next sc, ch1* repeat across to form a tall open lacy row. Work carefully so scallops will align. (maintain total st count equivalent to previous round)
Round 3 :
Ch1, sc in same st, *ch3, sc in ch-1 space* repeat across to form picot-like loops for scallop anchors. At pointed ends (short ends), work additional increases to create diamond point: (sc, ch2, sc, ch2, sc) in center point to form tip.
Round 4 :
Sc evenly around all edges, working 3 sc into each ch-3 loop to create small shell. At the end points increase by working (sc, inc, sc) to produce the triangular points at both ends. Fasten off and weave in ends. This produces a neat scalloped edge that frames the runner.
Info :
If you prefer a more ornate lace, substitute shell stitches (5 dc shells) in Round 3 instead of ch-3 loops and adjust Round 4 accordingly. Blocking strongly after the border will open the scallops.
— Hibiscus Flower (Make 3 identical blooms) :
Info :
Each hibiscus bloom is made of 5 large petals worked individually and joined at the center. Petals are crocheted from a small foundation chain arc to create a curved petal with ribbed front-post texture. Use blue yarn and 3.0–3.5mm hook. Make three complete flowers.
Petal — Round 1 :
Ch 12, sc in 2nd ch from hook, sc across to end (11 sc). Turn (11)
Petal — Round 2 :
Ch2 (counts as hdc), hdc in next st, *dc in next 3 sts, hdc in next 3 sts* across to end, turn. (11)
Petal — Round 3 :
Ch3 (counts as dc), dc in next st, fpdc around next dc, bpdc around next dc, dc in next 3 sts, bpdc around next 2 dc, fpdc around last dc, dc in top of turning chain. This row adds front/post ridges for texture. (11)
Petal — Round 4 :
Turn, ch2, hdc in each st across working into post stitches for a raised ribbed effect. Work 11 hdc. (11)
Petal — Round 5 :
Ch3, *2 dc in next st, dc in next 2 sts* across to add fullness near the outer edge; creates gentle flare. (total stitches 15 — math: worked increases 4 times across giving +4 -> 15)
Info :
Check the curve of the petal: the use of fpdc/bpdc in Row 3 and working into posts in Row 4 creates raised ribs that emulate the natural veins of a hibiscus petal. Make five petals to assemble one flower.
Petal — Round 6 :
Ch1, sc in each st across (15). Fasten off leaving long tail for sewing to center. Make 5 petals (5 x 15-st petals).
Info :
For a fuller bloom, block each petal lightly by pinning to a curved shape and spritzing with water; let dry before assembly. You may add a tiny bit of stuffing at the base of petal (approx 1/8 tsp) to lift petals if desired.
Flower Join — Round 7 :
Using long tails, arrange 5 petals in a radial layout with bases overlapping slightly. Whip stitch bases together, catching through back loops of each petal base to form a secure ring. Join seam through 5 petal bases with 8 evenly spaced whip stitches. Center should measure approx 3.5-4 inches across (varies by yarn).
Flower Center — Round 8 :
With dark navy (tiny amount) join at center, MR, ch1, 8 sc in MR, pull tight (8). Sl st to first sc, fasten off leaving tail for sewing. Sew this center disk to middle of assembled petal ring to hide seams.
Flower Stamen — Round 9 :
Using yellow, ch 12, sl st back along the chain to create a cord (this will be the filament). Fold cord then using a small tuft technique, embroider 5 tiny french-knot like bobbles along the top 6 ch by making tight single crochet knots or looped sc clusters. Secure to center of flower by stitching through the bottom and anchoring under the center disk. Fasten off and hide ends. Repeat to make a second shorter filament behind first for depth if desired.
Info :
Make 3 complete flowers. Vary the tightness of the petal join to create natural variation among the three blooms. You can also slightly offset some petal tips to avoid a perfectly symmetrical look and make the blooms more natural.
— Small Bud (Make 3) :
Round 1 :
With blue, ch6, join to form ring with sl st. Work 6 sc into ring (6)
Round 2 :
Inc in each st around (12)
Round 3 :
1 sc in each st around (12)
Round 4 :
FLO: ch1, sc in each st BLO across to create a textured outer lip (12)
Round 5 :
Fold bud slightly and sew one side to close, leaving the other open to attach to stem. Fasten off leaving long tail.
Info :
Make 3 buds to place near the flowers and solder them to the stems. If you wish the buds to be more pointed, work a round of decreases (6 dec) before folding to shape the tip.
— Leaves (Make 8 various sizes) :
Leaf Foundation — Round 1 :
Ch 14, sc in 2nd ch from hook and across to end (13). Turn (13)
Round 2 :
Ch2, hdc in first 3 sts, dc in next 4, tr in next 2 (center), dc in next 3, hdc in last st. This adds height in the center producing a slightly pointed leaf. (13)
Round 3 :
Ch1, sc across the first side decreasing at base: sc2tog over first 2 sts, sc in next 4, sc2tog twice over the center pair to form the point, sc in next 4, sc2tog at last 2 sts to taper back (9). Fasten off tail for sewing.
Info :
For veining, use a strand of green yarn and couch (sew) surface slip stitches (sl st) from base to tip and branch into smaller veins across the leaf face. Alternatively use embroidery floss for finer veins.
Leaf Variation (Larger) — Round 4 :
Ch 18 and work similar shaping with additional dc/tr in the center to create a larger leaf (length will be approx 3.5-4.5 inches). Use fpdc and bpdc rows on Round 2 to create a raised vein effect in the center.
Info :
Make 8 leaves total: 4 larger (use Ch18 method) and 4 medium (Ch14 method). Block leaves flat with a slight curve by pinning each leaf on a mat and spritzing lightly.
— Stems and Tendrils :
Stem — Round 1 :
Using olive yarn, ch 120 for each long stem (length varies). Sl st back along chain to create a firm tubular cord. Make 3 long cords for main stems that connect flowers. Make 2 shorter cords (approx ch 40-60) for small branches and buds.
Round 2 :
Create tendrils by ch 18, sl st back along chain, then wrap the cord into a spiral and sew the base to anchor. For curled tips, after creating the sl st cord, work tight sc in chain and it will naturally curl. Make 6 tendrils in varying lengths to place around flowers.
Info :
When sewing the stems to the base panel, allow a little slack so stems are slightly raised off the surface. This creates shadow and depth. Use hidden mattress stitch to anchor the cord so sewing is invisible from the right side.
— Assembly & Placement :
Info :
Layout all pieces on the blocked base panel while it is still pinned. Place one hibiscus approximately 6-7 inches from one pointed end, the second near the midpoint of the runner and the third near the other end, matching the visual spacing in the reference image (roughly 9-10 rows between flower centers). Arrange leaves and buds around each flower in a flowing vine motif.
Step 1 :
Pin one flower at a time. From the underside, use the long tail from the flower center disk to sew through the panel using small whip stitches. Sew around the base of the flower ring with 12-16 evenly spaced stitches to secure it flat to the panel while retaining slight lift at petal edges.
Step 2 :
Sew stems next. Lay stem cord into position and use yarn needle and matching green yarn to take small stitches every 1/2 inch to hold cord down. Use longer stitches lengthwise to conceal sewing on underside and keep the right side tidy.
Step 3 :
Sew leaves and buds to stems. Use the leaf tail to stitch to the stem cord and anchor the base of the leaf to the panel with small stitches. For buds sew at a slight angle so the tip points outward from the vine.
Step 4 :
Attach tendrils by sewing their base onto the stems, tucking them slightly under petals or leaves so they appear to spring from the vine. Arrange curls to fall naturally and tack each curl with a couple tiny stitches at the curve points.
Info :
Use matching thread and small, tight stitches to avoid visible seams on the lace panel. Keep all stitching mainly to the underlying mesh grid to keep the front view clean. If desired, use a tiny dot of fabric glue under petal tips to keep them lifted in place.
— Finishing Touches :
Round 1 :
Check all ends and weave tails through adjacent stitches on the underside. Trim excess. Re-block the assembled runner gently to coax it into final shape, pinning petals slightly up where you want lift.
Round 2 :
Press lightly from the backside with steam (test on scrap first). Allow to dry fully pinned before removing blocking pins. This will set the shape and open the lace scallops beautifully.
Info :
For table protection, apply a thin, removable table runner liner under the crochet before use. Avoid heavy use—this runner is decorative and looks best under light vases or candles on a stable surface.
This lovely hibiscus runner brings bright floral color to a classic crochet lace foundation. The combination of airy filet stitching and bold layered appliques makes every detail stand out. Whether you display it on a dining table or console, it will be a conversation starter and a handmade treasure. Enjoy the relaxing rhythm of filet rows, then the satisfying sculpting of blossoms—such a rewarding project to make and gift! 🧶🌺