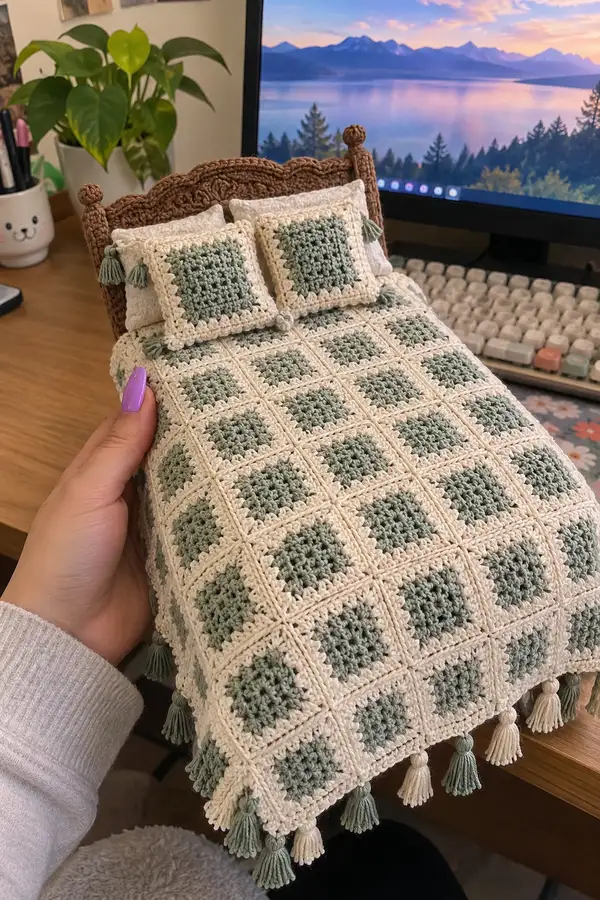
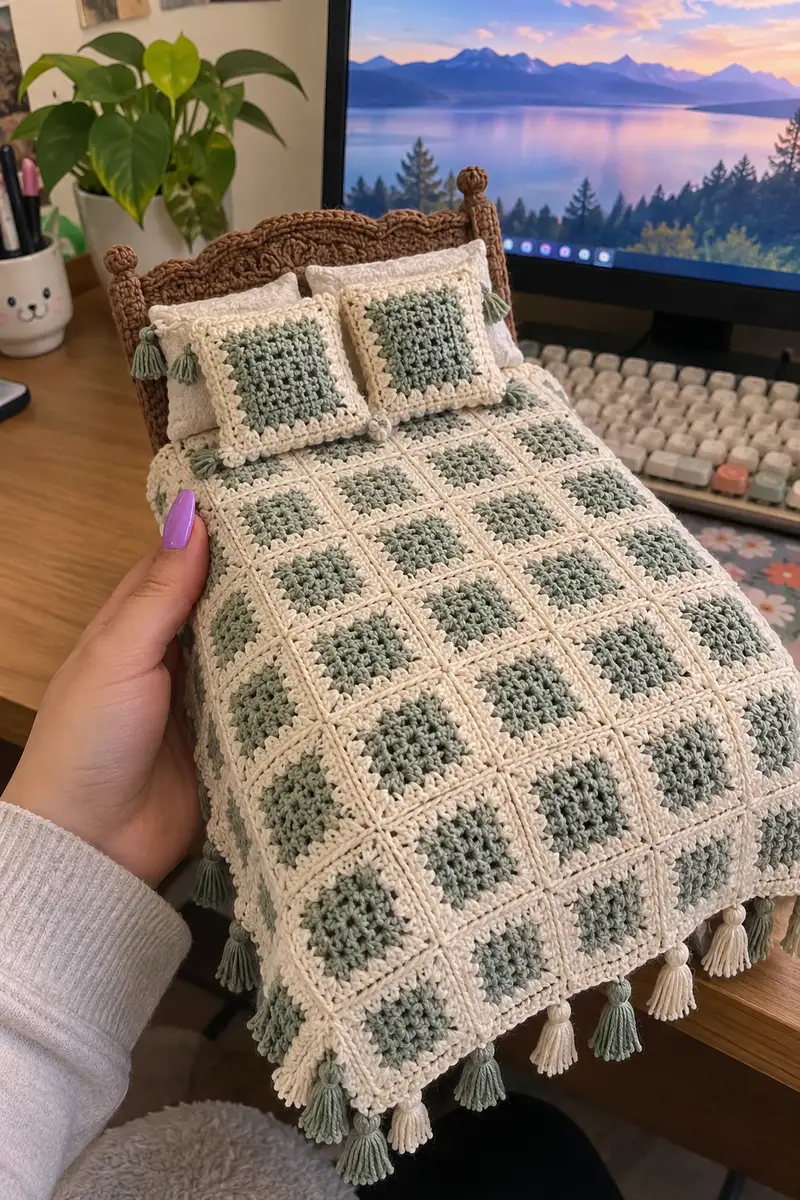
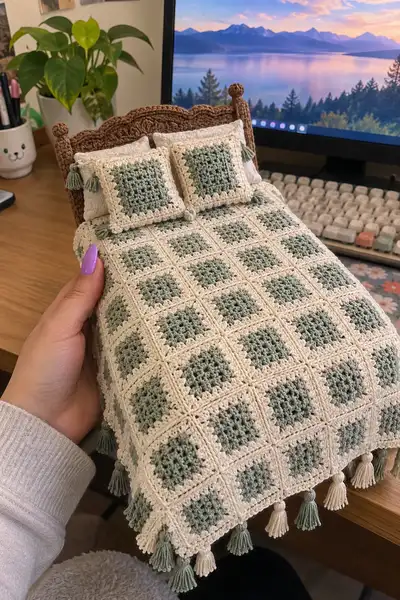
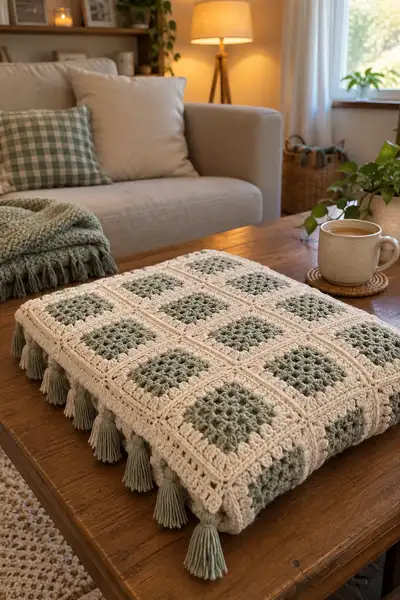
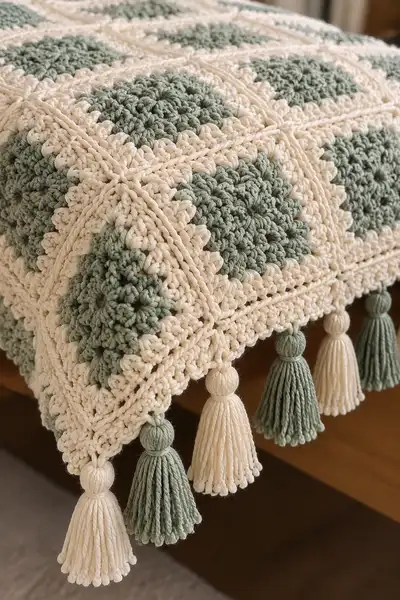
A calming, botanical-toned bedspread worked from many textured granny-style squares in sage green centers and a warm cream frame. The design features raised join seams and a layered cream border finished with alternating sage and cream tassels for a classic cottage look. This pattern includes step-by-step instructions to create the motif, join squares, add a sculpted border, and make matching pillow shams. Perfect for adding a soft, handmade accent to any bedroom.
Progress Tracker
0% Complete
— Notes & Gauge :
Info :
Gauge for one finished motif (before blocking): 6.0" square measured across corner-to-corner after final motif rounds using a 4.5mm hook and worsted cotton. Your gauge will change with different yarns/hooks. This pattern lists rounds for one motif and then detailed join and border rounds for the full bedspread. For a queen size bedspread pictured, layout is 10 motifs wide × 12 motifs long. Adjust motif count to desired bed dimensions.
Materials :
Use worsted weight cotton for structure and soft drape. Color A = Sage green (accent center). Color B = Cream or natural (main frame and border). Optional decorative colors for tassels and accents.
— Granny-Style Textured Motif (Make 120 motifs for pictured bedspread or adjust) :
Round 1 :
With Color A (sage) make a magic ring. Ch 3 (counts as first dc), work 2 dc into ring, ch 2 (corner made), *work 3 dc, ch 2* repeat 3 more times. Pull ring closed and sl st to top of ch3 to join. (4 corners; 12 dc total inside ring; 4 ch-2 corner spaces)
Info :
Cluster-style corners create textured centers; keep your ch-2 corners loose so later rounds lay flat. Place a stitch marker at the top of the joining ch-3 to mark start.
Round 2 :
Ch 3, (3 dc, ch 2, 3 dc) in same corner sp, ch 1 to reach next corner, *(3 dc, ch 2, 3 dc) in next corner sp, ch 1* repeat around to make 4 corner clusters and 4 ch-1 side spaces, sl st to top of ch-3 to join. (4 corner cluster sets and 4 side ch-1 spaces)
Info :
Round 2 begins to square out the motif. If your work ruffles, tighten loop on ch-1 spaces or use a slightly smaller hook for subsequent rounds.
Round 3 :
Change to Color B (cream) in final pull-through of join: ch 1, sc in same st, *ch 2, skip first dc of next corner cluster and sc in ch-1 side sp; ch 2, 3 dc, ch 2, sc into corner ch-2 sp (forming a framed corner) * Repeat around so that you create a ring of sc and framed corners. Sl st to first sc to join. (You will have 4 corner framed clusters and 4 side sc spaces.)
Info :
Change color by finishing the last stitch of previous round with the new color. Carry the unused yarn neatly across the back if you plan stripes; otherwise break yarn and reattach.
Round 4 :
With Color B ch 3 (counts as dc), work 2 dc into same sc, ch 1, *(3 dc, ch 1) into each side sc space across until you reach corner; in corner work (3 dc, ch 2, 3 dc) into corner ch-2 sp; continue around. Sl st to top of ch-3 to join. (Corner clusters keep square shape; total clusters per side will be 3 clusters between corners at this point.)
Info :
At this round your motif will begin to show the alternating textured center and framed cream rounds. Keep counts consistent by counting clusters per side: 3 clusters between corners is correct here.
Round 5 :
Ch 1, sc in same st, *in each side ch-1 sp work (ch 2, sc), repeat around; in each corner sc into the ch-2 corner sp; sl st to join. This forms a solid gridable sc round to prepare for a wider cream border. (You will have sc around with ch-2 corner spaces.)
Info :
This sc round evens the edge and creates a crisp line for join-as-you-go. Use this opportunity to check block width of the motif and adjust hook if necessary.
Round 6 :
Ch 3, *work 2 dc in next st, 1 dc in next st across side until corner, in corner work (2 dc, ch 2, 2 dc); repeat around, sl st to join. (This round adds height; the stitch count will be roughly 4 clusters per side depending on spacing.)
Info :
This round is worked into sc foundations; maintain consistent dc counts roughly matching previous rounds to keep square proportions.
Round 7 :
Ch 1, sc in same st, *sc in each dc across until corner, in corner sc, ch 2, sc; repeat around. (A tidy sc round to square up edges.)
Round 8 :
Change to Color A if you want an inner cream frame reversal, otherwise continue in Color B. Ch 3, dc in next 2 sts, (dc, ch 2, dc) in each corner ch-2 sp, continue around and sl st to join. This sets the textured center effect when viewed across many motifs.
Info :
At this point each motif should measure approximately 5.5"–6.0" depending on yarn and tension. Make a sample motif and measure to plan how many motifs you need to reach your bed dimensions (e.g., 10×12 for pictured bedspread).
Round 9 :
Ch 1, sc in same st, sc in each st around, placing sc 2 times in each corner ch-2 to preserve squareness. Sl st to join. (A neat sc round that uniforms edges; stitch count will depend on previous increases — expect ~36–44 sc.)
Round 10 :
Ch 2 (counts as hdc), hdc in each st around working (hdc, ch 1, hdc) into corners; sl st to join. (This introduces a subtle ridge to read as the framed border between motifs.)
Round 11 :
Ch 3, *dc3tog cluster in side spaces to add texture (work 3 dc cluster in next group), in corner work (3 dc, ch 2, 3 dc); repeat around. Sl st to join. This is an optional textured round to mimic the raised look in the pictured blanket center.
Info :
If you choose not to do Round 11 textured clusters, simply work a dc round or continue with sc to maintain a flatter motif. The textured round adds visual interest when joined into a grid.
Round 12 :
Ch 1, sc in same st, sc around, placing 2 sc in each corner to maintain shape. Fasten off, leaving a 6" tail to weave into the join. Block the motif if possible to square the edges and set dimensions.
Info :
Make the required number of motifs (sample layout 10 wide × 12 long = 120 motifs). Keep motifs in a labeled stack to track counts and color orientation, so tassel edge alternation is consistent.
— Layout & Join-As-You-Go (JAYG) Preparation :
Info :
Before joining, lay out all motifs on a flat surface in the final grid. Place motifs right side up so joins will be visible on the front as a raised cross (as pictured). Use pins to align seams, paying attention to matching corner points exactly. Decide whether you will join rows first then seam rows together, or join each motif continuously in a spiral. The following rounds assume joining one motif to neighbors using slip-stitch join-as-you-go and then a raised seam round to emphasize the grid line.
Join Round 1 :
Start with the first motif (top-left). Prepare adjacent motifs and with Color B attach to the next motif by working sl st into corresponding sc stitches along the side: working from corner to corner sl st through both motifs' corresponding sts to join. Continue joining across the row until row is complete. (You will create a neat seam of sl st between motifs). Fasten off at end of row.
Info :
When joining, use the loop that is most visible on the surface for a raised seam appearance. Keep tension relaxed so joined seam is not pulling motifs out of square. Use pins to prevent shifting.
Join Round 2 :
Join next rows to the first row by aligning the second row motifs beneath the first and repeating sl st join along the long side. Continue until all rows are joined into a full blanket panel. You should now have a unified lattice with visible cream joins and sage centers peeking through.
Info :
If you prefer a less visible join, use mattress stitch or whip stitch from the back with a yarn needle instead of sl st. The front raised seam is intentional in this design to mimic quilted piping.
Reinforced Cross Seam Round 1 :
With Color B held, work a round of standing dc across the entire joined panel to create a raised cross seam on the grid lines. Starting in a corner, attach yarn and ch 3, work dc stitches in the seam columns (the sl st join columns) to build a raised rib. Work dc into top of each join stitch across each row and turn at corners with (dc, ch 2, dc). Repeat this round around the entire outer edge of the panel to unify surface texture.
Info :
This round is decorative and structural. Keep your dc columns aligned with the join columns for the quilted look. If you have many motifs, work this by sections so the blanket remains flat and manageable.
Reinforced Cross Seam Round 2 :
Ch 1, sc into each dc and join column to tidy the edge. At corner work sc, ch 2, sc to maintain square corners. This sc round creates a clean baseline for the multilayered outer border to be added next.
Info :
At this point the grid lines should read as a distinct raised cross pattern across the blanket. If lines look uneven, you can lightly steam-block the join columns with a damp cloth and iron on low to settle stitches.
— Wide Layered Border (36 Rounds — builds the sculpted multi-layer border) :
Border Round 1 :
With Color B, join at any outer corner. Ch 1, work 1 sc into each st around the entire panel, working 3 sc into each corner sp to turn. Sl st to join. This evens the raw motif edge and gives a base for the sculpted layers. (Stitch count will vary based on motif counts across width/length.)
Border Round 2 :
Ch 3, dc in each sc around, working (dc, ch 2, dc) into each corner to create a taller outer round. Sl st to top of ch-3 to join.
Border Round 3 :
Ch 1, sc in each dc around, place 2 sc in each corner ch-2. This sets the next layer foundation.
Info :
Change to a slightly smaller hook for the next decorative ridges if you want tight, defined ridges. This is optional but gives the border a sculptural quality.
Border Round 5 :
Ch 3 (counts as dc), *work 1 dc in next st, then work 1 front post double crochet (FPdc) around the next dc to create texture; repeat across the side. In corner work (dc, ch 2, dc). Sl st to join. This round creates subtle raised ridges outward from the join lines.
Border Round 6 :
Ch 1, sc in each st around focusing sc stitches between FPdc posts to highlight ridges. (This is a tidy filler round.)
Border Round 7 :
Ch 2, hdc in each st around, hdc into corners with ch 1 between corner hdcs. Sl st to join.
Border Round 8 :
Ch 3, work 2 dc in next st, *skip 1 st, dc in next st, work puff cluster of 3 dc into following st (pull loops each time and finish cluster together) across side; in corners work (3 dc, ch 2, 3 dc). This introduces puff texture near the outer edge.
Info :
Practice puff clusters on a swatch before working full border. Pull loops to same height for even clusters and secure final stitch loops thoroughly to prevent unraveling.
Border Round 9 :
Ch 1, sc in each st around placing extra sc in puff cluster peaks to frame them neatly. Sl st to join.
Border Round 10 :
Change to Color A (sage) for a narrow contrast round: ch 3, dc in each st around; work dc groups in the middle of long sides to keep tension consistent. Sl st to join and fasten off color if desired.
Border Round 11 :
With Color B reattached, work ch 2, hdc in each st around to settle the two-color transition. Sl st to join.
Border Round 12 :
Ch 1, sc in each st around placing 3 sc into corner spaces. This is a tidy, unifying round that will receive next rounds of raised piping.
Border Round 13 :
Work a row of front post double crochet (FPdc) columns: attach yarn and *work FPdc around the post of the stitch two rows below to create a raised rope, skip next st, FPdc around next post; repeat around. At corners work (FPdc, ch 2, FPdc). Sl st to join.
Border Round 14 :
Ch 1, sc in each st across, paying attention to tuck FPdc stitches neatly into sc pockets. Sl st to join.
Border Round 15 :
Change to Color A and work a decorative scallop: *(sc, ch 3, sc) in same st, skip 3 sts* repeat between corners; in corners work (sc, ch 3, sc) to produce measured scallops all around. Sl st to join.
Info :
If you prefer blocky geometric corners instead of scallops, skip Round 15 and work an additional sc/hdc round instead.
Border Round 16 :
Ch 1, sc in each st around to anchor scallops; sl st to join.
Border Round 17 :
Work a decorative raised 'cross' between motif joins: with Color B make a standing dc at the midpoint of a seam column and work a row of dc along the seam column to enhance the quilted grid; repeat every seam column around the blanket (this is worked across entire blanket, not just the outermost edge). This step can be taken in sections to reduce bulk while working.
Border Round 18 :
Ch 1, sc across the edge to smooth join columns and set for final edging. Sl st to join.
Border Round 19 :
Change to Color A for the next 8 rounds of wide finishing ribs. Ch 3, dc in each st around maintaining (dc, ch 2, dc) at corners. Sl st to join.
Border Round 20 :
Ch 1, sc in each st around. Sl st to join. This provides a dense base for later tassel anchoring.
Border Rounds 21-28 :
Repeat the following sequence twice to build a deep layered band: Round A: Ch 3, dc in each st around with (dc, ch 2, dc) in corners. Round B: Ch 1, sc in each st around. (This sequence will create 8 additional rounds building height; adjust counts to maintain even layering.)
Info :
If you prefer fewer border rows reduce to 4–6 rounds; the pictured bedspread uses a deep border to produce weight and a soft drape.
Border Round 29 :
Work a final neat sc round in Color B to bring the edge to a crisp finish. Place 3 sc in each corner to maintain square corners. Sl st and fasten off leaving long tail for weaving.
Border Round 30 :
Optional decorative crab stitch (reverse single crochet): With Color A held and working from right to left along the front, work reverse sc into each st around for a rope-like finished edge. Sl st and fasten off. (This gives a subtle twisted edge.)
Info :
Because the bedspread will hang, crab stitch adds a polished edge that resists stretching. If you prefer soft ragged edge, skip this step.
Reinforced Border Rounds 31-36 :
To create the pronounced layered ridge seen near the edge in the photos, work the following sequence: Round 31: Ch 1, sc in each st around. Round 32: Ch 3, FPdc around the post of the st two rows below to form a raised rope. Round 33: Ch 1, sc around. Round 34: Ch 2, hdc around. Round 35: Ch 1, sc around. Round 36: Fasten off and weave in tails. These alternating ridges build the chunky finished look and give depth for tassel placement.
Info :
Total border rounds can be altered depending on motif count and desired border depth. When the border is complete, block the entire bedspread to set stitch definition and straighten edges before adding tassels.
— Tassels (Make alternating Color A & Color B tassels for edge) :
Tassel Step 1 :
Using a 3" template, wrap yarn around the template until about 40–60 wraps depending on desired fullness. Slip through one loop with a short tail and tie off near top to create tassel head. Trim bottom loops to create even tassel tail. For pictured bedspread alternate sage and cream tassels along edge; total tassels will equal edge stitches divided by spacing (approx every 2–3 inches).
Info :
Make tassels in small batches to ensure consistency. Store finished tassels labeled A or B to keep color alternation correct during attachment.
Tassel Step 2 :
Finishing head: wrap a short length of contrasting or matching yarn tightly around the tassel 1/2" down from top to create a neat head. Knot securely and hide tails by threading through head and trimming closely.
Tassel Step 3 :
Attachment: Use the long tail from tassel top to sew through the final stitch of the border and 1–2 sts back for stability. Tie a secure double knot on the wrong side and weave ends into head of tassel. Space tassels evenly around the entire perimeter. Alternate colors for a balanced look — e.g., cream, sage, cream, sage.
Info :
For heavy bedspread hang, reinforce tassels by sewing through border band twice. If using on a frequently used bed, consider securing tassels with a back-loop stitch and a dab of fabric glue on knot for extra holding power.
— Matching Pillow Shams (Make 2) :
Pillow Motif Assembly :
For each sham make a 3×3 motif panel (9 motifs) using same motif instructions. Join motifs with sl st or whip stitch as for the bedspread. End with the same border sequence but scaled down to 8–12 border rounds to provide a proportional edge.
Pillow Border Rounds 1-12 :
Round 1: sc around joined 3×3 panel. Round 2: dc round. Round 3: sc round. Round 4: FPdc decorative round. Round 5: sc round. Round 6: Change to Color A, dc round. Round 7: sc. Round 8: small scallop or picot. Round 9: sc. Round 10: hdc. Round 11: sc. Round 12: crab stitch (optional). Fasten off and weave in ends. Make two panels for each sham or make one panel and attach fabric backing with zipper for an envelope closure.
Info :
For a neat pillow finish, use a zipper or overlapping back panels; if you prefer a soft finish, create a binding flange by adding two extra sc rounds before finishing to sew under the backing material.
— Finishing, Blocking & Care :
Info :
Block motifs and the joined spread while damp. Use pins to square corners and lay flat until dry. For cotton yarn, steam blocking with a damp cloth works well to set stitch definition. Weave all tails under several stitches and trim close. Machine wash gently on cold delicate cycle if your yarn is machine-washable; otherwise hand wash and dry flat.
Final Touches :
Create small tied tassel loops at pillow corners for a coordinated finish. Inspect seams and reinforce any tassel attachments after 1–2 washes. Enjoy your finished bedspread and consider making a smaller lap blanket using fewer motifs for a matching set.
This sage green bedspread is a rewarding project that combines sculpted texture with classic granny-inspired building blocks. The raised seams and layered border give the spread a finished, quilt-like look, while the alternating tassels add playful movement and charm. Making a matching pair of pillow shams completes the set for a cohesive bedroom aesthetic. 🧶🌿 Finished beds look cozy and thoughtfully handmade—enjoy every stitch and the peaceful palette as you craft!