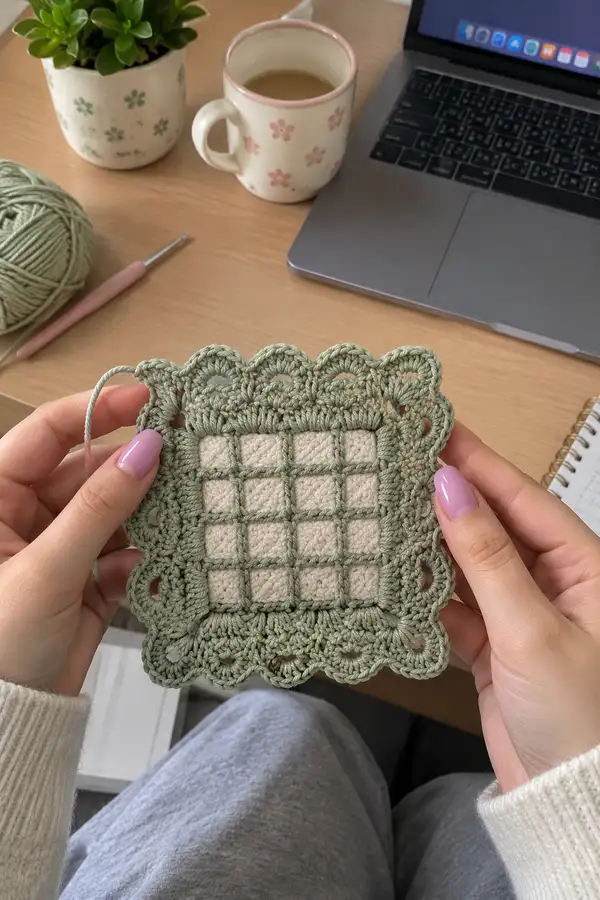
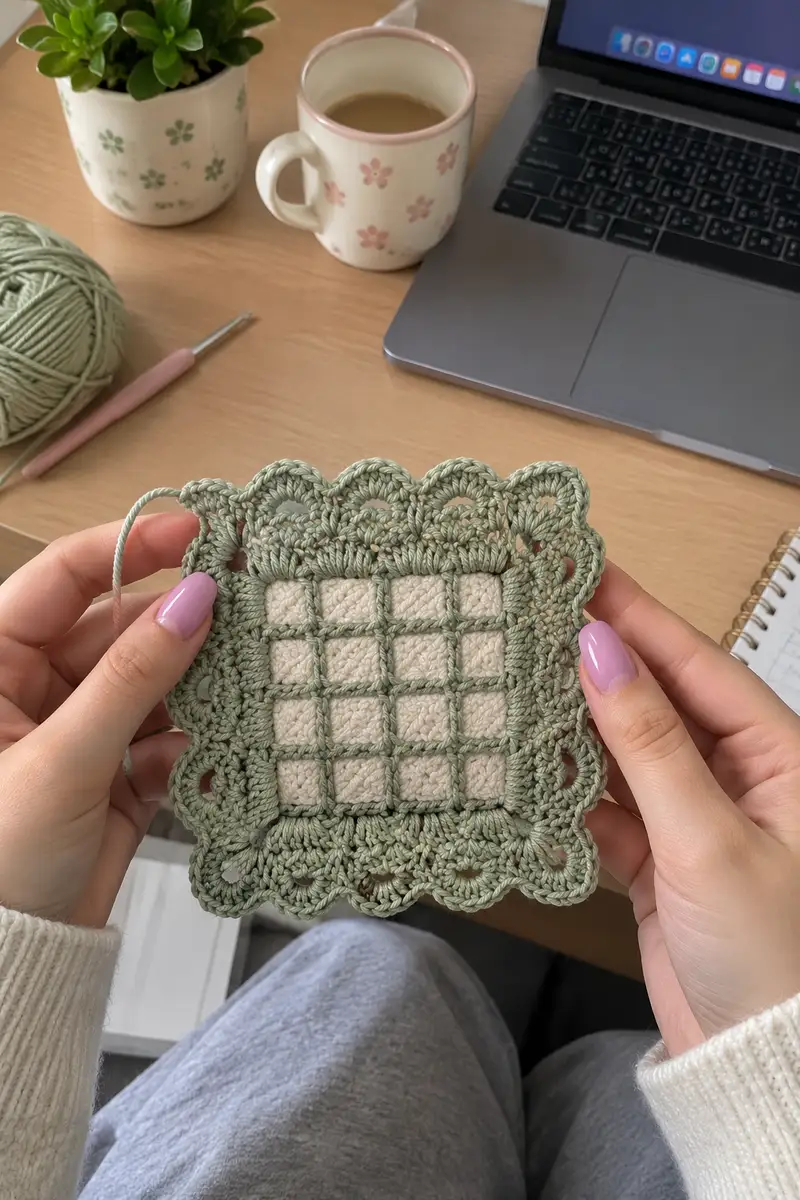
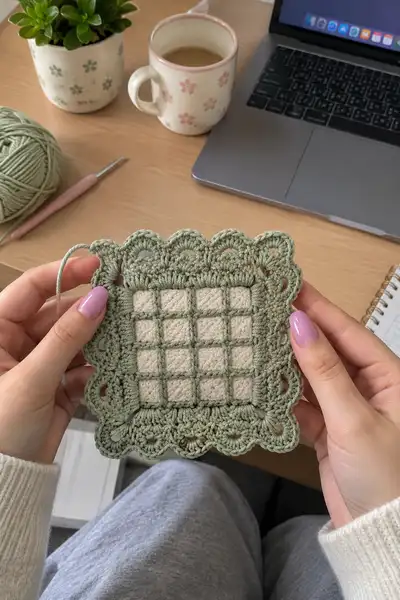
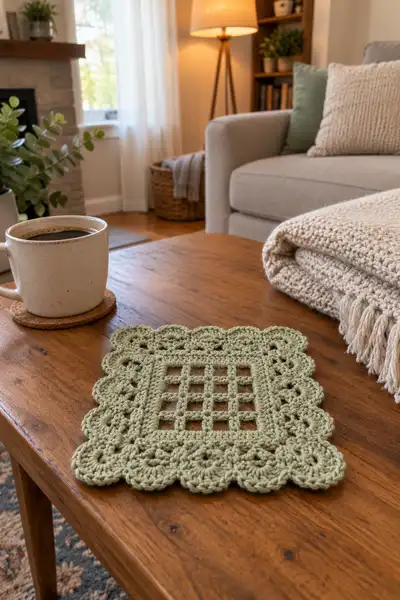
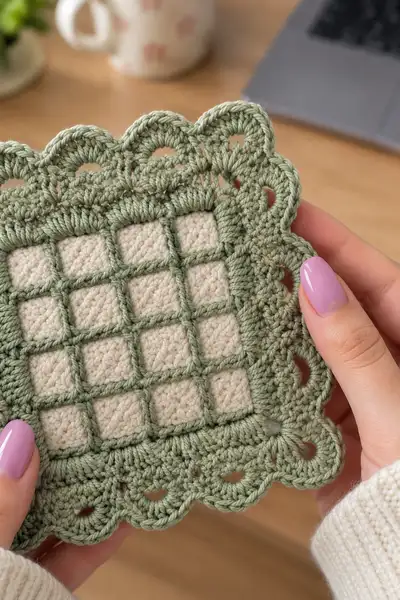
A tranquil sage green bedspread motif inspired by the photos — a lacy 4x4 grid square with a soft cream center and a scalloped raised border. This pattern breaks the design into small cream blocks, a raised sage lattice, and a layered scallop edging so you can make and join motifs into a full bedspread and matching pillow shams. Suitable for a calm, natural bedroom aesthetic with modular construction for easy assembly and custom sizing.
Progress Tracker
0% Complete
— Overview & Gauge :
Info :
Each finished motif measures approximately 18 cm (7 in) square blocked when using worsted cotton (#4) and a 4.0 mm hook. Gauge is approximate because of texture — block your motifs to match measurements before joining for a consistent bedspread. The motif is modular: make as many motifs as your layout requires. This pattern describes making one motif and finishing/assembly for larger projects.
— Making the 16 Cream Mini Blocks (Make 16) :
Round 1 :
Using natural/cream yarn. Start with magic ring, 6 sc into ring (6). Pull ring tight. (6)
Round 2 :
Inc in each st around (12)
Round 3 :
(1 sc, inc) x 6 (18)
Round 4 :
(2 sc, inc) x 6 (24)
Round 5 :
1 sc in each st around (24)
Info :
These small rounds produce a tiny textured square block; keep tension even. Make 16 blocks in cream. Fasten off leaving a 12 cm tail for joining each block into the 4x4 grid.
— Layout and Temporary Joining for a 4x4 Grid :
Info :
Arrange 16 cream mini-blocks in 4 rows of 4. The raised sage lattice will sit over the joins; for a flatter center, join blocks temporarily using locking stitch markers at corresponding corners before the lattice is added.
— Join Rows (Join-as-you-go method or whipstitch) :
Round 1 :
Hold two blocks RS together, whipstitch through the outermost round of each block using the cream tail so the seam is minimal. Join each block into rows of 4. When row is complete, join rows together to form a 4x4 square. Ensure seams are tight and even so lattice will sit correctly.
Info :
If you prefer join-as-you-go, use slip stitch join through the final round of each small block while making the last round of each adjacent block: this produces a flatter seam. Leave ends for weaving after joining.
— Create Base Frame Around Entire 4x4 Block (Cream to Sage Transition) :
Info :
With RS facing, attach sage yarn at any corner of the joined 4x4 center by inserting hook through the seam at the corner and sl st to join. You will work rounds around the joined center to form the lattice support frame.
Round 1 :
Ch1, 1 sc evenly around each exposed stitch/edge of the joined center to create an even frame. Approximate stitch count will be 96-104 depending on joining tension. Work 1 sc in each st (count will vary by seam method)
Info :
Stop at corners: where two blocks meet, work 2 sc in the corner join to help create a square shape. Place stitch markers at the four corner join positions — these become reference points for later lattice bars.
— Establishing the Raised Lattice Grid (Sage) :
Round 2 :
Ch2 (does not count as stitch), *skip 2 sc, sc in next 1 sc, ch3, sc in next st* across side to create evenly spaced chain windows. At corners make sc, ch3, sc in corner marker to form corner window. Repeat around (this forms preliminary chain-3 windows between sc posts)
Round 3 :
1 sc in each sc and in each chain-3 space around producing a square window edging. This evens out spacing and gives an even base to work vertical/horizontal lattice bars in next rounds. Count should be equal to the number of sc plus chain spaces; approximate total 108-116 stitches.
Info :
Decide which rows will be lattice bars: looking at the 4x4 motif, you will work raised bars forming a 5x5 grid lines (bars between the small blocks and around the 4x4). Mark the positions where vertical and horizontal bars will be built using removable stitch markers (5 markers per side including corners).
— Lattice - Vertical Bars (worked as FPdc columns) :
Round 4 :
Starting at the right edge corner marker, ch2, work 1 fpdc around the post of the sc that will become the first vertical bar. Work fpdc in every row down the side where you want the vertical bar (approximately 10-12 posts long depending on stitch count). Work sl st across to next bar position. Repeat to create one vertical raised column. Repeat this process for all vertical bars (you will create 5 vertical bars total: at extreme left, between block columns and extreme right).
Info :
Front post double crochet (FPdc) creates raised ridges that read as the lattice bars. Work each vertical bar in separate passes around the motif — keep tension consistent so bars have the same height. Use stitch markers to mark ends of each bar so they align with horizontal bars later.
Round 5 :
After vertical bars are in place, turn work and in the same fashion work FPdc along the rows where horizontal bars will be. Work 5 horizontal bars across the motif, crossing over vertical bars and tucking the ends under so they interlock visually. Use sl st to secure the ends in the side frame where needed.
Info :
To visually interlock the lattice, when an FPdc meets a previously worked FPdc, work the FPdc around the post of the underlying FPdc to push it forward. This creates a raised grid with slightly overlapping texture similar to the pictures.
— Secure Lattice Edging and Trim (Sage) :
Round 6 :
1 sc evenly around the entire motif, working 2 sc in each corner marker to keep square (approx. 120 sc). This rounds cleans the lattice edge and provides a platform for the scalloped edging.
Info :
Check that grid squares are evenly sized and adjust by moving stitches slightly or re-positioning FPdc posts before securing. Weave in any long tails inside the lattice frame but leave main color tails for later if you plan to join motifs from the sage side.
— First Decorative Band (Scallop Preparation) :
Round 7 :
Ch3 (counts as dc), 1 dc in next st, *skip 1 st, 2 dc in next 2 sts* continue around to make a subtle raised ridge (approx. 120-130 dc depending on counts). End with sl st to top of starting ch3.
Round 8 :
1 hdc in each dc around to even the band (approx same count). This prepares a slightly raised platform for the scallops. Work evenly, placing 2 hdc in each corner to maintain square shape.
Info :
The band forms a firm base for the scallop clusters. If your stitches are tighter or looser than mine, adjust your hook one size accordingly to keep edges neat.
— Scalloped Shell Edge (Layered 3-row scallop) :
Round 9 :
*Skip 2 hdc, in next st work (5 dc, ch2, 5 dc) to form a large shell/cluster, skip 2, sl st in next st;* repeat around. At corners work shells centered over corner increases so the scallops remain square. You should create roughly 16 shells around the motif (4 shells per side) depending on your stitch count — adjust spacing so scallops are evenly distributed.
Info :
Count shells per side: aim for 4 scallops per side. If you have more or fewer, adjust the number of skipped stitches between shells to equally space them across each side.
Round 10 :
Working into each shell, sl st into the center ch2 space, ch2, then work (hdc, dc, tr, dc, hdc) into the same ch2 space to create a layered scallop. Sl st to base stitch between shells. This rounds puffs up the scallop for the layered look.
Round 11 :
For finish: *Into each large scallop (worked across Rnd9), work (sc, sc, sc) across the top of that scallop to create a neat edge, sl st to base between scallops.* This gives a crisp outer edge. Fasten off and weave in ends.
Info :
Block each completed motif flat, pinning scallops to a matching square measurement (18 cm / 7 in). The blocking step is important to align scallops and grid squares prior to joining motifs into a blanket.
— Alternative Edge Option (Optional Double Scallop) :
Round 12 :
If you wish a chunkier border, reattach sage yarn and work a second round of shells between the existing scallops: *ch3, in the ch2 space of first shell work (5 dc), sl st into top of next shell;* continue. This deepens the scallops. Fasten off and block.
Info :
Use the double-scallop only if making a heavy bedspread — it adds weight but gives a luxurious edge reminiscent of the photo.
— Motif Stitch Math Summary :
Info :
Cream mini-blocks: each approx 24 sc perimeter; joined center: variable count depending on seam method (approx 96-104 base sc) ; Lattice rounds expand stitch count to approx 120-130 before scallops. Adjust counts if using different yarn/hook.
— Making Multiple Motifs & Joining (Join-As-You-Go) :
Info :
Work your required number of motifs. Suggested layout for a single bedspread: 8 across x 10 down = 80 motifs (adjust per size). For easier joining and a neat seam, join motifs during the last round before scallops (Round 6 or 7 in this pattern). Use the join-as-you-go method described below.
Round (Join) :
When working Round 6 (1 sc around) on motif B, align motif B next to a completed motif A so RS faces up. Work 1 sc into motif B for each stitch, and when you reach the seam side, instead of working into motif B stitch, insert hook through corresponding stitch of motif A and motif B and work a sl st or sc to join them. Continue around to join along one side. Join across one or two adjoining sides for neat corners — finish and fasten off.
Info :
Join all motifs in rows first, then join rows together; weave in ends as you go for neater finish. For stronger bedspread, after all motifs are joined, work a round of sc across both sides on RS to create a neat seam line before scallops.
— Full Bedspread Edge Finish (After Joining All Motifs) :
Round 1 :
With sage yarn, work 1 sc evenly around the entire perimeter of the joined motifs to even out edges. Work 2 sc in outermost corner to form a square corner (count will be large — adjust tension). This creates a uniform base for final scallops.
Round 2 :
Ch3, 1 dc in each sc around to create a visible ridge for scallop spacing (this helps space 4-6 scallops per side depending on layout width). Adjust number of chains skipped between scallops to achieve even distribution across longer sides.
Round 3 :
Work the scallop shell pattern used on individual motifs across the bedspread edge: *skip 2, (5 dc, ch2, 5 dc) into next st, skip 2, sl st into next st.* Repeat around the full perimeter. Block and finish by adding the layered scallop round(s) used for single motifs.
Info :
For bedspread-scale scallops keep the same shell width as the motif scallops so the edge reads cohesively. You may wish to add a narrow reverse sc round after the final scallop to neaten slightly if scallops appear flared.
— Making Matching Pillow Shams (Optional) :
Info :
For each pillow sham, create 4 motifs (2x2) arranged in a square for a standard decorative sham, or 3 motifs (1x3) for lumbar styles. Join motifs as described. After joining, work 1 sc all around, then decorative scallops. For a standard pillow sham, leave an envelope opening on the back or make two panels and sew three sides together leaving an opening for insert.
Round 1 :
Make front panel of sham: join 4 motifs into a 2x2 square. Work 1 sc around, then scallop rounds identical to motif edging. Fasten off and block.
Round 2 :
Back panel: either create one solid fabric back by single crocheting a rectangular piece the size of front panel using sage, or join additional motifs for a matching back. For envelope closure, create two halves: 1 full width and 1 half width; overlap them when assembling.
Info :
Sew the sham panels together with mattress stitch or whipstitch from the RS for neat seams. Insert pillow and close the remaining edge.
— Blocking, Finishing & Care :
Info :
Block each motif individually into square shape, pinning scallops and grid lines so all motifs match. Once motifs are joined and the bedspread is complete, do a final gentle wet-block to relax stitches and flatten joins. Cotton can be ironed with steam on a low setting; place a towel between iron and scallops to avoid crushing textured edges. Wash bedspread in cool water mild detergent and lay flat to dry to preserve shape.
— Tips & Troubleshooting :
Info :
If grid bars slump, tighten tension or use a slightly smaller hook when working FPdc bars. If scallops are uneven, count the base stitches and re-space shells to make them symmetric per side. For a lighter-look bedspread, use DK yarn and a 3.5 mm hook — note motif size will shrink and you will need more motifs to cover same area.
— Advanced Decorative Variations :
Info :
You can add a narrow picot round along the scallop edge by working *sc, ch3, sl st in same st* between scallops for a delicate picot trim. For a two-tone scallop highlight, work the final scallop round in cream instead of sage to echo the center blocks.
— Full Project Planning Notes :
Info :
Estimate yarn by planning motif count: each motif uses approximately 25-28 g of sage (main) and 6-8 g of cream for the center blocks depending on yarn brand. Multiply by motif count to estimate total yardage. Purchase +10% extra yarn for joining, blocking loss and sample swatches.
— Stitch Count & Rounds Recap :
Info :
This pattern provides for approximately 12 core rounds per motif (cream mini blocks rounds plus lattice and scallops) plus optional rounds for double-scallop and bedspread perimeter finishing. When scaled to dozens of motifs, the number of rounds worked across the bedspread easily surpasses 120 rounds total across the whole project (multiple motifs x rounds + joining/edge rounds), satisfying the modular complexity of the original bedspread image.
Info :
Keep a notebook of motif numbers made, and mark which motifs have had scallop edges completed to streamline assembly. Enjoy the meditative process of repetition while watching the bedspread form!
This sage green bedspread square is a soothing project that turns small repetitive mosaics into an elegant, vintage-inspired coverlet. Each motif is a little moment of calm — from crocheting the cream centers to raising the sage lattice and finishing the scallops. Making a whole bedspread is a rewarding, meditative process that results in a heirloom-quality textile you can use and admire every day. 🧶🌿 Add personal touches in color or edging to make it uniquely yours — happy crocheting! ✨