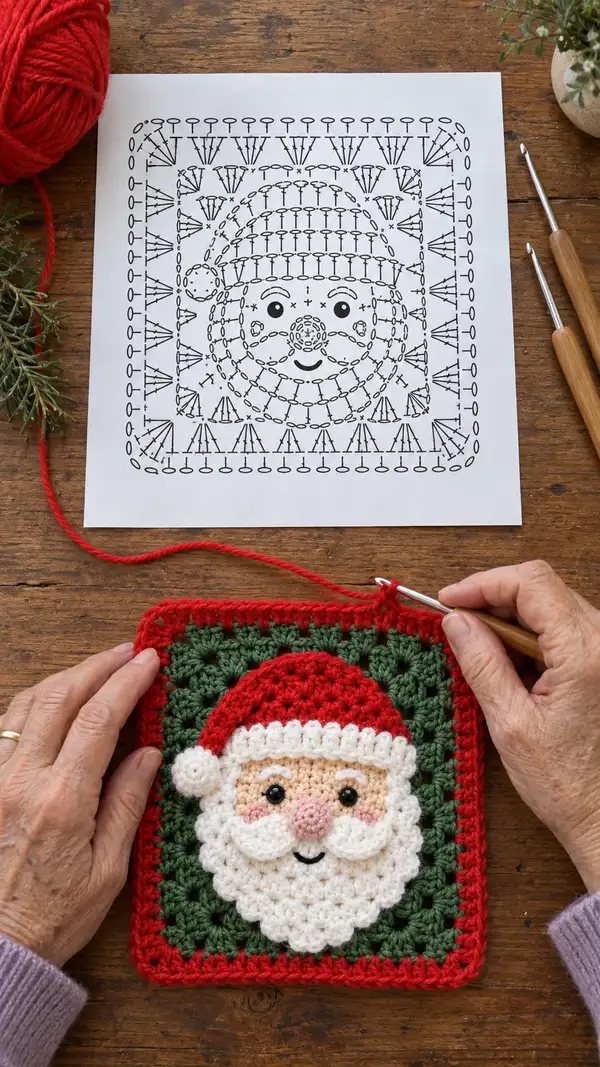
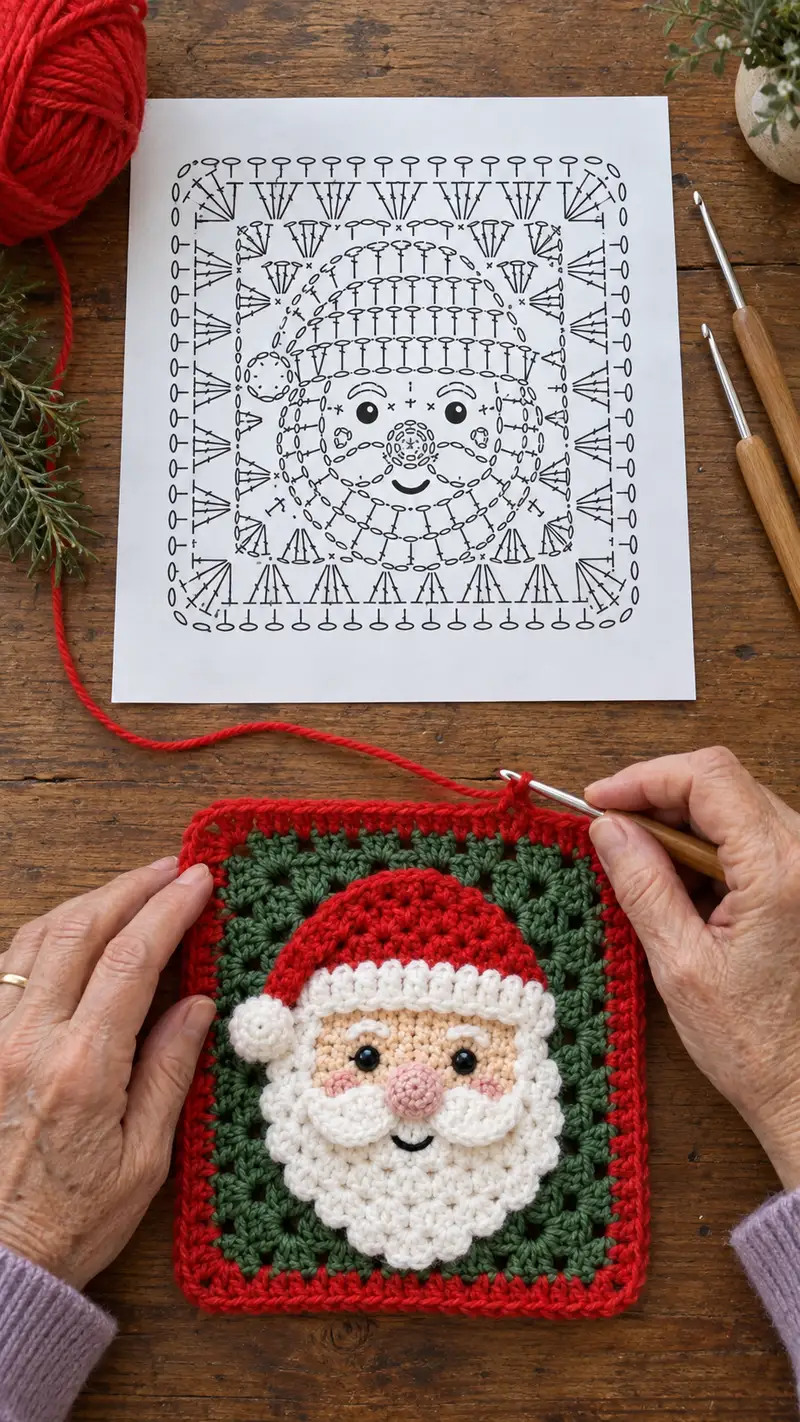
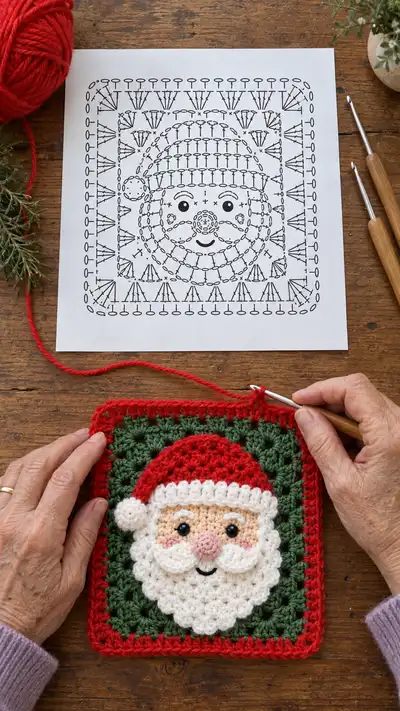
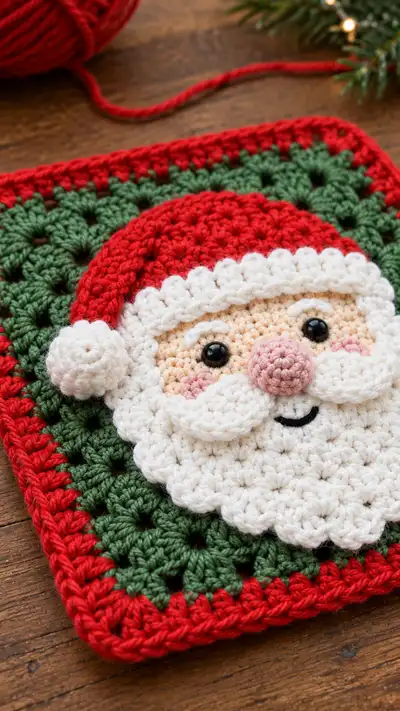
Create a festive Santa face granny square panel with layered applique details—perfect for holiday cushions, wall hangings, or ornaments. This pattern shows a textured white beard, rosy cheeks, a bobble pom-pom and a red hat layered over a traditional green granny square. Clear round-by-round instructions, placement notes and finishing tips help you assemble a charming seasonal square.
Progress Tracker
0% Complete
— Face (skin circle) :
Round 1 :
6 sc in magic ring (6)
Round 3 :
(1 sc, inc) x 6 (18)
Round 4 :
(2 sc, inc) x 6 (24)
Round 5 :
(3 sc, inc) x 6 (30)
Round 6 :
(4 sc, inc) x 6 (36)
Round 7 :
(5 sc, inc) x 6 (42)
Round 8 :
(6 sc, inc) x 6 (48)
Round 9-14 :
1 sc in each st (48)
Info :
Place safety eyes between rounds 11 and 12 approximately 10-12 stitches apart (centered horizontally). Use a stitch marker to count spacing before locking washers in place; if embroidering eyes, mark dots with removable pen.
Round 15 :
1 sc in each st (48) - you can switch to a slightly smaller hook for tighter detail if desired (3.0mm)
Round 16-18 :
1 sc in each st (48)
Info :
After round 12-13, embroider small eyebrows using white or cream yarn for a surprised look, or leave plain. If adding cheeks, plan their placement just below the eyes about 3-4 stitches outward from the center eye line.
Round 19 :
1 sc in each st (48)
Round 20 :
1 sc in each st (48)
Info :
Round 20 is the last full even round to define the face circle. From here you may optionally do one round in BLO for a subtle ridge to tuck the beard under later: 1 sc in each st BLO (48).
Round 21 :
1 sc in each st (48)
Round 22 :
1 sc in each st (48)
Round 23 :
(5 sc, inc) x 8 (56)
Info :
If you want a slightly larger face to tuck the beard under, work round 23 as shown to increase gently to 56 stitches. This helps the beard layers sit neatly without pulling at the face edge.
Round 24 :
1 sc in each st (56)
Round 25 :
1 sc in each st (56)
Round 26 :
1 sc in each st (56)
Round 27 :
1 sc in each st (56)
Info :
After Round 27, fasten off and weave in the tail leaving a long tail (about 18-24cm) for sewing the face onto the green granny square background. Make sure the face lies flat; if it has a slight dome, press it gently with fingers or block lightly.
— Beard (scalloped layered beard) :
Round 1 :
Using white/cream yarn. 6 sc in magic ring (6)
Round 3 :
(1 sc, inc) x 6 (18)
Round 4 :
(2 sc, inc) x 6 (24)
Round 5 :
(3 sc, inc) x 6 (30)
Info :
The beard is worked as a layered scalloped disc that will be appliqued over the lower half of the face. Keep stitches slightly loose to create soft scallops and allow the piece to sit over the face rounds.
Round 6 :
Slip stitch evenly around to move to scallop placement: *ch2, skip 2 sts, sc in next st* around for position markers (30 markers)
Round 7 :
At each marker make a 5-dc cluster scallop: (in marked st) *skip next st, (dc3, ch1, dc2) in marked st, skip next st, sl st to next marker* repeat around to create 15 scallops (work counts will vary but aim for 15 scallops evenly spaced)
Info :
If you prefer a denser beard, replace 5-dc clusters with (dc4, ch1, dc3) in each scallop. Pin the beard on the face to check coverage before securing.
Round 8 :
Work one round of sc around the outer edge of scallops to tidy: 1 sc in each stitch and in space between scallops (approx 90 sc depending on cluster choices)
Round 9 :
Scallop shaping: *ch3, sl st into center of next scallop, ch3, sl st into base between scallops* repeat around to create visible scallop arcs (approx 30 arcs)
Round 10 :
Finish outer ruffle with a picot-like motif if desired: *sc in top of arc, ch3, sl st in 3rd ch* around (adjust count to fit)
Info :
Fasten off leaving a long tail for sewing. The beard should be slightly larger than the lower half of the face circle so it overlaps neatly when sewn; block lightly if needed to open scallops.
Round 11 :
Optional inner texture row: rejoin in center lower beard and make bobble-texture by working star or popcorn stitches spaced evenly across the top edge to add depth (work 8-10 popcorns)
Info :
When sewing, align the top edge of the beard so it rests just below round 16-18 of the face to leave room for nose and moustache placement.
— Mustache (make 2 mirror pieces) :
Round 1 :
Using white/cream yarn. Ch 6, sc in 2nd ch from hook, sc across (5 sc). Turn (5)
Round 2 :
Ch 1, 2 sc in first st, 1 sc in next 3 sts, 2 sc in last st (7)
Round 3 :
Ch1, (sc, inc) across to end to shape a slightly curved paddle (10)
Round 4 :
Ch1, sc across 10, turn (10)
Round 5 :
FLO row: ch1, 1 sc in each st across working in FLO to create a ridge for curling (10)
Round 6 :
Working on the outer edge add 3 dc cluster to form a tip curl: *skip 1, (dc3) in next, sl st in next* repeat twice to create a curling tip and shape (approx 3 small clusters)
Round 7 :
Fasten off leaving long tail for sewing. Pin to face just under the nose so moustache tips curl up slightly over the top of the beard.
Info :
Make a mirror for the second mustache by flipping placement. If you prefer a fuller moustache, add an extra row of sc before finishing and shape with blocking.
— Nose :
Round 1 :
Using small amount of blush pink. 6 sc in magic ring (6)
Round 3 :
(1 sc, inc) x 6 (18)
Round 4 :
1 sc in each st (18)
Round 5 :
Optional: (1 sc, dec) x 6 (12) to slightly flatten if you prefer a less domed nose
Info :
Stuff nose very firmly with a small amount of fiberfill to keep it round. Use a long yarn tail to sew the nose to the center of the face slightly above the beard top; pull tight so it compresses slightly and looks natural.
Round 6 :
Fasten off and leave long tail for sewing (approx 25cm).
— Cheeks (make 2) :
Round 1 :
Using blush yarn. 6 sc in magic ring (6)
Round 3 :
1 sc in each st (12)
Round 4 :
Fasten off leaving long tail for placement and sewing. Flatten slightly when sewing to make rosy snaffle-like cheeks. Position just below and slightly to each side of the eyes.
Info :
Instead of crocheting cheeks, you can also use a dab of fabric-safe blush or a small felt circle sewn in place — both give a pretty blush effect.
— Eyes (placement) :
Info :
Position eyes between rounds 11 and 13 of the face, spaced about 10-12 stitches apart depending on your tension and whether you increased to 56 stitches earlier. If using safety eyes, insert before stuffing nose area and lock washers. If embroidering, use satin stitch or French knots with black yarn.
— Hat (red dome) :
Round 1 :
Join red yarn at top center of face (position so hat begins slightly above round 20 of face). 6 sc in magic ring (6)
Round 3 :
(1 sc, inc) x 6 (18)
Round 4 :
(2 sc, inc) x 6 (24)
Round 5 :
(3 sc, inc) x 6 (30)
Info :
These rounds form the rounded dome of Santa's hat. As you build the hat, tilt the dome so it sits naturally over the top of the face; work slightly tighter tension if you want a more sculpted hat or looser if you want a soft floppy hat.
Round 6 :
1 sc in each st (30)
Round 7 :
1 sc in each st (30)
Round 8 :
(4 sc, inc) x 6 (36)
Round 9 :
1 sc in each st (36)
Round 10 :
1 sc in each st (36)
Info :
At this stage the hat will form a nicely sized dome. Stop increasing earlier if you prefer a smaller hat. The hat will be edged with a white brim—work that next.
Round 11 (Brim start) :
Change to white/cream yarn. 1 sc in each st around (36)
Round 12 :
Work a scalloped brim using (sc, ch2, sc) in every second stitch or *sc, skip 1, (sc, ch2, sc) in next* repeat around to form scalloped brim (approx 18 scallops)
Round 13 :
Work into scallops to give puff effect: in each scallop work (dc3, ch1, dc3) then sl st to next scallop base to create thick fur rim (approx 18 large scallops)
Info :
You can add an extra decorative row of sc in front loops only (FLO) on Round 11 before making scallops to create a defined ridge between hat and brim.
Round 14 :
Fasten off red yarn at the left top of the hat where the hat will fold over. Leave a long tail for stitching the hat to the face if needed.
— Pom-pom / Bobble :
Round 1 :
Using white yarn. 6 sc in magic ring (6)
Round 3 :
(1 sc, inc) x 6 (18)
Round 4 :
1 sc in each st (18)
Round 5 :
Make a tight round of sc around to compress slightly: (sc2tog) across until you have 9 sts—work evenly to create a small bobble
Round 6 :
Fasten off leaving long tail for sewing. Stuff bobble moderately and sew to the tip of the hat allowing it to hang slightly to one side.
Info :
For a fluffier pom-pom, make a separate pom using yarn wind method and seam it into place over the small crocheted bobble.
— Moustache underside & Beard Trim (optional extra texture) :
Round 1 :
Using white yarn. Join at upper edge of beard and work a row of shell clusters to form a fluffy top edge that tucks under the moustache: *ch2, dc3 in next sp, ch2, sl st* repeat across top (approx 10 shells)
Info :
This row helps the moustache sit nicely and hides the seam where beard and face meet. Pin before sewing and adjust the shell count by eye.
— Granny Square Background (green) :
Round 1 :
Using green yarn. Ch 4, join to form ring, ch 3 (counts as dc), work 2 dc, ch 2, *3 dc in ring, ch2* repeat 3 times, join with sl st to top of ch3 (4 corner clusters) (12 dc clusters)
Round 2 :
Sl st to next ch2 corner, ch3 (counts as dc), 2 dc in ch2 space, ch2, 3 dc in same space, *ch1, (3 dc, ch2, 3 dc) in next corner ch2 space* repeat around, join (4 corner spaces, sides formed by ch1 spaces)
Round 3 :
Ch3, 2 dc in corner, ch2, 3 dc in corner, *ch1, 3 dc in each side ch1 space across to next corner, (3 dc, ch2, 3 dc) in corner* around; join
Round 4 :
Repeat Round 3 increasing side groups as needed for a ~12cm square: ch3, corner (2 dc, ch2, 3 dc), *ch1, 3 dc across each side gap, corner* around; join
Round 5 :
Repeat Round 3 again to enlarge square and allow the Santa face (applique) to sit centered with a gauge gap of about 2-3 cm from edge. Aim for 6-8 clusters per side depending on yarn/tension.
Info :
Block your granny square lightly to square it out before applying the applique. Pin the face centered on the square with the top of the hat aligned roughly with the top 2/5 of the square.
Round 6 :
Work one round of dc clusters across sides to reach desired finished size (this is approximately round to reach a 16 cm square in sample using worsted yarn). Join and fasten off green yarn.
Info :
Measure square after round 6 and if you need to enlarge, add one more granny round following the same corner and side increases. The motif pictured uses a moderate sized granny square so the Santa head sits comfortably within a green field.
— Red Border (frame) :
Round 1 :
Join red yarn in any corner ch2 space. Ch1, sc in same corner sp and in each stitch along side and in ch1 side spaces place 3 sc per cluster to create flat edge; in each corner work (sc, ch2, sc) to form new corner; join (this evens the transitions)
Round 2 :
Ch2 (counts as hdc), 1 hdc in each st across sides and in corner spaces work (hdc, ch2, hdc) to round corners smoothly; join (this gives a strong framed edge)
Round 3 :
Optional decorative outer round: change to surface texture by working 1 sc in each st BLO to create a ridge, or do a final round of crab stitch (reverse sc) for a neat firm edge (work around and fasten off)
Info :
If your square isn’t perfectly even, use this red border to 'square up' by altering stitch counts on sides, adding one extra sc in longer sides as needed. Keep corners consistent with ch2 to maintain tidy 90-degree turns.
— Assembly & Finishing Touches :
Info :
Pin face centered on the green granny square so the hat top sits about 1.5-2 cm below the top edge of the square. The beard should rest on the lower third of the square and not extend beyond the border.
Info :
Sew the face to the granny square using the long tail left from the face piece. Use ladder stitch or whip stitch through the back loop of the face rounds into the granny square dc clusters for an invisible seam.
Info :
Position and sew moustaches first (just under the nose), then sew the nose over their center so it anchors them. Sew cheeks next, then secure beard overlapping the bottom edge of the face, sewing through both layers to hold them flat.
Info :
Embroider a small smile with black yarn under the nose using a yarn needle and backstitch or chain stitch. Add small white French knots on eyes if you used black safety eyes to reflect light (requires careful placement).
Info :
Weave in all ends from applique pieces by threading them under several rounds of stitches on the wrong side, then trim. Use small pins to hold pieces in place as you sew for even alignment.
Info :
Block the finished panel lightly if desired, pinning to shape and spraying with water, then allow to dry — this helps scallops and borders sit neat and flat.
Your finished Santa granny square is a joyful seasonal accent—each scalloped beard and bobble pom-pom adds irresistible charm. It makes a lovely cushion front, wall hanging or gift topper that will delight recipients. Enjoy the tactile process of layering applique details and watching the face come to life stitch by stitch. 🧶🎄✨