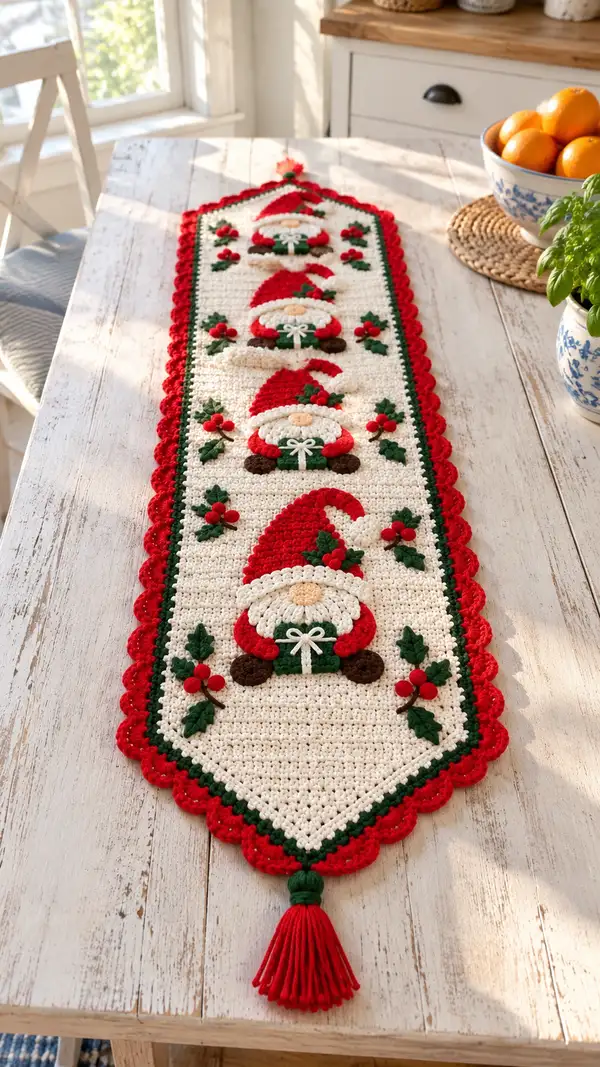
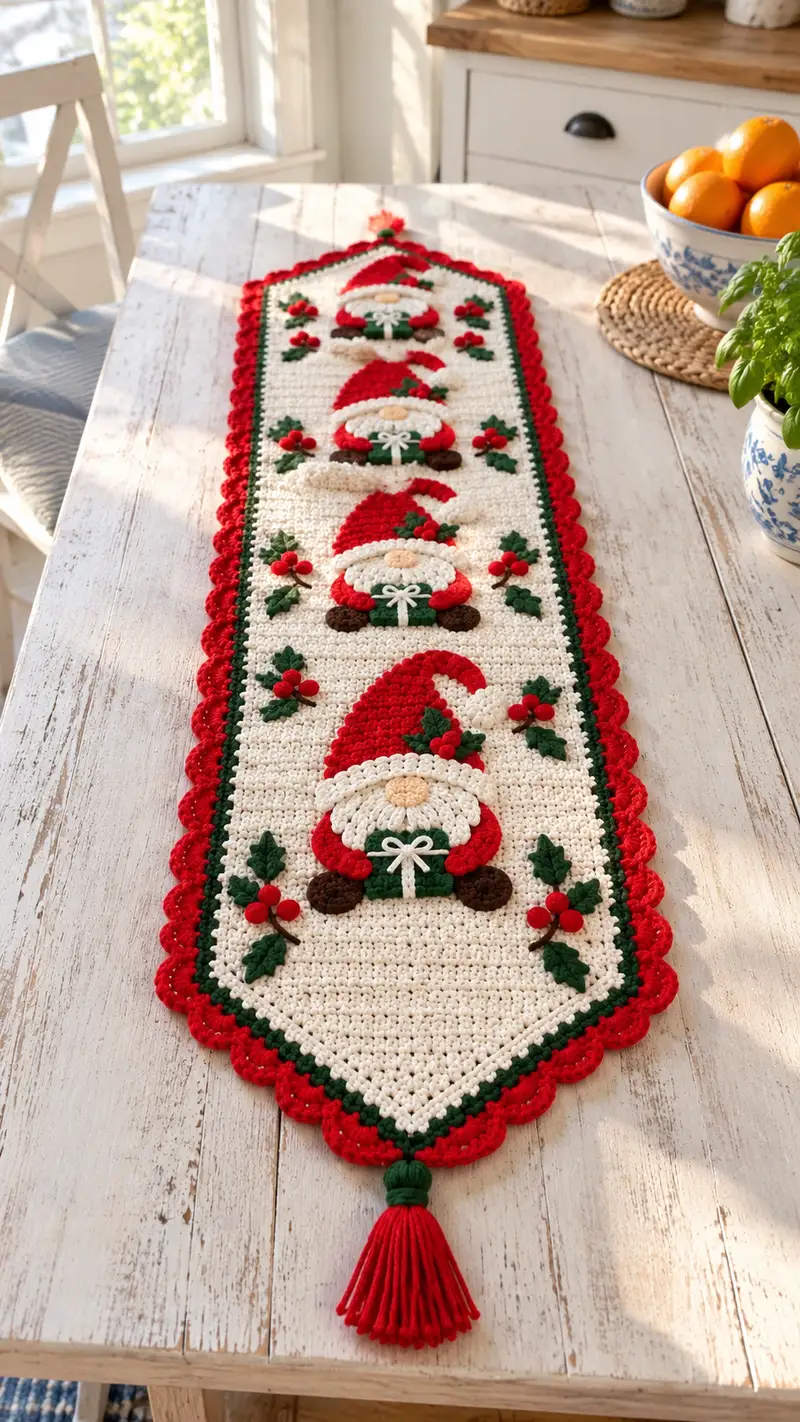
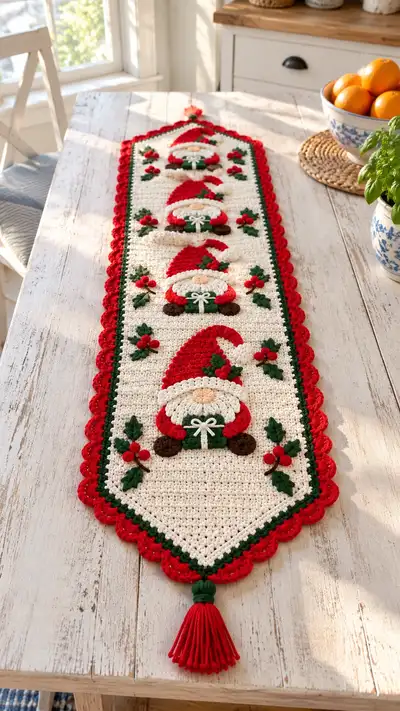
A long, elegant holiday table runner featuring a repeating gnome motif, holly sprigs, and scalloped edging. Worked in warm cream with bright red hats, deep green accents, and brown boot details. Finished with tassels at each pointed end, this runner brings handmade seasonal charm to your table.
Progress Tracker
0% Complete
— Gauge & Finished Size :
Info :
Gauge is not critical but helpful: 14 sc x 14 rows = 4 inches in worsted weight with 5.0 mm hook. Finished runner in this pattern measures approximately 14 inches wide by 48-52 inches long depending on number of motif repeats and tassel length. Adjust chain length and repeats for alternate sizes.
— Notes :
Info :
Pattern is worked in rows for the main panel and includes multiple appliques attached after panel is complete. Work tightly for a neat fabric that hides stuffing and keeps appliques flat. Use stitch markers at the beginning of each row. Color changes are carried or fastened off depending on preference; Info boxes indicate recommended method.
— Materials Prep :
Info :
Prepare 4 small bobbles per holly berry cluster by winding yarn around a finger and securing, or crochet small 3-loop bobbles as instructed later. Pre-cut tassel bundles for ends approximately 14 inches long before folding and attaching.
— Foundation & Main Panel (Background) :
Round 1 :
Chain 121 (this produces 120 stitches across, adjustable by multiples of 2 for pattern symmetry).
Round 2 :
Row 1 (RS): sc in 2nd ch from hook and in each ch across. Turn. (120)
Round 3 :
Row 2 (WS): ch 1, sc in BLO in each st across for a subtle ridge. Turn. (120)
Info :
Working BLO on alternating rows creates a lined texture similar to the pictured runner. Keep the edges straight by placing a stitch marker in the first stitch of every row.
Round 4-11 :
Rows 3-10: Repeat Row 2 alternating BLO and full sc rows as follows: Row odd = ch 1, sc in each st across (120); Row even = ch 1, sc in BLO across (120). Turn each row. (120)
Round 12 :
Info: Change to Cream/Ivory (if not started in cream). Carry green/red yarn inside if preferred when making inner green stripe later. Fasten off other colors.
Round 13-20 :
Rows 11-18: Continue texture pattern (alternating sc and sc BLO) until you have created a flat panel tall enough for the spacing of your first gnome applique. Rows 11-18 = 8 rows (120)
Info :
Placement: Divide your panel mentally into four vertical sections for four gnome motifs spaced evenly along the length. From the starting edge, the center of the first gnome will sit approx row 16-20 depending on preference. Use pins or stitch markers to mark centers before attaching appliques.
Round 21-28 :
Rows 19-26: Work 8 more rows of alternating sc/BLO to create a smooth field for appliques. Keep stitch count consistent. (120)
Round 29 :
Info: At this point you can add a narrow green inner stripe to frame the motifs. Change to Deep Green yarn for 2 rows. If you prefer to attach the inner border after appliques, skip this change and work in cream — instructions for border follow]
Round 30-31 :
Rows 27-28 (Optional green stripe): With Deep Green, ch 1, sc across (120). Turn. Repeat once. (120)
Round 32-55 :
Rows 29-52: Change back to Cream/Ivory. Continue the alternating texture rows until you've reached the length needed to accomodate the row spacing between the gnome motifs (approx 24 rows between motif centers). Work 24 rows (120 each).
Info :
If your runner will include four gnomes, plan spacing so that the center points fall on rows 16, 36, 56, and 76. Use stitch markers to mark the middle stitch across width for each motif center placement.
Round 56-63 :
Rows 53-60: Continue 8 more rows in background cream (alternating sc/BLO) maintaining 120 sts per row. (120)
Round 64 :
Info: Shape the pointed end for the top of the runner. We will form a centered point by decreasing at both edges over the next 16 rows so that the panel narrows evenly to a point. Mark the center stitch on the last row as reference.
Round 65 :
Row 61 (Shape start): ch 1, sc2tog across first 2 sts, sc in each st until last 2 sts, sc2tog last 2 sts. (118)
Round 66 :
Row 62: ch 1, sc in each st across. (118)
Round 67 :
Row 63: ch 1, sc2tog first 2 sts, sc in each until last 2 sts, sc2tog last 2 sts. (116)
Round 68 :
Row 64: ch 1, sc across. (116)
Round 69 :
Row 65: ch 1, sc2tog first 2 sts, sc across until last 2 sts, sc2tog. (114)
Round 70 :
Row 66: ch 1, sc across. (114)
Round 71 :
Row 67: ch 1, sc2tog first 2 sts, sc across to last 2 sts, sc2tog. (112)
Round 72 :
Row 68: ch 1, sc across. (112)
Round 73 :
Row 69: ch 1, sc2tog in first 2 sts, sc across, sc2tog last 2 sts. (110)
Round 74 :
Row 70: ch 1, sc across. (110)
Round 75 :
Row 71: ch 1, sc2tog across edges as above to continue shaping. Continue this decrease pattern until the panel narrows to an appropriate point about 10-14 sts wide at center depending on your preference. (decrease by 2 sts every 2 rows)
Info :
Maintain symmetry by keeping counts consistent on both sides. If your width becomes less than 16 sts across the center point before desired length, stop decreasing and work even to finish the point.
— Bottom Point & Tassel Attachment :
Round 76 :
Once the panel has been narrowed to a central point about 10-14 sts across, ch 1 and work 1 sc in each stitch across the narrow portion. Fasten off leaving a long tail for finishing. Block lightly to flatten the point. (10-14)
Round 77 :
Info: Make tassel base by wrapping red yarn around a 5 inch card 14-18 times for a full tassel. Fold and secure at the top with a separate wrap of green yarn. Attach to the point with the long tail using a tight knot and several whip stitches. Trim tassel to even length.
— Repeat Panel for Opposite End :
Round 78 :
Mirror the shaping instructions to create the opposite pointed end: reattach cream yarn to the open straight edge and work even sc rows until you reach the opposite motif spacing, then shape decreases symmetrically across another 16 rows. Maintain the texture pattern while shaping.
Info :
When completed, you will have a long panel with two pointed ends and a flat center field for attaching four gnome appliques and holly sprigs. Fasten off and weave in any loose ends before applique placement.
— Gnome Applique (Make 4 Identical) :
Info :
Each gnome is made from multiple small appliques sewn to the panel: Hat, Beard, Face/Nose, Arms, Mittens, Boots, and small Gift/Leaf accents. Work each motif flat and sew in place using matching yarn. Use the 4.0 mm hook for tighter, neater shapes.
Hat — Round 1 :
Make hat: With Accent Red, magic ring, 6 sc into ring. (6)
Hat — Round 2 :
Inc in each st around. (12)
Hat — Round 3 :
(1 sc, inc) x 6. (18)
Hat — Round 4 :
(2 sc, inc) x 6. (24)
Hat — Round 5 :
(3 sc, inc) x 6. (30)
Hat — Round 6 :
1 sc in each st around. (30)
Info :
We will now create a curved triangular hat by working short rows and shaping. Mark the center front stitch to help form the slanted tip.
Hat — Round 7 :
ch 1, sc 12, turn. (12) — work back-and-forth across only a portion of stitches to create the ear flap shape for the hat's slant. Leave the remainder unworked.
Hat — Round 8 :
ch 1, sc dec across to shape tip (sc2tog x 6). (6)
Hat — Round 9 :
Fasten off leaving a long tail for sewing. Fold and sew the short-row edges to form the curved hat shape, creating a tapered tip similar to the image. Add a tiny pom-pom or bobble at the tip by making 6 sc in a magic ring with red and closing tightly, then sew to hat tip.
Beard — Round 1 :
With Cream (same as background), ch 6, sc in 2nd ch from hook and next 4 sts (5). Turn. This flat strip will be worked into a scalloped beard texture.
Beard — Round 2 :
ch 1, sc across (5). Turn. (5)
Beard — Round 3 :
Work 1 sc in first st, (hdc, dc, hdc) in next st to create a small scallop, 1 sc in last 2 sts. Turn. (5 with scallop)
Beard — Round 4 :
Repeat Round 3 along length to create 3 scallops across the beard area for fullness. Fasten off leaving tail for sewing. (approx width 5)
Info :
The beard is intentionally dimensional; consider adding a loop stitch or surface loop detail to mimic fluffy beard texture. Attach the beard to the panel first so the hat and other pieces tuck behind it for a layered look.
Nose — Round 1 :
With Peach/Nude, magic ring, 6 sc into ring. (6)
Nose — Round 2 :
(1 sc, inc) x 3. (9)
Nose — Round 3 :
1 sc in each st around. (9)
Nose — Round 4 :
Fasten off leaving a long tail and add a touch of polyester stuffing if a slightly raised nose is desired. Sew the nose centered above the beard scallops.
Arms — Round 1 :
With Red, ch 8, sc in 2nd ch from hook across (7). Turn. (7)
Arms — Round 2-5 :
Work 4 rows sc back and forth to form a flat tube for each arm. (7 each row)
Arms — Round 6 :
Fold and seam long edge with slip stitch or whip stitch to form a neat rounded arm. Fasten off leaving tail. Lightly stuff the rounded end if a little dimension is desired.
Mittens — Round 1 :
With Green, magic ring, 6 sc into ring. (6)
Mittens — Round 2 :
1 sc in each st around. (6)
Mittens — Round 3 :
Fasten off leaving long tail for sewing to arm ends. Sew mittens so the hands appear to cradle a small gift or rest on the beard as in the photo.
Boots — Round 1 :
With Brown, magic ring, 6 sc into ring. (6)
Boots — Round 2 :
Inc in each st around. (12)
Boots — Round 3 :
1 sc in each st around. (12)
Boots — Round 4 :
Fasten off leaving tail. Flatten and sew boot pairs side-by-side beneath beard area to represent feet peeking out.
Gift Accent (Optional) — Round 1 :
With Green, ch 4, sc in 2nd ch from hook and next 2 ch (3). Turn. (3)
Gift Accent — Round 2 :
sc across (3). Fasten off and tie small white yarn bow to top to create the tiny package the gnome holds. Sew between arms.
Info :
Each gnome uses a layered attachment method: sew boots to panel, then beard overtop, then face/nose, then hat last so hat overlaps the top of the beard for a neat layered look.
— Holly Leaf & Berry Clusters (Make 8-12 clusters) :
Leaf — Round 1 :
With Deep Green, ch 6. Sc in 2nd ch from hook, hdc next, dc next, hdc next, sc next. (5 main stitches creating a tapered leaf)
Leaf — Round 2 :
Fold chain in half and work sc across opposite side to create symmetric leaf shape, finishing with a sc along the base for a neat edge. Fasten off leaving long tail for sewing. (approx 10)
Leaf — Round 3 :
Info: Use surface slip stitch with brown or green to embroidery-style vein down center if desired. Leaves in the photo are slightly cupped; use a damp blocking or steam to shape if you want more curve.
Berry — Round 1 :
With Accent Red, magic ring, 6 sc into ring, pull tight. (6)
Berry — Round 2 :
sl st around to create a tight berry, fasten off leaving tail. Make 3 berries per cluster and sew together at base to make the little grouped berries seen at each side of a gnome.
Info :
Arrange clusters symmetrically on each side of each gnome — three berries with two leaves behind them gives the pictured look. Sew securely to the panel through the base of the leaves and through the berry core, hiding knots with extra whipping.
— Decorative Inner Border (Green) :
Round 1 :
With Deep Green, join yarn to long sides of the panel with sl st at bottom corner, ch 1, sc evenly along edge across the long side to the opposite point. Make sure you have an even number of stitches to allow scallop spacing outside. Turn at the point and work along the angled point edges with sc to keep density. Continue around the perimeter so you have a neat green frame around the cream panel.
Round 2 :
ch 1, sc in each st around to build a stable base for scalloped edge. Fasten off and weave in ends. Count sts to confirm evenness; adjust with extra sc or skipped sc at corners to keep scallops symmetrical.
Info :
This green border should sit slightly inset from the red scallop so the red scallop wraps the edge boldly. If you omitted the green stripe earlier, working it now yields the same visual result.
— Outer Scalloped Border (Red) :
Round 1 :
With Accent Red, join to any green sc, ch 1, *skip 2 sc, 5 dc in next sc (scallop made), skip 2 sc, sl st in next sc; rep from * around. At corners/pointed ends, adjust by working 7 dc in the central corner stitch to maintain curve. Fasten off and weave in ends.
Round 2 :
Info: For a fuller scallop repeat the shell one additional row: join red into top of any shell, ch 1, in each shell work (sl st, ch 2, 5 dc) into the central dc of the shell, sl st to next shell center. This creates a layered scallop similar to the runner pictured.
— Final Assembly & Sewing Appliques :
Round 1 :
Info: Block the panel flat and mark centers for each gnome using pins or removable stitch markers. Typically centers are placed at approximately equal intervals along the panel; use the earlier marked rows and spacing to line up four centers evenly.
Round 2 :
Pin each applique piece in its final place: boots first, then beard, then nose, then hat and arms on top. Layer so seams are hidden — hat tip will overlap the top of the beard as pictured. When satisfied with placement, use a matching yarn and tapestry needle to sew each piece securely with small, even stitches.
Round 3 :
Info: Sew leaves and berry clusters symmetrically on either side of each gnome. For the small green bows (if making), create a tiny bow with white or cream yarn and sew at the center of the gnome's hands as the present tie.
Round 4 :
Weave all tails into the wrong side of the panel and trim. Use a running invisible stitch around appliques where edges meet the background to prevent snagging. Add a few backstitches through the panel body if the piece will be handled frequently.
— Tassels & Final Finishing :
Round 1 :
Create 2 tassels per runner end (one main tassel plus a small wrapped top as shown). For the main tassel use 14-18 wraps of Red yarn around 5 inch card, fold, wrap the top tightly with green yarn to form the neck, and secure with a knot. Attach to the very tip point using the long tail left from panel shaping and reinforce with several whip stitches through the tassel neck and the panel point.
Round 2 :
Trim tassels evenly and steam gently if needed to relax any kinks. Give the whole runner a light steam block if necessary and press carefully on a towel to set shape without flattening appliques.
Info :
For extra stability, you can stitch an additional fabric backing using cream cotton or felt to the wrong side of the panel, sewing close to the green inner border. This hides ends and helps the runner lie flat on the table.
This festive gnome table runner is a joyful blend of texture, color and charming appliques — perfect for holiday tables and seasonal gatherings. Each gnome and holly cluster adds personality while the scalloped border and tassels finish the piece with handcrafted flourish. I hope this pattern inspires cozy decorating and many warm memories around your holiday table. 🧶🎄✨