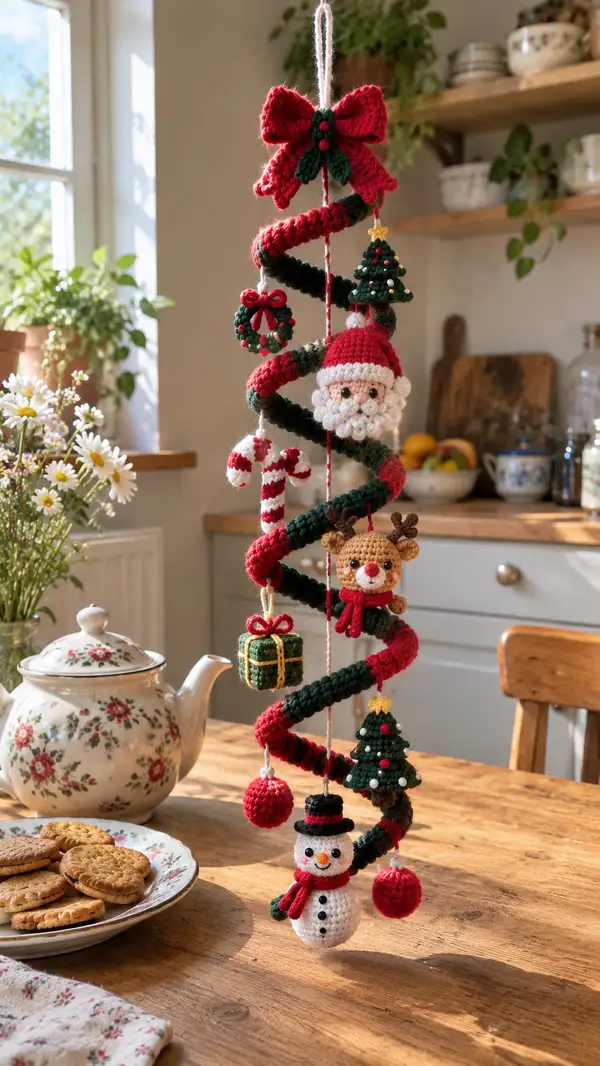
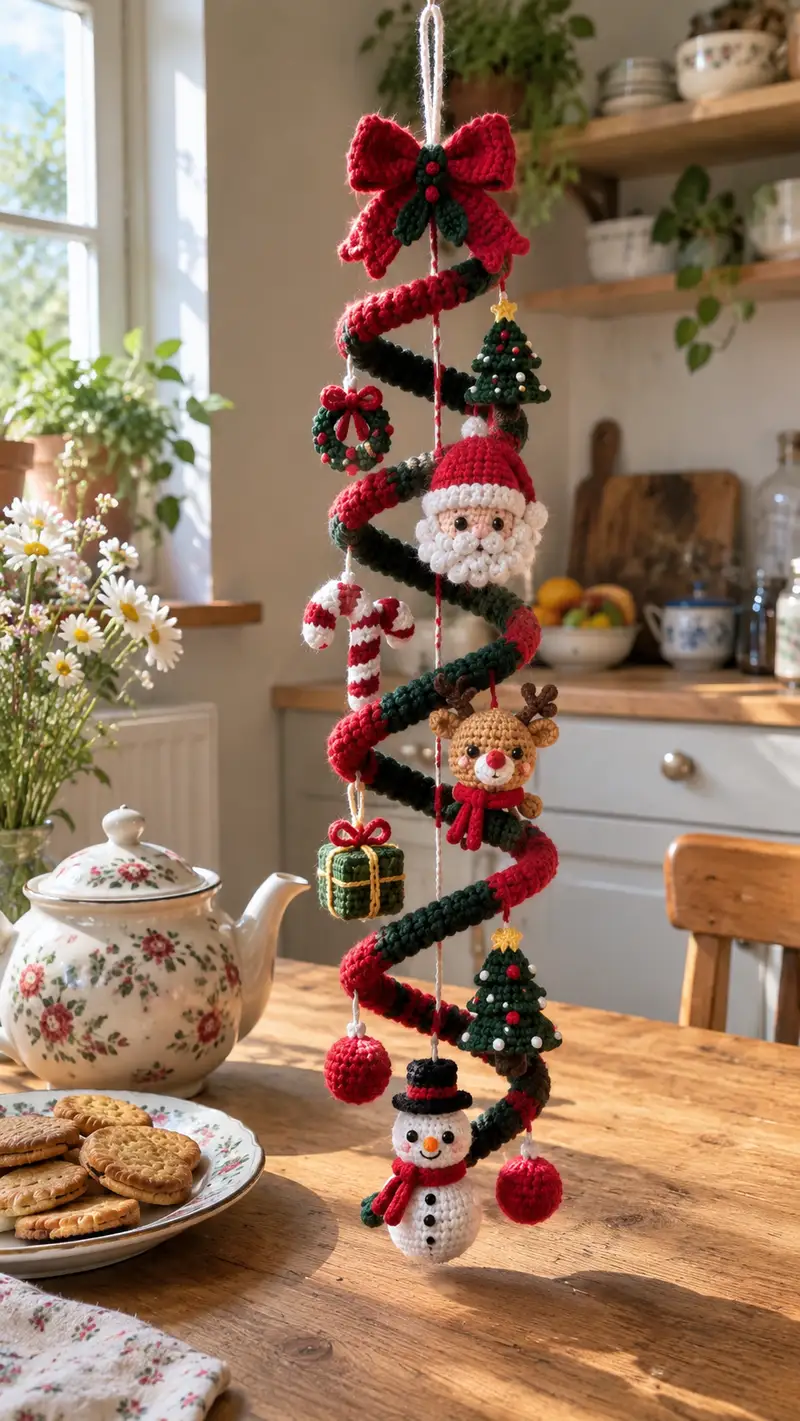
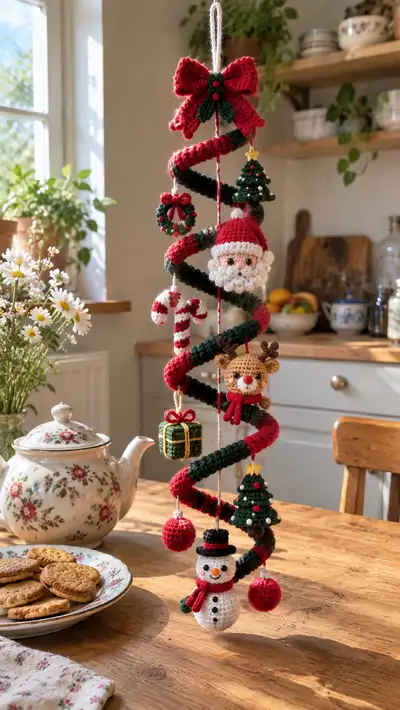
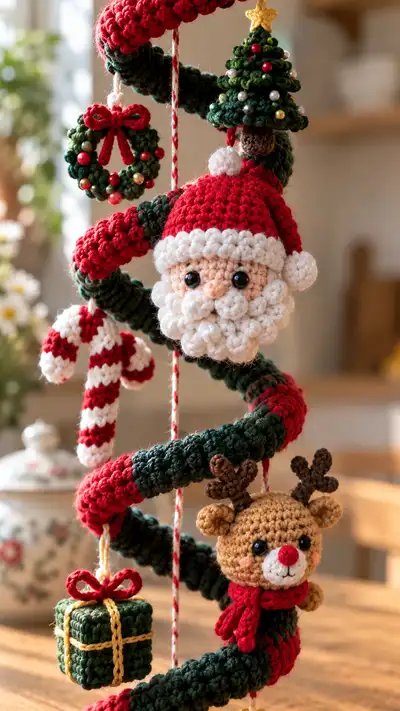
A festive spiral hanging garland crocheted in traditional red and deep green with a collection of tiny amigurumi ornaments. This set features a bobble-bearded Santa head, a cheerful reindeer, a smiling snowman, mini trees, a wreath, candy cane, gift and baubles that dangle from the spiral. Designed to be hung in a doorway or as a centerpiece, it combines textured stitches, colorwork stripes and lots of small sewed-on details for a charming holiday display.
Progress Tracker
0% Complete
— Notes and Preparation :
Info :
All pieces are worked in continuous rounds unless otherwise specified. Use a stitch marker to mark the first stitch of each round. Tight tension is essential to hide stuffing inside small ornaments. You can adjust hook size one step smaller if your tension is looser than pictured.
Info :
For the spiral base you will crochet a long narrow tube and insert a flexible wire or cord into it while stuffing so that the spiral holds its shape. Plan the total length before starting—this pattern assumes roughly 120cm finished spiraled length when coiled.
— Spiral Base (make 1) :
Round 1 :
6 sc in magic ring (6)
Round 3 :
(1 sc, 1 inc) x 6 (18)
Info :
Change to forest green yarn for the first stripe section now. Carry unused yarn inside tube where comfortable to create the spiral stripe pattern later. Insert a long piece of cotton cord or temporary rope if you prefer to slide wire in later.
Round 4-13 :
1 sc in each st (18) (work 10 rounds total in green) (18)
Info :
Change to red for next stripe. To create a chunky candy-cane spiral effect, alternate color every 8-10 rounds. When changing color, finish last stitch of the round with the new color and carry the other color inside the tube, or fasten off and rejoin if you prefer a cleaner join.
Round 14-23 :
1 sc in each st (18) (work 10 rounds in red) (18)
Info :
Repeat color bands for the whole length. Continue alternating green and red in blocks of 8-12 rounds to match the photo's broad stripes. Keep your rounds even and use your stitch marker at the start of each round.
Round 24-113 :
1 sc in each st (18) (continue alternating colors every 8-12 rounds to create spiral stripes) (18)
Info :
At about round 90 (or when the tube reaches roughly 90-100cm long uncoiled) prepare to insert the flexible wire. Slide the wire through the tube carefully so it sits centered along the cord. If wire insertion is too tight, remove some stuffing in a small area, insert wire, then restuff and continue.
Round 114 :
(4 sc, 1 dec) x 3 (15)
Round 115 :
(3 sc, 1 dec) x 3 (12)
Info :
Begin gradual taper to finish the end neatly. If you prefer an open-ended spiral, you may stop earlier; for closed ends, continue decreases as below and leave a tail for sewing shut.
Round 116 :
(2 sc, 1 dec) x 3 (9)
Round 117 :
(1 sc, 1 dec) x 3 (6)
Info :
Fasten off leaving long tail. Stuff the end lightly and use tail to sew the last 3 stitches closed. Weave remaining yarn inside the tube and trim. Seal any wire ends by folding wire tips or covering with heat shrink tubing, and tuck inside tube. Shape the tube into a spiral and secure with a few whip stitches to hold coil position if desired.
— Top Bow (make 1) :
Round 1 :
6 sc in magic ring (6)
Round 3 :
(1 sc, 1 inc) x 6 (18)
Round 4-6 :
1 sc in each st (18)
Info :
Work two identical bow loops and a ribbon tail piece. After making the two loops, flatten and sew the center tightly with a short strip to create the bow knot.
Round 7 :
Work FLO for 18 sts for a neat ridge. 1 sc in each st FLO (18)
Round 8-12 :
1 sc in each st (18)
Info :
Make a small narrow strip 2 ch, 6 sc across for the bow knot. Fold the loop pieces and wrap the knot strip around and stitch tightly at the center. Sew the bow to the top of the spiral tube, about 3–4 cm from the top loop.
— Santa Head (make 1) :
Round 1 :
6 sc in magic ring (6)
Round 3 :
(1 sc, 1 inc) x 6 (18)
Round 4 :
(2 sc, 1 inc) x 6 (24)
Round 5 :
(3 sc, 1 inc) x 6 (30)
Round 6 :
(4 sc, 1 inc) x 6 (36)
Info :
Change to skin/peach yarn for the face at the end of round 6. Place safety eyes between rounds 10-11 about 6-8 stitches apart depending on desired expression. Mark eye placement now with pins or safety eye alignment tool.
Round 7-12 :
1 sc in each st (36)
Round 13 :
(5 sc, 1 dec) x 6 (30)
Round 14 :
(4 sc, 1 dec) x 6 (24)
Info :
Insert safety eyes between rounds 10-11 and secure backs. Embroider or attach small embroidered eyebrows above eyes using brown thread if desired. Begin stuffing the head firmly but leave space for the hat to be attached.
Round 15 :
(3 sc, 1 dec) x 6 (18)
Round 16 :
(2 sc, 1 dec) x 6 (12)
Round 17 :
(1 sc, 1 dec) x 6 (6)
Info :
Fasten off leaving long tail for sewing. Finish stuffing firmly to make a rounded head. Sew opening closed and weave tail through inside of head to secure. Add a small safety stitch for the top of the head to anchor hat later.
— Santa Beard (make 1 large beard and 2 cheek tufts) :
Round 1 :
6 sc in magic ring (6)
Round 3 :
1 sc in each st around (12)
Info :
The beard is made using bobble clusters for the curly look. A bobble here equals a 5-dc cluster worked into the same stitch and secured by a sl st. Make several bobbles across the round, then sew the beard plate to the lower face with bobbles pointing outward to mimic curls.
Round 4 :
*sc 1, bobble in next st* rep around (12 bobbles and sc pairs if space allows)
Round 5 :
sc around filling any gaps; add extra bobbles at edge for fullness (approx 14-16 bobbles total)
Info :
Make two smaller cheek tufts: start 6 sc magic ring, inc to 12, fasten off leaving tails. Attach them to the sides of the beard to frame Santa's face. Position beard so it covers lower half of face and sew firmly.
— Santa Hat (make 1) :
Round 1 :
6 sc in magic ring (6)
Round 3 :
(1 sc, 1 inc) x 6 (18)
Round 4 :
(2 sc, 1 inc) x 6 (24)
Round 5-9 :
1 sc in each st (24)
Info :
Switch to white for trim for one round: join white and work 1 sc in each st BLO to create defined brim. Fold brim forward and sew into place. Create a small white bobble for the hat tip and attach firmly.
Round 10 :
Change to white trim: 1 sc in each st BLO (24)
Round 11 :
Fasten off red, make small white pom from 6 sc tight sphere: 6 sc magic ring, 6 inc (12), (1 sc,1 inc)x6 (18), sc around 18, decrease down to 6, close. Sew to hat tip.
Info :
Sew hat onto top of head with even stitches. Tuck the hat brim under the top of the beard and secure so it looks nestled into the facial features.
— Reindeer Head (make 1) :
Round 1 :
6 sc in magic ring (6)
Round 3 :
(1 sc, 1 inc) x 6 (18)
Round 4 :
(2 sc, 1 inc) x 6 (24)
Round 5-9 :
1 sc in each st (24)
Info :
Place 6mm safety eyes between rounds 7-8 about 7 stitches apart. Leave room for a white snout. Use a small stitch marker to mark nose placement. Stuff head moderately firm but leave a flat area for neck attachment.
Round 10 :
(4 sc, 1 dec) x 4 (20)
Round 11 :
(3 sc, 1 dec) x 4 (16)
Round 12 :
(2 sc, 1 dec) x 4 (12)
Round 13 :
(1 sc, 1 dec) x 4 (8)
Info :
Fasten off leaving tail for sewing. Make a small white snout: 6 sc magic ring, 6 inc (12), 1 sc around 12, decrease to 6 and close. Sew a small red nose puff to the snout center for the Rudolph look.
Round 15-20 (Antlers and Ears) :
Make two small ears: 6 sc magic ring, 6 inc (12), 1 sc around 12, fold and sew to head at rounds 3-4. Make antlers in dark brown: ch 6, sl st back along chain to create a branched short antler; shape into three prongs and sew to crown of head. Attach scarf as small 12-st strip wrapped once around neck and tied at front.
— Snowman (Head+Body as one piece) :
Round 1 (Head) :
6 sc in magic ring (6)
Round 3 :
(1 sc, 1 inc) x 6 (18)
Round 4-6 :
1 sc in each st (18)
Info :
Insert two 6mm safety eyes between rounds 4-5. Embroider a small carrot nose with orange yarn protruding 2-3 stitches out. Stuff head firmly then continue to body.
Round 7 :
(2 sc, 1 inc) x 6 (24)
Round 8 :
(3 sc, 1 inc) x 6 (30)
Round 9-14 :
1 sc in each st (30) (body rounds)
Round 15 :
(3 sc, 1 dec) x 6 (24)
Round 16 :
(2 sc, 1 dec) x 6 (18)
Round 17 :
(1 sc, 1 dec) x 6 (12)
Info :
Before final closure, add two small black French-knot-like beads or embroidered dots for coal buttons, and wrap a tiny red scarf strip around neck. Fasten off and sew closed. Keep overall stuffing moderate so the snowman hangs well from the spiral.
— Small Christmas Tree Ornament (make 2) :
Round 1 (trunk) :
6 sc in magic ring with brown (6)
Info :
Change to green and work stacked cone layers to create a tiered tree. Add beads between rounds using contrasting thread to secure them, or sew beads on afterwards.
Round 3 :
Attach green: 6 sc into brown trunk top to make base of tree (6)
Round 4 :
(1 sc, 1 inc) x 3 (9)
Round 6 :
(1 sc, 1 inc) x 3 (12)
Round 7 :
1 sc around (12)
Round 8 :
(2 sc, 1 inc) x 4 (16)
Round 9 :
1 sc around (16)
Round 10 :
Decrease slightly around top to make conical shape: (3 sc, 1 dec) x 4 (12)
Round 11 :
Close and fasten off leaving tail for sewing. Sew a small yellow star on top from 6 sc magic ring worked into small star shape and attach with a few stitches.
Info :
Sew tiny pearl beads or red seed beads into tree tiers as ornaments using a needle and gold thread. If desired, glue beads into place for extra security for hanging items that may be touched.
— Mini Wreath (make 1) :
Round 1 :
Make a ring base: ch 12, join to first ch with sl st to make ring. Work 24 sc evenly around ring (24)
Round 2 :
1 sc in each st (24)
Round 3 :
*sc 1, bobble in next st* rep around to create texture (12 bobbles approx)
Info :
Sew small bead 'berries' randomly on bobbles using thread. Make a tiny red bow and attach to wreath top. Fasten off and leave a loop for hanging.
— Gift Box (make 1) :
Round 1 :
6 sc in magic ring (6)
Round 3 :
(1 sc, 1 inc) x 6 (18)
Round 4-8 :
1 sc around (18) (grow cube height)
Round 9 :
Start forming top by decreasing to shape a small box lid: (3 sc, 1 dec) x 4 (15)
Round 10 :
(2 sc, 1 dec) x 4 (12)
Round 11 :
Fasten off leaving long tail; stuff lightly and sew closed. Wrap with gold yarn for ribbon: make two crossing lines and a small bow on top with a tiny loop for hanging.
— Candy Cane (make 1) :
Round 1 :
6 sc in magic ring with white (6)
Round 2-4 :
1 sc in each st (6)
Info :
Work a short tube and then shape a curved top by increasing on one side and decreasing to create the hook. Alternate red stripes by changing color every two rounds: work 2 rounds white, join red for 2 rounds, continue until cane length is reached.
Round 5-14 :
1 sc in each st with color changes every 2 rounds to create candy stripes (6)
Round 15 (hook formation) :
Increase on one side to add 6 stitches: (sc 1, inc) around half of tube to widen curve (approx +6 sts), then work rounds in the new stitch count to curve, finally decrease to return to 6 and close.
Round 16 :
Close and fasten off leaving tail to sew the cane hook end closed. Stuff only lightly so cane hangs with a curve.
— Small Baubles (make 2) :
Round 1 :
6 sc in magic ring (6)
Round 3 :
(1 sc, 1 inc) x 6 (18)
Round 4-6 :
1 sc around (18)
Round 7 :
(1 sc, 1 dec) x 6 (12)
Round 8 :
6 dec (6) close and fasten off leaving tail for hanging loop
Info :
Add a stitched gold loop or a short length of chain-stitch to hang each bauble. Beads may be sewn on the surface for metallic shine if desired.
— Snowman Scarf and Hat Details :
Round 1 (Scarf) :
Ch 18, sc back across chain to create a narrow scarf band. Wrap once around snowman's neck and sew ends or make fringe by knotting short strands through the ends.
Round 2 (Snowman Hat) :
6 sc magic ring, increase to 12, work 4 rounds (12) for hat crown, then 1 round in black BLO for brim (12). Make a tiny red trim and top pom if desired.
Info :
Keep the snowman small and light—avoid heavy beads to maintain balance on the spiral. Attach hat to bottom of the hanging cord so it dangles beneath a bauble or near the spiral's lower coil.
— Small Details & Finishing Touches :
Info :
Use embroidery to stitch smiles, rosy cheeks, and nostrils. For cheeks use tiny dabs of blush or pink thread to embroider small circles. For tiny berries and beads use a fine needle and polyester thread to prevent the beads from pulling through yarn.
Info :
Attach all ornaments to the central hanging cord with lengths of contrasting pearly yarn or twisted red/white threads. Space ornaments evenly along the height of the spiral so they hang at different coil depths, as shown in the image.
Info :
To add stability to the spiral, whip stitch the coil to itself at 3-4 discreet anchor points. These stitches should be hidden and only used to prevent unwinding during display or travel.
Info :
When sewing on small parts, use ladder stitch or whip stitch for invisible joins. For heavy-use decorations, stitch pieces through multiple times and tie secure knots before weaving ends back into the body.
This festive spiral garland brings tiny crochet ornaments into a dramatic vertical display, perfect for small spaces or as a hanging centerpiece. Each miniature character and bauble adds its own personality and charm, and the spiral base provides a playful way to suspend them in a single elegant column. I hope this crochet journey fills your home with handmade cheer and becomes a treasured seasonal decoration. 🧶🎄✨