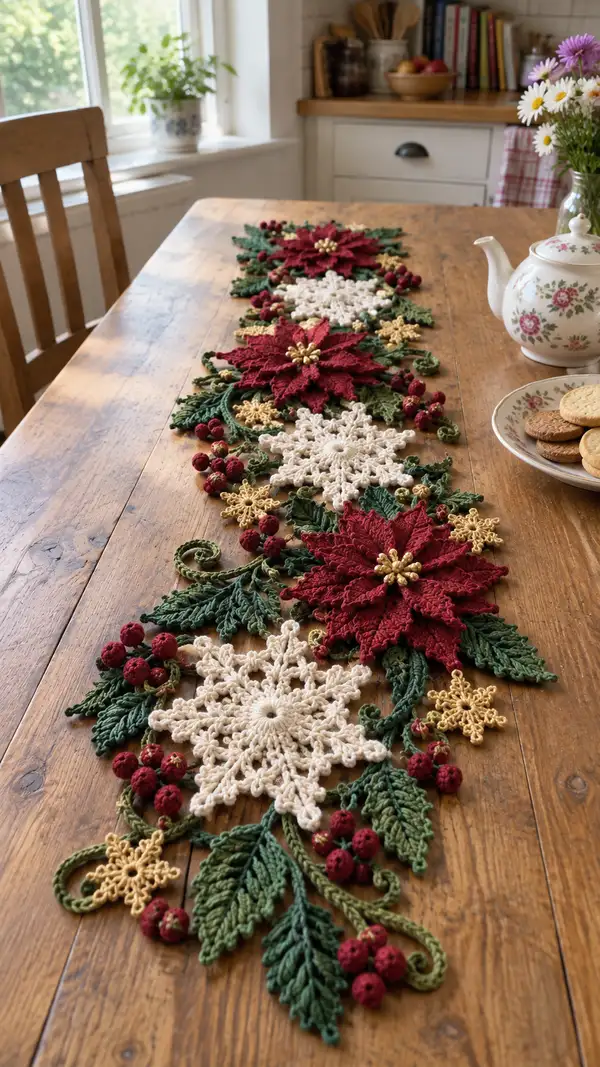
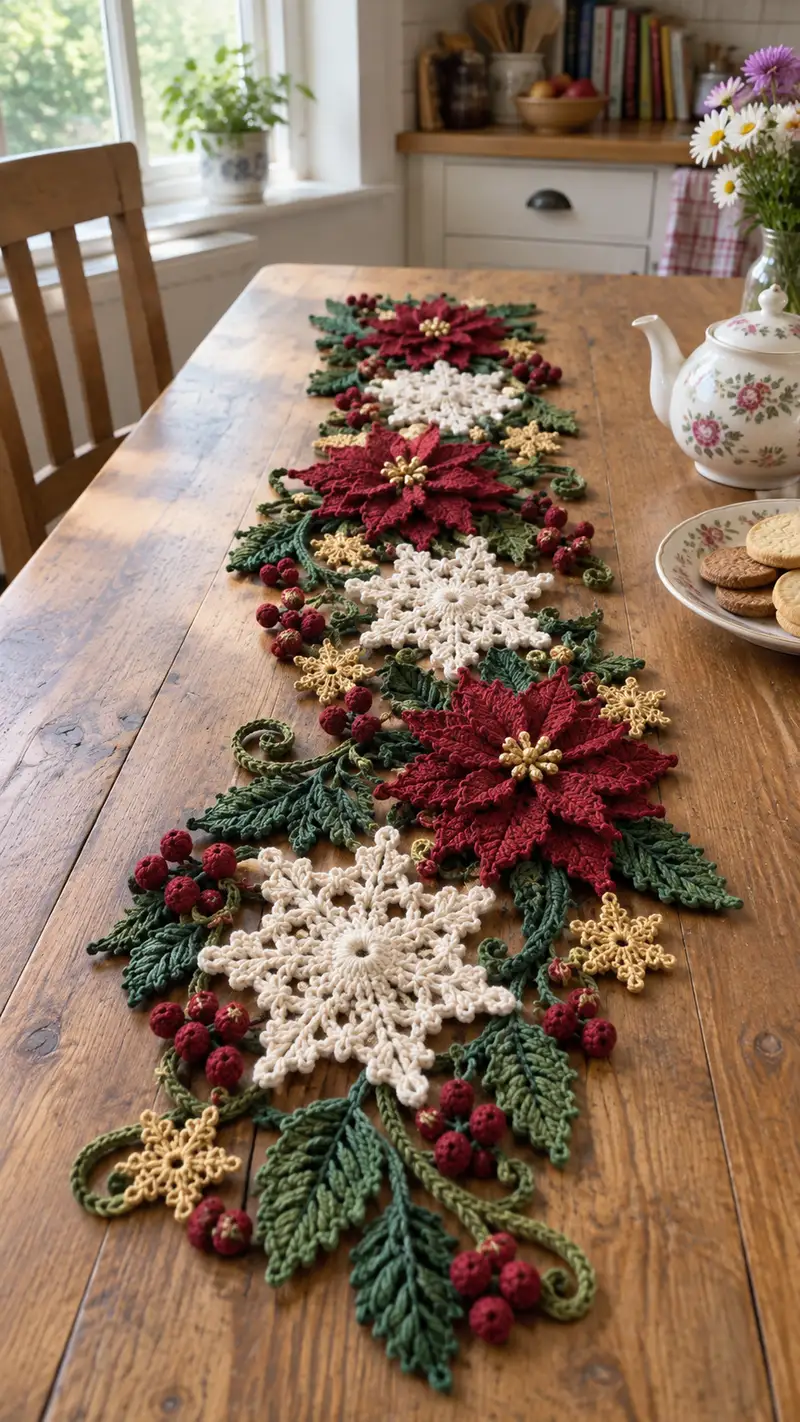
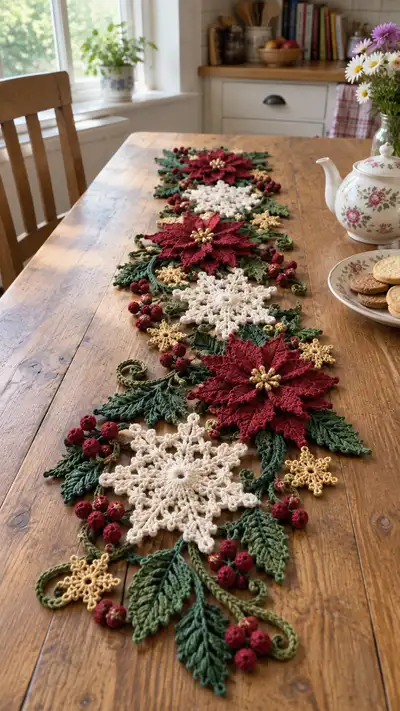
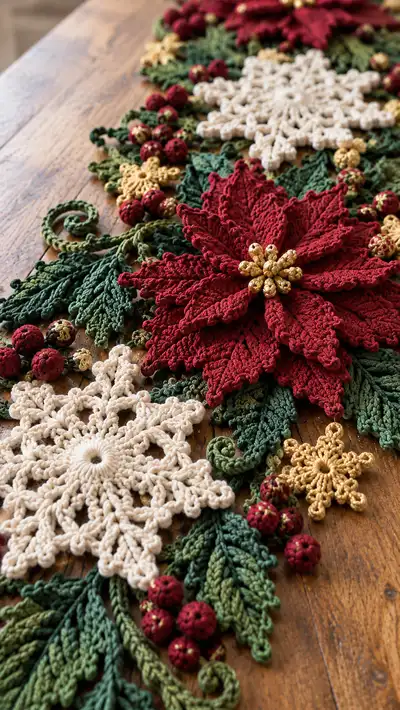
A richly textured holiday table runner featuring layered poinsettias, lacy snowflakes, curled vines, and clustered berries. Worked in worsted cotton for crisp stitch definition, this runner lays flat and looks stunning down a dining table. The design combines 3D petals, openwork snowflakes and leafy sprigs for a classic seasonal centerpiece.
Progress Tracker
0% Complete
— Overview :
Info :
This pattern is modular: you will make large poinsettia flowers (each made of layered petals and a central bead cluster), lacy snowflake motifs, elongated leaves, small gold snowflakes, berry spheres and curled vines. Motifs are arranged and sewn together to form a runner. Work motifs flat and block snowflakes/leaves before assembly for best results.
Info :
Gauge is not strict for this decorative runner, but for reference: a 10cm/4" square of sc in worsted cotton using 3.5mm hook = approx 16 sts x 18 rows. Adjust hook if you prefer tighter or looser fabric. Always block snowflakes to final size.
— Poinsettia Petal Unit (Make 24 petals for each large flower; 8 outer, 8 middle, 8 inner) :
Round 3 :
(1 sc, inc) x 6 (18)
Round 4 :
1 sc in each st (18)
Info :
This small disk will form the base of each petal; keep it flat. Use deep red yarn for petals. If making different size petals, adjust increases in Rounds 2-3.
Round 5 :
Ch3 (counts as dc), dc in same st, (sk next st, sc in next, ch1, sk next, 3 dc in next) x 6 around, join with sl st to top of ch3. You will have 6 dc-cluster shells (36 dc total incl ch3) (approx result: 36)
Round 6 :
Working into dc clusters: sl st into center of first cluster, ch1, (sc, hdc, 2 dc, dtr, picot (ch3 sl st into first ch of picot), dtr, 2 dc, hdc, sc) in each cluster around, join with sl st. This creates the petal shape outline (6 petals per unit; counts vary by clusters).
Info :
Work Round 6 with slightly taller stitches (dtr) to give a pointed, cupped petal. Do not pull tight; keep petals gently cupped by shaping with your fingers while the stitches are warm.
Round 7 :
Ch1, sc in same st, (ch2, sk 2 sts, sc in next) around petal top to create picot edging and loops for texture. Fasten off leaving long tail for assembly. Petal base diameter approx 1.5-2" depending on yarn/hook.
Info :
Make petals in three sizes by varying Round 6 height and number of clusters: For outer petals work dtr as written; for middle petals substitute tr for dtr (slightly shorter); for inner petals use 2 dc instead of dtr for a smaller profile.
— Poinsettia Petal Layering (Assemble one large flower = 24 petals layered) :
Round 1 :
Create a small flat disc in deep red to anchor petals: mr, 8 sc (8); sl st to join, fasten off but leave long tail for sewing.
Info :
Pin the anchor disc to a flat surface. Arrange petals with 8 outer (largest), 8 middle, 8 inner (smallest) in concentric layers, staggering petals so seams hide. Use the long tails to sew each petal through its base to the anchor disc, catching the disc and the petal base with a whip or mattress stitch.
Round 2 :
Sew outer 8 petals evenly spaced around the anchor disc. After sewing each petal, add a small tacking stitch at petal tip to maintain cupped shape if needed. After outer layer, position middle layer slightly offset and sew, then inner layer.
Info :
For a fuller look, slightly overlap petals and use a few running stitches across petal bases to secure layers. The finished flower diameter should be 8-10" for this runner when using worsted cotton and 3.5mm hook; adjust if you used different yarn.
— Poinsettia Center Pistils (Make one cluster per flower) :
Round 1 :
Using metallic gold: mr, 6 sc (6)
Round 3 :
Ch1, (sc, ch2, sc) in each st around to create little loops for bead attachment (12 loops)
Info :
Sew small gold beads or tiny crocheted bead covers to each loop. Alternatively, string beads on a short length of sewing thread and anchor them into the center. This creates the gilded pistils shown in the photo.
Round 4 :
Fasten off and weave ends. Use sewing thread to anchor bead cluster to center of layered petals, inserting stitches through anchor disc beneath petals for stability.
— Lacy Snowflake Motif (Make 6-8 snowflakes depending on runner length) :
Round 1 :
With cream yarn: mr, 8 sc (8)
Round 3 :
(1 sc, inc) x 8 (24)
Round 4 :
Ch4 (counts as tr), tr in next st, ch2, sc in next, ch2, (2 tr, ch2, sc, ch2) x 7 around, sl st to top of ch4. You now have 8 points forming the snowflake skeleton.
Info :
Round 4 builds the eight branches. Work with consistent tension so branches lie flat. Block snowflake after completion by pinning branches straight and steaming lightly or spritzing with water and letting dry.
Round 5 :
In each branch: sl st into first ch2 sp, ch3, (2 dc, picot, 2 dc) in same ch2 sp, sl st into next ch2 sp across branch to create decorative arms. Repeat for all 8 branches.
Round 6 :
Ch1, sc into base, *(ch5, sl st into top of branch to create open loops), sc into base between branches* repeat around. Fasten off, weave ends, block flat.
Info :
For larger lacy snowflakes, add another decorative round of picots and chains to give the airy look in the photos. If you want slightly stiffer snowflakes, thread a little starch on the finished motif while blocking.
— Long Leaf Motif (Make many; arrange in pairs and layered clusters) :
Round 1 :
Using forest green: ch12, working back across chain: sc in 2nd ch from hook, hdc in next, dc in next 3, tr in next 3, dc in next, hdc in next, sc in last. Do not turn; now work along other side of starting chain: sc, hdc, dc, tr, tr, dc, hdc, sc into starting chain base. Join with sl st to first sc to form a long leaf outline. (approx 22 sts)
Round 2 :
Ch1, working in BLO only around leaf edge: sc around evenly placing (sc, hdc, dc, dc, hdc, sc) rhythm to build a ribbed margin. Sl st to join. This creates a slight raised edge.
Round 3 :
Ch1, *fpdc around post of next 3 stitches from previous round, bpdc around next 3 stitches* repeat to create central vein texture down the leaf. Finish with sl st. (Work totals will match stitch count around leaf)
Info :
Leaf length and fullness can be varied by changing starting chain. Make both single leaves and paired leaves (sewn along the spine) to build layered greenery beneath flowers and snowflakes.
Round 4 :
Edge finish: ch1, sc around leaf, adding picots every 6 sts to mimic the textured tips seen in the photos. Fasten off leaving long tail for sewing.
Info :
Make leaves in a few shades of green to simulate depth. Slightly curl leaf tips by wetting lightly and pinning edges to curl inward while drying.
— Berry Sphere (Make many small berries in clusters of 3-7) :
Round 1 :
With burgundy yarn: mr, 6 sc (6)
Round 3 :
(1 sc, inc) x 6 (18)
Round 4 :
1 sc in each st (18)
Info :
For small realistic berries, no stuffing is often necessary; the dense rounds will form a tight ball. If you prefer slightly rounder berries, add a tiny bit of stuffing before finishing the last rounds.
Round 5 :
(1 sc, dec) x 6 (12)
Round 6 :
6 dec (6) finish stuffing slightly if desired; fasten off leaving tail. Use tail to sew together multiple berries into clusters of 3-7; anchor clusters into the runner with extra stitches from vines or leaves.
— Small Gold Snowflake / Mini Flower (Make many for scatter accents) :
Round 1 :
With gold yarn: mr, 6 sc (6)
Round 3 :
*(ch4, sl st into next st) x 6 to create small loops around center, then sl st to join*
Round 4 :
Into each ch4 loop: (sc, picot, sc) to form six small petals. Fasten off and weave ends. These are used as tiny gold snowflakes or little floral accents scattered among leaves and berries.
Info :
Mini flowers look particularly attractive when twisted slightly and sewn so that petals point in different directions; this adds a bit of sparkle between larger elements.
— Curled Tendril / Vine (Make multiple connecting vines) :
Round 1 :
Ch40 (or length desired), sl st into 2nd ch from hook, sl st across to end to create a spiral rope. Alternatively for thicker vine: ch20, 3 sc into each ch across to create a thicker corkscrew, fasten off leaving tail for sewing.
Round 2 :
Optional: With a contrasting green, chain a few 8-12 ch loops interspersed with small leaf attachments to mimic the thin curling tendrils seen in the photo.
Info :
When joining, place vines so they naturally curve between motifs. Use a yarn needle to stitch vines flat against motifs, creating subtle height differences for natural look.
— Join-As-You-Go Connector (Create small joining motifs and mesh to link larger motifs) :
Round 1 :
Ch6, join to form ring. Rnd: ch1, 12 sc in ring, sl st to join (12)
Round 2 :
Ch3, (1 dc, ch2, 1 dc) in each st around to form small daisy rings, sl st to top of ch3.
Round 3 :
Use these small connector daisies as join points: when assembling the runner pin motifs with a daisy between them and sew connector through outer loops of snowflake and inner base of leaf or petal to lock positions.
Info :
Plan motif placement on a large table before permanent sewing. Leave small gaps if you want to add extra vines or berries later. Sew connectors on underneath where possible so top stays decorative and uninterrupted.
Round 4 :
For a more structured runner start with a central strip of connectors: ch6, join, (12 sc) x 10 rounds to make a thin base 'spine' then work motifs off that spine with sl st or sewing. Fasten off when base matches length desired.
— Assembly & Layout Guide :
Info :
Layout all motifs on a large flat surface. Place large poinsettias at even intervals (example layout: poinsettia, snowflake, poinsettia, snowflake, poinsettia across runner). Surround each large flower with layered leaves, curl vines into decorative spirals, and tuck berry clusters in the leaf gaps.
Info :
Secure motifs using small invisible stitches from the motif base into the connector daisies or directly into the next motif's base. Use matching yarn for neat seams. Leave the top of petals free to give 3D effect but firmly anchor bases so runner is stable.
Round 1 :
Start by sewing the center flower(s) first. Work outwards, adding snowflakes and leaves. Use longer tapestry needles for strength and stitch through multiple motif layers to secure, especially for high-traffic table pieces.
Info :
When joining motifs with different heights, stitch the taller elements (poinsettia centers) down slightly so they don't catch easily. Add a few stitches from the underside to hold height while preserving shape.
— Final Edge and Finishing Touches :
Round 1 :
Once all motifs are anchored: around the outer edge of the whole runner, work a single crochet round in green to tidy raw edges, joining motifs by sc into both motifs' edge loops and through connectors. Keep stitches loose enough to ease curves.
Round 2 :
Ch3, sl st into next st to create small scallops every 4 sc around the edge; where gaps appear work (sc, picot, sc) to create decorative points. Fasten off and weave ends in thoroughly.
Info :
For added durability stitch a few hidden anchoring stitches to the underside blocks. If runner will be displayed on a rough wooden table, consider attaching a felt backing to reduce snagging and protect wood finish.
Round 3 :
Optional: Lightly starch or spray the runner with fabric sizing to stiffen motifs and keep snowflakes and leaves planar when displayed. Allow to dry fully on blocking board.
— Care & Blocking :
Info :
Block snowflakes and leaves flat by pinning to blocking board and spritzing with water or steam. Pin petal shapes gently to preserve 3D structure. Hand wash gently in cool water; lay flat to dry. Starch can be reapplied after washing for stiffness.
Info :
Store runner flat or rolled to avoid crushing 3D petals. If storing folded, place tissue between layers to protect delicate points and beads.
This festive table runner brings classic holiday motifs to life with textured petals, airy snowflakes and curled greenery. The detailed modular construction allows for endless customization and makes every finished runner unique. Lay it across your table and enjoy the warm handmade charm it brings to any holiday gathering. 🧶🌿✨