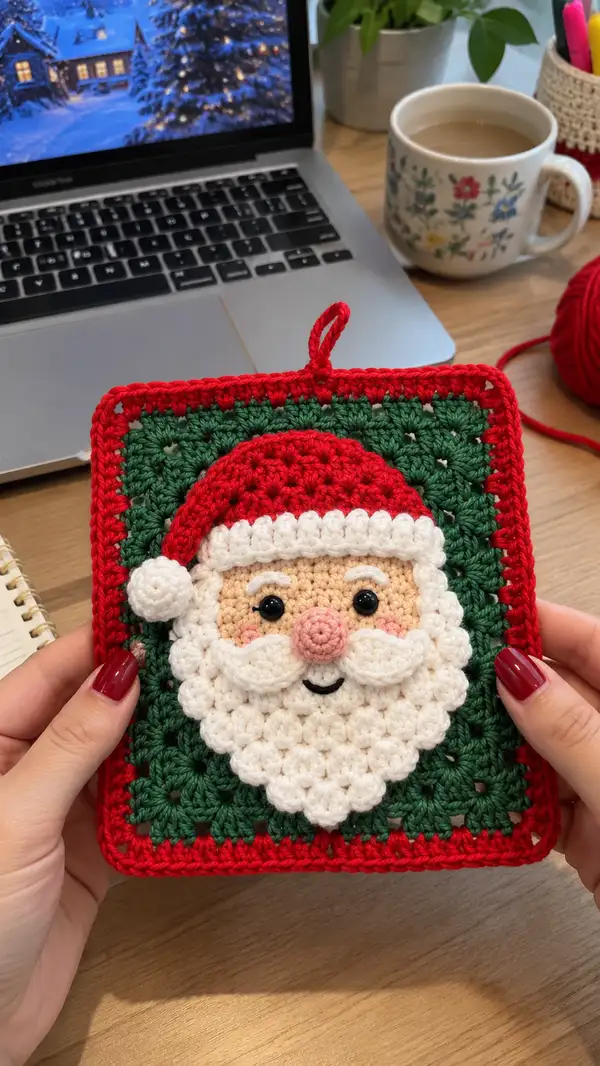
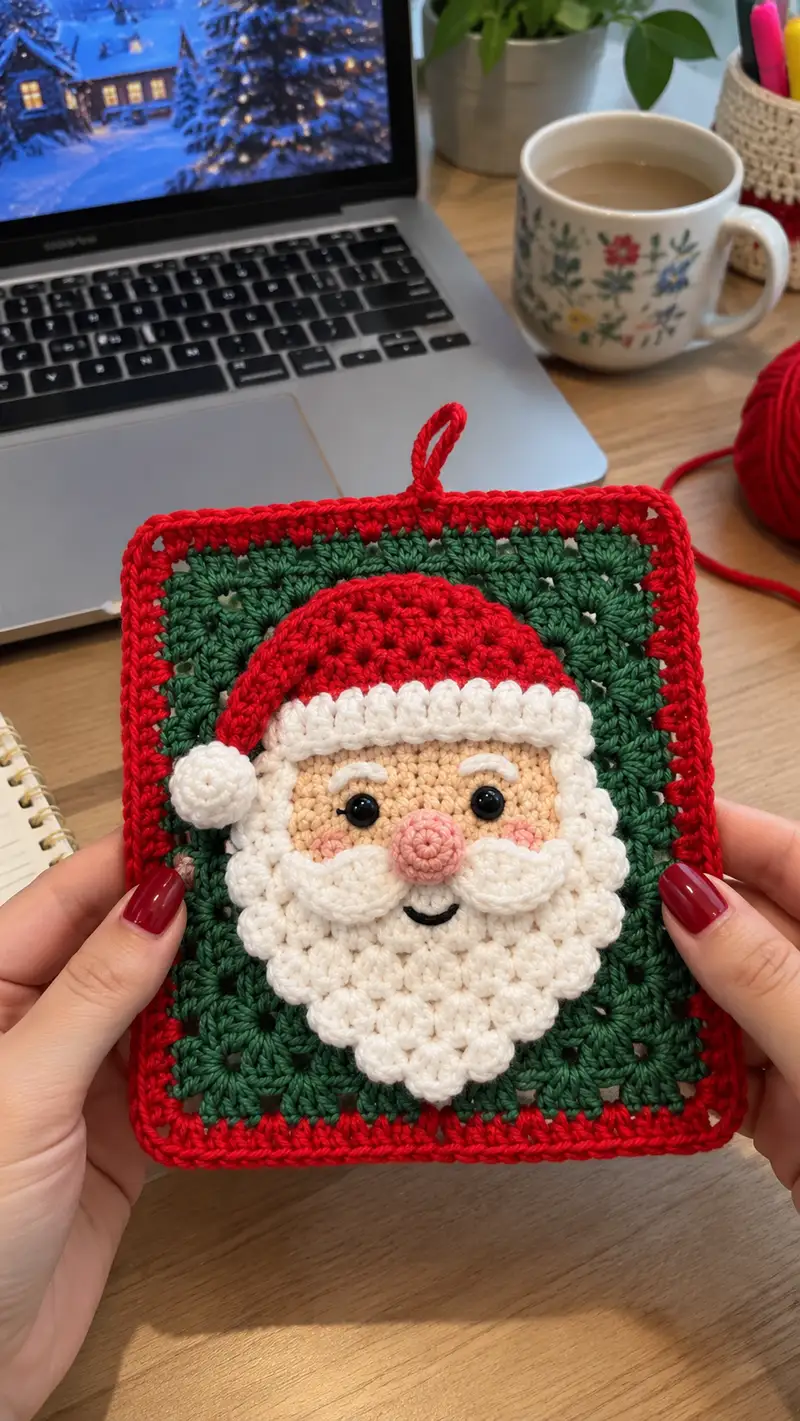
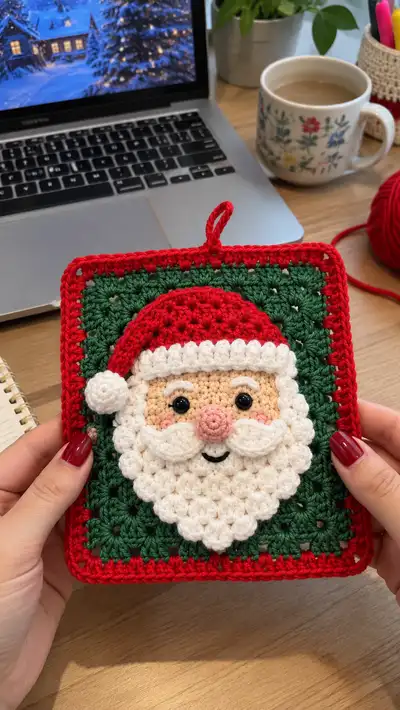
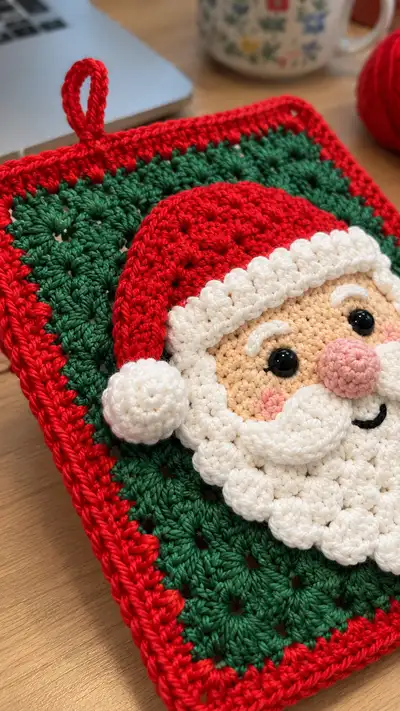
This cheerful Santa granny square potholder combines classic granny-square background with a raised, sculpted Santa face applique. Finished in festive red, green, white and a touch of blush, it features a textured beard, curled moustache, pom-pom, and a handy hanging loop. The pattern uses basic stitches, clusters and small amigurumi components so you can create a charming holiday kitchen accent or gift.
Progress Tracker
0% Complete
— Granny Square Background :
Info :
This classic granny square is worked flat in rounds using 3-dc clusters, creating the green backdrop seen in the photo. The whole square finishes approximately 18 cm (7 in) wide when using worsted cotton and a 3.5mm hook. If you prefer a larger potholder, use thicker yarn/hook and adjust accordingly.
Round 1 :
Using green yarn, ch 4, sl st to first ch to form a ring. Ch3 (counts as first dc), work 2 dc into ring, ch2, (3 dc into ring, ch2) x 3, join with sl st to top of starting ch3. (12 dc total; 4 clusters separated by 4 ch-2 corners)
Round 2 :
Sl st into next 2 dc to reach corner space, sl st into ch-2 sp, ch3, (2 dc, ch2, 3 dc) in same ch-2 sp, *ch1, skip to next ch-2 sp, (3 dc, ch2, 3 dc) in ch-2 sp* around, finish with ch1, join with sl st to top of ch3. (4 corner clusters and ch1 spaces between)
Round 3 :
Ch3, (2 dc, ch2, 3 dc) in first corner, *ch1, 3 dc in each ch1 space between corners; at corner work (3 dc, ch2, 3 dc)*; repeat around, join. This increases the granny fabric evenly.
Round 4 :
Repeat Round 3, working 3-dc clusters into each ch1 space and (3 dc, ch2, 3 dc) into corner spaces. Work evenly so the square stays flat. The square now measures roughly 12 cm across internal area.
Round 5 :
Change nothing, continue building the square exactly like Round 3, increasing the number of ch-1 spaces on each side. Keep tension steady so the square remains flat and not cupped.
Info :
Check for curling or rippling as you work. If the square cups, loosen tension or skip one cluster increase; if it waves, tighten tension slightly. Blocking later will even edges.
Round 6 :
Repeat pattern: at each corner work (3 dc, ch2, 3 dc), and in side spaces make 3-dc clusters separated by ch1. Join with sl st. Square is expanding; stop and measure to suit desired final size before adding border rounds.
Round 7 :
Work another round of granny clusters as in Round 6. Aim for a total of 6-8 cluster rounds for the green body depending on desired size; in the sample there are 6 contiguous granny rounds producing a dense background.
Round 8 :
Make final green round of clusters if desired. Fasten off leaving tail for weaving in. The granny background should be square and flat; trim ends neatly.
Info :
If you want the Santa head to sit with a slight raised effect, block the granny square flat and leave the central area slightly looser than the edges so applique sits proud.
— Head (Face Disc) :
Info :
The face is a flat-ish disc worked in single crochet in skin/peach yarn and uses increases to reach a diameter that fits centrally on the granny square. Place safety eyes between rounds 8-9. Work with a 3.0-3.5mm hook for a firmer fabric.
Round 1 :
With skin color, mr, 6 sc in mr (6)
Round 3 :
(1 sc, inc) x 6 (18)
Round 4 :
(2 sc, inc) x 6 (24)
Round 5 :
(3 sc, inc) x 6 (30)
Round 6 :
(4 sc, inc) x 6 (36)
Info :
Check the diameter now against the granny square: it should cover roughly the central area leaving room for beard and hat. Place safety eyes between rounds 8-9 about 8-10 stitches apart (measure visually when against square). Mark the positions with stitch markers before continuing.
Round 7 :
1 sc in each st around (36)
Round 8 :
1 sc in each st around (36)
Info :
Insert safety eyes between rounds 8 and 9 with approximately 8 stitches between them measured across the face. Lock washers on the back. If you prefer embroidered eyes, use black embroidery thread and make small satin stitch circles here after the face is attached to the square.
Round 9 :
1 sc in each st around (36)
Round 10 :
1 sc in each st around (36)
Round 11 :
1 sc in each st around (36)
Info :
At this stage the face disc is achieving height; use the next few rounds to create slight curve toward top of head for hat placement by working even and then making a small decrease later under the neck area for a tidy applique edge.
Round 12 :
1 sc in each st (36)
Round 13 :
(4 sc, dec) x 6 (30)
Round 14 :
(3 sc, dec) x 6 (24)
Info :
Begin shallow decrease to create a slight neck edge for sewing to the granny background; do not stuff the face disc as it is flat—only very light stuffing or weaving in can be used to slightly cushion.
Round 15 :
(2 sc, dec) x 6 (18)
Round 16 :
(1 sc, dec) x 6 (12)
Info :
Fasten off leaving a long tail for sewing the face disc centrally onto the granny square. Weave the tail through the last round to close slightly if you prefer a firm edge, but keep the overall face mostly flat to allow the beard to sit on top.
— Beard (Scalloped Cluster Panel) :
Info :
The beard is built from layered crocheted scallops (cluster/puff/3-dc shells) to recreate the textured look. Each round adds rows of clusters shaped into a triangular/rounded beard. We'll make the beard as a separate panel then sew it to the lower portion of the face disc.
Round 1 :
With white yarn, mr, 6 sc in mr (6)
Round 3 :
(1 sc, inc) x 6 (18)
Round 4 :
1 sc in each st (18)
Round 5 :
Change technique: work scallop row. Ch1, *skip next st, in next st work (sc, ch2, sc) forming small 'shell', skip next st; rep across to form 9 small shells.* Adjust to create curve and point at bottom center.
Info :
The beard in the photo uses clustered scallops arranged in rows; you will build 6-8 rows of scallops, decreasing the number of scallops per row as you approach the chin point to make a triangular beard shape.
Round 6 :
Turn and attach a new row of shells below each existing shell: ch1, in each shell space work (3 dc cluster / shell) to produce a textured puff. Work shells centered below previous shells to create overlapping scallops. Aim for 9 shells in this round (count and adjust to match the width of the face).
Round 7 :
Work a row of shells again but reduce by 1 shell near each outer side to shape inward: you may work 7-8 shells depending on placement. Keep shells centered and slightly overlapping for fullness.
Round 8 :
Work another shell row decreasing to 6 shells. Make sure to maintain an even bottom edge by aligning shells symmetrically from center.
Info :
Stuffing: the beard is not stuffed; its texture comes from clustered stitches. Block layout on top of face disc to ensure scallops fall correctly over the mouth area. Pin before sewing to confirm placement.
Round 9 :
Work a narrower row of shells (5 shells) to taper toward chin point. Use single crochet joining points between shells so the panel stays stable.
Round 10 :
Work final small row of 3-4 shells forming the pointed chin outline. Fasten off leaving long tail for sewing.
Round 11 :
Optional: To give the beard additional lower scallop depth, crochet single crochet picots or small 3-sc clusters into bottom edge at even spacing to create the scalloped visible rim as in the photo.
Round 12 :
Add edging row: with white yarn, sc evenly around outer edge of beard panel to create a neat seam for sewing onto face. Fasten off.
Info :
Count the total number of shells across each row so you can mirror placement when sewing to the face disc. Use pins to align the top of the beard to just below where the nose will sit and below the mouth area.
— Moustache (Make 2 symmetrical halves) :
Info :
The moustache is made as two mirrored crescent pieces that attach above the beard and below the nose. Work small rounds shaped by decreases.
Round 1 :
With white yarn, mr, 6 sc in mr (6)
Round 3 :
(1 sc, inc) x 6 (18)
Round 4 :
1 sc in each st around (18)
Round 5 :
Shape into crescent: (3 sc, dec) x 3 (15)
Round 6 :
(2 sc, dec) x 3 (12)
Info :
Fasten off leaving long tail for sewing. Make two identical halves and shape them so they curve outward slightly; sew them in place above the beard, framing the nose and beneath the eyes.
Round 7 :
Optional decorative row: add sc around each moustache for a thicker edge and a more sculpted look. Fasten off.
— Nose :
Info :
The nose is a small stuffed sphere worked in light pink/peach. It is sewn at the center of the face, slightly overlapping the top of the beard and moustache junction. Stuff firmly for a rounded puckered look.
Round 1 :
With pink, mr, 6 sc in mr (6)
Round 3 :
(1 sc, inc) x 6 (18)
Round 4 :
1 sc in each st around (18)
Round 5 :
(1 sc, dec) x 6 (12)
Round 7 :
Fasten off leaving a long tail for sewing. Stuff firmly but not overstuffed and sew onto face center. Use extra stitches to anchor through face disc so nose is stable.
— Eyes (Make 2) :
Info :
Use 8mm safety eyes inserted between Face rounds 8-9 before attaching beard. If you prefer crocheted backing discs for a more finished look, make small discs to sew on the back.
Eye Backing Round 1 :
With black or matching skin color, mr, 6 sc in mr (6)
Eye Backing Round 2 :
6 inc (12)
Eye Backing Round 3 :
Fasten off leaving tail, place behind safety eye and sew to the face to hide washers and secure edges.
Info :
Position eyes about 5-6 rounds down from the top of the face disc and about 8-10 stitches apart depending on desired expression. Check placement on the granny square before final attachment.
— Eyebrows (Make 2) :
Info :
Eyebrows are tiny piped shapes in white made from short chains and sc and sewn above the eyes. They are more decorative than structural.
Round 1 :
With white yarn, ch 6, sc in 2nd ch from hook, sc next 4 (5 sc across), fasten off leaving long tail for sewing.
Round 2 :
Pin in a gentle curve above each eye and sew with long tail. Add a tiny surface embroidery stitch in a contrasting white to make brows look raised if desired.
— Cheeks (Make 2) :
Info :
Cheeks are small flat circles worked in blush pink then lightly smudged with fabric-safe blush or embroidery to achieve rosy look. They are mostly decorative and sewn flush to the face.
Round 1 :
With blush pink, mr, 6 sc in mr (6)
Round 3 :
Fasten off leaving tail; flatten slightly and sew to face at positions beside the nose. Optionally add soft blush after sewing for color depth.
— Hat (Cap and Brim) :
Info :
The hat is worked in red as a shallow cone/half-sphere that sits on top of the head disc and overlaps the uppermost rounds. The white brim is a line of small bobbles/puff stitches to match photo. The hat is made separately and sewn to the top edge of the face disc.
Round 1 :
With red yarn, mr, 6 sc in mr (6)
Round 3 :
(1 sc, inc) x 6 (18)
Round 4 :
(2 sc, inc) x 6 (24)
Round 5 :
(3 sc, inc) x 6 (30)
Round 6 :
1 sc in each st around (30)
Round 7 :
1 sc in each st around (30)
Info :
After 6-7 rounds, the red cap should have a shallow dome height similar to the photo. Continue with fewer increases or straight rounds to shape the cap into a slightly elongated half-sphere before flattening the top and shaping the slouch that goes to one side.
Round 8 :
1 sc in each st around (30)
Round 9 :
(4 sc, dec) x 5 (25)
Round 10 :
1 sc in each st around (25)
Round 11 :
(3 sc, dec) x 5 (20)
Round 12 :
1 sc in each st around (20)
Round 13 :
(2 sc, dec) x 5 (15)
Round 14 :
1 sc in each st around (15)
Info :
Leave the top slightly open; the slouched shape is achieved by offsetting the last few rounds to one side when sewing to the face. Do not fasten off yet; change to white to create the brim in the next rounds.
Round 15 :
Change to white yarn. Work a row of puff/bobble stitches for the brim: *ch1, in next st work (hdc, ch1, hdc) to create a raised bump* across the lower rim of the hat. Alternatively work (sc, ch2, sc) shells for a scalloped brim. Fasten off leaving long tail for sewing.
Round 16 :
Optional decorative top: with red yarn reattach to one side of hat and make 4-6 sc rounds to extend the point of the hat if you want it longer, then gather to attach pom-pom later. Fasten off.
— Pom-Pom :
Info :
Pom-pom is a small crocheted ball attached to the tip of the hat. Make a small amigurumi ball and stuff lightly. Alternatively, wrap yarn around a small template to make a yarn pom and secure.
Round 1 :
With white, mr, 6 sc in mr (6)
Round 3 :
(1 sc, inc) x 6 (18)
Round 4 :
(1 sc, dec) x 6 (12)
Round 6 :
Stuff lightly, close opening by drawing tail through remaining stitches and fasten off. Leave long tail for sewing onto hat tip. Fluff pom-pom if using yarn-wrapped method and sew securely.
— Border and Hanging Loop :
Info :
The bright red border frames the square and creates the hanging loop at the top center. Work even single crochet rounds around the square then a thicker rope-like round for structure and make a linked chain loop at the top.
Round 1 :
Attach red yarn at any corner. Ch1, sc evenly around square placing 3 sc in each corner ch-2 space. Work 1 sc along every side cluster area about every 2-3 stitches to keep edge neat. Join with sl st to first sc.
Round 2 :
Ch1, sc in each st around; at corners work 3 sc into same st to maintain square corner. Join with sl st. This round adds a defined red frame to the green granny.
Round 3 :
Ch1, sc blo (back loop only) in each st around to create a slight ridge; join with sl st. Fasten off leaving tail for weaving.
Round 4 :
Hanging loop: at the top center count across to locate the midpoint. Join red yarn, ch 20 (or desired length for loop), sl st back across 2nd ch from hook to form a small chain loop. Fasten off and weave in ends securely on reverse.
Info :
For a sturdier hanging loop, crochet a chain, sc back along chain to thicken it, then attach ends to the border before finishing. Make sure loop is proportional to potholder size.
— Assembly Instructions & Attachment Prep :
Info :
All applique pieces are sewn to the granny square using matching yarn tails and invisible whip/ladder stitch. Pin positions carefully and use temporary tacking stitches before permanent sewing. Sew from the back of the square so front remains tidy.
Round 1 :
Position face disc roughly centered on the granny square and pin. The top of the face should sit about 3-4 granny cluster rows down from the top border to leave room for hat brim and pom-pom.
Round 2 :
Using the long tail from the face disc, sew around the outermost round of the face with mattress or whip stitch. Use small, evenly spaced stitches and stitch through the granny clusters behind to anchor firmly. Knot and weave tail to the backside.
Round 3 :
Pin the beard to the lower half of the face disc so the top edge of the beard aligns with rounds 4-6 of the face depending on size. Make sure scallops are symmetrical. Sew using a ladder stitch across the top edge only; do not flatten the scallops when sewing — let them remain textured.
Round 4 :
Sew moustache halves above the beard, slightly overlapping the upper scallops and framing the nose. Use short invisible stitches so the moustache looks to sit on top of the beard naturally.
Round 5 :
Sew nose at the center using sturdy stitches through the nose base into the face disc so it is highly secure. Add a couple extra anchor stitches through the beard top if the nose overlaps both pieces for extra support.
Round 6 :
Sew hat brim to the topmost round of the face disc so it surrounds the forehead area; adjust brim to rest naturally on the face. Attach the pom-pom to the hat tip securely by stitching through the top of the hat and knotting several times.
Info :
Take your time pinning and checking alignment; a small shift will be noticeable on the front. Use a few temporary tacking stitches before final sewing to confirm placement.
— Finishing & Embroidery :
Round 1 :
Using black yarn and a yarn needle, embroider a small smiling mouth under the nose: bring the needle up at left mouth corner and down at right in a shallow curve, secure on the back. Use a few small backstitches for a neat curve.
Round 2 :
Use white yarn for small highlights in the eyes if desired with a tiny surface knot or French knot using embroidery thread for sparkle. Add blush to cheeks with diluted fabric paint or a small dab of washable blush if you like; test on scrap first.
Round 3 :
Weave in all yarn ends neatly on the reverse. Trim any stray fibers and check that all pieces are firmly attached. Optionally block lightly to ensure the square sits flat and edges are even.
Info :
Secure safety eye washers on the back firmly. For gift-giving and kitchen use, avoid loose embellishments and ensure pom-pom and nose are well-stitched to reduce hazard for children.
This festive Santa granny square potholder is a delightful mix of classic crochet and playful amigurumi elements, perfect to brighten your holiday kitchen. The textured beard, cheerful hat and pom-pom give personality and charm, while the handy hanging loop keeps it functional. Each stitch brings the character to life — enjoy making one for yourself or as a heartwarming handmade gift. 🧶🎅✨