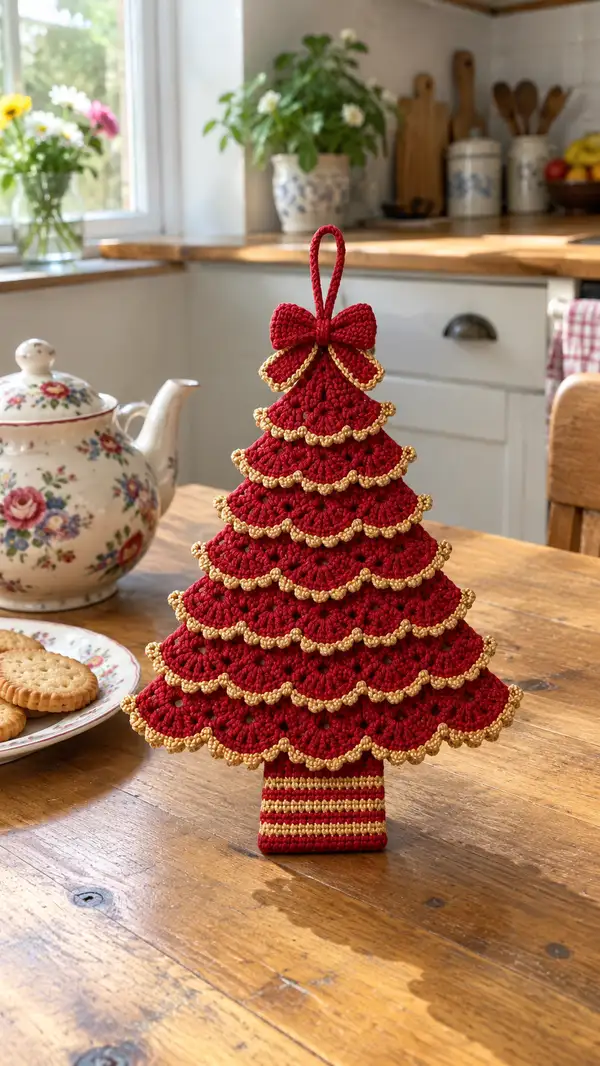
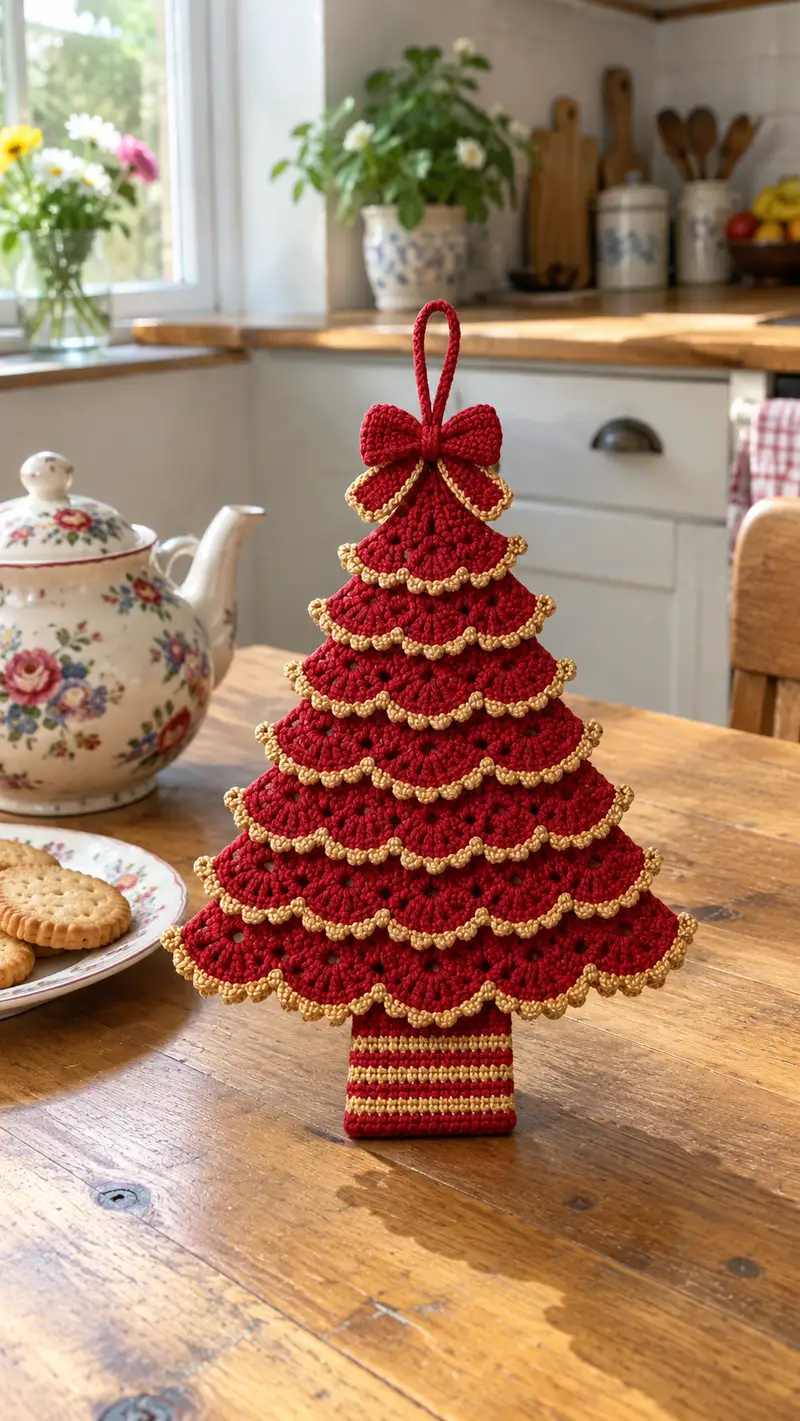
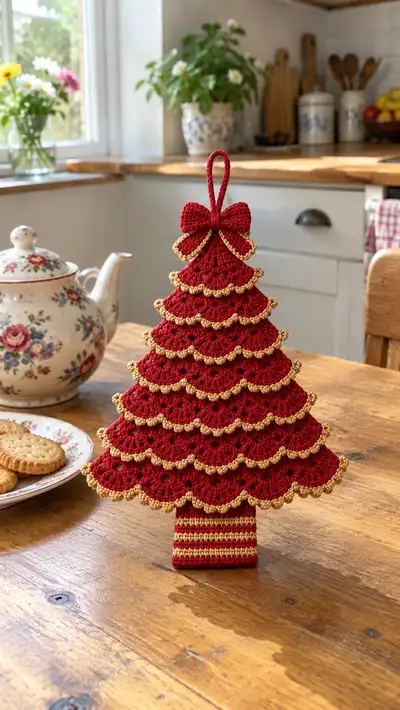
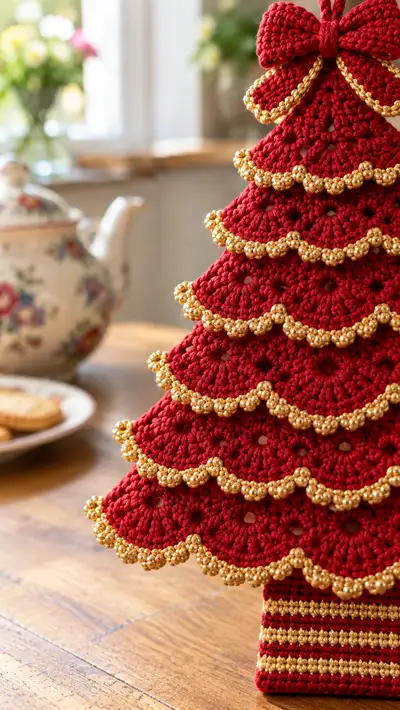
Create a charming layered tabletop Christmas tree in rich red with sparkling gold edges. This decorative standing tree features stacked scalloped tiers, a striped trunk, a neat bow topper and a practical hanging loop. The detailed pattern uses simple rounds, shell stitches and a metallic edging technique to produce a refined holiday accent perfect for tabletops, mantel displays or handmade gifts.
Progress Tracker
0% Complete
— Notes & Overview :
Info :
This pattern creates a freestanding layered tree made from 8 stacked round tiers folded into semicircles, plus a striped rectangular trunk, a bow topper and a braided hanging loop. Each tier is made separately from a small magic-ring circle expanded to the desired diameter, finished with a gold scalloped edge (worked without changing the base stitch count) and folded in half before being sewn to the tier below. Work tightly so stuffing and the scallops are neat. All rounds are worked continuous rounds unless otherwise stated; use a stitch marker and move it each round.
Info :
I recommend making a test small tier to check gauge. With DK cotton and 3.5mm hook you should get firm stitch definition; adjust hook size for your tension to keep fabric dense. The tree pictured measures approximately 28-32 cm (11-12.5 in) tall with the trunk and bow included when made in DK yarn.
— Materials & Prep :
Info :
Wind yarn into balls so you can see how much remains for each tier. If you plan to add real beads thread them onto the metallic thread before beginning the gold edging rounds — it's easier to slide them up as you work.
— Bow Topper (make 1) :
Round 1 :
6 sc in magic ring (6)
Round 3 :
(1 sc, 1 inc) x 6 (18)
Round 4 :
(2 sc, 1 inc) x 6 (24)
Round 5 :
1 sc in each st (24)
Round 6 :
1 sc in each st BLO (24)
Round 7 :
Change to FLO if you want a ridge; 1 sc in each st (24)
Info :
These rounds form one wing/loop of the bow. Make two identical pieces for the two bow wings. Keep tension slightly tighter on the BLO round to create a nice fold line when shaping the bow.
Round 8 :
Fold wing in half lengthwise and sew base across 6 stitches using yarn tail to secure (do not stuff). Fasten off leaving long tail for attaching to tree.
Info :
Make a small center knot by wrapping yarn around both wings at the center and stitching to secure; you can create a small wrapped loop to attach a braided hanger through the knot later.
— Hanging Loop / Cord :
Round 1 :
Chain 50 (or length desired for loop), sl st in 2nd ch from hook and along chain back to beginning to form a tight cord approx 8-12 cm long depending on chain length. Fasten off and leave long tail.
Info :
For extra firmness twist three strands of yarn and braid, or crochet a thin i-cord for a sturdier loop. If making a hanging ornament, create a shorter loop; for a tabletop tree loop can be used as a handle.
— Tier Construction Overview :
Info :
Make 8 tiers from smallest (Tier 1 - top) to largest (Tier 8 - base). Each tier is started with a magic ring and increased in rounds to a final stitch count then worked evenly for 2–4 rounds to build depth. After finishing a tier in red, join metallic gold thread and work a decorative edging round that does not change the underlying stitch count (the edging anchors into stitches and chain-spaces around the edge). Fold each flat round into a semi-circle by bringing opposite edges together and sewing the base together at the center back — this transforms a circle into a cone-like fan that becomes one layer of the tree.
— Tier 1 (Top smallest semicircle) :
Round 1 :
6 sc in magic ring (6)
Round 3 :
(2 sc, 1 inc) x 6 (18)
Round 4 :
(3 sc, 1 inc) x 6 (24)
Round 5 :
(4 sc, 1 inc) x 6 (30)
Round 6 :
(5 sc, 1 inc) x 6 (36)
Round 7 :
(6 sc, 1 inc) x 6 (42)
Round 8 :
(7 sc, 1 inc) x 6 (48)
Round 9-11 :
1 sc in each st (48)
Info :
Join metallic gold thread with a sl st to the last round's first stitch when you are ready to add the edging. The gold edging is worked as a separate pass that sits on top of the red round and does not alter the base stitch count — follow the edging instructions in the Beaded/Gold Edging section for the exact method.
Round 12 :
Fasten off red leaving 20 cm tail for sewing. Fold circle into a semi-circle by bringing opposite edges together and aligning center back. Use tail to whip-stitch base edge closed for approx 2.5 cm from center top to center bottom (this creates the small cone shape). Secure and weave in ends.
Info :
Lightly stuff the fold with a tiny pinch of fiberfill to give body to the cone if you want it slightly three-dimensional. Don't overstuff — the tier should remain soft and flat enough to stack underneath larger tiers.
— Tier 2 :
Round 1 :
6 sc in magic ring (6)
Round 3 :
(2 sc, 1 inc) x 6 (18)
Round 4 :
(3 sc, 1 inc) x 6 (24)
Round 5 :
(4 sc, 1 inc) x 6 (30)
Round 6 :
(5 sc, 1 inc) x 6 (36)
Round 7 :
(6 sc, 1 inc) x 6 (42)
Round 8 :
(7 sc, 1 inc) x 6 (48)
Round 9 :
(8 sc, 1 inc) x 6 (54)
Round 10-12 :
1 sc in each st (54)
Info :
When stitching rounds evenly, move the stitch marker each round to keep track. You may adjust number of even rounds to change the depth/height of each layer; the sample uses 2–3 even rounds per tier to keep scalloped edges distinct.
Round 13 :
Fasten off red leaving long tail. Fold into semi-circle and sew base closed for approx 3.5 cm, leaving the top open for slight flare when stacked. Add small pinch of stuffing if desired.
— Tier 3 :
Round 1 :
6 sc in magic ring (6)
Round 3 :
(2 sc, 1 inc) x 6 (18)
Round 4 :
(3 sc, 1 inc) x 6 (24)
Round 5 :
(4 sc, 1 inc) x 6 (30)
Round 6 :
(5 sc, 1 inc) x 6 (36)
Round 7 :
(6 sc, 1 inc) x 6 (42)
Round 8 :
(7 sc, 1 inc) x 6 (48)
Round 9 :
(8 sc, 1 inc) x 6 (54)
Round 10 :
(9 sc, 1 inc) x 6 (60)
Round 11-13 :
1 sc in each st (60)
Info :
These slightly larger tiers give the graduated shape. Keep counts exact: for Round 10 we have 60 stitches, then maintain 60 for even rounds. The number of rounds per tier increases slowly toward the base so each tier steps out gently.
Round 14 :
Fasten off and fold into semi-circle. Sew base closed for approx 4.0 cm; add a small amount of stuffing to provide a gentle curve if you prefer a rounded layer look.
— Tier 4 :
Round 1 :
6 sc in magic ring (6)
Round 3 :
(2 sc, 1 inc) x 6 (18)
Round 4 :
(3 sc, 1 inc) x 6 (24)
Round 5 :
(4 sc, 1 inc) x 6 (30)
Round 6 :
(5 sc, 1 inc) x 6 (36)
Round 7 :
(6 sc, 1 inc) x 6 (42)
Round 8 :
(7 sc, 1 inc) x 6 (48)
Round 9 :
(8 sc, 1 inc) x 6 (54)
Round 10 :
(9 sc, 1 inc) x 6 (60)
Round 11 :
(10 sc, 1 inc) x 6 (66)
Round 12-14 :
1 sc in each st (66)
Info :
After Round 11 you have 66 stitches. Work 2–3 even rounds to build the height of the tier. Adjust the number of even rounds across tiers to shape the slope of the finished tree — fewer even rounds = steeper slope.
Round 15 :
Fasten off, fold and sew base closed for approx 4.5 cm. Light stuffing optional.
— Tier 5 :
Round 1 :
6 sc in magic ring (6)
Round 3 :
(2 sc, 1 inc) x 6 (18)
Round 4 :
(3 sc, 1 inc) x 6 (24)
Round 5 :
(4 sc, 1 inc) x 6 (30)
Round 6 :
(5 sc, 1 inc) x 6 (36)
Round 7 :
(6 sc, 1 inc) x 6 (42)
Round 8 :
(7 sc, 1 inc) x 6 (48)
Round 9 :
(8 sc, 1 inc) x 6 (54)
Round 10 :
(9 sc, 1 inc) x 6 (60)
Round 11 :
(10 sc, 1 inc) x 6 (66)
Round 12 :
(11 sc, 1 inc) x 6 (72)
Round 13-15 :
1 sc in each st (72)
Info :
At this stage Tier 5 is a wider round (72 sts). If you want bigger scallops, you can reduce the number of stitches per scallop when you do the gold edging; the edging is flexible and can be anchored to every stitch or every other stitch depending on the look desired.
Round 16 :
Fasten off and fold; sew base closed for approx 5.0 cm. Light stuffing will help tiers retain a gentle curve.
— Tier 6 :
Round 1 :
6 sc in magic ring (6)
Round 3 :
(2 sc, 1 inc) x 6 (18)
Round 4 :
(3 sc, 1 inc) x 6 (24)
Round 5 :
(4 sc, 1 inc) x 6 (30)
Round 6 :
(5 sc, 1 inc) x 6 (36)
Round 7 :
(6 sc, 1 inc) x 6 (42)
Round 8 :
(7 sc, 1 inc) x 6 (48)
Round 9 :
(8 sc, 1 inc) x 6 (54)
Round 10 :
(9 sc, 1 inc) x 6 (60)
Round 11 :
(10 sc, 1 inc) x 6 (66)
Round 12 :
(11 sc, 1 inc) x 6 (72)
Round 13 :
(12 sc, 1 inc) x 6 (78)
Round 14-16 :
1 sc in each st (78)
Info :
These larger tiers will be folded into semi-circular fans with a broader base. The steady increase of 6 stitches per round is key to maintain a regular circular shape; use even tension to avoid ruffles or waves in the fabric.
Round 17 :
Fasten off and fold; sew base closed for approx 5.5 cm. Add a small amount of stuffing to shape if preferred.
— Tier 7 :
Round 1 :
6 sc in magic ring (6)
Round 3 :
(2 sc, 1 inc) x 6 (18)
Round 4 :
(3 sc, 1 inc) x 6 (24)
Round 5 :
(4 sc, 1 inc) x 6 (30)
Round 6 :
(5 sc, 1 inc) x 6 (36)
Round 7 :
(6 sc, 1 inc) x 6 (42)
Round 8 :
(7 sc, 1 inc) x 6 (48)
Round 9 :
(8 sc, 1 inc) x 6 (54)
Round 10 :
(9 sc, 1 inc) x 6 (60)
Round 11 :
(10 sc, 1 inc) x 6 (66)
Round 12 :
(11 sc, 1 inc) x 6 (72)
Round 13 :
(12 sc, 1 inc) x 6 (78)
Round 14 :
(13 sc, 1 inc) x 6 (84)
Round 15-17 :
1 sc in each st (84)
Info :
Tier 7 is the penultimate large tier. Keep the fold point neat and sew evenly so the scalloped gold edging will sit neatly along the curved outer edge when the tree is assembled.
Round 18 :
Fasten off and fold; sew base closed for approx 6.0 cm. Optional stuffing for gentle dome shape.
— Tier 8 (Largest base tier) :
Round 1 :
6 sc in magic ring (6)
Round 3 :
(2 sc, 1 inc) x 6 (18)
Round 4 :
(3 sc, 1 inc) x 6 (24)
Round 5 :
(4 sc, 1 inc) x 6 (30)
Round 6 :
(5 sc, 1 inc) x 6 (36)
Round 7 :
(6 sc, 1 inc) x 6 (42)
Round 8 :
(7 sc, 1 inc) x 6 (48)
Round 9 :
(8 sc, 1 inc) x 6 (54)
Round 10 :
(9 sc, 1 inc) x 6 (60)
Round 11 :
(10 sc, 1 inc) x 6 (66)
Round 12 :
(11 sc, 1 inc) x 6 (72)
Round 13 :
(12 sc, 1 inc) x 6 (78)
Round 14 :
(13 sc, 1 inc) x 6 (84)
Round 15 :
(14 sc, 1 inc) x 6 (90)
Round 16-19 :
1 sc in each st (90)
Info :
This final tier has 90 stitches at Round 15 and is worked evenly for several rounds to give a broad, flared bottom. Make sure the final folded base sits flat; sometimes sewing an extra short running stitch across the very edge of the fold helps the tier spread evenly when stacked.
Round 20 :
Fasten off and fold; sew base closed for approx 6.5–7.0 cm. The bottom tier will provide the main support for the trunk; ensure it is symmetrical when laid flat.
— Beaded / Gold Edging (Work for each tier) :
Info :
Work the gold edging after finishing each red tier. Use a thinner metallic DK or metallic thread and a smaller hook (3.0mm or 3.25mm). Option A: beaded edging — pre-string small beads onto the metallic thread and slide a bead up then anchor it with tiny slip stitches at intervals to create the bead-scallop look. Option B: gold bobble edging — use puff/bobble stitches with metallic yarn to approximate bead clusters. The edging is decorative and is worked along the outermost round; it does not change the tier's folded size.
Round 1 :
Join gold with a sl st to any outermost stitch. *Ch 1, sc in next st, ch 2, slide a bead up (if using beads), sl st into same st to anchor bead; sl st in next 4 sts to move to next anchor point; rep from * around. Fasten off and weave ends.
Info :
If you prefer a continuous scallop instead of individual beads, work *sc, ch3, sc* anchored into every 4th stitch to form gentle scallops. For more pronounced scallops use *5 dc in one stitch, sl st in next 2 sts* repeating; this increases stitch count slightly so only use if you want more dramatic curves.
— Trunk (Rectangular base) :
Info :
The trunk is worked flat in rows to a rectangle that is then folded and seamed to form a box that acts as the base. The sample trunk is striped: alternate 2 rows red / 2 rows gold across the height for a candy-canestyle stripe. Use single crochet for dense fabric.
Row 1 :
Ch 18, sc in 2nd ch from hook and in each ch across (17)
Row 2 :
Ch 1, turn, sc in each st (17)
Row 3-18 :
Repeat Row 2 for a total of 18 rows (17 sts x 18 rows). Alternate colors every 2 rows: Rows 1-2 red, 3-4 gold, 5-6 red etc to create narrow stripes.
Info :
Adjust the rectangle height for your desired trunk height — 18 rows yields a squat trunk similar to the photograph. To make the trunk sturdier, insert a small piece of cardboard or craft foam inside the folded box before sewing closed; this keeps the tree standing upright.
Row 19 :
Fold rectangle lengthwise so short edges meet and whip-stitch or slip-stitch together to form a tube. Fold the tube flat and sew bottom edge closed across the width to create a short box. Fasten off and weave ends.
Info :
If you prefer a hollow trunk for inserting a dowel for extra support, leave one short end open and insert the dowel before closing the bottom. Secure the dowel with glue or a few stitches through the dowel slot.
— Assembly :
Step 1 :
Position the largest folded tier (Tier 8) flat with the folded seam at the back. Place the trunk centered on the folded edge at the middle front and pin in place.
Step 2 :
Using a yarn needle and matching red tail from Tier 8, sew the trunk to the base of Tier 8 through the trunk's top edge and the inner fold edge of the tier. Make stitches every 6–8 mm for stability. Secure with several passes around the trunk seam.
Step 3 :
Stack Tier 7 above Tier 8 aligning center backs. Sew Tier 7 to the back top edge of Tier 8 using running stitches from center to side to secure. Repeat with Tiers 6,5,4,3,2, ending with Tier 1 on top. Ensure each tier overlaps the one below by approx 1–1.5 cm so scalloped edges remain visible.
Info :
Pin tiers in place and check symmetry before final stitching. Use small hidden stitches along the fold line inside each tier to attach to the tier beneath — this will keep top scallops free and neat on the outside.
Step 4 :
Attach the two bow wings to the top center of Tier 1 by sewing through the center wrap; fasten securely. Sew the loop/cord into the center knot's underside so the loop stands upright behind the bow for hanging or handle use.
Step 5 :
Weave in all ends, trim threads and give final light block with steam if working with cotton to set edges. If beaded edges are used, check all beads are secure and add a few drops of craft glue behind any beads that appear loose.
Info :
To make the tree freestanding without a trunk box, you can instead insert a small foam cone or styrofoam inside the folded tiers and glue them onto a foam or wood base. The trunk in the pictured sample is a sewn box for a textile finish.
— Finishing Touches :
Info :
Check balance and symmetry. If the tree leans, adjust stitch placement at the trunk-tiers junction and ensure the trunk base is flat. Optionally add tiny embroidered stars or French knots on select scallops to mimic ornaments.
Final :
Admire your finished tree and place on a shelf or table as a festive holiday accent.
This elegant layered tree makes a delightful seasonal accent you can display year after year. The contrast of deep red and bright gold transforms simple stitches into a luxurious table centerpiece. Working the tiers individually and assembling them lets you personalize size and spacing easily, and the stitched trunk gives a neat, finished base. Have fun adding tiny beads or embroidered stars for your signature touch — and enjoy the cozy glow your handmade tree brings to the room. 🎄✨