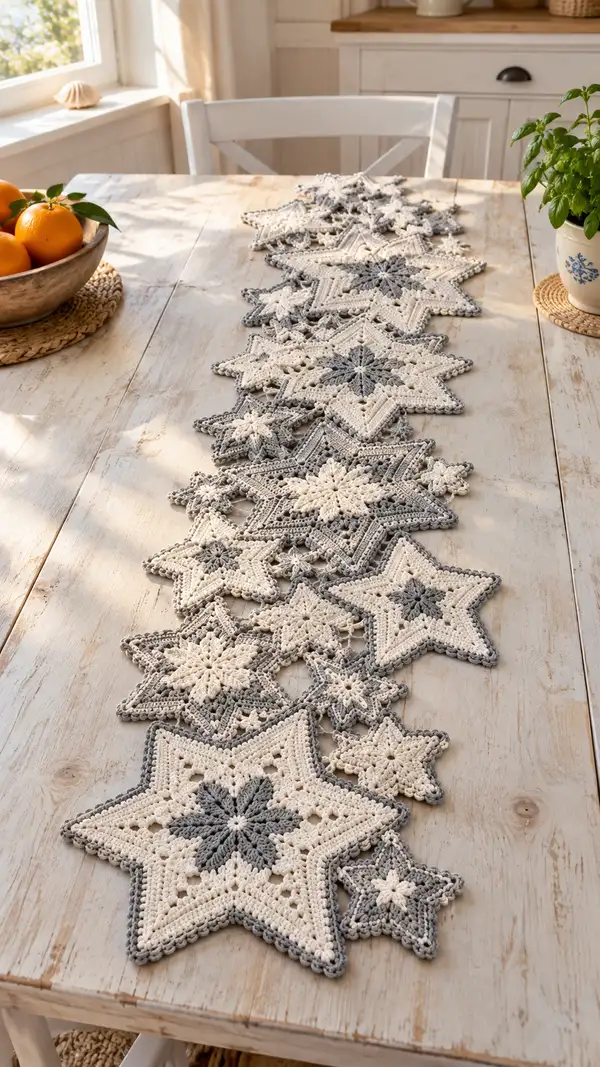
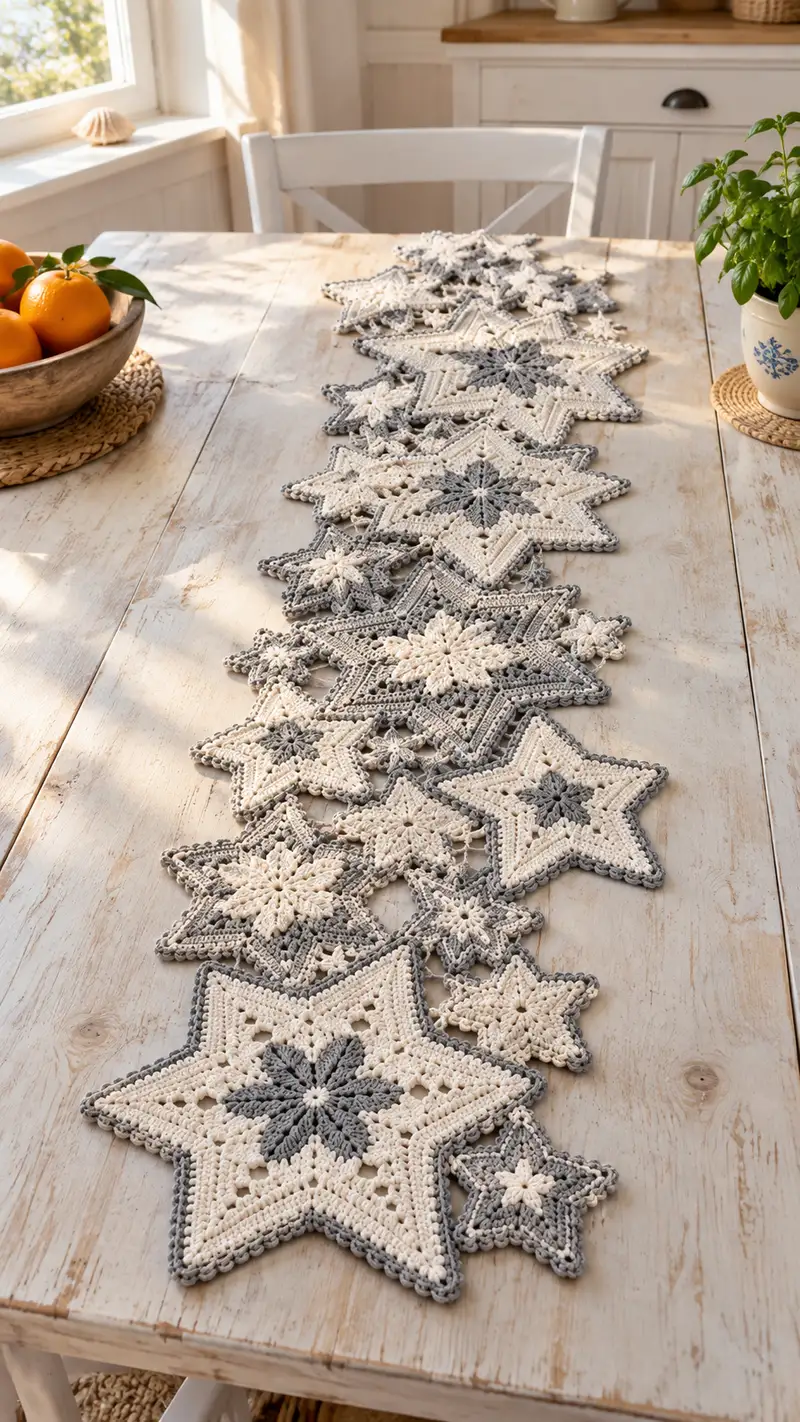
Create a beautiful star-themed table runner made from interlocking crochet star motifs in soft cream and slate grey. This pattern shows how to crochet three star sizes, join them into a long runner and finish with a neat scalloped edge. Perfect for seasonal decor or as an ever-present cozy accent on a kitchen or dining table.
Progress Tracker
0% Complete
— Notes & Gauge :
Info :
Gauge is not critical for motif-based table runner, but make one large star to check appearance. Using 3.5 mm hook with worsted cotton should produce a large star approximately 20-22 cm (8-8.5 in) from point to opposite point. Adjust hook size if your motifs cup or ripple.
Info :
Work in continuous rounds unless instructed to join with sl st. Use stitch markers to mark round starts and the 6 equal divisions for star points (mark every Nth stitch as listed per round). Keep tension even to retain flatness.
— Large Star Motif (Make 6 for runner layout) :
Round 1 :
6 sc in magic ring (6). Pull ring tight and place marker in first sc.
Round 2 :
Inc in each stitch around (12). (Work pattern: 2 sc in each st)
Round 3 :
(1 sc, inc) x6 (18). Place markers every 3 sts to mark point divisions (18/6=3).
Round 4 :
(2 sc, inc) x6 (24). Place markers every 4 sts (24/6=4) to help locate point bases.
Round 5 :
(3 sc, inc) x6 (30). This round broadens the centre and prepares for built-in chains that will shape the points.
Info :
Before Round 6, decide if center will be worked in cream or slate. For pictured runner, start with slate for the star center and change to cream on Round 7. Carry unused yarn loosely on wrong side or fasten off and rejoin as preferred.
Round 6 :
Join cream (or chosen color) with sl st in next st. *(ch 4, skip 2, sc in next 4) repeat from * around to create 6 chain arches (30). The stitch count remains 30; you will work into chain loops to form points.
Round 7 :
*Into each ch-4 space: (sc, hdc, 3 dc, hdc, sc) - this forms the base of each point. Repeat from * around (points formed: 6). Total anchored stitches around total remain 30 stitches worked into segments; treat each ch-space as a unit.
Round 8 :
Into the center stitches between points: 2 sc in each of the next 2 sts (12) and work point shaping into each ch-space: (ch3, 3 tr cluster, ch3) in apex of each point, securing into base scs as you go. After completing all six points you will have 36 visible grouped stitches if counting point apex anchors. For clarity: base round anchor count remains 30; star now has defined points extending outward.
Info :
Work tightly at the base of the points so that the points sit flat and maintain six distinct arms. Use your marker placement to ensure symmetry.
Round 9 :
Working around the outside of each point: *sc in each dc/tr and into chain loops so that each point edge has 10 edge stitches; rep from * for all 6 points. Edge stitch count around the whole motif will be approximately 60 edge stitches (10 x 6). This count is for edge-work reference and will be used for decorative rounds.
Round 10 :
Change to slate accent yarn. *Work (sc, picot, sc) along the outer edge of each point: (sc in next 3 sts, picot (ch3 sl st into first of ch3), sc in next 3 sts); repeat for each point. The total sc count remains approx 60.
Round 11 :
Return to cream. Into the valleys between points work * (ch 5, sl st to valley anchor) to create airy lacy joins when motifs are connected; in each point outer edge work (sc, picot) pattern as established. Maintain approx 60 working positions around motif.
Round 12 :
Decorative ridge round: *Work 1 sc BLO in each stitch around the point edges and valleys (approx 60) to create a defined ridge at the separation of points. This adds texture and makes joining easier.
Round 13 :
Textured round: *In each point apex work (ch2, puff, ch2, sl st into next st) to place six puff accents on the star tips. Puff stitch: yarn over, insert hook, pull loop (repeat 3 times total loops), yarn over and pull through all loops, ch1 to close puff. Count remains unchanged.
Round 14 :
Reinforce base: *1 sc in each anchor stitch around the centre and base (approx 30). This secures the central rounds and flattens the motif.
Info :
If your motif is cupping, block it before joining. Press gently while damp and pin star points flat to blocking mat until dry.
Round 15 :
Final outer finishing round: Change to grey and work * (sc, picot, sc) along each outer edge making small scallops all around; the approximate stitch count for this finishing round will be 72 (12 scallops x 6 points). Fasten off and leave a 40 cm (16 in) tail for joining.
Info :
Weave in loose ends on the wrong side. Make six large star motifs total following these rounds. Block motifs flat, taking care to align points accurately; this makes joining much easier and gives a crisp final look.
— Medium Star Motif (Make 8 for contrast and filler) :
Round 1 :
6 sc in magic ring (6). Place marker.
Round 2 :
Inc in each st around (12).
Round 3 :
(1 sc, inc) x6 (18). Mark divisions for 6 points every 3 sts.
Round 4 :
(2 sc, inc) x6 (24). This forms a slightly smaller base than the large motif.
Round 5 :
*Ch4, sl st into second base st to form 6 arches; repeat across (24 anchor sts remain).
Round 6 :
Into each ch-4 space work (sc, 2 dc, sc) to begin point shaping. After all six points are built the approximate total of worked stitches will be 36 anchors.
Round 7 :
*Work 1 sc in each stitch around the point edges and into the valleys (approx 36). This evens the outer profile for the edge rounds.
Round 8 :
Change to alternate color (cream if center was slate, or slate if center was cream) and work a decorative round of (hdc, picot, hdc) on each point edge. Maintain approximate count of 36-42 depending on picots.
Info :
Medium motifs serve as bridges between large stars and the small motifs. Keep colors alternating to mimic the photographed layout: large slate-centered star, medium cream, large cream-centered star, medium slate, etc.
Round 9 :
Working BLO across the previous round: 1 sc BLO in each st around (approx 36). This round produces a thin ridge to help motifs nest when joined.
Round 10 :
Embellish point tips with small puff clusters: *ch2, puff, ch2; repeat for each point apex (6 puffs). Fasten off leaving a 30 cm tail for joining.
Info :
Make 8 medium stars, mixing centre colors so the runner has contrast and a woven look. Block these motifs gently and align their points when drying.
— Small Star Motif (Make 10-12 for filler clusters) :
Round 1 :
6 sc in magic ring (6).
Round 2 :
(1 sc, inc) x3 then sl st into next to maintain tiny star center (9). For small motif symmetry, use 3 mini-points or make it a 6-point micro star by working (inc) to 12 if preferred.
Round 3 :
Work 6 tiny chain loops around: *ch3, sl st into next sc; repeat from * six times (9-12 anchors depending on chosen approach).
Round 4 :
Into each ch-3 loop work (sc, picot, sc) to make a tiny star tip; total stitch count will be approx 18. Fasten off leaving a 20-25 cm tail for joining.
Info :
Small stars are decorative fillers between larger motifs; they should be made quickly with a tighter hook (3.0 mm) if you want crisper tiny points.
— Joining Motifs (Join-as-you-go and connecting rounds) :
Info :
Decide your runner layout before joining: photograph shows alternating large and medium stars with smaller filler stars clustered at overlaps. Lay motifs out on a flat surface to plan connections. We recommend joining at strategic point tips and valley chains with 3-5 slip or whip stitches per contact area for strength.
Join Method A (Whip Stitch Join) :
Place two motifs right sides together aligning point tips and valley spaces. Using long tails from motifs, sew through both layers with whip stitch at each connecting point: 1 seam = 6-10 stitches depending on contact area. Knot and weave tail securely. Repeat across runner layout until motifs are connected in a chain.
Join Method B (Join-As-You-Go) :
Working from a prepared motif with a 40 cm tail: With motif A on bottom and motif B on top, align their outer rounds. Using the working yarn on motif B, sl st into corresponding stitches of motif A each time you reach a valley or specified connection stitch. Use sl st on every 2nd or 3rd stitch to create a lacy join; aim for 3-5 connections per adjoining point for stability. Continue joining motifs sequentially in planned layout.
Round J1 :
After connecting a row of motifs, work a stabilization round around the entire runner: With cream yarn, join at any valley and *ch2, sc into next outer edge stitch across all outer edges including motif joins; when reaching an existing join, work (sc, sl st to adjacent motif) to lock connection. Keep overall stitch count flexible; purpose is stabilization, not an exact count.
Info :
Where multiple motifs meet (three or more points touching), use reinforced stitching: pass yarn through all layer seams with a stout yarn needle and 4-6 tiny securing stitches. This prevents future sagging or separations under weight.
— Continuous Edging & Scalloped Border :
Round E1 :
Once all motifs are joined in the desired runner configuration, join grey yarn at one outermost point. Work 1 sc evenly around the entire outer perimeter of the assembled runner, working into outer edge stitches and sl st joins so that the runner edge is uniform. Count will vary depending on assembled width; note the number for reference—expected total around 280-360 sc for a 6-large-star runner.
Info :
This round evens out the edge and adds structural integrity. Work into picot and ridge rounds where present; if there are gaps, add an extra sc into the chain loops to maintain evenness.
Round E2 :
Scalloped finishing: *(sc in next 2 sts, (5 dc in next st) for shell, sc in next 2 sts, sl st in next st) repeat around. This creates a neat scallop shell along each motif outer edge. The shell count per motif point will be roughly 1-3 shells depending on point size; overall shell count across runner approx 45-60. Fasten off.
Round E3 :
Optional picot accent: Join cream and work *sc in each st around the scallop edge, placing picot at the top of each shell (ch3, sl st into first ch). This adds a small decorative trim and softens the profile. Fasten off and weave in ends.
Info :
For a tighter finishing edge, use a 3.0 mm hook for rounds E2 and E3. This helps reduce stretch and keeps scallops crisp.
— Stabilizing & Blocking :
Info :
Blocking is essential for this runner. Lay the runner flat on a blocking mat, gently mist with water and pin each star point with blocking pins to the desired shape. Pay special attention to points that overlap; pin them to show separation but let the joins remain taut. Allow to dry fully (12-24 hours).
Info :
If you prefer a stiffer table runner, you can lightly starch the motif before final drying. Test starch on a small motif sample first to ensure you like the hand and finish.
— Alternate Decorative Rounds (Add texture if desired) :
Alt Round 1 :
Raised ridge round: 1 hdc BLO in each st around any motif to create vertical ridges. This can be used on selected motifs for tonal interest. Count equals the motif's outer stitches (approx 36-72).
Alt Round 2 :
Cluster band: Work alternating clusters (3 dc cluster) with chain spaces in the valley areas between points to create a lace band across certain motifs. Repeat cluster placements evenly; ensure each band is mirrored on connecting motifs for a cohesive look.
Info :
Use alternate rounds sparingly to maintain the subtle, Scandinavian aesthetic; too many textures can make the runner look busy.
— Finishing Touches :
Info :
Weave all tails on the wrong side of the runner and secure with small, tidy stitches. Check each join and reinforce any area that looks loose. Block again lightly if necessary after ends are woven in to reshape scallops or points.
Info :
For laundering, use a gentle machine cycle in cool water with mild detergent if yarn label permits. Reshape on a flat surface and dry away from direct heat to preserve shape and color.
Completing this Scandinavian star table runner brings a calm sense of accomplishment — the interlocking stars and soft neutral palette look elegant on any table. The textured puff and picot details add a handmade touch that friends and family will notice. Every blocked star points to careful stitching and thoughtful design, and the finished runner will be a seasonal favorite or everyday accent. 🧶✨ Spread it across your table, add a vase or candles, and enjoy the cozy, crafted atmosphere. 🌟