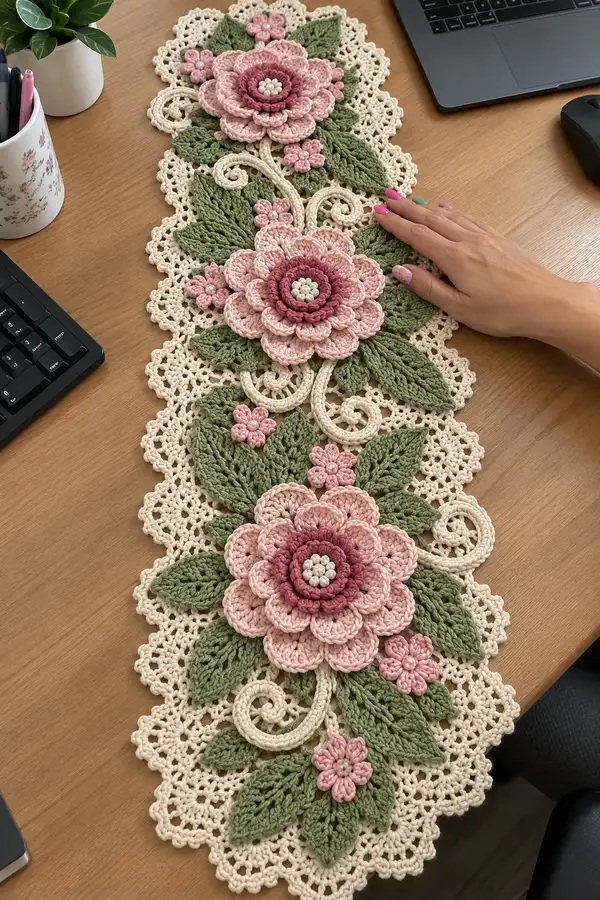
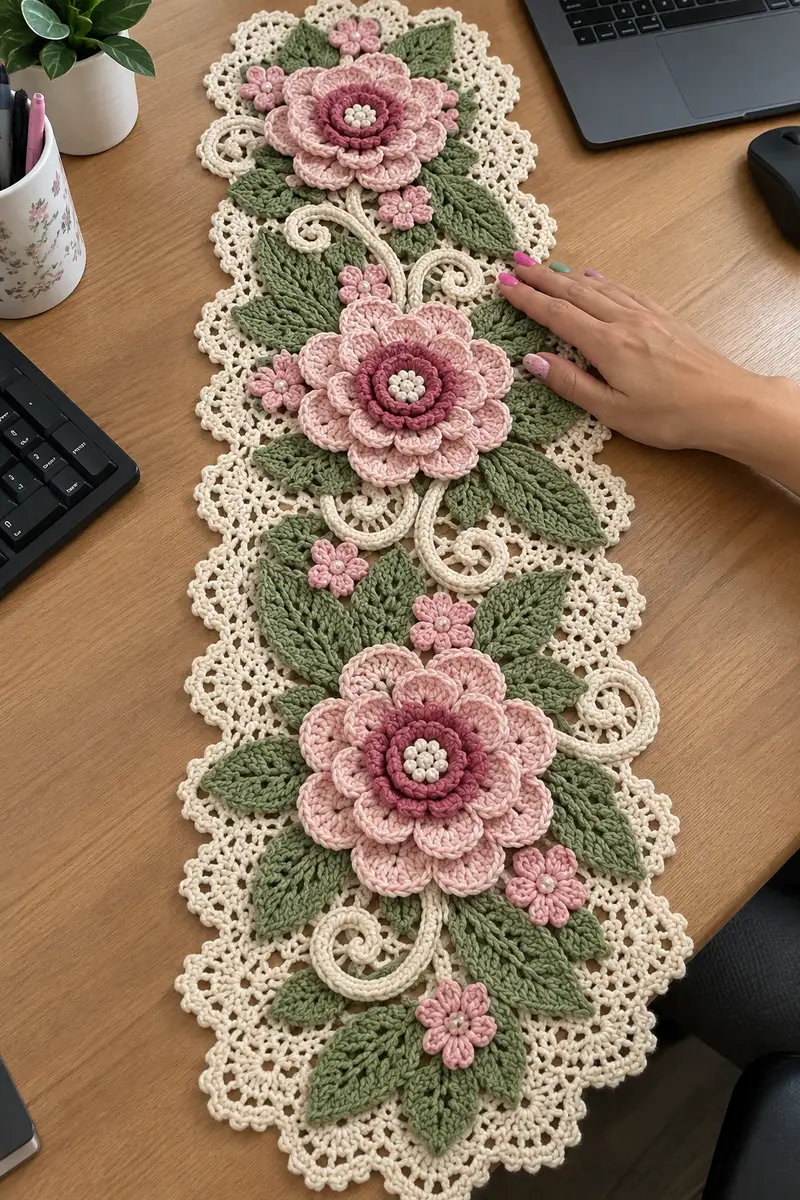
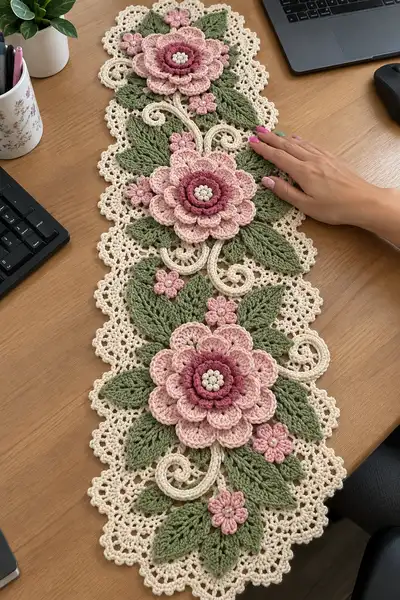
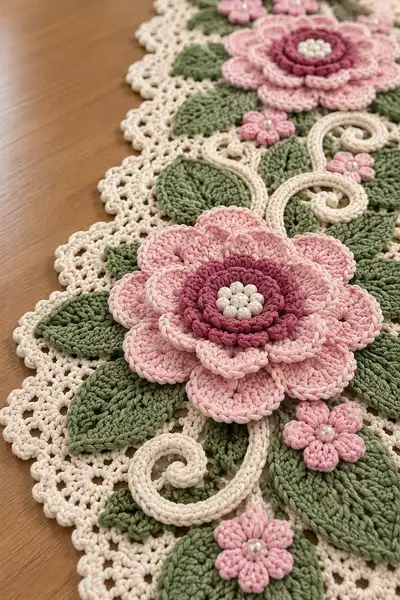
Create an elegant floral lace table runner with layered 3D flowers, leafy appliques and decorative scrolls. This pattern recreates the soft cream lace background, dusty pink layered blooms, olive-green leaves and pearl-centred tiny flowers shown. Detailed step-by-step rounds guide you through making the lace base, three large layered flowers, small blossoms, leaves and curving stems, plus full assembly and border finishing.
Progress Tracker
0% Complete
— Materials & Gauge :
Info :
Gauge is not critical for this decorative runner but for consistency aim for 18 sc x 20 rows = 10cm using 3.5mm hook with worsted cotton. Adjust hook if necessary to match texture and drape. Pattern built from motifs and appliques — final runner in photo measures approximately 82-88cm long and 20-22cm wide (excluding loose leaves) when made with the specified yarn and hooks.
— Base Lace Motif (Make 7 and join as-you-go) :
Round 1 :
6 sc in magic ring (6)
Round 3 :
(1 sc, 1 inc) x 6 (18)
Round 4 :
(2 sc, 1 inc) x 6 (24)
Round 5 :
(3 sc, 1 inc) x 6 (30)
Round 6 :
1 sc in each st (30)
Info :
Change to cream lace color if not already using it. Work this motif flat in rounds to create a circular lace medallion. Use stitch marker at round beginnings to maintain evenness.
Round 7 :
*ch3, skip 1, sc in next* around to create 15 chain arches (30)
Round 8 :
Into each ch-3 arch: (sc, ch3, sc) — shell created (15 shells total). Maintain 30 anchor points
Round 9 :
Round of picoted connectors: sl st into shell top, ch4, (sc in next shell top, ch4) x 14, sl st to join (15 ch-4 loops)
Info :
Block each motif flat now to open lace. Create 7 motifs total, arranging them lengthwise. Join motifs as-you-go at round 10 for continuous runner: when you reach round 10 on motif 2, join to motif 1 by sewing or slip stitching through corresponding ch-4 loops.
Round 10 :
Edging round: sc around working 2 sc in each ch-4 loop to create scallop edge (approx 30-36 sc depending on join points)
Round 11 :
Join round when assembling: place motif next to previous motif and sl st through both outer loops at 6 evenly spaced points to form secure seam (maintain 30 sts per motif edge)
Info :
Repeat motif creation and join as-you-go until you have 7 motifs joined in a line. When joining, aim for slightly overlapping joins so appliques can cover seams. Blocking after joining ensures even scallops.
Round 12 :
Optional reinforcement row: sc in every st around entire joined strip to tidy joins (st count varies with joins; approximately 7 motifs x ~32 sts = ~224 sc)
Round 13 :
Begin decorative interior mesh: working into spaces across motif centers, ch5, sk 2 sts, sc into next space continue across creating open mesh runner (mesh repeat approx 40-44 ch-5 loops)
Round 14 :
In each ch-5 mesh loop: sc, ch3, sc to create open shell lattice (mesh count consistent with previous; anchors unchanged)
Info :
Use this open mesh to later stitch down curlicues and leaf bases. Keep the runner flat by blocking between rounds 12 and 15 — pin scalloped edges evenly to prevent distortion.
Round 15 :
Edge stabilization: 1 sc in each st and 3 sc in each scallop tip around full runner (approx 240 sc total)
Round 16 :
Smaller picot row: *(ch3, sl st in same sp), sc in next* repeat to create delicate picoted rim (detail only; anchors unchanged)
Info :
Finish base panel and leave long tails for sewing appliques. This cream lace panel provides the background openwork seen in the photos; it is intentionally light and airy to contrast with the dimensional flowers.
— Large Layered Flower (Make 3) :
Round 1 :
6 sc in magic ring (6)
Round 3 :
(1 sc, 1 inc) x 6 (18)
Round 4 :
Work 18 hdc into ring to create a slightly raised disk (18)
Info :
This small disk will form the bead cup; beads are sewn onto this disk later. If using pearls, sew them now to the disk center catching the base stitches and anchoring through the yarn center multiple times.
Round 5 :
Change to deep rose pink for inner small petals. Ch1, *(sc in next st, ch3, sl st into same st)* repeat 18 to create 18 small loops (18 loops)
Round 6 :
Into each ch-3 loop: sl st, (sc, hdc, 3 dc, hdc, sc) — small petal made; repeat 18 (18 petals)
Info :
Keep tension relaxed for petals so they puff up. Use a hook one size smaller for petal loops if you want firmer petals.
Round 7 :
Fasten off inner petal round leaving long tail for sewing. Arrange inner petals to sit raised above the center.
Round 8 :
Change to dusty blush pink for outer petal round. Join with sl st at outer base of inner petal spaces and ch2, *(sc in next petal base, ch2) x 18 creating 18 anchor loops for outer petals (18)
Round 9 :
Work larger petals into each ch-2 loop: sl st, (sc, hdc, 5 dc, hdc, sc) to form full rounded petal. Repeat 18 (18 petals)
Info :
Block petals gently by pinning them to shape while damp — this encourages soft, even curves. Outer petals are slightly larger than inner, creating the layered flower effect seen in the photo.
Round 10 :
Second outer petal layer (optional for extra fullness): join at space between petals and create 18 small scallop petals using *(sc, ch3, sl st)* into each interspace (18 additional petals)
Round 11 :
BLO trim round: 1 sc in each st BLO around petal bases to form a neat underside for sewing (approx 72 sc across the petal band)
Info :
Make three of these layered flowers — arrange them down the runner with approximately equal spacing. Use the remaining tails to sew the flower undersides to the lace base, covering seams where motifs meet.
Round 12 :
Optional corded ring for flower base: with cream yarn, ch40, sl st back along chain to form a cord ring; sew the cord ring under flower to make a defined border (cord length adjustable; anchor with ~16 stitches)
Info :
If you want bead centers that appear as pearls recessed in the center disk, sew pearls to Round 4 disk now then position the inner petals around them and sew through the hdc disk multiple times to secure.
— Small 5-Petal Blossom (Make 8-10) :
Round 1 :
6 sc in magic ring (6)
Round 2 :
(sc, ch3) x 6 creating 6 loops for petals (6 loops)
Round 3 :
Into each ch-3 loop: sl st, (sc, hdc, 3 dc, hdc, sc) — form 6 small puff petals (6 petals)
Info :
Sew a small pearl or French knot at blossom center for the highlight. Make 8-10 of these to sprinkle around the runner to echo the large bloom centers.
Round 4 :
Fasten off leaving tails for sewing, weave tail through back of blossom and stitch onto lace ground at chosen points (no additional stuffing required)
— Leaf (Make 18-22) :
Round 1 :
Ch 8, sc in 2nd ch from hook, sc, hdc, 2 dc, hdc, sc, sl st into last ch; working on opposite side of foundation chain: sc, hdc, 2 dc, hdc, sc, sl st to join to first sc — leaf shaped (approx 16 sts along edge excluding foundation)
Round 2 :
Turn leaf: in each dc of center line work 1 dc in same st BLO to create textured vein: sl st, *dc BLO in next dc across*, sl st to finish (leaf remains 16 anchor points)
Info :
Make leaves in olive green. Alternate sizes slightly by using chains of 6-10 for small-to-large leaves. Use BLO on Round 2 to create the prominent raised vein visible in the photos.
Round 3 :
Optional outline round: with cream or matching green, 1 sc around leaf edge to neaten (approx 32 sc including reverse edge)
Info :
Create between 18 and 22 leaves: arrange them under and around large flowers, overlapping edges so seams are hidden. Block leaves flat to accent the raised vein.
— Tubular Curlicue Stem (Make 6) :
Round 1 :
With cream yarn ch 40 (or required length for curl), sl st in 2nd ch and in every ch back to beginning to create a tight chain tube: ch1, (sc around chain) working through both loops of chain to make firm tube (40 sc)
Round 2 :
Continue in the round: 1 sc in each st around to neaten tube (40)
Info :
Lightly stuff the tube with a tiny amount of fiberfill to make it hold the spiral shape; do not overstuff. Use curved pins to hold spiral shape while sewing onto runner. Make several lengths for the scrolls seen between flower clusters.
Round 3 :
Shape into spiral and stitch into place on the lace background by running a sewing needle and matching thread through the underside tube stitches, securing every 6-8 mm to maintain curl (tube remains same stitch count)
— Border Edging (Cream) :
Round 1 :
Along full runner edge: *ch3, skip 2, sc in next* repeat forming small scallop anchors (count varies; follow edge spacing)
Round 2 :
Into each ch3 loop: (sc, ch3, sc) to create neat scallops across whole length (approx 60-72 scallops depending on motif joins)
Info :
Work this edging last after all appliques are sewn down so any stretched areas can be pulled back into shape. Blocking after edging will open the scallops evenly.
Round 3 :
Final picot finish: sc around scallop edges adding small picots: *(sc, ch3, sl st in tip) in each scallop tip to form delicate rim (st count varies)
— Assembly & Placement (Detailed) :
Info :
Layout your cream lace runner flat. Plan placement for three large flowers: one near each end and one centered between them. Leaves and small blossoms fill spaces around the flowers and help hide motif joins. Curlicue stems weave between flowers and tuck under leaves to appear integrated.
Round 1 :
Position first large flower: center it over motif join or at chosen location. Pin in place at 8 equidistant points under the flower base.
Round 2 :
Sew flower base to lace using yarn tail and mattress stitch through BLO round (Round 11 on Large Flower). Use small evenly spaced stitches so underside remains tidy (approx 16-20 sewing passes around base)
Info :
Attach leaves under and around the flower by overlapping with the flower base and sewing through both appliques and the lace mesh. This covers seam lines and gives organic layered look.
Round 3 :
Sew tubular curlicue stems by tacking them with discreet whip stitches every 6-10 mm so they hold curves but appear to float above lace.
Round 4 :
Position small blossoms and sew pearl beads into their centers with a separate fine thread, making sure knots sit on the underside and are secured through the blossom's core stitches (3 passes per bead).
Info :
Weave all loose tails into the underside of the runner through several adjacent stitches and trim close. If any join edges show, use tiny whip stitches to pull layers together invisibly.
— Finishing Touches & Blocking :
Round 1 :
Steam-block carefully on a pin-block or towel using low heat and steam from an iron held 1-2cm above work. Do not press directly to pearls or beads.
Round 2 :
Trim any stray fibers, check bead securement and sew any additional reinforcement where needed, especially on curlicue stems that may get tugged when moving the runner.
Info :
Allow the runner to dry fully while pinned to maintain scallop shape. Attach felt pads under heavy beads if you want to protect surfaces from scratches.
Finishing this runner gives a beautiful combination of lace and sculptural florals that feel both refined and cozy. Each layered petal and leaf adds tactile depth, while the cream lace base keeps the overall look light and elegant. This project is perfect to show off on a dining table, dresser, or as a thoughtful handmade gift. 🧶🌸 Enjoy the slow, satisfying process of layering and assembly — your finished runner will be a charming focal point. ✨