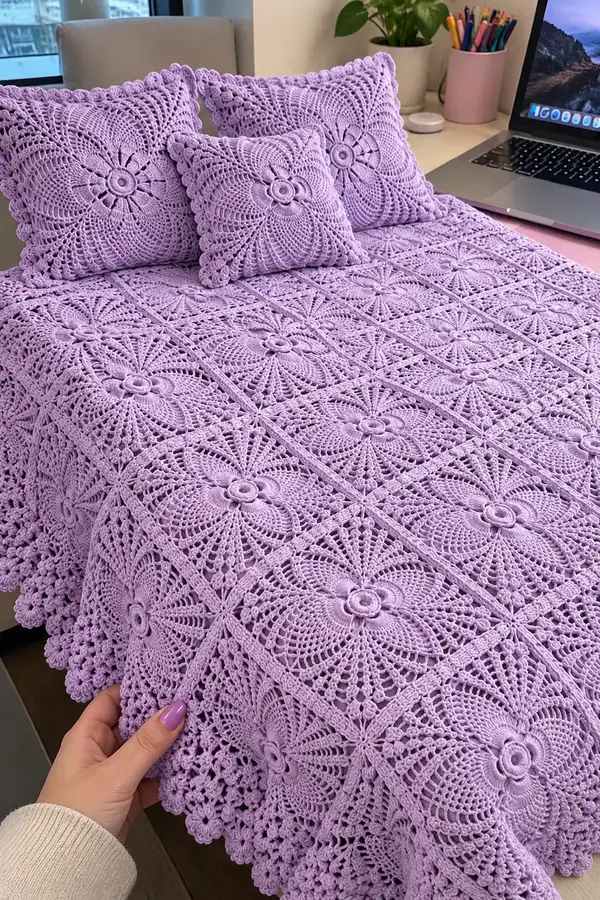
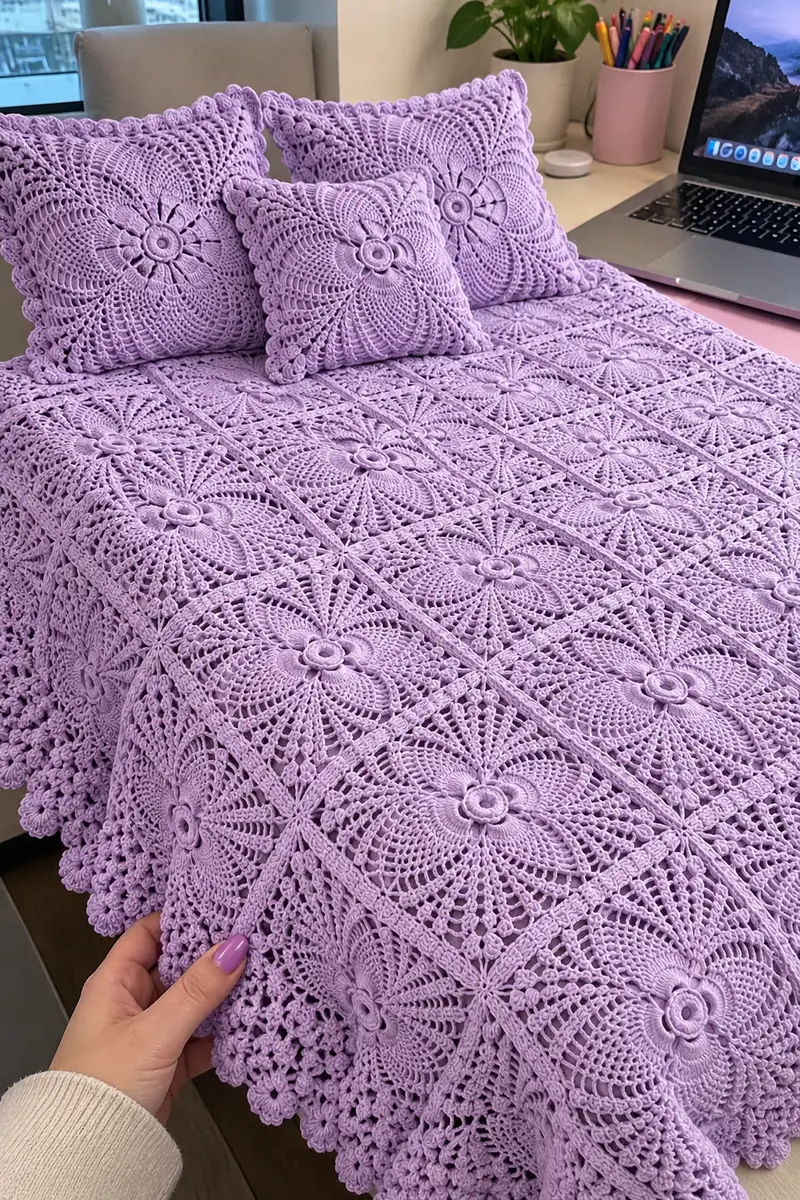
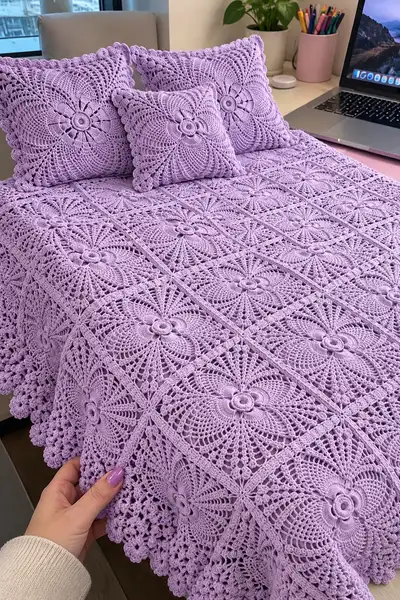
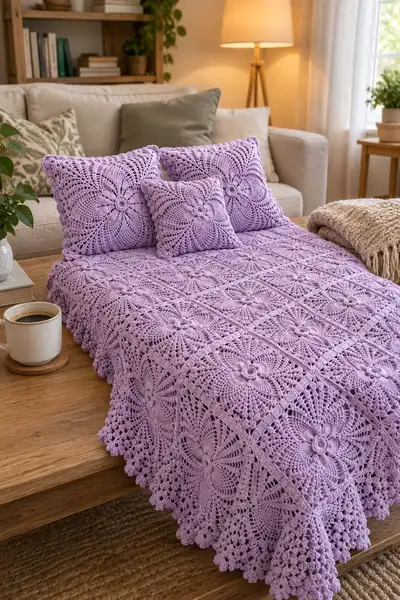
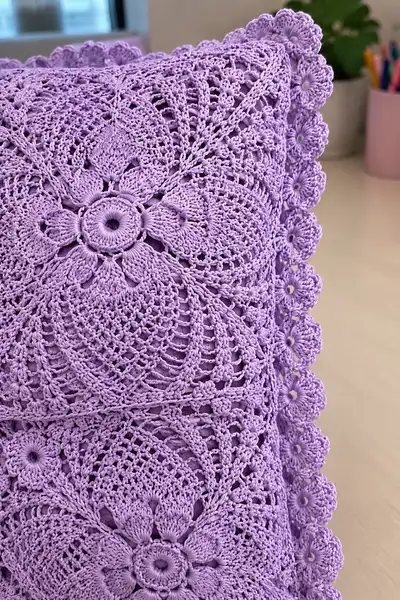
A romantic, vintage-inspired bedspread made from joined floral lace squares in a soft lavender hue. This pattern recreates the openwork floral motifs, raised petal centers and delicate scalloped edging you see in the photos. Suitable for an experienced crocheter who enjoys motif work, join-as-you-go techniques and elegant finishing—includes full instructions for motifs, pillow covers, join method and scalloped border.
Progress Tracker
0% Complete
— Motif (make required number of squares to fit bed: examples given below) :
Note :
Each motif is worked in the round from the center out and is designed to finish roughly 20-22 cm (8-8.5") blocked using DK/light-worsted yarn and a 3.5 mm hook; adjust hook or yarn weight to suit your desired size. The motif below is shown with 8 primary petal anchors and then worked into a square using quarter repeats. Maintain consistent tension and block each motif square-flat before joining.
Round 1 :
Make a magic ring. Ch 1, 8 sc in magic ring. Tighten ring. (8)
Round 2 :
Inc in each st around (2 sc in each st). (16)
Round 3 :
(1 sc, inc) x 8. (24)
Round 4 :
(2 sc, inc) x 8. (32)
Round 5 :
(3 sc, inc) x 8. (40)
Info :
This establishes 40 base stitches which divide neatly into 8 petal anchors (40/8 = 5 sts per petal section). Mark the first stitch of the round with a removable marker so you know where rounds begin.
Round 6 :
*2 sc in next 2 sts, (make petal anchor: 1 tr cluster into next st — see Info for cluster method), 1 sc in next st* repeat x8 (40)
Info :
Petal anchor cluster method: yarn over twice, insert hook into base st, yarn over pull through, yarn over pull through two loops twice (US: treble cluster of 3 partial trebles), repeat to make the specified cluster and close together at the top. This creates a raised center for each petal. For consistent height, use the same number of yarn-overs and pull-through steps for every cluster.
Round 7 :
*Ch 2, 5 dc worked around the top of the cluster (these form the petal surface) all worked into the same cluster top, ch 2, sl st into the next sc (the dividing sc)* repeat x8; sl st to first ch-2 to join. (This round creates 8 raised petals)
Info :
If you prefer puff petals, replace the 5 dc petal with 5 puff stitches worked into the cluster top: make a small puff (yarn over, insert hook, pull loop, repeat 5 times, yarn over, pull through all loops) then ch1 to close; the stitch count around remains a group for each petal and does not change the total 40 base divisions.
Round 8 :
Ch 1, 1 sc in same join, *ch 4, skip 2 sts, sc in next 3 sts, ch 4, skip 2 sts, sc in next st* repeat x8. The round is worked in grouped segments that create small open arches between petals. (40 base divisions preserved)
Round 9 :
Working into ch-4 spaces and sc groups: *in ch-4 space: (sc, ch3, 3 dc, ch3, sc) to make a scalloped arch; in the 3-sc group along petal side: 1 sc in each sc* Repeat around. This creates a ring of arches between petals. Stitch count by visual segments; the round is composed of 8 arch units and 8 small sc groups.
Round 10 :
Working into the arch units: sl st to center top of an arch, ch 3 (counts as first dc), 2 dc in same space, ch 2, 3 dc in same space (corner-like mini shell), sc into the following 3-sc segment; repeat across each quarter so that you have four corner-like shell units equally spaced. The total repeat pattern uses 8 shell minis and keeps the motif circular but introduces quarters for future squaring.
Info :
At the end of Round 10 you should be able to visually divide the motif into four even quarters (each quarter spans two petals). Place pins or markers at those quarter points — they will become the four corners when forming the square rounds.
Round 11 :
Change to working quarters: *[in shell mini at quarter point: (2 dc, ch 4, 2 dc) to begin a corner], ch 2, skip next small arch, 1 dc in next two arch spaces and 1 dc in each sc of the following 3-sc segment* Repeat per quarter. This begins to create chain-corners and longer openwork fans to square the motif. (Work counts expressed per quarter; overall stitch geometry expands.)
Round 12 :
1 sc in each dc across the side fan sections and in the center of each corner ch-4 space work (sc, ch 4, sc). This creates a row of sc that delineates sides and sets 4 corner chain spaces. The total number of side sc will vary by pattern repeat but maintain symmetry in each quarter.
Info :
From this point forward we transition from circular growth to measured quarter-repeats. Each quarter uses the same number of stitches so counting every quarter and keeping them identical ensures a true square after blocking. If counts seem off, undo to last even round and recount quarters.
Round 13 :
In each side space: ch 5 (counts as ch3+ch2 corner chain), (dc, ch 3, dc) in the corner ch-4 (this increases the corner into a more pronounced square corner), then along the side make a repeat of (1 dc, ch 2, skip 1) x 9 to produce open fans along each side. Repeat for each of the 4 sides so that the square outline grows. (Quarter-by-quarter shaping)
Round 14 :
Distance-fill round: In each ch-2 side space work (hdc, 1 sc, hdc) to fill and compress the fan rows, creating a firm lattice side. In the corner ch-3 spaces work (sc, ch 3, sc). This reduces flaring while maintaining openwork.
Round 15 :
Work a shell-based side: *(3 dc, ch 3, 3 dc) into corner ch-3 to define corner; along side work (skip next 2 loops, 5 dc shell in next sp, skip next 2 loops, sl st into next loop)* Repeat across. The motif becomes a square with four defined corners and four side panels of shell fans.
Info :
At this stage the motif looks roughly square but may still be slightly circular. Block the motif flat to the target square measurement before continuing rounds that will set the final edges; blocking ensures uniform squares for joining later.
Round 16 :
After blocking (or if skipping blocking, working gently) ch 1, sc around the whole motif evenly placing 3 sc in each corner ch-3 space to ensure corners are full and corners measure the same. This round creates a tidy base for the final lace rounds. Total sc count will vary but is evenly distributed across 4 corners and sides.
Round 17 :
Begin outer lace: *[in each side segment: ch 6, skip 3 sc, sl st into next sc to create long chain arches], in each corner work (sc, ch 4, sc)* Repeat around. The number of chain arches per side should be equal in each quarter; for a 20 cm motif you will typically have 9-11 arches per side depending on stitch size.
Round 18 :
Working into chain arches: (sc, ch 3, 3 dc, ch 3, sc) into each long chain arch to create a repeating fan. This builds the lacy fan rows visible in the photos. Repeat in each arch. This round significantly increases visual diameter but is still square by quarter repeats.
Round 19 :
Ch 1, sc in each dc around across the fans to compact them slightly; in corner ch-4 spaces work (sc, ch 4, sc) to keep corner fullness. This creates a consistent row to link motifs later.
Info :
From Rounds 16-19 we transition motif shape and prepare edge detail. If you prefer a slightly larger motif, add another fan round (repeat Rounds 17-18) before moving on to the final edging rounds. Always block to the target size.
Round 20 :
Decorative petal outer: *in each quarter corner: (ch 1, 1 sc into corner ch-4, ch 4, 5 dc cluster across next 3 loops to form a rounded petal, ch 4, sc in the next corner)* Fill sides with (1 sc in each sc across) to stabilize. This is the last round before final scallops.
Round 21 :
Final motif border: work small scallops around the complete square: *(sl st into next st, ch 3, 4 dc in same st, ch 3, sl st into next st) repeat across sides; in each corner work (sl st, ch 4, 6 dc, ch 4, sl st) to create a more pronounced corner scallop.* Finish off and weave ends. The motif is complete. (Use blocking pins to square up and set shape.)
Info :
Make as many motifs as required: measurement guidelines — throw/bench: 6 x 8 motifs, single bed: 8 x 9 motifs, double/queen: 9 x 11 or add rows to desired size. Because motif sizes vary by tension, always make a gauge swatch using 2 motifs joined and blocked to confirm how many motifs are required for your target bed size.
— Join-as-you-go Method and Joining Rounds :
Info :
We recommend joining with a join-as-you-go (JAYG) technique so seams are flat and invisible. Join on the last round of the motif when possible. Use the same yarn color and hook as motifs. Below is a JAYG schema that attaches motif edges using slip-stitch joins and single crochet bars, with corner alignment using the corner chain spaces created earlier.
Round 22 (Joining - first motif placed) :
Work Round 22 as you would Round 21 (final motif border) for the first motif—do not join. This motif becomes your center or starting piece.
Round 23 (Joining - subsequent motif edge joins) :
When working the final border round of a new motif, join to adjacent completed motifs as follows: when you reach a stitch that mates to a completed motif's edge, instead of working the stitch alone, sl st into the corresponding stitch/space of the completed motif, then continue the scallop on the new motif. Join at each side working across the side and in corners join to corner ch-4 by sl st into corner ch-4 and then complete the corner on the new motif. Repeat along each joined side. This produces a nearly invisible seam and keeps motif fronts facing outward.
Info :
Always align floral centers/orientation before joining. If needed use safety pins to pin motifs together through the center to prevent rotation while joining. For a bedspread shown with all floral centers oriented the same direction, make sure petals point consistently across the layout.
Round 24 :
If joining more than one side at once (for motifs inserted into an existing grid), join to one motif fully, then to the adjacent motif in a subsequent pass. For internal motifs that have two neighbors, secure one side first, then the next. When joining at a junction of 4 motifs, make the final tiny connecting stitch through intersection loops of all four motifs to create a strong cross point.
Round 25 :
To create an even join line across the bedspread, after all motifs are joined, work a single crochet spacer row across the whole blanket through the side openings: with wrong side facing, insert hook under both loops of the joining bars and work 1 sc in each, maintaining consistent tension. This evens any small height differences.
Info :
Alternative joining: you can use a slip-stitch seam or whip stitch with a yarn needle for a softer seam. JAYG is recommended to keep the front neat and avoid a visible yarn needle join on the right side.
— Outer Scalloped Border (after joining all motifs) :
Info :
After all squares are joined into your final bedspread rectangle, work the border in rounds all around the outer edge to frame the spread and create the prominent scalloped edge visible in photos. Work evenly into the side loops and corner ch-4 spaces. Below are multiple rounds; do not be intimidated—work slowly and pin frequently while blocking.
Round 26 :
With RS facing, attach yarn anywhere on the outer edge. Ch 1, sc evenly around the entire outer edge placing 3 sc in each corner ch-4 space. Count to ensure stitch distribution is even on opposite sides. Join with sl st to first sc.
Round 27 :
Ch 3 (counts as dc), dc in same st, *ch 3, skip 2 sc, (3 dc in next sc), ch 3, skip 2 sc, sl st into next sc* Repeat around to create large chain arches spaced evenly. In corner spaces place (3 dc, ch 4, 3 dc) for a full corner shell. Join with sl st to top of ch-3.
Round 28 :
In each ch-3 side arch: (sc, ch 3, 5 dc, ch 3, sc) to turn each arch into a fan; in each corner ch-4 work (sc, ch 4, 9 dc, ch 4, sc). Repeat around. This builds the large fans seen on the side of the spread.
Info :
Carefully count fans per side; add or remove small fan repeats to keep opposite sides mirrored. If one side needs adjustment, reduce or add a ch-3 arch earlier in the round to balance.
Round 29 :
Ch 1, sc around each fan top, with 3 sc in each corner shell. This evens the fabric and prepares for the dense scalloped edging.
Round 30 :
Work the scalloped finishing edge: *Into each cluster of 5 dc on fans: (sl st, ch 1, 7 dc pop/puff shell into same base, ch 1, sl st into base)* Repeat across; in corners work larger 11-dc shells to keep corner fullness. Finish off and weave in ends. Pin and steam block the entire spread to set scallops.
Info :
For the deep droplet scalloped edge visible in the photos, repeat Round 30 for a second pass (place shells directly adjacent) to give a more three dimensional scallop cluster. Blocking after this repeated shelling will set the pronounced scalloped border.
— Pillow Covers (Make 2-4 depending on display) :
Info :
Pillow fronts use the same motif as the bedspread square. For a decorative cushion (shown with two large and one small), make square motifs and join in a 2x2 or 3x3 grid for larger sizes. Backings can be a plain fabric, solid crochet panel, or crocheted solid rectangle worked in dc rows to match dimensions. Below are steps for a 2x2 motif pillow front and a crocheted backing.
Round 31 :
Make four motifs per pillow front following Rounds 1-21. Block each motif to an identical square. Join the four motifs using the JAYG method described in Round 23 so that the floral centers all face outward. Weave ends.
Round 32 :
Optional backside - Crocheted square backing: With 3.5 mm hook and same yarn, ch (motif width in cm converted to chains) + 2, work in dc rows until back matches front dimensions. Fasten off leaving long tail for seam. Alternatively, sew on a cotton or linen pillow cover backing using a sewing machine and a zipper closure for a polished finish.
Round 33 :
Assembly: align front and back with right sides together, whipstitch or single crochet around edges leaving 10-12 cm (4-5") open to insert cushion form, then finish seam and insert form. Close opening with ladder stitch or slip stitch to hide seam. For an envelope back, overlap two crocheted rectangular panels instead of a single zip closure.
Info :
For the decorative picot-style outer edge on pillows (framing the motifs), work a neat sc round followed by a small picot scallop (ch3, sl st into base) repeated in each side loop for a delicate finish that matches the bedspread.
— Detailed Stitch Notes, Puff & Pop Techniques :
Info :
Puff stitch: yarn over, insert hook, pull loop through (repeat 3-5 times as directed), yarn over and pull through all loops on hook, ch 1 to close puff. Keep loops uniform. Popcorn stitch: 5 dc in same space, remove hook, insert into first dc of group, pull loop through to close popcorn, ch 1 to secure.
Info :
Invisible decrease (dec): insert hook into front loop of next stitch, then into front loop of following stitch, yarn over and pull through both loops, yarn over and pull through remaining two loops on hook. This creates a neater, less visible decrease in lace sections; practice on scrap before using on motifs.
Info :
Blocking: wet-block each motif gently, pin to the target square shape using blocking wires or pins, and allow to dry fully. Blocking evens stitch patterns and opens the lace so joins sit flat and the scalloped edge fluffs beautifully.
— Finishing & Final Assembly :
Round 34 :
After all joins and border rounds are complete and ends are woven in, steam-block entire bedspread on a large table or blocking surface. Pin the scallops to get an even, flowing edge. Let dry fully and then use a soft steam iron at a distance (do not press) if needed to further shape scallops.
Info :
Weave in ends by threading yarn tail onto yarn needle, pass under many nearby stitches on the wrong side, then trim close. For extra security on items that will be laundered often, tack down ends with a small dab of fabric glue hidden under a join.
Round 35 :
If you wish to produce a deeper drop at bed sides, add extra motif rows before working the border. Alternatively, add a crocheted solid ruffle row using repeated shell rounds for a tailored skirt effect.
Info :
Care Instructions: washable yarns (machine washable on gentle cycle) are recommended for ease of care. To preserve the scalloped edge, lay flat to dry instead of tumble-drying. Store folded in dry environment to avoid distortion.
Assembly Instructions
- Attach motifs using the join-as-you-go method on the final motif round: when your new motif's final round reaches an adjacent completed motif, join by slip stitching into the corresponding stitch/space of the completed motif, continuing the border pattern as written.
- For internal junctions where four motifs meet, secure the crossing point by passing the hook or yarn needle through the central intersection loops of all four motifs and making a tight slip stitch or small whipstitch; this reinforces the junction.
- When joining rows to the central panel, align motifs so floral centers all face the same direction. Pin motifs together along each side at the quarter points (every corner chain space) to keep consistent orientation while you seam.
- Sew pillow covers by joining motifs into a 2x2 or 3x3 front using the same JAYG technique. Add a plain crocheted or fabric backing. Sew three sides, insert cushion, and close remaining opening with neat ladder stitch or slip stitch.
- Attach border after all motifs are joined. Work the sc stabilizer round, then large fan rounds, then the scalloped shell finishes. Pin the scallops before the final shell round and steam-block to set the shape.
- Weave in all ends on the wrong side, then press the wrong side lightly with steam to smooth joins. For added stability along the bedspread top edge where it may experience more handling, add an interior line of small whip stitches in the seam allowances.
- If a stronger seam is desired (e.g., for frequent use), reinforce the join-as-you-go joins from the wrong side using a thin yarn and mattress stitch to hide reinforcement.
- Trim any stray fibers and store flat or rolled to maintain the scalloped border.
Important Notes
- 💡Use stitch markers consistently at the beginning of each round to avoid counting errors and maintain proper shaping.
- 💡Stuff pillow centers and block motifs before final joining to avoid distortion when motifs are joined.
- 💡For safety, position motifs on a layout grid before permanent joining to ensure correct orientation and pattern flow.
- 💡Work with a slightly smaller hook than yarn label suggests for tighter lace definition, especially in the raised petals.
- 💡Block motifs flat to uniform dimensions before joining to keep the assembled bedspread even and square.
- 💡Pin all pieces in position before final sewing to ensure proper placement and symmetry across the full bedspread.
- 💡Maintain consistent tension; inconsistent tension will create a wavy seam or ruffled edge instead of neat squares.
- 💡If substituting yarn, make a full motif and join sample to calculate how many motifs you need for your desired size.
Completing this bedspread is a labor of love — each floral square stacks into a beautiful, romantic whole with soft scallops and raised petal texture. The lavender color creates a calming bedroom focal point while the lacework adds heirloom charm. Take joy in blocking and joining; the finishing steam-block will make every motif sing. 🧶🌸💜
What is the finished size of this bedspread?
Finished size depends on number of motifs and your gauge. With motifs blocked to 20 cm (8") square, an 8x9 grid produces approximately 160 cm x 180 cm (queen-approx). Measure your motif and calculate needed motifs for your bed size.
Can I use different yarn weights for this pattern?
Yes — you can change yarn weight, but adjust the hook accordingly and make a motif gauge to calculate motif counts. Thicker yarn yields larger motifs and fewer squares; thinner yarn means more motifs and longer work time.
Do I need to block every motif before joining?
Blocking each motif before joining is strongly recommended to make sure squares line up evenly and edges sit flat for a neat joined bedspread.
How much yarn will I need?
For DK/light-worsted yarn, expect approximately 1200-1800 g for a full bedspread depending on bed size. The sample shown used about 1500 g for a single/throw-style spread with matching pillow covers.
Can I make the spread in more than one color?
Absolutely. You can create multicolor motifs, change color per round, or add a contrast border. Carry or fasten off colors as preferred; if carrying, weave in ends at motif joins carefully.
Is join-as-you-go the only way to assemble?
No — you can also sew motifs together with a yarn needle (mattress stitch or whipstitch) or use a crochet seam, but join-as-you-go gives the neatest right-side finish without extra finishing seams.
How do I launder the bedspread?
Use washable yarn when possible; machine wash on gentle with cold water and mild detergent, then lay flat to dry to protect the scalloped edge. Avoid tumble-drying to preserve shape.
What if my motifs differ slightly in size?
Dry-blocking and gentle steam can often even small differences. If one motif remains different, consider swapping its position to a less visible area or rework it to match the required gauge.
Stay in the Loop!
Get notified when we release new free crochet patterns and join our crafting community!