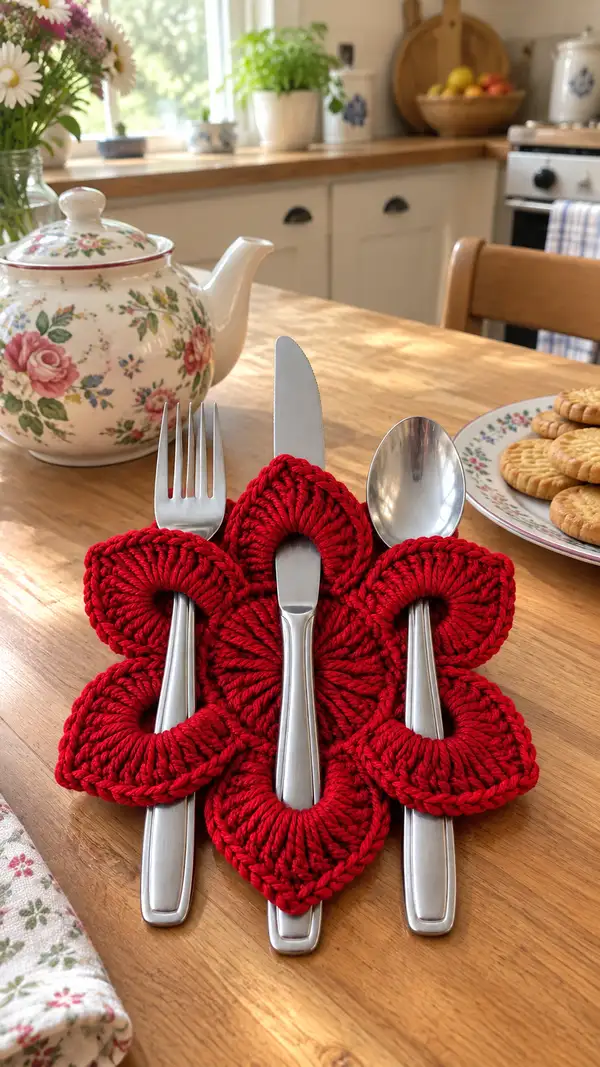
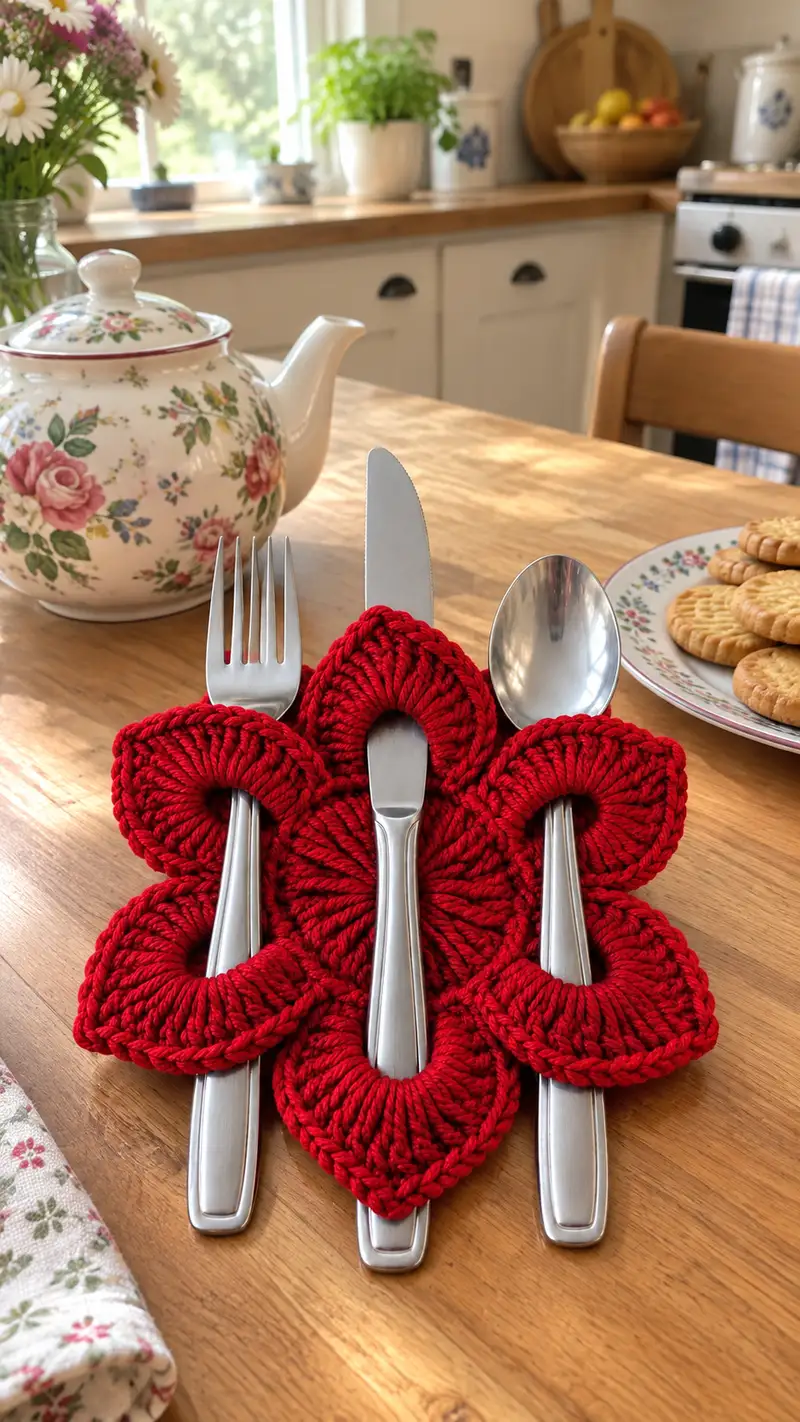
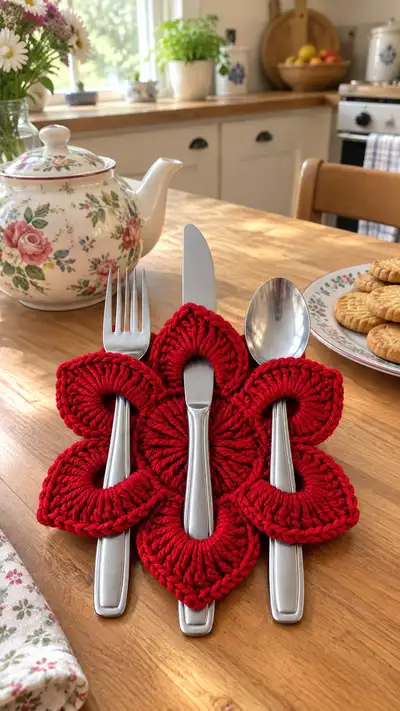
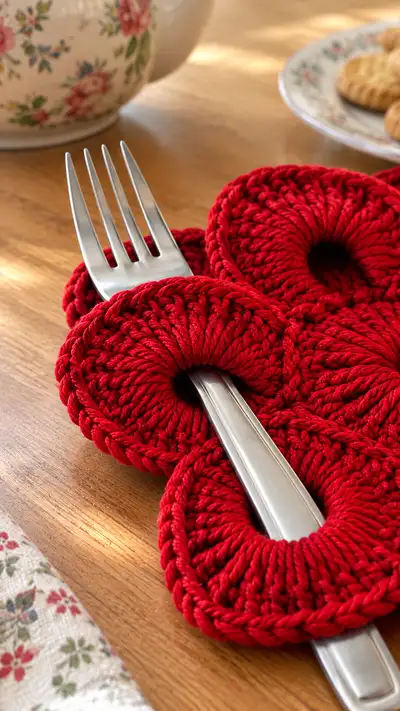
This charming floral cutlery holder is a quick, practical and decorative table accent worked in a rich red cotton yarn. The design features five petal-shaped loops arranged like a flower, each forming a neat opening to tuck a knife, fork or spoon. The piece is sturdy, slightly padded, and finished with a neat braided edge that holds place settings beautifully for tea or dinner. Perfect for seasonal tables, parties or simple everyday charm.
Progress Tracker
0% Complete
— Notes & Gauge :
Info :
Gauge is not critical for this accessory but influences inner opening size. With worsted cotton and a 4.5mm hook, the inner hole formed in the petal after Round 7 should measure approx. 2.0-2.5 cm (just under 1") across. If your holes are smaller than your cutlery handles, move up a hook size; if they are larger, move down.
Info :
Puff stitch used here = yarn over, insert hook into indicated stitch, yarn over and pull up loop to near height of the stitch (repeat 3-4 times until 5-6 loops on hook), yarn over and pull through all loops, ch1 to close puff. Adjust number of yarn overs per puff to match your yarn thickness. For bulky yarn do 3 loops; for thinner yarn do 4-5 loops.
— Petal 1 :
Round 1 :
6 sc in magic ring (6)
Round 3 :
(1 sc, 1 inc) x 6 (18)
Round 4 :
(2 sc, 1 inc) x 6 (24)
Round 5 :
(3 sc, 1 inc) x 6 (30)
Info :
These rounds build the small disc that will form the base of the petal. Keep stitches tight enough so the inner hole does not gape; adjust hook if needed.
Round 6 :
1 sc in each st around (30)
Round 7 :
To create the central opening (chain-bridge): *Ch 8, skip next 8 sts, sc in next 14 sts, then sc along the 8 chs made (working 1 sc in each chain) to complete the round* — total remains (30). Fasten with a sl st to first sc.
Info :
At the end of Round 7 you have a small chain-bridge that forms an oval opening. Test the inner hole with a fork handle — the chain length gives the inner circumference. If you prefer a larger opening, retake Round 7 with ch 10; smaller openings use ch 6.
Round 8 :
1 sc in each st around, working into chains and stitches evenly (30)
Round 9 :
BLO 1 sc in each st (30)
Info :
Working this round in the back loops only creates a subtle ridge along the inner opening; this ridge helps keep cutlery handles centered and gives the petal its inner lip.
Round 10 :
*Puff stitch in next st, sc in next st* around (15 puff, 15 sc) — work puff and sc alternating; total 30 stitches equivalent (30)
Round 11 :
sc in each st around (30) — position puffs more prominently by working into puff base if necessary
Round 12 :
(3 sc, 1 dec) x 6 (24)
Info :
Begin shaping the petal tip by decreasing in this round. Stuffing is not used for each petal — they remain flat. Keep tension consistent so petals lie flat when joined.
Round 13 :
(2 sc, 1 dec) x 6 (18)
Round 14 :
1 sc in each st (18)
Round 15 :
BLO sl st in each st (18)
Info :
This slip stitch round in the back loops only creates a turning ridge that helps the petal hold its curved outer edge when fluffed and blocked.
Round 16 :
(1 sc, 1 inc) x 6 (24) — begin to flare the outer edge slightly so petals will sit visibly when joined
Round 17 :
sc in each st (24)
Round 18 :
sl st in next 24 sts to neaten the outer edge, fasten off leaving a 30cm/12" tail for sewing (24)
Info :
Weave the long tail through the last round to neaten the edge. Pin the finished petal flat and gently steam-block or wet-block to create a consistent shape. Repeat for each petal, matching orientation so the inner openings will align when placed in a circle.
— Petal 2 :
Round 1 :
6 sc in magic ring (6)
Round 3 :
(1 sc, 1 inc) x 6 (18)
Round 4 :
(2 sc, 1 inc) x 6 (24)
Round 5 :
(3 sc, 1 inc) x 6 (30)
Round 6 :
1 sc in each st (30)
Round 7 :
Ch 8, skip 8 sts, sc in next 14 sts, sc along 8 chs (30)
Round 8 :
1 sc in each st around (30)
Round 9 :
BLO 1 sc in each st (30)
Round 10 :
*Puff stitch in next st, sc in next st* around (30)
Round 11 :
sc in each st around (30)
Round 12 :
(3 sc, 1 dec) x 6 (24)
Round 13 :
(2 sc, 1 dec) x 6 (18)
Round 14 :
1 sc in each st (18)
Round 15 :
BLO sl st in each st (18)
Round 16 :
(1 sc, 1 inc) x 6 (24)
Round 17 :
sc in each st (24)
Round 18 :
sl st in next 24 sts to neaten the outer edge, fasten off leaving 30cm/12" tail for sewing (24)
Info :
Make sure the inner opening of Petal 2 matches Petal 1 in size and tension. If the openings differ noticeably, frog back to Round 7 and adjust ch length for the chain-bridge.
— Petal 3 :
Round 1 :
6 sc in magic ring (6)
Round 3 :
(1 sc, 1 inc) x 6 (18)
Round 4 :
(2 sc, 1 inc) x 6 (24)
Round 5 :
(3 sc, 1 inc) x 6 (30)
Round 6 :
1 sc in each st (30)
Round 7 :
Ch 8, skip 8 sts, sc in next 14 sts, sc along 8 chs (30)
Round 8 :
1 sc in each st around (30)
Round 9 :
BLO 1 sc in each st (30)
Round 10 :
*Puff stitch in next st, sc in next st* around (30)
Round 11 :
sc in each st around (30)
Round 12 :
(3 sc, 1 dec) x 6 (24)
Round 13 :
(2 sc, 1 dec) x 6 (18)
Round 14 :
1 sc in each st (18)
Round 15 :
BLO sl st in each st (18)
Round 16 :
(1 sc, 1 inc) x 6 (24)
Round 17 :
sc in each st (24)
Round 18 :
sl st in next 24 sts to neaten outer edge, fasten off leaving 30cm/12" tail for sewing (24)
Info :
If you want a fuller petal, add one extra round of sc (Round 11 duplicate) before beginning decreases; this will widen the petal slightly.
— Petal 4 :
Round 1 :
6 sc in magic ring (6)
Round 3 :
(1 sc, 1 inc) x 6 (18)
Round 4 :
(2 sc, 1 inc) x 6 (24)
Round 5 :
(3 sc, 1 inc) x 6 (30)
Round 6 :
1 sc in each st (30)
Round 7 :
Ch 8, skip 8 sts, sc in next 14 sts, sc along 8 chs (30)
Round 8 :
1 sc in each st around (30)
Round 9 :
BLO 1 sc in each st (30)
Round 10 :
*Puff stitch in next st, sc in next st* around (30)
Round 11 :
sc in each st around (30)
Round 12 :
(3 sc, 1 dec) x 6 (24)
Round 13 :
(2 sc, 1 dec) x 6 (18)
Round 14 :
1 sc in each st (18)
Round 15 :
BLO sl st in each st (18)
Round 16 :
(1 sc, 1 inc) x 6 (24)
Round 17 :
sc in each st (24)
Round 18 :
sl st in next 24 sts to neaten outer edge, fasten off leaving 30cm/12" tail for sewing (24)
Info :
Make sure the long tails are left on the OUTER edge; these will be used for joining petals to the central disc and to each other. Use a contrasting stitch marker to mark the spot on each petal that should face the center.
— Petal 5 :
Round 1 :
6 sc in magic ring (6)
Round 3 :
(1 sc, 1 inc) x 6 (18)
Round 4 :
(2 sc, 1 inc) x 6 (24)
Round 5 :
(3 sc, 1 inc) x 6 (30)
Round 6 :
1 sc in each st (30)
Round 7 :
Ch 8, skip 8 sts, sc in next 14 sts, sc along 8 chs (30)
Round 8 :
1 sc in each st around (30)
Round 9 :
BLO 1 sc in each st (30)
Round 10 :
*Puff stitch in next st, sc in next st* around (30)
Round 11 :
sc in each st around (30)
Round 12 :
(3 sc, 1 dec) x 6 (24)
Round 13 :
(2 sc, 1 dec) x 6 (18)
Round 14 :
1 sc in each st (18)
Round 15 :
BLO sl st in each st (18)
Round 16 :
(1 sc, 1 inc) x 6 (24)
Round 17 :
sc in each st (24)
Round 18 :
sl st in next 24 sts to neaten outer edge, fasten off leaving 30cm/12" tail for sewing (24)
Info :
All five petals are now complete. Lay them out in a circle with the inner openings pointing to the center. Adjust orientation so the outer petal tips radiate evenly like a flower. Use blocking to flatten and uniformize if necessary.
— Center Disc (Join Petals) :
Round 1 :
Make a central disc that joins petals: MR, 6 sc in ring (6)
Round 3 :
(1 sc, 1 inc) x 6 (18)
Round 4 :
(2 sc, 1 inc) x 6 (24)
Round 5 :
(3 sc, 1 inc) x 6 (30)
Info :
This disc will sit under the inner openings of all five petals and serve as the piece to which you sew the inner rims of the petals. For a firmer center, you can make an extra round (Round 6) of sc before sewing petals on.
Round 6 :
1 sc in each st around (30)
Round 7 :
sl st evenly around to create a smooth surface and add a visual ridge for the petal joins (30)
Info :
Pin the central disc to the center of your petal layout, aligning the chain-bridge openings directly above the disc so the holes sit concentrically. The disc should be large enough to cover the inner edges of all five petals where you will sew them.
Round 8 :
Using the long tail from Center Round 6, whip-stitch through the inner loops of each petal and into the central disc. Make small, tight stitches approximately every 3-4mm to hold firmly (working a complete circle until all petals are attached).
Info :
Begin by sewing Petal 1 to the disc at the first marked point. Sew Petal 3 opposite Petal 1 (for balance), then sew the remaining three petals in the other spaces. Use pins to hold petals in place before sewing to maintain symmetry.
Round 9 :
After securing petals, work 1 sc through both disc and the inner row of each petal all the way around for reinforcement (approx. 60 sts if you pick up both layers evenly). If your stitches are tight this will be slightly fewer; simply work one sc in each space you pick up (60)
Round 10 :
sl st around neat join and fasten off leaving tails to weave through underside (60)
Info :
If you want a padded center, before fully closing the join stuff a small bit of polyester filling between the disc and the petal inner rims and then finish the sc reinforcement round to lock the stuffing in. Keep padding minimal — a flatter center is better for cutlery stability.
— Outer Edging :
Round 1 :
With right side facing, join yarn to any outer edge st. Work sc evenly around the entire flower, placing 2 sc in outermost points (petal tips) to keep the shape (approx. 120 sc total depending on how many outer sts you catch).
Round 2 :
*(1 sc, ch 2, 1 sc) in next stitch (creates small picot style scallop), skip 1-2 sts depending on spacing, sc in next 3 sts* around to create even scallops (repeat until round close)
Info :
This scalloped round gives a decorative, finished look similar to the neat braided border in the photo. You can substitute a braided-edge (worked by chain loops and slip stitch braid) if you prefer a thicker rim.
Round 3 :
Work a reverse single crochet (crab stitch) around the very edge to make a tight twisted rope finish. Sl st to join and fasten off, weave in ends (approx. 120)
Info :
Reverse single crochet is worked left-to-right: insert hook in next stitch behind the working yarn, yarn over and pull through, then complete single crochet. This gives a rope-like edging that resembles the thick neat edge in the photo.
— Optional Backing (Stability) :
Round 1 :
Make a backing disc slightly smaller than the assembled flower. MR, 6 sc (6)
Round 3 :
(1 sc, inc) x 6 (18)
Round 4 :
(2 sc, inc) x 6 (24)
Round 5 :
1 sc around (24)
Info :
Sew the backing to the underside of the center disc and to the inner part of the petals to create a tidy underside and extra stability. If you prefer fabric backing, cut a felt circle and whip-stitch it to the underside instead.
Round 6 :
Sl st around and fasten off; weave in ends and trim (24)
— Finishing Touches & Blocking :
Info :
Pin the finished flower on a flat surface and gently steam or wet-block to even out petals. If using cotton, a light starch spray will help the petals keep their shape. Check each inner opening with your actual cutlery; the fit should be snug but not tight.
Info :
Weave in all tails onto the underside, trimming close. Consider reinforcing the center joins with a second pass of small whip stitches if you expect heavy use.
Info :
For machine washable durability, use 100% cotton yarn and wash on gentle cycle; reshape while damp and dry flat.
This red flower cutlery holder transforms a simple table setting into something special with a few hours of crochet and a handful of yarn. Each petal is deliberately shaped to nestle cutlery handles and create a tidy floral presentation. Block and finish carefully for the sharp, professional look shown, and don't forget to try contrasting edging for a seasonal flair. 🌺🧶 Enjoy the satisfaction of handmade details on your next gathering — happy stitching!