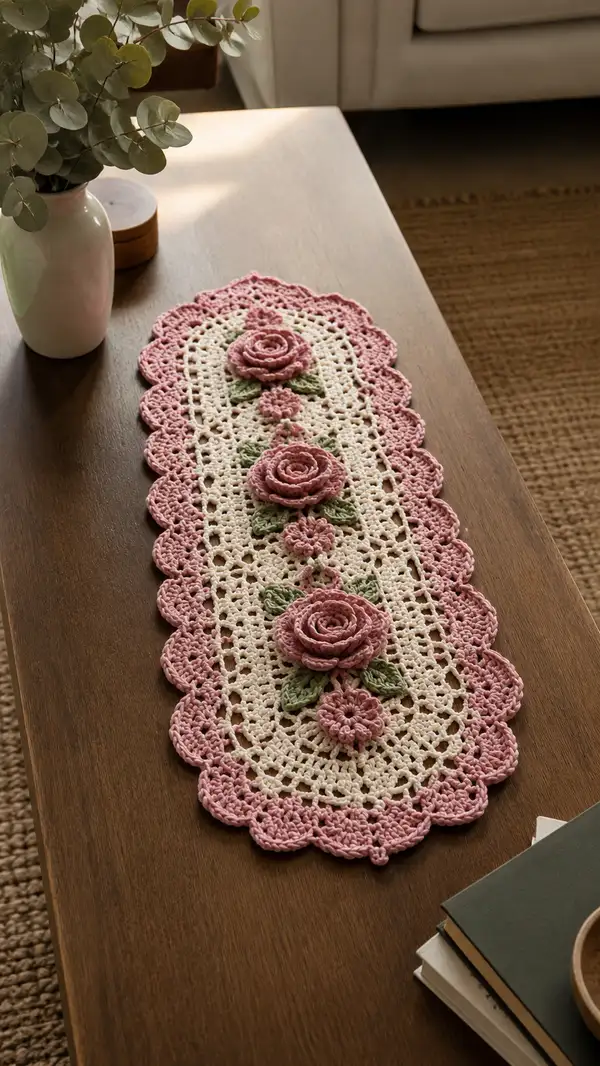
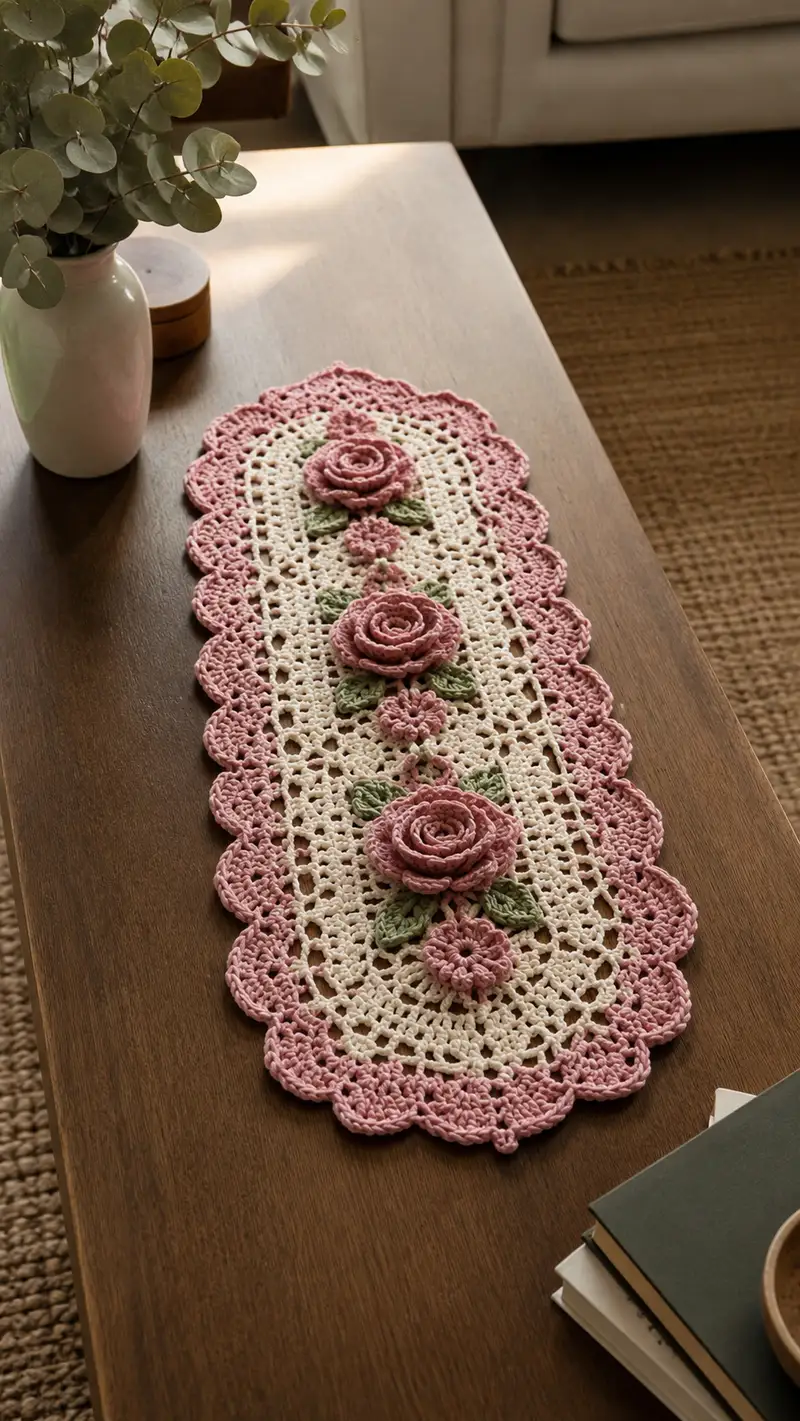
A romantic vintage-inspired table runner featuring three dimensional pink roses, soft green leaves and an elegant cream lace center. This pattern combines lacy filet-style rounds with textured appliques and a scalloped pink border for a timeless centerpiece. Perfect for a coffee table or dresser, it brings delicate floral charm to any room.
Progress Tracker
0% Complete
— Materials & Gauge :
Info :
Gauge is not critical for lace runner but for reference: 10 cm square = 14 dc x 8 rows in pattern approximations using 3.5mm hook and worsted cotton. Adjust hook if you prefer a looser lace. Finished runner measures approximately 14.5" (37 cm) wide x 38" (97 cm) long with three rose motifs as shown.
— Notes :
Info :
This pattern is worked mostly in rounds to create a long oval lace panel. Work a tension sample and practice the rose spiral before starting the main panel. Use stitch markers for the start of each round; the oval shape requires careful increases at the two short ends to maintain an elongated shape rather than a perfect circle.
— Central Lace Panel (Cream) :
Round 1 :
MR, ch 3 (counts as dc), 11 dc into MR, pull ring closed; join with sl st to top of ch-3. (12)
Round 2 :
Ch 3, 1 dc in same st, 2 dc in each st around, join. (24)
Round 3 :
Ch 3, 1 dc in same st, (1 dc, inc) x 11, join. (36)
Round 4 :
Ch 3, 1 dc in same st, 2 dc in next st, (1 dc, 1 dc, 2 dc in next st) x 11, join. (48)
Info :
Rounds 1-4 build a compact round that will be gradually stretched into an oval by later targeted increases. Place a marker at the top of each round to track the start stitch.
Round 5 :
Ch 3, dc in same st, dc in next 10 sts, (2 dc, ch 2, 2 dc) in next st (corner increase), dc in next 12 sts, (2 dc, ch 2, 2 dc) in next st, dc in remaining sts to join. This begins forming two elongated corners opposite each other. (56 plus 2 ch-2 loops)
Round 6 :
Ch 3, dc in same st, dc evenly around working 1 dc in each dc and 1 dc into each ch-2 space as 2 dc separated, when you reach the opposite corner work (2 dc, ch 2, 2 dc) again, continue to join. (Total approximately 64 dc)
Info :
From Round 5 onward we treat the piece like an oval: two opposing sets of increases (corner shells) maintain elongation. Keep the number of dc between corner shells even across rounds so the long sides grow slowly while ends get shaped.
Round 7 :
Ch 3, dc in each st to first corner shell, (2 dc, ch 2, 2 dc) in ch-2 sp, dc in each st to next corner shell, (2 dc, ch 2, 2 dc) in ch-2 sp, dc to join. (Approx 72 dc)
Round 8 :
Repeat Round 7, keeping stitches even along long sides. (Approx 80 dc)
Round 9 :
Ch 1, sc in same st, *ch 3, sk 3 dc, sc in next dc*; rep * to * around, making sc into each dc that falls between ch-3 spaces and into the shell sections as worked; join. This begins the filet/open lattice look. (Sc count approx 24-28 depending on tension)
Info :
Work Round 9 evenly so the ch-3 arches sit in a gentle repeating grid down the length. Use a marker to ensure the same number of arches on each long side by counting repeats at the end of the round.
Round 10 :
Ch 3, dc in same st, dc in next st, *ch 3, dc in next sc (the sc from previous round), dc in next dc*; rep from * around. This fills the arches with openwork and creates a rectangular net within the oval frame. Join. (Approx 80 dc)
Round 11 :
Ch 1, sc in first dc, *ch 4, sk 1 dc, sc in next dc*; rep to end; join. The slightly larger arch helps transition to more decorative mesh. (Sc approx 40)
Round 12 :
Ch 3, 2 dc in same st, *ch 1, 3 dc in next sc; ch 1, sk to next arch and 3 dc around arch top*; rep to end; join. This introduces vertical column clusters that will center rose placements. (Clusters approx 18-24)
Info :
Place markers at three central cluster points along the length where roses will be centered: roughly one near each end third and one at the center. These clusters will be used as anchor points for sewing roses later. Mark the face of the runner as you plan to attach appliques to the top side.
Round 13 :
Ch 3, dc in each st and in each ch-1 space around; when you reach the marked anchor cluster, work an extra ch-2 loop (dc, ch 2, dc) to make a small decorative opening for flower placement; continue around. Join. (Approx 88 dc)
Round 14 :
Ch 1, sc in same st, *ch 3, sc in 3rd dc of next 3-dc group*; rep to end. This forms a more pointed mesh. Join. (Sc count approx 44)
Round 15 :
Ch 3, dc in each st and across ch-3 arches; at short ends work (2 dc, ch 3, 2 dc) in the endmost arch to continue elongation. Join. (Approx 92 dc)
Info :
If you wish to lengthen the runner, repeat Rounds 11-15 additional times before proceeding to the lace border. Each repeat adds roughly 3-4 cm to the overall length depending on your tension and yarn.
Round 16 :
Ch 1, sc in each dc around working sc into ch-3 spaces as well; at corner shells sc evenly around ch-3 spaces. Join. (Sc approx 92)
Round 17 :
Ch 3, dc in each st around for one round to create a firm base for borders. Join. (Approx 92 dc)
Round 18 :
Ch 1, *sk 1 dc, sc in next dc, ch 3, sc in next dc*; rep around to create delicate scallop points spaced around the oval; join. (Sc count approx 46)
Info :
At the end of Round 18 the central panel is complete and ready for the pink scalloped border. Before changing color pin-point the three anchor clusters for roses again and make small tacking stitches to mark exact center points for each rose. These marks help visually center roses later.
— Scalloped Pink Border :
Info :
Change to Dusty Pink yarn. Work border rounds in pink to form the scalloped edge that frames the runner. Carry the cream tail neatly or weave it in before proceeding.
Round 1 (Border) :
Join pink in the back loop of any sc, ch 1, sc in same st, *ch 3, sk 2 sts, 5 dc in next st (shell), sk 2 sts, ch 3, sc in next st*; rep around until reaching a corner end where work (ch 3, 7 dc, ch 3) to keep the scallop larger at the short ends; join. (Shells approx 22-26 depending on counts)
Round 2 (Border) :
Sl st to center of first 5-dc shell, ch 1, sc in same st, *ch 4, (7 dc) in center dc of next shell, ch 4, sc in center of next shell*; rep around. This builds raised petals in each scallop. Join. (Shells remain same number)
Info :
Adjust shell sizes at the two small ends so scallops stay symmetrical. If a scallop looks squeezed, add or subtract a dc in that shell to even the look. Blocking later will settle irregular shells but try to make counts consistent on the two long sides.
Round 3 (Border) :
Ch 1, sc in same st, *in next shell work (sc, hdc, 3 dc, hdc, sc) to create a rounded raised scallop, ch 2, sk to next shell center*; rep around; join. Fasten off and weave in ends. (Sc count approx 44)
Info :
Optional decorative picot: after Round 3 you can add a picot into the top of each small sc on the edges with (ch 3, sl st to first ch) to create tiny points on each scallop.
— 3D Rose Spiral Appliques (Make 3) :
Info :
Each rose is worked as a spiral coil that is then rolled and tacked to create full layered petals. Work with Dusty Pink yarn. The roses are approximately 2.5"–3" (6.5–7.5 cm) diameter when rolled tightly, and can be fluffed to taste.
Round 1 (Rose Base) :
MR, ch 2 (counts as hdc), 10 hdc in MR, pull tight; join with sl st to top of ch-2. (10)
Round 2 :
Ch 2, hdc in same st, 2 hdc in each st around; join. (20)
Round 3 :
Ch 2, hdc in same st, *hdc in next st, 2 hdc in next st*; rep around; join. (30)
Round 4 :
Ch 1, sc in same st, *ch 3, sk 1 st, sc in next st*; rep around; join. This creates small loops along the outer edge to anchor the first petal row. (Sc count 15)
Round 5 :
Ch 2, in each ch-3 sp work (sc, hdc, 2 dc, hdc, sc) to form petal shapes; rep around; join. (Petal clusters 15)
Round 6 :
Ch 1, sc in same st, *ch 4, skip to next petal center, sc in next st*; rep around; join. This spaces the next petal layer out for a bigger coil. (Sps equal to petal clusters)
Round 7 :
Ch 2, in each ch-4 sp work (sc, hdc, 3 dc, hdc, sc) creating larger petals. Rep around. Join. (Approx 15 larger petals)
Round 8 :
Ch 1, sc in same st, *ch 5, sc in next petal top*; rep around; join. Fasten off leaving a long tail for sewing and rolling. (Tail approx 12-18" for sewing)
Info :
To form the rose, lay the spiral flat with the center small and begin rolling from the center outward so that the petals overlap. As you roll, tack the base with small whip stitches using the long tail to hold the spiral in place. For a fuller rose, roll loosely and then tack several times at regular intervals; for a compact rose, roll tightly and use more tacking stitches at the base.
Round 9 :
After rolling, secure by sewing across the base with small stitches; add 3-5 tightly spaced stitches through the runner anchor point so the rose will not shift. Repeat to make 3 roses. (Construction step)
— Small 3D Rosettes (Make 3) :
Round 1 (Small Rosette) :
Ch 4, join to form ring, ch 2, 8 hdc in ring, join. (8)
Round 2 :
Ch 1, sc in each hdc around; join. (8)
Round 3 :
Ch 1, *sc in next st, ch 2* around; join. (8 sc, 8 ch-2 sps)
Round 4 :
In each ch-2 sp work (sc, hdc, dc, hdc, sc) for tiny petals; join. Fasten off and leave long tail for sewing. These small rosettes sit between the larger roses for contrast. (8 petals)
Info :
Make three small rosettes. When sewing them into place, stagger them slightly in height relative to the large roses for a layered look. Use tiny stitches through the base of each petal to secure firmly.
— Leaves (Make 6) :
Round 1 (Leaf Base) :
Using Soft Green yarn: ch 8, sc in 2nd ch from hook, hdc in next, dc in next 2, hdc in next, sc in next, sl st in last. Work along opposite side: sc in next, hdc in next, dc in next 2, hdc in next, sc in last; join to first sc. (Approx 14 sts around)
Round 2 :
Ch 1, sc in first 3 sts, hdc in next 2, dc in next 2, hdc in next 2, sc in next 4; fasten off leaving long tail for sewing. This shapes a firm leaf with a central ridge. (Approx 14)
Info :
After completing leaf rounds, use a running stitch with green yarn along the center back of the leaf and pull gently to create a midrib if you prefer a more folded leaf. Flatten and steam-block lightly if desired to set shape.
— Small Accent Stems and Picot Details :
Round 1 :
Using Soft Green yarn: with 3.5mm hook attach at center cluster point on runner, ch 6, sl st back into the same base to create a tiny loop. Repeat for small stems between rose placements as shown. Fasten off and weave tail to back. (Decorative step)
Info :
These tiny stems are decorative and help camouflage sew-in stitches. Use them between the roses and rosettes to create a natural vine effect. Make 6-8 stems evenly spaced between main motifs.
— Optional Raised Chain Vine (for leaf anchors) :
Round 1 :
In Soft Green, ch 30 (or length needed), attach vine with sl st along the runner in a serpentine pattern between roses, leaving small loops to sew leaves under. Fasten off and weave in ends. (Length depends on spacing)
Info :
Pin the vine in place before stitching so you can adjust its placement; tack with small stitches through chain bases to secure so it reads as a subtle embossed stem rather than a bulky applique.
— Assembly & Applique Placement :
Info :
Layout the central cream panel flat and mark the three rose anchor points identified earlier. Place the three large roses: one at each end third and one at the center. Between and slightly below each large rose place a small rosette. Arrange two leaves symmetrically around each large rose. Use pins to hold placement before sewing.
Step :
Roll roses as described earlier, then using the long tail on each rose sew through the base of the spiral to tack it flat so the rose stands slightly proud of the lace. Sew to anchor points with hidden stitches through lace only, not through top petals for a neat appearance.
Step :
Sew rosettes into place using the tail, making small stitches through the base and runner. Tuck them under the outer petals of large roses to create layered clusters that look natural and slightly raised.
Step :
Pin and sew leaves under the large roses. Each rose gets 2-3 leaves depending on the look you prefer. Use the leaf long tails to whipstitch through the runner at the leaf base; secure with multiple passes to hold the leaf flat and avoid flipping.
Info :
When stitching appliques, avoid pulling too tightly: gather tension should be enough to secure the piece but not so tight that the lace puckers. Work on a flat surface and use glass-headed pins to maintain positioning while stitching.
— Additional Edge Embellishment (Optional) :
Round 1 :
If you want a tiny picot edge beyond the scallops, rejoin pink at center of any scallop and work around: *sc in each sc across, picot (ch 3, sl st to first ch) in each peak*; rep around and fasten off tightly. This creates delicate points on each scallop for an antique lace finish.
Info :
Only add the picot if you have practiced the look; it is easy to overdo the points which detract from the runner's soft lines. One row of picots is usually enough.
— Finishing & Blocking :
Info :
Weave in all tails on the back side using a yarn needle. Gently wet-block or steam-block the runner pinned to desired shape, ensuring scallops are evenly spaced and roses sit upright. Use pins around scallops and inside lace openings to gently stretch and shape to exact dimensions. Allow to dry fully before removing pins to set shape.
Step :
Trim any remaining yarn tails, and if you like, add a tiny dab of fabric glue to the underside of each rose base stitch to further secure it; allow to dry thoroughly before use.
Info :
When storing, avoid folding across the roses. Roll loosely or store flat to preserve the 3D elements. Spot clean gently if needed; full washing may distort appliques if not handled carefully.
Finishing this romantic table runner is so rewarding—watch the lacy cream oval come alive as you add the dusty pink roses and soft green leaves. Each stitch adds personality and warmth; the scalloped border gives a delicate frame for the floral centers. Pin, block, and admire your handiwork—this runner makes any table feel special. 🧶🌸✨