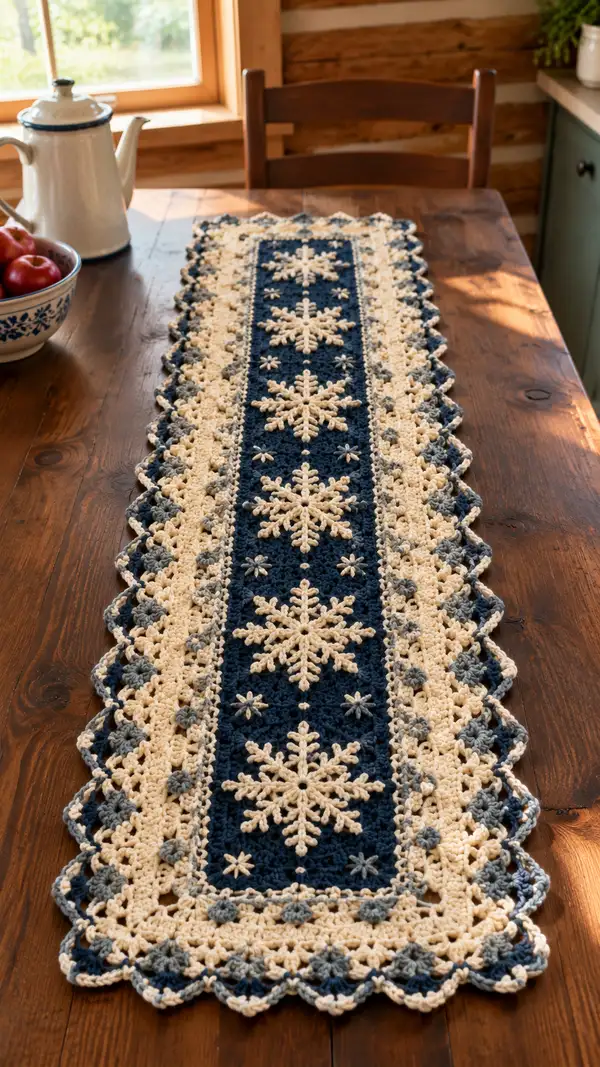
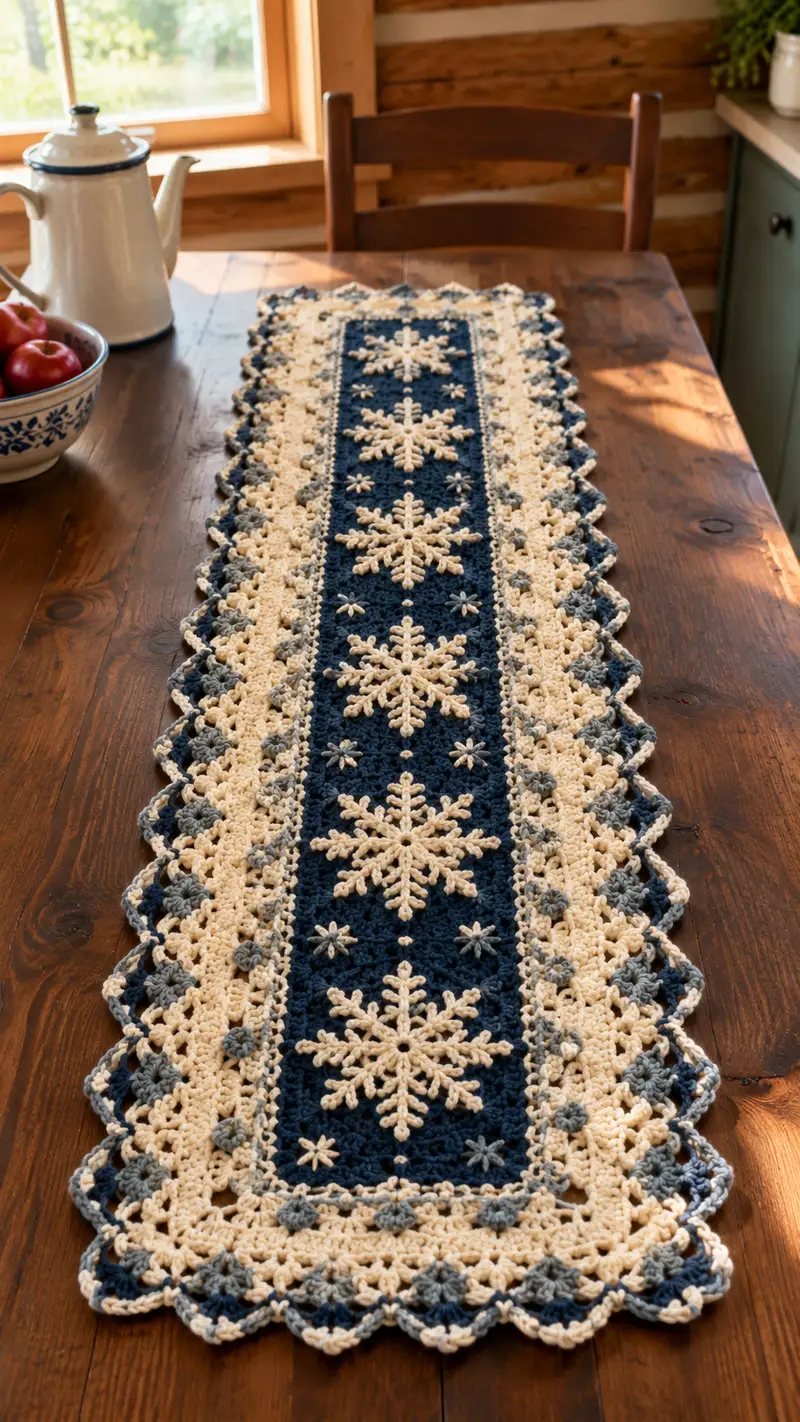
Create a charming winter-ready table runner featuring raised cream snowflake appliques set on a deep navy center, framed with cream and soft gray scalloped borders. This long, narrow runner combines textured stitches, star accents, and a delicate lace edge to bring cozy, classic farmhouse style to your table. Clear step-by-step instructions guide you through the center panel, appliques, joining, and finished scalloped edging.
Progress Tracker
0% Complete
— Notes and Gauge :
Info :
Finished size using specified yarn and hook is approximately 13" wide x 48" long. Gauge is not crucial for this rectangular decorative runner but will affect final measurements. A sample 4" square worked in sc is approximately 12 sc x 8 rows. Adjust hook size to match your preferred drape.
— Center Panel (worked flat in rows) :
Setup :
Chain 61 (this creates a center panel approximately 10-12" wide depending on your tension). If you wish a wider runner, chain additional multiples of 6 + 1 to maintain pattern repeats.
Row 1 :
In second ch from hook, 1 sc in each ch across. Turn. (60 sc)
Row 2 :
Ch 1, 1 sc in first st, *ch 1, sk 1, 1 sc in next st*; rep from * to * across to create a tone-on-tone lacy texture reminiscent of a vintage filet; end with 1 sc in last st. Turn. (60 sc + 30 ch-1 spaces worked)
Info :
This row sets a subtle background. Maintain consistent tension; use a stitch marker at the start of each row if you prefer counting.
Row 3 :
Ch 1, 1 sc in each st and in each ch-1 space across. Turn. (60 sc)
Row 4 :
Ch 2 (counts as hdc), hdc in next st, *sk 1, 3 hdc cluster over next 3 sts (hdc, ch1, hdc) [creates slightly raised texture], sk 1, hdc in next 2 sts; rep from * across, end with hdc in last st. Turn. (60 hdc approx)
Info :
Work Rows 1-4 as the foundational repeat. These four rows create a rich textured navy ground. Keep the edges neat by placing the first stitch into the first turning chain stub.
Rows 5-48 :
Rep Rows 1-4 twelve times (total rows now 48). After Row 48 your center panel should measure approximately 40-44" in length; for a longer runner increase repeats to reach desired length. Keep counts consistent: each row maintains approx 60 stitches across.
Info :
Place stitch markers every 10 sts along the first row to quickly identify placement for appliques later. These markers will also help you when joining the border rounds.
Row 49 :
Ch 1, 1 sc in each st across. Turn. (60 sc)
Row 50 :
Ch 1, sc in each st across. Fasten off navy if you will add an inner border in cream. This completes the main navy panel. Block flat to square edges before applique placement.
— Snowflake Appliques (Make 5 large snowflakes) :
Info :
Each large snowflake is worked in rounds from a magic ring in cream and will be sewn on top of the navy center. These snowflakes are slightly raised using slip stitch joins and elongated chains. Optional: add a small bit of polyfill at the center to raise the motif.
Round 1 :
Using cream, make a magic ring, ch 1, 6 sc into ring, pull tight, join with sl st to first sc. (6)
Round 2 :
Ch 2 (counts as tr), in same st dc, ch 3, sl st into next st; *ch 2, dc in next st, ch 3, sl st into next st; rep from * around to create six points. Join to base of first chain-2 with sl st. (6 main points)
Info :
Round 2 forms the backbone of each snowflake arm. Keep tension even so arms are similar in size. If you want a floppier snowflake, work with a larger hook.
Round 3 :
Sl st to the base of first point, ch 1, (sc, hdc, dc, tr) into the first ch-3 loop; ch 1, sl st into center ring; *sl st to next ch-3 loop, ch 1, (sc, hdc, dc, tr) into loop, ch 1, sl st into center ring; rep around. This builds layered points. Fasten off and weave in the tail. (6 layered points)
Round 4 :
Rejoin cream to the tip of any point, ch 6, sl st into tip to form a decorative picot loop. Rep picot around each of the six tips (6 picots). Fasten off leaving a long tail for sewing.
Info :
Optional: stitch a tiny dot of gray in the very center with a French knot-style stitch using small yarn or embroidery thread to echo the border accents.
Alternate Round 3 Option (for more intricate snowflakes) :
Ch 1, *into ch-3 loop make (sc, ch 2, (dc, ch 2) x 2, sc), sl st into center; rep around. This option produces more filigree style arms. Fasten off and leave long tail for sewing.
Info :
Make 5 large snowflakes. Space them evenly along the center panel lengthwise: place the first approximately 3-4" from one short end, then place the remaining four evenly spaced between the first and last so they span the panel aesthetically.
— Small Star Appliques (Make 12-16 small stars) :
Round 1 :
With cream or gray, magic ring, ch 1, 6 sc into ring, pull tight, sl st to first sc. (6)
Round 2 :
Ch 2, in same st 1 dc, ch 2, sl st into next st; *ch 2, 1 dc in next st, ch 2, sl st into next st; rep around to form 3 tiny arms depending on shaping. Fasten off leaving long tail. (3 arms)
Info :
Use these small star motifs to fill negative space inside the navy panel between the large snowflakes. You may also sew two small stars together in an X for a slightly larger accent.
— Layout and Sewing Appliques :
Info :
Block the center panel flat. Lay the panel on a flat surface and arrange the 5 large snowflakes and small stars. Use pins to hold each motif in place; ensure they are centered down the width of the navy panel and evenly spaced lengthwise. Measure equal distances between centers for visual balance (approx 7-8" between large snowflake centers). Photograph the layout or mark lightly with water-soluble fabric marker for reference.
Sewing :
Using matching cream yarn and a tapestry needle, sew each snowflake down by working small whip stitches through the center ring and into the navy panel. Take care to only catch the top layer of the navy panel so the stitches remain invisible from the front. Knot securely at the back and weave in ends. For the small stars use a single thread and sew through the central stitch only so they remain slightly raised.
Info :
If you want snowflakes to sit lightly on top, add a small amount of fiberfill to the center before sewing and stitch the center closed over the fill for a tiny puffed effect.
— Joining Border (Rounded rectangular join) :
Info :
Join cream yarn to any corner stitch of the blocked center panel. You will work in rounds around the rectangle; corners are formed with (3 sc, ch 2, 3 sc) into the corner space to keep edges square. Place stitch markers at the center of each side to help space increases evenly.
Round 1 :
With cream, join with sl st, ch 1, 3 sc in same corner edge (working into edge stitches and turning chains), continue sc evenly along the long side placing 1 sc in each row edge (approx 48 sc along long edge counted from blocked panel), into corner work (3 sc, ch 2, 3 sc); continue along short side sc evenly (approx 12 sc), corner (3 sc, ch 2, 3 sc); rep around and join with sl st to first sc. (Corner increases create extra stitches; total stitch count varies by blocking but keep even spacing.)
Info :
Keep counts approximate; the goal is to create a neat base for the decorative border. If you have many or few stitches on an edge, adjust sc spacing so scallops later will line up evenly.
Round 2 :
Ch 1, 1 sc in each sc around, working 1 sc in each of the 3 sc of corners and 2 sc in corner ch-2 space. Join with sl st. This evens the border base. Fasten off cream if changing to gray accents next.
Info :
Now you have a stable border to build the outer decorative rows. Use this time to count how many sc lie along one long side; you'll use that to space decorative sts evenly in subsequent rounds.
— Decorative Border Rows :
Round 3 :
Rejoin cream in any corner, ch 3 (counts as dc), *skip next 2 sc, 5 dc cluster into next sc (shell), skip next 2 sc, dc in next sc; rep across long side; in corner work (dc, ch 2, dc), continue around repeating for each side. Join with sl st. This begins the lacy shell foundation.
Info :
If your long side count is not divisible by the repeat, distribute an extra dc or skip in the first and last repeats so shells are symmetrical across the centerline.
Round 4 :
Ch 1, sc in each dc and in each space across, placing 3 sc in corner ch-2. This flattens the shells and prepares for bobble rounds. Join with sl st.
Round 5 :
Change to gray yarn. Ch 1, *in the center dc of each shell make a 3-d bobble: (yo, insert, pull up loop) x 4, yo and draw through all loops, ch 1 to close bobble; sk next 2 sc, sc in next sc; rep across. In corners make a bobble in the middle corner sc. Join and fasten off gray leaving tails for weaving. (Gray bobbles spaced evenly)
Info :
Bobble technique: work 4 partial double crochet loops into same st, then finish together to make a rounded puff that echoes the photo's small gray nodules between scallops.
Round 6 :
With cream, ch 1, sc in each st and in each bobble top (by inserting under the closed bobble loop), placing 3 sc in corner ch-2. This reinforces the bobbles and evens the row. Join with sl st.
Info :
Work Row 6 firmly but not tightly to avoid pulling the bobbles flat.
Round 7 :
Ch 3, *in next sc create (2 dc, ch 2, 2 dc) shell; sk 3 sc, sl st into next sc to anchor; rep across long side; in corners work (2 dc, ch 2, 2 dc) into the corner sc; join with sl st. This creates a larger lace foundation for the scalloped edge.
Round 8 :
Ch 1, sc in each dc and in ch-2 spaces across, with 3 sc in corner ch-2. Join with sl st. Fasten off cream.
Info :
At this stage the border will look lace-like. Take a moment to ensure corner shells line up; if not, gently reseat by undoing last join and re-spacing stitches.
— Scalloped Edge and Final Shells :
Round 9 :
Rejoin cream at any shell center, ch 1, *5 sc across each shell space to form a rounded scallop, sl st in top of adjacent anchored stitch to secure; rep around. In the corner distribute scallops so each corner has three small scallops that curve neatly. Join with sl st.
Info :
This round forms the shallow scallops seen along the border. Work loosely so scallops sit on top rather than pull the border tight.
Round 10 :
Change to gray yarn for accent edging. Ch 1, *in the center of each scallop work (sc, ch 2, sc) into the top of the scallop to form little V-points; rep around. Join and fasten off gray.
Round 11 :
With cream, final decorative picot round: join cream, *sc into each sc around, in every third sc make (sc, ch 3, sl st into 3rd ch) to create picot highlights, rep around. Fasten off and weave in all ends neatly.
Info :
If you prefer a stronger contrast along the outermost edge, you can reverse colors (make Round 9 gray and Round 10 cream). Blocking after finishing will shape the scallops perfectly.
— Optional Inner Contrast Row (thin frame) :
Round A1 :
If you want an inner cream frame directly on the navy before the large border, join cream around the inside navy edge and make 1 round of sc evenly; place 1 sc into the edge stitch of every row of the navy panel. Join and then proceed to the Joining Border steps above. This thin frame helps the snowflakes pop visually.
Info :
This optional frame is great for color pop. Add it before working the corner joins to ensure consistent seam lines.
— Final Finishing and Blocking :
Info :
After weaving in all tails, damp-block the runner to open the lace and evenly shape the scallops: pin to a flat blocking board or towel, stretching gently into shape. Allow to dry fully. Steam blocking is acceptable for synthetic blends; for 100% acrylic use a pressing cloth and low steam carefully.
Final Touches :
Trim any stray fibers and recheck that apploques are secure. If needed, use a few hidden stitches along the snowflake arms to secure them further. Press lightly if using natural fibers; do not iron directly.
— Notes on Size Adjustments :
Info :
To lengthen the runner make additional repeats of Rows 1-4 in the center panel until you reach desired length before attaching the border. To widen the runner increase the starting chain by multiples of 6+1 and carry through the row pattern. The border follows proportions so only the number of repeats change.
This lovely snowflake table runner blends traditional stitchwork with raised appliques for a classic winter centerpiece. Working the navy panel and cream snowflakes is both meditative and rewarding — each repeat grows your runner into a cozy, gift-ready decor piece. The scalloped cream and gray border adds the perfect finishing touch and frames your table with handcrafted charm. 🧶❄️ Happy stitching and enjoy sharing this warm seasonal accent with family and friends! 🌟