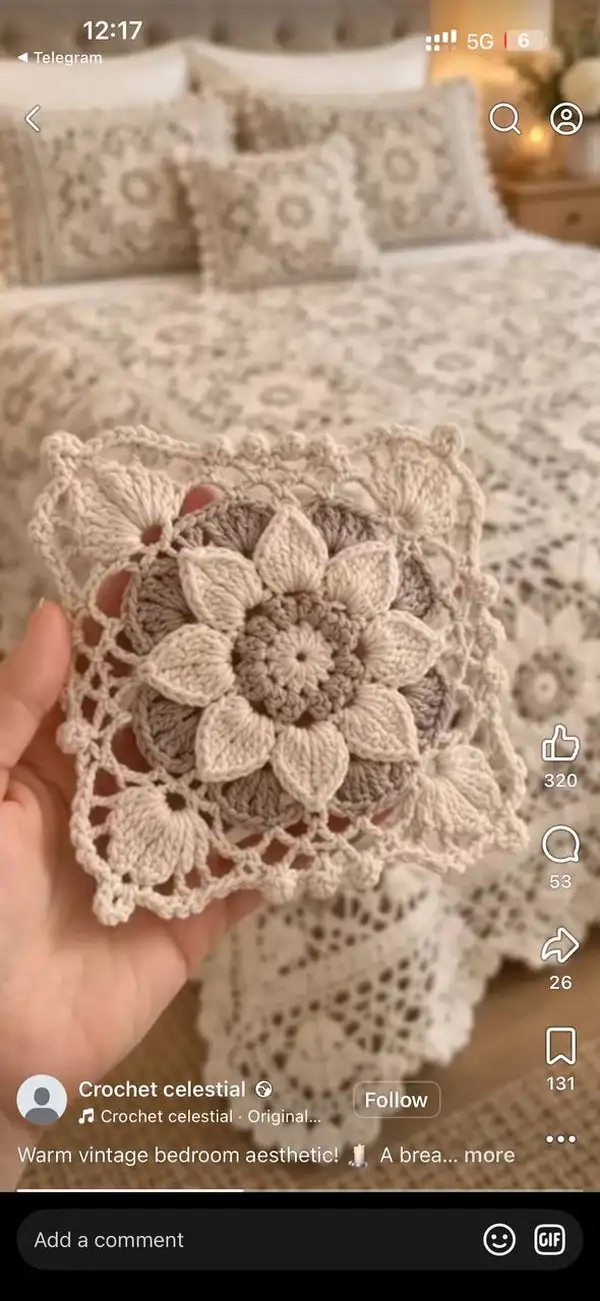
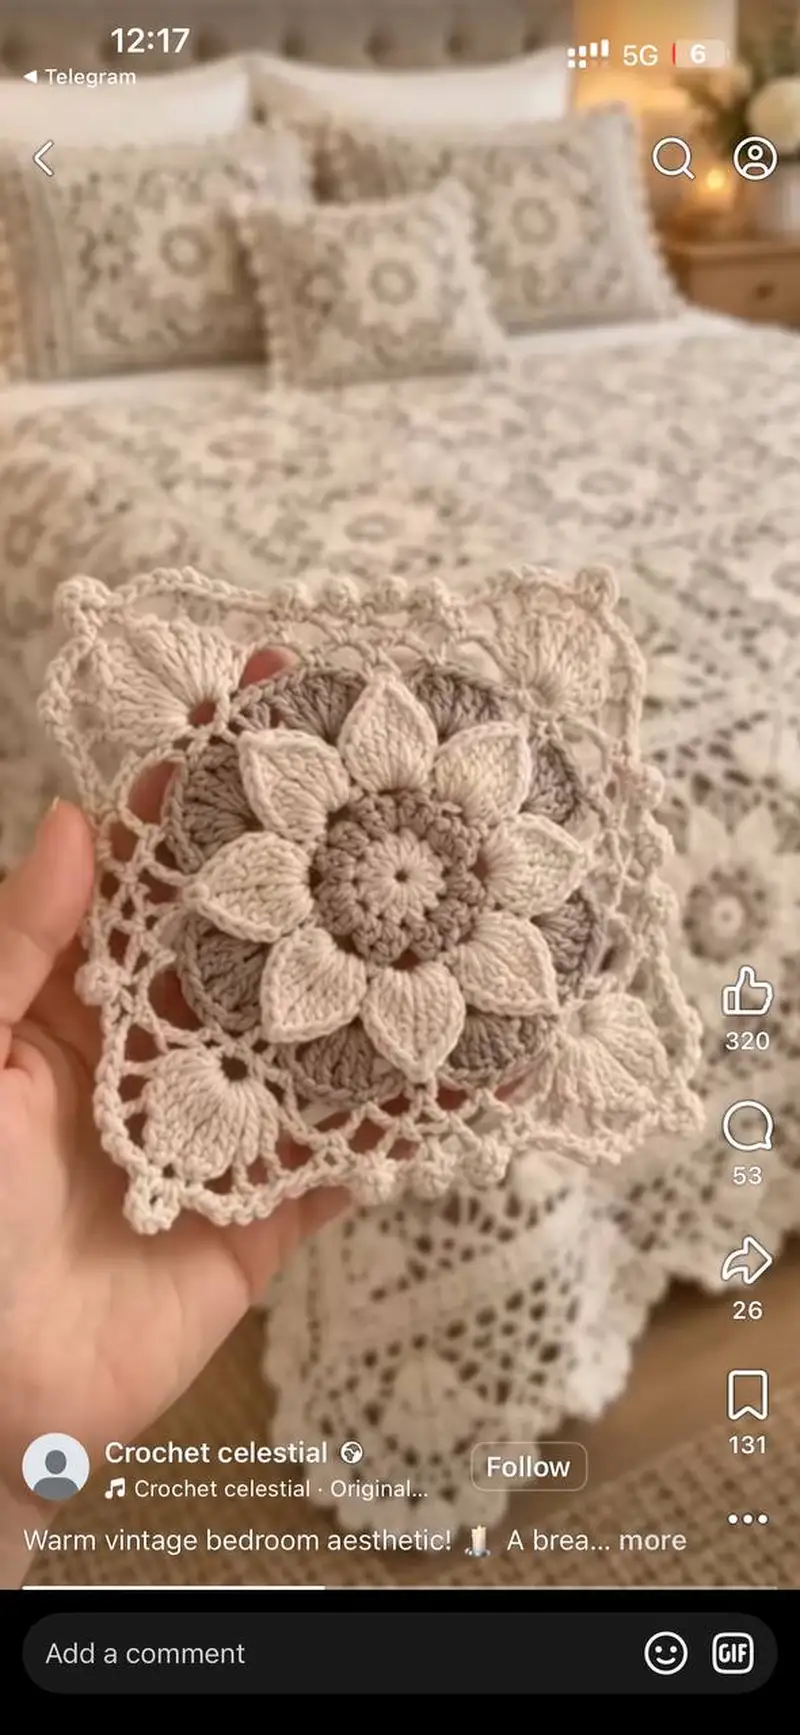
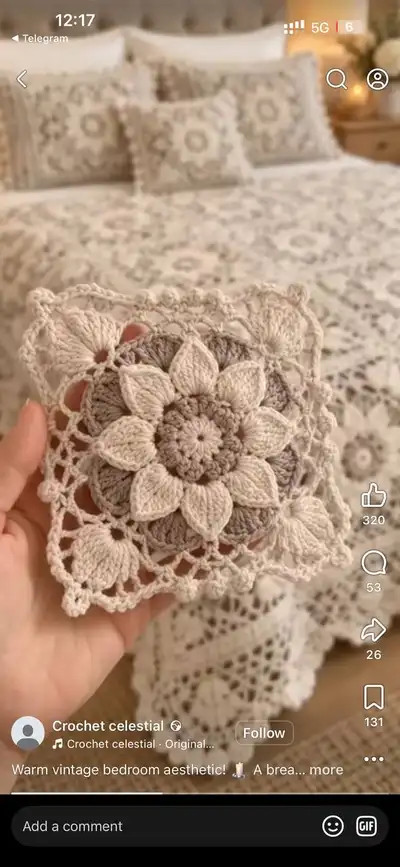
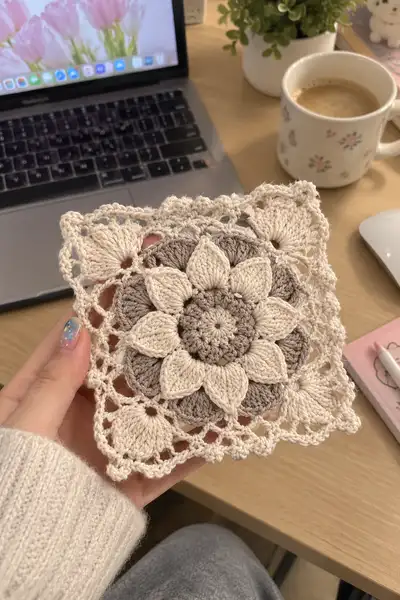
A delicate vintage-inspired floral granny square worked in soft cream and warm taupe tones. This motif features a textured layered flower with raised petals, a lacy mesh background and scalloped corners — perfect for throws, cushions or a romantic bedspread. The pattern includes step-by-step round work, color-change tips and multiple edging options so you can scale it for small coasters or a full blanket.
Progress Tracker
0% Complete
— Center and Foundation :
Round 1 :
6 sc in magic ring (6)
Round 3 :
(1 sc, 1 inc) x 6 (18)
Round 4 :
(2 sc, 1 inc) x 6 (24)
Round 5 :
(3 sc, 1 inc) x 6 (30)
Round 6 :
(4 sc, 1 inc) x 6 (36)
Round 7 :
(5 sc, 1 inc) x 6 (42)
Round 8 :
(6 sc, 1 inc) x 6 (48)
Info :
We now have a 48-stitch round which makes a stable base for an 8-petal flower. Use a stitch marker at the start of each round. Change to the taupe center color now if making the two-toned look shown in the photo.
— Inner Ring and Petal Base (Rounds 9-24) :
Round 9 :
1 sc in each st (48)
Round 10 :
1 sc in each st (48)
Info :
These two rounds create a stable platform for working puff and petal stitches. Keep tension slightly loose for textured stitches in the following rounds.
Round 11 :
*Ch 3 (counts as first dc), skip 2 sts, 7 dc cluster in next st (making a fan/petal base), skip 2 sts, sl st in next st; rep from * around to create 8 fans. End sl st to top of starting ch-3 (48 groups worked into same spacing).
Info :
The 7-dc fan will sit as a base behind the upcoming raised petals. If your yarn is fine, work 7 dc into the same stitch carefully to avoid splitting the yarn.
Round 12 :
1 sc in each st and in each fan space around (48)
Round 13 :
Change to cream/main color. Ch 1, *in the center of the first fan work: (yarn over, insert hook, pull up loop) 4 times to create a puff (see Info), close puff with a final yarn over and pull through, ch1, sl st into next space; rep for each fan around (8 puffs). End sl st to starting sc (48)
Info :
Puff stitch instruction: YO, insert hook, pull up a loop; repeat YO+insert and pull up until you have 9 loops on hook (for a 4-loop puff), YO and pull through all loops, ch1 to secure. The puff counts as 1 stitch for the round count.
Round 14 :
1 sc around working 1 sc between each puff and in sc stitches (48)
Round 15 :
Ch 1, *sl st to center front of puff, ch 2, 7 dc petal into the same center stitch (work petals into the front loop of the puff to make them raised), ch 2, sl st into next sc; rep around to form 8 raised petals (48)
Info :
When working the petal, insert hook around the front loops of the puff to anchor the petal and bring it forward. Keep petal tension looser than sc rounds so they puff nicely.
Round 16 :
Working behind petals: ch 1, sl st in each petal base and sc around to secure petals, ending with sl st to join (48)
Round 17 :
1 sc in each stitch across the top of petal bases and around (48)
Info :
At this point you should have one full layer of petals. Arrange petals outward as you go around so they lay flat. Use a flat surface and pin petals temporarily if needed.
— Secondary Petal & Layering (Rounds 18-28) :
Round 18 :
Change to cream (if not already). Ch 1, *in the space between petals ch 3, (dc, tr, dc) all into same sp to form a pointed petal arch, ch 3, sl st in next space; rep around creating 8 pointed arches (48)
Round 19 :
1 sc in each st and in each ch space around to tidy arches (48)
Round 20 :
Working into the top of each pointed arch: ch 1, 5 dc cluster into arch top to form inner petals, sl st to next arch; rep across 8 arches (48)
Info :
These inner petals will form the compact center ring seen in the photo. Keep clusters even — if one seems shorter, unpick and rework with slightly looser loops.
Round 21 :
1 sc in each st around, placing 2 sc between clusters where needed for spacing (48)
Round 22 :
Ch 1, *(1 sc, ch 4, 1 sc) in the top of next petal cluster to create small picot arches between petals, rep around (48)
Round 23 :
1 sc in each st and in each ch-4 space across to secure lacy spacing (48)
Round 24 :
1 sc in each st (48)
Info :
Check that your flower has even symmetry — 8 petals and consistent spacing make later square shaping simple. If some petals overlap too much, adjust by opening or slightly stretching petals while the round is still live.
— Transition to Square: Corner Placement & First Increases (Rounds 25-40) :
Info :
We will now begin adding increases at 8 evenly spaced points (every 6 stitches) to expand the round and gradually form a square. The increases are grouped to create four gentle corner zones that will later be emphasized with lacy corners.
Round 25 :
(6 sc, 1 inc) x 8 (56)
Round 26 :
1 sc in each st (56)
Round 27 :
(7 sc, 1 inc) x 8 (64)
Round 28 :
1 sc in each st (64)
Info :
Increasing every 8th repeat keeps the growth even. As you increase to 64 stitches, you will notice the round widening evenly — this allows us to create corner shaping in later rounds.
Round 29 :
(7 sc, 1 inc) x 8 (72)
Round 30 :
1 sc in each st (72)
Round 31 :
(8 sc, 1 inc) x 8 (80)
Round 32 :
1 sc in each st (80)
Info :
When counts expand beyond 64-80 stitches you can pause and measure: if making a large bedspread, continue increasing every 2-3 rounds; for coasters stop earlier. Keep markers at the starts of each quadrant so corner increases stay aligned.
Round 33 :
(9 sc, 1 inc) x 8 (88)
Round 34 :
1 sc in each st (88)
Round 35 :
(10 sc, 1 inc) x 8 (96)
Round 36 :
1 sc in each st (96)
Round 37 :
(11 sc, 1 inc) x 8 (104)
Round 38 :
1 sc in each st (104)
Round 39 :
(12 sc, 1 inc) x 8 (112)
Round 40 :
1 sc in each st (112)
Info :
At 112 stitches the round is large enough to start working a more open mesh. Each increase round added 8 stitches; we repeated the pattern to make increases predictable and evenly spaced. You now have 4 marked quadrants (use stitch markers) which will be used to form the corner lace.
— Mesh and Lace Expansion (Rounds 41-72) :
Round 41 :
Ch 1, *1 sc in next 6 sts, ch 4, skip 4 sts; rep from * around working 1 sc in each sc and leaving chain arches (112)
Round 42 :
Work into ch-4 spaces: *sl st, ch 4, (3 dc, ch 2, 3 dc) in ch-4 space to create a shell, ch 4, sl st into next sc; rep around (112)
Info :
These shells create the lacy net seen outside the petals. The stitch count is maintained since shells are worked into the chain spaces, not replacing sc stitches.
Round 43 :
1 sc in each sc and 1 sc in each chain arch to tidy shell placement (112)
Round 44 :
*Ch 3, skip 2, sc in next; rep across each sc to form a diagonal chain mesh around (112)
Round 45 :
1 sc in each stitch and in each ch-3 space (112)
Round 46 :
On the four corner quadrants: at the quadrant marker work (sc, ch 5, sc) to begin a larger corner arch; continue 1 sc in each st across other areas (112)
Round 47 :
Into each corner ch-5: (5 dc, ch 3, 5 dc) to form pronounced corner shells. Elsewhere: 1 sc in each sc and treat ch spaces as provided (112)
Info :
Corner shells produce the square corners you see in the motif. If your corners round instead of pointing, increase the size of the corner arch (use ch-6 then 6 dc clusters) to emphasize the corner.
Round 48 :
1 sc around to even out stitches, working 2 sc in the top of each corner shell where necessary to maintain 112 sts (112)
Round 49 :
Ch 4, *skip 3, sc in next, ch 4; rep around creating a larger open mesh (112)
Round 50 :
1 sc in each sc and 1 sc in each ch-4 space (112)
Round 51 :
*Work into alternating spaces: (sc, ch 2, 5 dc cluster, ch 2, sc) to create decorative elongated petals along the mesh; rep around (112)
Round 52 :
1 sc around in every stitch and space to secure decorative clusters (112)
Info :
Rounds 41-52 introduce varied lace and decorative clusters. Work loosely through chain spaces and more firmly for sc rounds. The motif will begin to appear square-shaped because of corner shells combined with consistent increases earlier.
Round 53 :
Ch 1, *1 sc in next 10 sts, ch 3, skip 3; rep around (112)
Round 54 :
In ch-3 spaces: work (3 dc, ch 2, 3 dc) shells; sc in remaining sc (112)
Round 55 :
1 sc in each st and in each ch-3 space (112)
Round 56 :
*Ch 2, skip 1, sc in next 2; rep around to create a small mesh band (112)
Round 57 :
1 sc around in each stitch and chain space (112)
Round 58 :
Work a decorative round: *in next sc work (sc, ch3, sc) to form little arches; rep around (112)
Round 59 :
1 sc in each st and in each ch-3 space (112)
Info :
You can repeat any two-round mesh + secure sequences to continue building size without changing overall stitch count. This is how the motif becomes an expansive square while keeping symmetry. For a small square stop around round 56; for afghans continue repeating mesh motifs.
Round 60 :
Ch 1, *1 sc in next 12 sts, ch 4, skip 4; rep around (112)
Round 61 :
In ch-4 spaces: (sc, ch 2, sc) to make small arches; sc in remaining sc (112)
Round 62 :
1 sc around (112)
Round 63 :
*Work into small arches: 5 dc cluster in ch-4 spaces, sc on sc; rep around (112)
Round 64 :
1 sc around in each stitch (112)
Round 65 :
Ch 5, *skip 4, sc in next 8 sts, ch 5; rep around creating wide open arches between areas (112)
Round 66 :
Work into ch-5 spaces: (7 dc, ch3, 7 dc) corner-like shells on four corners and 1 sc elsewhere to unify round (112)
Round 67 :
1 sc in each st and in each chain space (112)
Info :
Rounds 60-67 produce larger lacy motifs that will frame the square. At this stage check the square on a flat surface and pin to block; corners should be gently pointed by the shells worked in corner quadrants.
Round 68 :
Ch 3, *dc in each of next 10 sts, ch 3, skip 3; rep around (112)
Round 69 :
1 sc in each stitch and 1 sc in ch-3 spaces (112)
Round 70 :
Small scallop round: *in next sc work (sc, ch2, sc) to create scallops; rep around (112)
Round 71 :
1 sc in each stitch (112)
Round 72 :
Slip stitch around to tidy and prepare for edging (112)
Info :
After round 72 your square will have a fully developed lacy area around the central flower. If you prefer a smaller square, remove rounds 60-67 and finish earlier. Continue if you want a large decorative lace panel.
— Border & Final Scallop Edging (Rounds 73-90) :
Round 73 :
Change to main cream color if you used an accent. Ch 1, 1 sc in each st around (112)
Round 74 :
*Ch 2, skip 1, sc in next: rep to form tidy border ridge (112)
Round 75 :
1 sc around working in back loops only (BLO) to create a framed ridge (112)
Round 76 :
Scallop round: *into next st work (5 dc, sl st into next st) to make a shallow scallop; rep around (112)
Round 77 :
Ch 1, 1 sc in each st around (112)
Round 78 :
Small loop round: *ch 4, sl st in next st, rep around to form decorative loops (112)
Round 79 :
Into each ch-4 loop work (sc, picot, sc) where picot = ch3, sl st into top of last sc; rep around for neat picoted loops (112)
Round 80 :
1 sc around to secure picot loops (112)
Info :
Edging defines the motif. Work the scallop and picot rounds loosely so edges lay flat. For a crisp finish, damp-block the square and pin each scallop into position.
Round 81 :
Optional decorative chain round: ch 1, *sk 1, 7 dc in next st, sk 1, sc in next; rep around (112)
Round 82 :
1 sc around in each stitch (112)
Round 83 :
Alternate scallop: *in next sc work (sc, ch2, sc) for a tighter scallop; rep around (112)
Round 84 :
1 sc in each st (112)
Round 85 :
Final finishing round: *sl st into next st, ch 1, sl st into next to create a neat corded edge; rep around (112)
Round 86 :
Weave in all ends emerging from color changes; block square lightly (no more rounds needed unless increasing size) (112)
Info :
If you want to make a bedspread or large throw, repeat rounds 41-72 multiple times expanding the open mesh bands and increasing at the four corner quadrants every 6-10 rounds as needed until desired size is reached. The repeat units are modular and designed to scale cleanly.
Round 87 :
Optional join-as-you-go round: prepare final round of sc and leave longer tail for joining motifs using your preferred join method (112)
Round 88 :
Optional surface crochet: Using contrasting color, surface chain or sl st an outline around the petals to emphasize their shape (112)
Round 89 :
Optional bead or seed stitch placement: Add small ties or embroidery stitches to the center for a vintage look (112)
Round 90 :
Final inspection round: block and pin into square, check symmetry and weave in any remaining ends securely (112)
Info :
Congratulations — you have completed a detailed layered flower granny square. Use the join-as-you-go round for assembling multiple squares, or sew with whip stitch for a flatter seam. When joining many squares, block each one first to ensure consistent sizing.
This soft flower granny square captures a vintage bedroom aesthetic with modern stitch techniques. The layered petals and airy lace create a beautiful, heirloom-style motif you will be proud to make. Whether you make a small coaster, a set of cushions, or a full bedspread, the pattern scales beautifully and finishes with an elegant scalloped border. 🧶✨ I hope you enjoy making it and sharing the cozy results with loved ones. 🌸