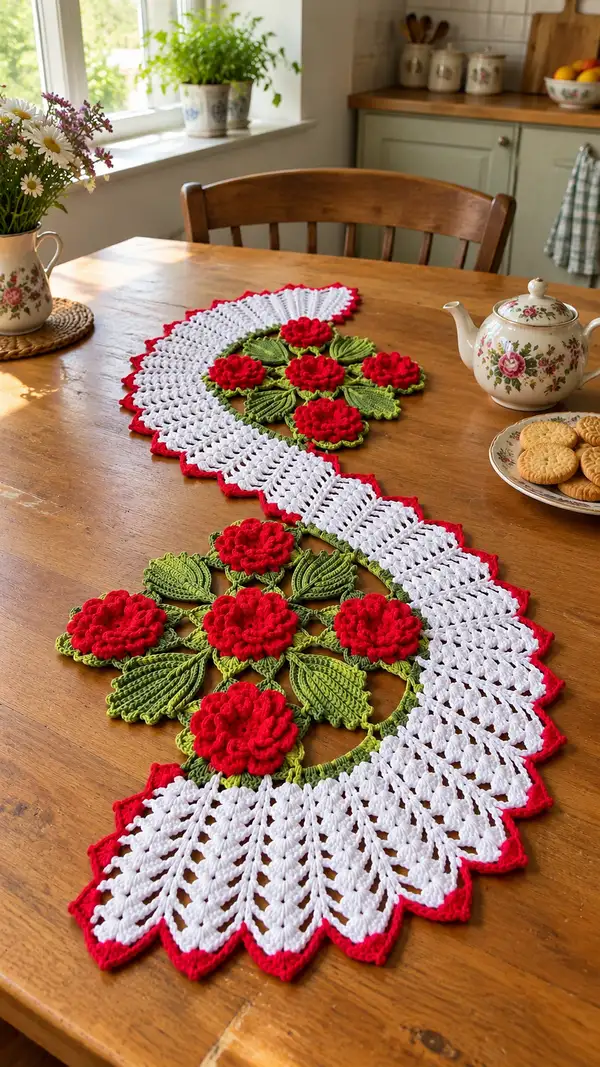
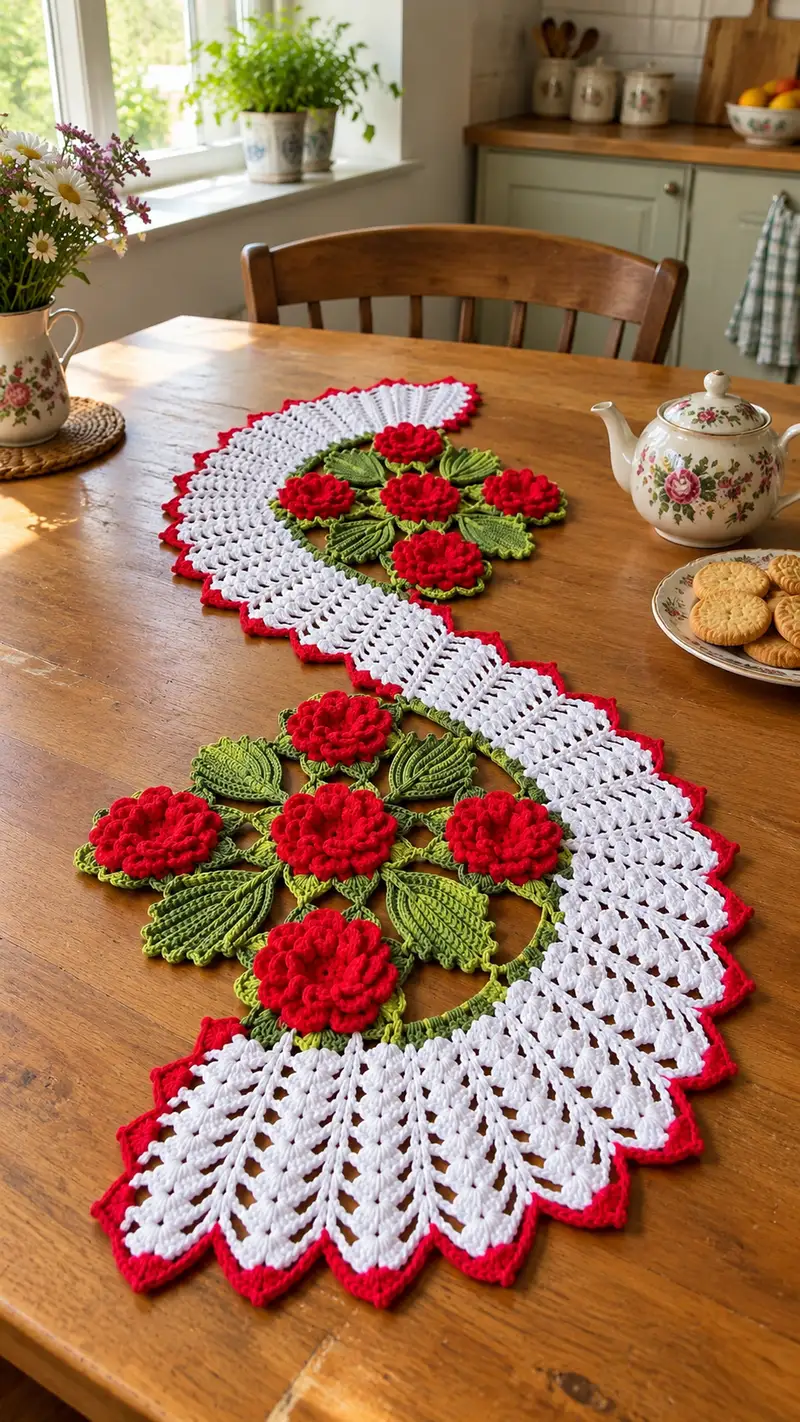
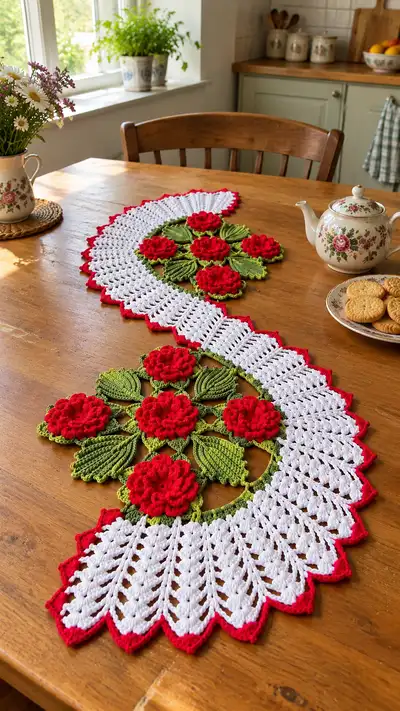
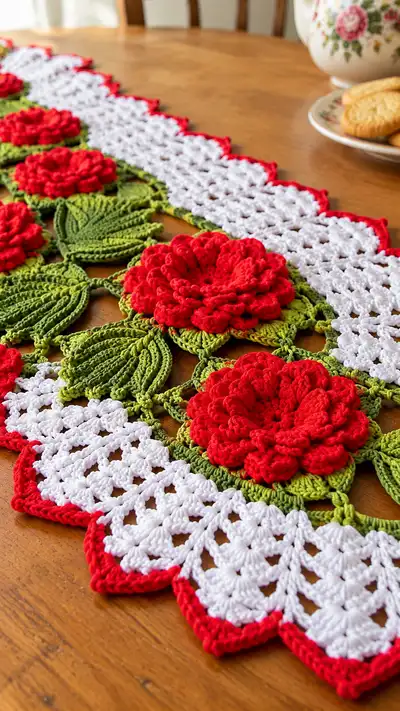
A charming vintage-style table runner featuring clustered 3D red roses, sculpted green leaves and a scalloped white fan border edged in bright red. This written pattern walks you through motif construction, leaf shaping and the airy fan panels that create the elegant S-shaped runner. Ideal for a dining table centerpiece, the finished runner combines dimensional flowers with lacy crochet stitches for a classic, cottage look.
Progress Tracker
0% Complete
— Overview and Construction Notes :
Info :
This runner is made from repeatable modules: Rose motifs (make 7), Leaves (make alternating to total 14), Center connecting rounds and Fan scallop panels (make 8 panels for the pictured S-shape). Work each motif flat, block them to shape, then join with joining chains and slip stitch joins. Finish with a narrow red picot-style border. Read whole pattern before beginning.
Info :
Gauge is not critical for design but affects final size. Sample made with worsted cotton (#4) and 3.5mm hook. One rose motif measures approx 3.5"–4" across when blocked. Fan panel length approx 11" and width 5" at widest point. Adjust yarn weight or hook to change size uniformly.
— Rose Motif (Make 7) :
Round 1 :
With red, make a magic ring. Ch 1, work 8 sc into ring. Pull tight. (8)
Round 2 :
Inc in each st around (work 2 sc in each st). (16)
Round 3 :
(1 sc, inc) x8 (24)
Round 4 :
(2 sc, inc) x8 (32)
Info :
Rounds 1-4 form the tight center of the rose; work tightly to keep center neat. We will now begin petal layers; switch to smaller hook (3.0mm) if you prefer tighter petals.
Round 5 :
Ch2 (counts as first hdc). *Sk next st, 5 dc in next st (forming a shell/petal), sk next st, hdc in next st; rep from * around to create 8 petal bases. Join with sl st to first hdc. (8 petals)
Round 6 :
Working into each shell: sl st into shell center, ch1, 1 sc in same place, ch2, 3 tr in same place, ch2, 1 sc. Rep in each shell around; join. This creates a pronounced petal ridge. (8 petals)
Info :
Use BLO on the next round to create a base ridge for the second petal layer so petals stack outward. Don't cut yarn between rounds so petals remain attached; you can fasten off later.
Round 7 :
Working behind the existing petals in BLO: *ch3, sc into base between petals, ch3; rep around to form tall loops behind petals, join. (8 loop spaces)
Round 8 :
Into each loop: work (sl st, sc, hdc, 3 dc, hdc, sc, sl st) to form full ruffled petal. Fasten off or continue. (8 ruffled petals)
Info :
At this point your first petal row should create a tight, ruffled rose center. For depth, we will add a second, offset petal layer that nestles between the petals of round 8.
Round 9 :
Join red to the base between two petals: ch1, sc in same sp, ch2, sk next petal, sc in next base; rep to place 8 smaller base stitches between petals. Join. (8)
Round 10 :
Into each base: *sl st, sc, hdc, 5 dc, hdc, sc, sl st; rep around. This creates a second inner layer of smaller petals. Fasten off. (8)
Info :
For fuller roses, add a third petal layer by repeating rounds 9-10 offset to sit between the second layer petals. The pictured roses have three distinct layers for a very full bloom.
Round 11 :
Rejoin red at base between round 10 petals (if adding third layer). Ch1, sc around each base for 8 base points. (8)
Round 12 :
Into each base point: (sl st, sc, hdc, 7 dc, hdc, sc, sl st) to make larger outer petals. Fasten off and weave in ends. (8)
Info :
Optional: lightly steam-block petals to open slightly; for a crisp look, starch spray lightly and pin into shape until dry. If you want flatter flowers, omit the third layer.
Round 13 :
Using leftover tail, sew a small running stitch through centers to slightly pull in and shape the domed center if needed. Knot securely on back. Hide tail by weaving through back loops. (no count)
Info :
Make 7 rose motifs for the runner shown. Work all roses the same so they sit evenly when joined. Block and press lightly if using cotton yarn to maintain petal shape.
— Leaf (Make 14) :
Round 1 :
With green, ch 8. Row-style work: 1 sc in 2nd ch from hook, 1 sc, hdc, dc, tr, 2 tr in next ch (center tip), working down opposite side of foundation chain: tr, dc, hdc, sc, sc in last st. Sl st to first sc to form a closed leaf (approx 14 sts around).
Round 2 :
Ch1, sc in same st, *sc, hdc, dc, tr in each corresponding st along one side, at tip work 3 dc cluster (3 dc in tip st worked together as cluster), then tr, dc, hdc, sc down other side; join. (leaf edgings increase to create point)
Round 3 :
Working BLO on the next round to create ribbed veins: ch1, *1 sc in each of next 3 sts BLO, 1 hdc in next 2 sts BLO, 1 dc in next 2 sts BLO; rep across leaf and join. This produces a raised central vein.
Info :
For dramatic ribbing, work an additional round of FLO slip stitches to create shallow raised ribs. In the sample leaves have strong central ribs and thinner secondary ribs, achieved by mixing BLO and FLO rounds.
Round 4 :
Ch1, sc around edge evenly placing (sc, ch1, sc) at wider points to keep edge flat; join. Fasten off leaving long tail for joining. (edge approx 28 sc total counted)
Info :
Sew veins if desired: using contrasting green in a strand, use embroidery-style running stitches to echo the central vein for extra definition (optional).
Info :
Make 14 leaves in two sizes: 8 large (as above) and 6 slightly smaller by starting with ch 6 and following same shaping steps for variety, matching the photo composition.
— Center Connecting Motif (Flower Grid) :
Info :
This section creates the green lattice that holds the roses and leaves. Work several small rounded diamond motifs and join them into a 3x3 grid that becomes the centerpiece for flower placement. The grid is made from diamond motifs linked by picot-bridges.
Round 1 :
With green, make a magic ring, ch1, 6 sc into ring; pull tight. (6)
Round 2 :
Inc in each st around (12)
Round 3 :
(1 sc, inc) x6 (18)
Round 4 :
Ch4 (counts 1 tr + ch1), sk1, sl st in next, ch4, sl st to form small loop; rep to make 6 small loops evenly spaced around. Join. (6 loop anchors)
Round 5 :
Working into loops: *ch3, 3 dc, ch3, sl st into same loop to create a small petal/leaf node; rep around to form 6 nodes. Fasten off. (6 nodes)
Info :
Make 9 of these diamond-centered nodes and join them by slip stitching ch-bridges (ch6, sl st to adjacent node) to form a 3x3 lattice large enough to hold 7 roses as seen in the photo. Place one node center and 8 nodes around for a hexagonal grid; adjust per your composition.
Round 6 :
Join nodes: with long tail, use sl st and ch-bridges to connect nodes making three rows of three. Keep tension loose enough to lie flat but not floppy. Tie off and weave ends.
Info :
Pin the lattice flat on blocking mat and steam or spray-block to stabilize before sewing roses and leaves in place. The lattice acts as the structural foundation for joining fan panels later.
— Joining Roses and Leaves to Grid :
Info :
Position 7 roses onto the grid: one center and six surrounding forming a cluster as pictured (center + 6 around). Pin in place and hand-sew through the back of each rose using the long tail, catching a couple of stitches of the grid to secure. Sew leaves in the spaces between roses to create continuous greenery.
Info :
Sew leaves so their base overlaps the grid nodes; secure with whip stitch and hide tails through back loops. Ensure leaves point outward to create the floral cluster silhouette shown in the photo.
— Fan Scallop Panel (Make 8) :
Info :
Each fan panel is a long, scalloped white section made of repeated shell rows in a semi-circular fan. The pictured runner uses 8 panels alternating left and right to make the S-shape curve. The fan panels are worked flat and joined to the green lattice with small ch-bridges and single crochet edges.
Round 1 :
With white, ch 30 (foundation chain length controls fan width; sample uses ch30). Row-turn: sc in 2nd ch from hook and across (29 sc). This creates a straight foundation; fan will be built in rows.
Round 2 :
Ch3 (counts as dc), *skip 2 sts, (3 dc, ch2, 3 dc) in next st, skip 2 sts, dc in next st; rep across, ending with dc. This begins scattered shell placements. Turn. (fan scallops forming)
Round 3 :
Ch1, sc across into spaces: sc into each dc and into ch2 spaces place 7 sc evenly; this evens the row and prepares next shell row. Turn.
Info :
From this point the fan grows outward using alternating shell rows and connective sc rows. Work tightly to keep shell edges even. Use stitch markers at the ends to count shells and maintain symmetry.
Round 4 :
Ch3, *3 dc in next sc (into center), ch2, 3 dc in same sc, sk 3 sc, dc in next sc; rep across, end with dc. Turn. (increasing shell density)
Round 5 :
Ch1, sc in each st across and into ch2 spaces place 5 sc. Turn. (keeps shells anchored)
Round 6 :
Ch3, *5 dc cluster in next anchor sc, ch2, 5 dc cluster in same anchor sc, sk 4 sc, dc in next sc; rep across. Turn. (wider shells forming)
Info :
Progressively increase shells every other shell row to create the fan arc. Each shell row increases the stitch height so the panel curves naturally. Continue alternating shell rows and anchor sc rows until you have 10 shell rows total (counts below).
Round 7 :
Ch1, sc in each st across; secure the shell anchors. Turn.
Round 8 :
Ch3, *7 dc in next anchor, ch2, 7 dc in same anchor, sk 6 sc, dc in next sc; rep across. Turn. (shell count now larger)
Round 9 :
Ch1, sc across, placing 5 sc into each ch2 space to keep anchor count. Turn.
Round 10 :
Ch3, *9 dc in next anchor, ch2, 9 dc in same anchor, sk 8 sc, dc in next sc; rep across. Turn. (10th shell row)
Info :
After 10 shell rows your panel will be full and curved nicely. If you want a longer/wider fan, increase foundation chain by multiples of 4 and add corresponding shells in pairs to maintain the pattern.
Round 11 :
Ch1, sc across; turn.
Round 12 :
Edge shaping: ch1, sc in each st across placing (sc, ch1, sc) at each shell peak to flatten and define scallops. Fasten off leaving long tail for joining. (count varies by foundation chain)
Info :
Make 8 identical fan panels. Block them flat on a mat to open shells evenly and keep edges crisp. The blocking will also help when joining to the green lattice so the edges sit flush.
— Fan Panel Joining and Placement :
Info :
Lay out the runner shape: alternate fan panels and floral clusters so the fans create the white scalloped borders in the S-shape and the floral clusters sit in the indentations. The sample alternates fan-left, cluster, fan-right, cluster repeating to achieve flowing curves.
Round 1 :
To join a fan panel to the grid: align the straight edge of the fan with the outer edge of the grid node row. With green yarn join at a grid node, ch3, sl st into first sc of fan; *ch4, sl st into next anchor on grid and corresponding sc on fan; rep until entire edge is joined. This creates small ch-bridges that keep fan and grid slightly apart for depth.
Info :
For added stability, secure with a few whip stitches along the base edge of the fan through the grid back loops. Hide tails between layers.
— Outer Red Picot Border and Finishing Edge :
Round 1 :
With red, join at any scallop peak. Ch1, sc around entire outer edge of the runner placing (sc, ch3, sc) at each scallop point to form a looped peak that will receive the picots. Work evenly around the entire runner. Join. (count varies)
Round 2 :
Ch1, sc in same st, *ch3, sl st into top of ch3 loop to form picot, sc in next st; rep around. For a stronger picot, work (sc, picot, sc) into the scallop peaks and sc in between. Fasten off and weave ends. This neat red edge gives the runner its finished bright outline.
Info :
Optional: Add a second round of sc behind the picots to reinforce; this makes the border sturdier for frequent use. Use slightly smaller hook (3.0mm) if you want a crisp, tight edge.
— Alternate Decorative Leaf Details (Optional) :
Round 1 :
Create small decorative leaves to place between fans and clusters. Ch6, sc in 2nd ch from hook, hdc, dc, hdc, sc, sl st to join. Fasten off. Make 10 and scatter-sew into gaps for extra greenery.
Info :
These tiny leaves add visual interest and fill small gaps along the runner. Sew them down with hidden stitches along the lattice to keep them flat.
— Blocking and Final Finishing :
Info :
Block each rose, leaf, grid and fan panel individually. Pin to desired shape on a blocking mat, lightly spray with water or use a steam iron at a safe distance for cotton yarn. Allow to dry fully before joining to ensure the runner lies flat and crisp.
Info :
As you sew modules together, keep the runner laid flat on a table and pin each piece in place to prevent stretching. Use small, even stitches for assembly and hide tails in the back loops or underside of lattice for a neat finish.
Info :
Edge-check: after all pieces are joined, check the outer border for even scallops and adjust by sewing or blocking if necessary. The red picot border can correct small asymmetries by tightening or loosening at peaks.
Info :
Care instructions: Hand wash gently in cool water with mild detergent, reshape while damp and lay flat to dry. Iron lightly from wrong side if needed, using a pressing cloth for cotton yarns.
This vintage rose table runner brings classic cottage charm to any table setting. With bright red 3D roses, sculpted green leaves and airy white scallop panels, each stitch weaves together to create a cozy centerpiece you'll be proud to display. The modular build makes the pattern flexible—extend the runner by adding panels or create a matching placemat set. Enjoy the therapy of crafted details and the joy of a handmade home accent! 🧶🌹