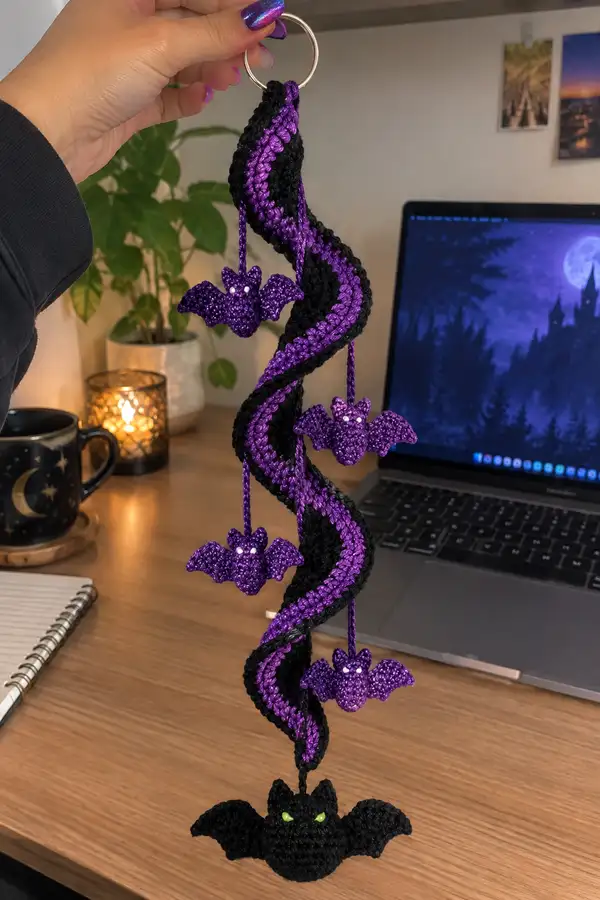
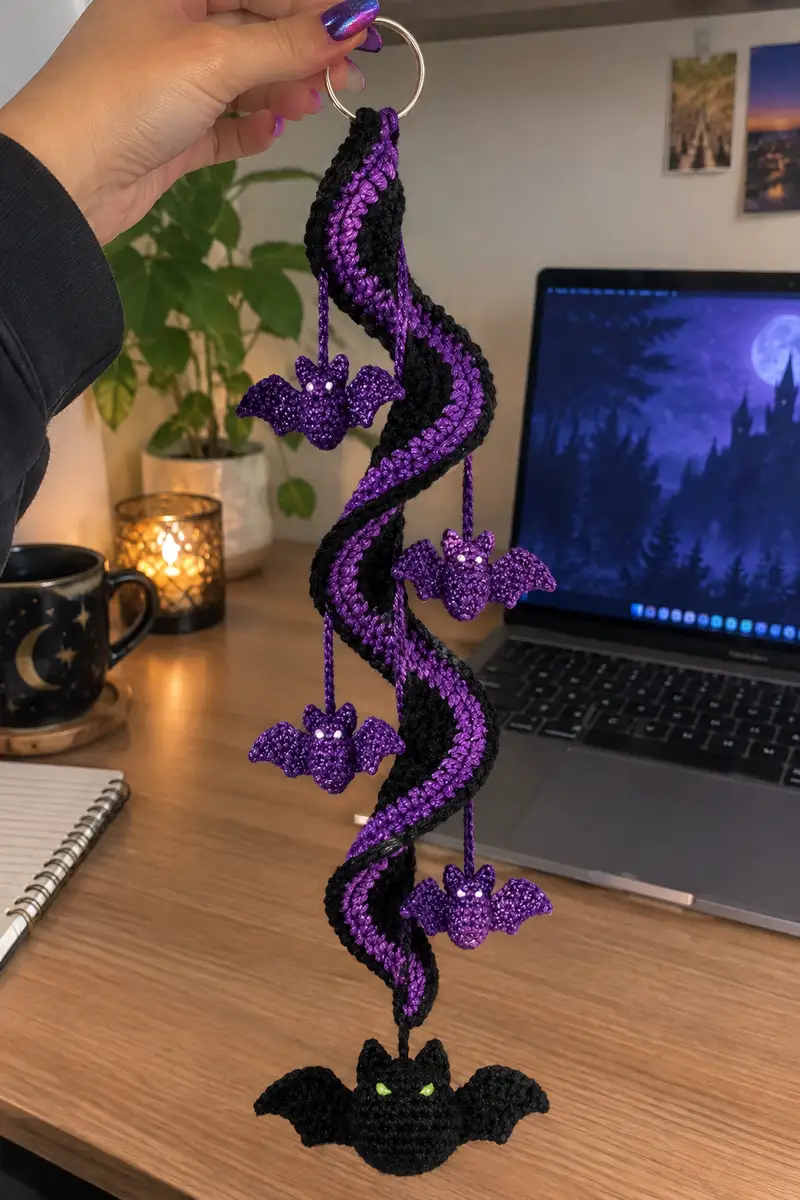
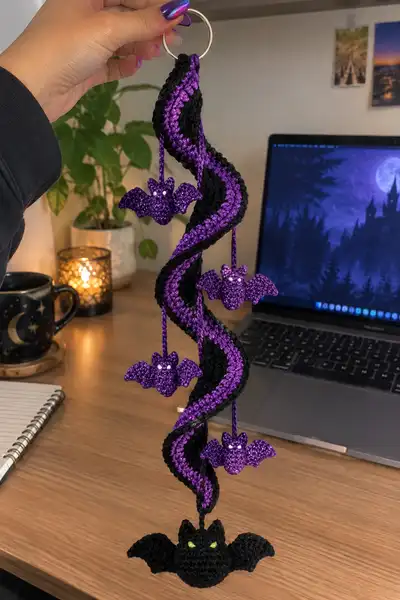
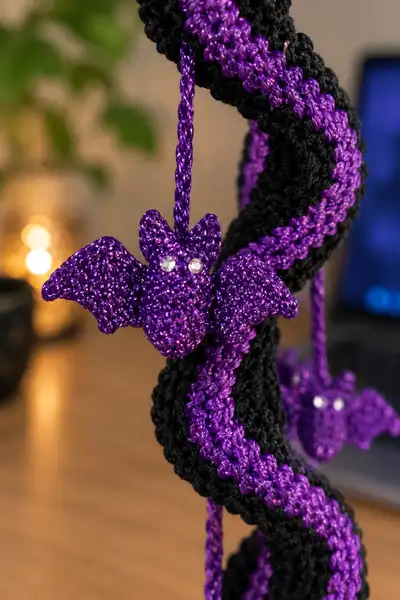
A spooky, shimmery hanging garland featuring a twisted spiral cord in black and metallic purple with four little crocheted bats—three sparkly purple mini bats and one larger black bat with green eyes. The design is perfect for seasonal decor, keyring charms, or a Halloween doorway accent. Worked in small amigurumi pieces and long spiral strips, this pattern combines basic amigurumi shaping with lengthwise strip crochet for a dramatic twisted effect. Finished project measures roughly 18-22 inches from ring to bottom bat depending on yarn and hook.
Progress Tracker
0% Complete
— Materials & Gauge :
Info :
Gauge is not critical for this decorative item, but for tight amigurumi-like fabric work use a hook size 1-2 sizes smaller than yarn label. Using the recommended 3.5mm hook with worsted weight results in compact stitches that hide stuffing. Make two long spiral tubes (black and purple), three small sparkly bats, and one larger black bat. Final length will depend on how many even rounds you work for the tubes; sample shown is approximately 45-50 rounds for the tubes, producing an 18-22 inch hanging garland.
— Spiral Tube - Black (Make 1) :
Round 1 :
6 sc in magic ring (6)
Round 3 :
(1 sc, inc) x 6 (18)
Round 4 :
(2 sc, inc) x 6 (24)
Round 5 :
(3 sc, inc) x 6 (30)
Info :
We are building a narrow tube that will become one half of the spiral. Keep tension tight; this tube will be long so check your wrist comfort and maintain even stitch size.
Round 6 :
1 sc in each st (30)
Round 7 :
1 sc in each st (30)
Round 8 :
1 sc in each st (30)
Round 9-15 :
1 sc in each st (30)
Info :
Work even rounds until you reach desired tube width length. The example uses Rounds 6-50 to achieve a long spiral. Count rounds and measure length against the second tube to keep them matched.
Round 16-50 :
1 sc in each st (30) - repeat until tube reaches target length (suggest 45-50 rounds total for the tube)
Round 51 :
(3 sc, dec) x 6 (24)
Round 52 :
(2 sc, dec) x 6 (18)
Round 53 :
(1 sc, dec) x 6 (12)
Info :
Close the end with an invisible close and leave a long tail for sewing. Flatten and close the little end so it tucks neatly into the spiral seam. Do NOT stuff this long tube; small amounts of fiberfill can be added at the very bottom if you want weight, but the tube remains mostly flat and floppy so it twists easily.
— Spiral Tube - Purple (Make 1) :
Info :
Work this tube to match black tube length. Purple tube is slightly narrower in the example to create a visual inlay. Use metallic purple worsted yarn for sparkle. Start with a magic ring to form a small tube.
Round 1 :
6 sc in magic ring (6)
Round 3 :
(1 sc, inc) x 6 (18)
Round 4 :
(2 sc, inc) x 6 (24)
Round 5 :
(3 sc, inc) x 6 (30)
Info :
The purple inner tube will visually nestle against the black tube before assembly. Work the purple for slightly fewer rounds so it does not completely cover the interior curvature — this creates the visible purple stripe.
Round 6-40 :
1 sc in each st (30) - work even rounds until purple tube length matches most of the black tube length (example uses 40 rounds to create a slightly shorter inner tube)
Round 41 :
(3 sc, dec) x 6 (24)
Round 42 :
(2 sc, dec) x 6 (18)
Round 43 :
(1 sc, dec) x 6 (12)
Info :
Fasten off leaving a long tail for sewing. Flatten and close the small end. You now have two tubes: one black (longer) and one purple (slightly shorter). Lay them side by side to compare lengths and adjust by adding or removing even rounds if necessary.
— Preparing the Cord & Top Ring :
Info :
Decide your final length. Use a short braided cord or crochet an i-cord for the hanging loop. In the photo, a metal keyring is used. Attach both tube tops to the metal ring by sewing through the closed ends with the long tails and fastening securely. Braid a short piece of purple metallic yarn for extra decorative hangers if desired.
Round 1 :
Make a 30-ch foundation chain (or braid 30 strands of purple yarn) and fold into a loop. Sew securely to the keyring and knot. This will be the central hanging cord used to position the spiral.
Info :
Attach tubes to the ring by placing the open ends side by side, leaving long tails. Using a length of yarn, sew through both tube bottoms and the loop on the ring to anchor them. We will twist and sew the tubes together along the seam to make the spiral.
— Assembling the Spiral Twist :
Info :
Lay the black and purple tubes side by side, RS up. Start at the closed ends near the bottom of the garland and align edges. Twist the two tubes around each other gently to create a spiral. As you twist, stitch the inner seam using mattress or whip stitch through the outer edge only, catching both tubes so they stay together but still maintain a soft ridge seam. Continue twisting and stitching every 6-8 stitches to hold the spiral shape. Keep tension gentle so the spiral can flex.
Round 1 :
Pin the two tube edges together at the bottom closed end; using a yarn tail, sew 3-4 running whip stitches to secure the initial join.
Round 2 :
Continue twisting tubes and sew along the seam every 6-8 stitches for the full length. Aim for evenly spaced stitches (approx 60-90 sewing stitches depending on length).
Info :
Periodically check how the twist hangs. You want an elegant corkscrew with well-defined ridges and the purple stripe visible on the inner curve. Avoid over-sewing which flattens the spiral; small securing stitches are ideal.
— Hanging Cord Loops for Bats (Make 4) :
Round 1 :
Using metallic purple yarn, ch 40, or create a 12-14cm braided cord. Fasten off leaving tails long enough to sew into the bat tops and tie into the spiral seam.
Info :
You will attach three shorter cords spaced along the spiral and one longer cord for the bottom large bat. Measure these against your spiral to place them evenly — approximately top third, middle, lower third, and bottom tip.
— Mini Bat (Sparkly Purple) - Make 3 :
Overview :
These mini bats are worked in small amigurumi style with a simple head/ body and pair of wings crocheted flat and sewn to the body top. Each mini bat is approximately 2.0-2.5 inches wide when finished.
Head - Round 1 :
6 sc in magic ring (6)
Round 3 :
(1 sc, inc) x 6 (18)
Round 4 :
1 sc in each st (18)
Info :
Place two small beads or 4mm rhinestones at Rounds 3-4, spaced about 4-6 stitches apart for eyes. If using beads, sew them on after stuffing to avoid catching stuffing in bead holes.
Round 5 :
(2 sc, dec) x 4 + 2 sc (14) - work a gentle shaping to form a slightly tapered muzzle (detailed maths: starting with 18 sts, 4 decreases remove 4 sts = 14)
Round 6 :
1 sc in each st (14)
Info :
Stuff head very lightly. The mini bats require minimal stuffing to keep a flat, slightly puckered face. Use a small amount of fiberfill pushed in with a stuffing tool or blunt pencil tip.
Round 7 :
(1 sc, dec) x 4 + 2 sc (10)
Round 8 :
1 sc in each st (10)
Round 9 :
10 dec around to close slightly leaving a small opening; fasten off leaving tail for sewing (5)
Info :
We left the head small and slightly flattened. Fasten off and weave tail through front loops to close tightly. Leave the long tail (approx 6-8 inches) to attach the hanging cord and the wings.
— Mini Bat Wings (Make 2 per mini bat) :
Wing Row 1 :
ch 8, 1 sc in second ch from hook and across (7 sc)
Wing Row 2 :
ch1, turn, sc in each st across (7)
Wing Row 3 :
ch1, turn, (sc, inc) in first 2 sts, sc across until last 2 sts, (inc, sc) across last 2 sts (9)
Wing Row 4 :
ch1, turn, sc across (9)
Wing Row 5 :
ch1, turn, (2 sc, inc) at start, sc across, (inc, 2 sc) at end (11)
Wing Row 6 :
ch1, turn, sc across (11)
Wing Row 7 :
Shape scallops: *sc, hdc, sc* across the wing edge to create two small scalloped points at the tip, then fasten off leaving tail for sewing
Info :
Wings are small flat shapes. Make two matching wings per mini bat and slightly bend the scalloped edge to give batty wing shape. Use metallic yarn to make the sparkle pop.
Attach Wings :
Pin wings to either side of the head body, aligning centers. Sew wings with mattress stitch or whip stitch using longest tail, stitching through the head and wing base to make them secure. Tie knots and weave in ends.
Final Touch :
Sew the hanging cord into the top center of the mini bat head, burying the knot inside the head for a neat finish. Glue or sew beads for eye shine if needed.
— Large Bat (Black) - 1 Piece :
Overview :
The large bat at the bottom is approximately 3.5-4 inches wide and constructed from a round body/head, two medium wings worked flat and attached, and two small ear points for silhouette. Use matte black yarn and bright green 8mm safety eyes (or embroider for child-safe toy) placed between Rounds 7-8.
Head/Body Round 1 :
6 sc in magic ring (6)
Round 3 :
(1 sc, inc) x 6 (18)
Round 4 :
(2 sc, inc) x 6 (24)
Round 5 :
(3 sc, inc) x 6 (30)
Round 6 :
1 sc in each st (30)
Info :
Place green safety eyes between rounds 7-8 approximately 6-8 stitches apart depending on desired expression. If using embroidered eyes, mark placement now with a removable stitch marker.
Round 7 :
1 sc in each st (30)
Round 8 :
1 sc in each st (30)
Info :
After Round 8 start to reduce slightly to make a squat body for a stylized bat. Stuff head/body firmly but not overly tight so the bat remains slightly plush and flatish in front view.
Round 9 :
(3 sc, dec) x 6 (24)
Round 10 :
(2 sc, dec) x 6 (18)
Round 11 :
1 sc in each st (18)
Round 12 :
(1 sc, dec) x 6 (12)
Round 13 :
6 dec (6) - close slightly leaving long tail for sewing (fasten off)
Info :
Leave a long tail (approx 10-12 inches) for sewing wings and hanging cord. Shape the body to look round and slightly flattened; the wings will be sewn into the seam to make it appear wide and winged.
— Large Bat Ears (Make 2) :
Round 1 :
4 sc in magic ring (4)
Round 3 :
1 sc in each st (8)
Round 4 :
(1 sc, dec) x 2 (6)
Info :
Fasten off leaving a long tail for sewing. Pin ears to top front of body between rounds 4-6 and sew securely so they stand slightly upright.
— Large Bat Wings (Make 2) :
Wing Row 1 :
ch 12, sc in second ch from hook and across (11)
Wing Row 2 :
ch1, turn, sc across (11)
Wing Row 3 :
ch1, turn, (sc, inc) in first 2 sts, sc across until last 2 sts, (inc, sc) across last 2 sts (13)
Wing Row 4 :
ch1, turn, sc across (13)
Wing Row 5 :
Shape scallops and points along outer edge: *sc, hdc, sc, sl st* across to get a bat-wing silhouette. Fasten off leaving long tail for sewing (approx 16-20 sts width depending on shaping)
Info :
Make both wings identical. Use pins to shape wings with slight curve. Starch or spray lightly for a firmer silhouette if you want crisp wing edges (optional).
Attach Wings :
Pin wings to each side of the body so the wing tops align with Rounds 5-8. Sew using long tail and strong whip stitches through wing base and body. Reinforce with extra passes to ensure wings hold their shape while hanging.
Attach Ears :
Sew ears to top of head between rounds 4-6. Use small, tight stitches and hide tails inside the body.
Attach Hanging Cord :
Sew the long tail used as hanging cord into the bottom-most stitch of the spiral and knot securely. Bury knot inside the bat body.
— Optional Embellishments :
Info :
Add small rhinestones for mini bat eyes or embroider mouth detail. Use contrasting embroidery thread for tiny fang stitches if desired. Attach a small jump ring at the top hidden inside the spiral loop for hanging on hooks.
— Finishing & Assembly :
Step 1 :
Decide placement for the three mini bats and one large bat along the spiral. Mark positions using pins or removable markers. Typical spacing in the example is roughly 3.5-4 inches between each hanging point.
Step 2 :
Sew each hanging cord to the spiral seam at the marked points: push the cord tail under the seam, knot, then sew through the seam and tube edge several times to secure. Weave in ends into the tube body to hide them.
Step 3 :
Attach mini bats to their cords by hand-stitching the cord tail into the top of each mini bat head and knotting securely inside. Hide tails and trim.
Step 4 :
Attach the large bat at the very bottom of the spiral using the longer hanging cord or the tail left from the large bat body. Make sure the bottom bat sits centered in the spiral base for a balanced look.
Info :
After all bats are attached, suspend the garland and check balance. Adjust placements by unpicking minimal stitches and re-sewing if needed. Add a little weight (tiny washer) inside the bottom bat body if the spiral spins too much or tilts.
— Care & Storage :
Info :
Spot clean with a damp cloth. Store flat or hanging to preserve shape. Metallic yarns may catch light and show wear over time; avoid rough handling.
Final Notes :
This pattern intentionally provides flexibility in tube length and bat sizing. You can shorten the tubes and bats to create keychains or lengthen them for a long doorway garland. The modular approach makes it simple to customize color and spacing.
This Spiral Bat Garland is a delightful mix of spooky and sparkly — perfect for seasonal decor or as a unique hanging gift. The balanced contrast between matte black and metallic purple gives it presence and personality, while the little bats add charming character. I hope you enjoy assembling each modular piece as much as I did designing it; it comes together quickly and looks fantastic in any doorway or window. 🎃🦇