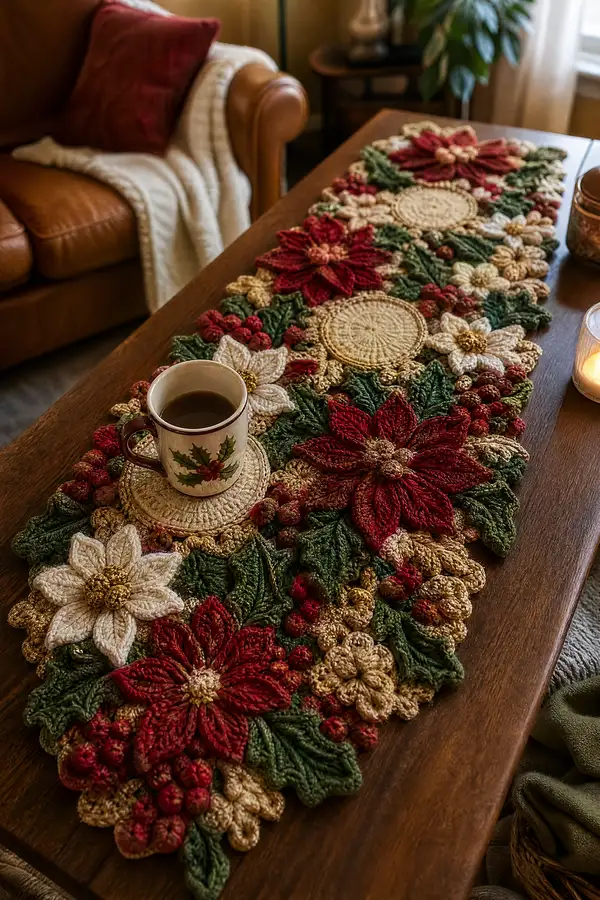
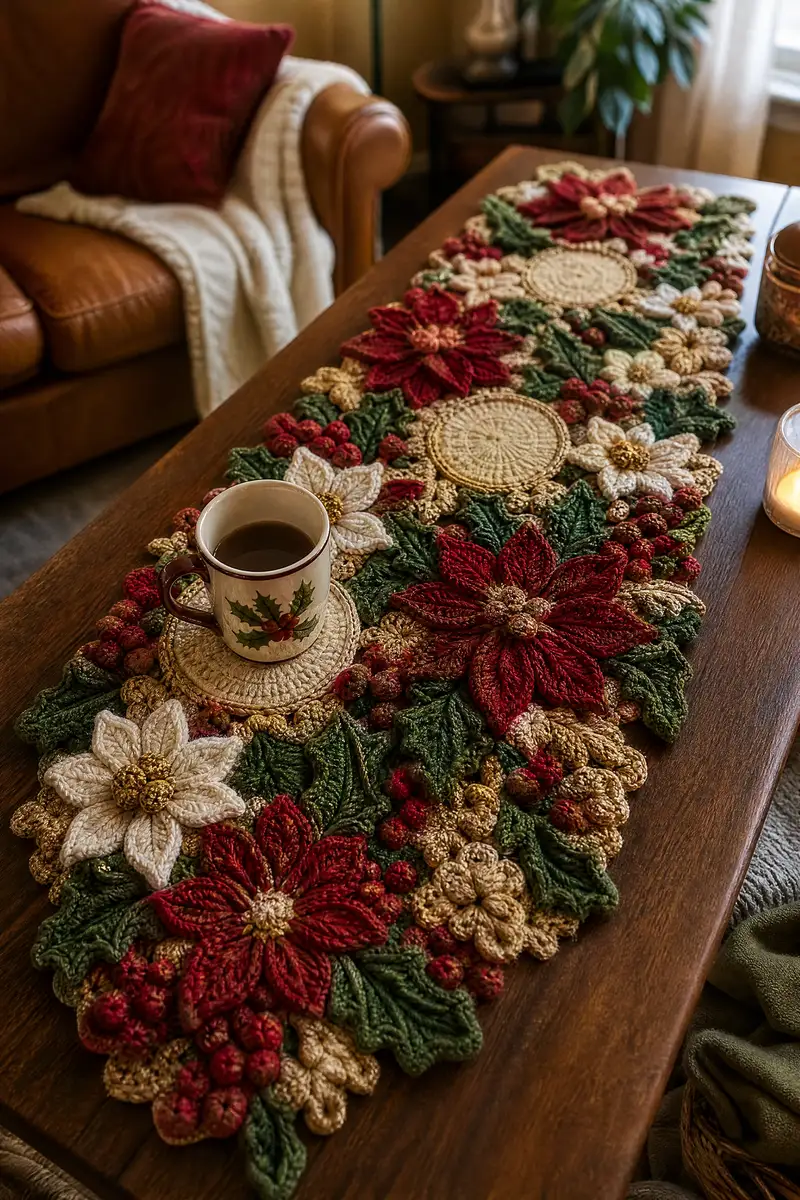
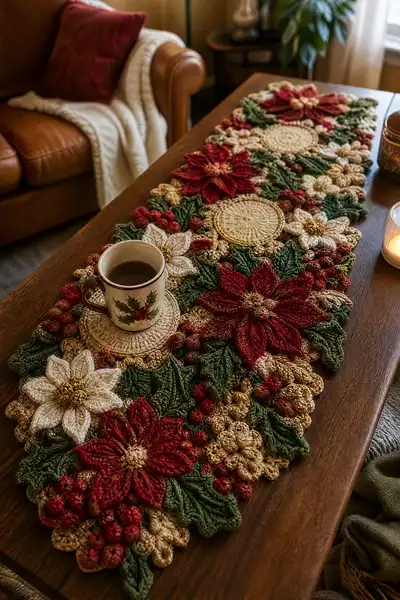
Create a lush, textured Christmas poinsettia table runner full of dimensional flowers, layered leaves, berry clusters and scalloped gold edging. This runner features deep red poinsettias, cream star-flowers, olive and forest leaves, and decorative gold accents. The pattern is designed as joined motifs and appliques so you can customize length and placement. Perfect for a holiday centerpiece, with detailed step-by-step instructions and assembly guidance.
Progress Tracker
0% Complete
— Overview and Notes :
Info :
This pattern is modular: you will make multiple circular coaster/medallions, large poinsettia flowers (petal sets), small star flowers, leaves, berry clusters and scalloped trim pieces. Pieces are joined by surface slip stitches and sewn for stability. Use stitch markers liberally to mark round starts and pattern repeats.
Info :
Gauge is not critical for overall look but affects finished size. Using worsted weight yarn and a 3.5mm hook will produce a runner approx 10-12 inches wide and 36-48 inches long depending on motif repeats. Adjust hook/yarn to change size.
— Center Medallion / Coaster (Make 3) :
Round 1 :
6 sc in magic ring (6)
Round 3 :
(1 sc, 1 inc) x 6 (18)
Round 4 :
(2 sc, 1 inc) x 6 (24)
Round 5 :
(3 sc, 1 inc) x 6 (30)
Round 6 :
(4 sc, 1 inc) x 6 (36)
Round 7 :
(5 sc, 1 inc) x 6 (42)
Round 8 :
(6 sc, 1 inc) x 6 (48)
Info :
Switch to a neutral beige or antique gold color here if you want a decorative ring. Carry color carefully or fasten off and join new color with sl st.
Round 9 :
1 sc in each st (48)
Round 10 :
1 sc in each st BLO (48) — creates a slight ridge for coaster edge
Round 11 :
1 sc in each st (48)
Round 12 :
(6 sc, 1 inc) x 6 (54)
Round 13-16 :
1 sc in each st (54)
Info :
Fasten off leaving a long tail for sewing into the runner base. Block flat on a mat for best appearance. Make three medallions for the inset circular placements shown in the photo.
— Poinsettia Petal (Make 8 petals for each large flower; make 3 large flowers) :
Round 1 :
Ch 12, sc in 2nd ch from hook, hdc in next, dc in next 3, tr in next 2, dc in next 2, hdc in next, sc in last (this forms a petal foundation; count along the chain: 10 sts)
Round 2 :
Turn, working along opposite side of foundation: sc in first st, hdc in next, dc in next 3, tr3tog over next 3 chain loops to create a raised apex (see technique note), dc in next 3, hdc in next, sc in last — fasten off (petal is symmetrical)
Info :
Petals are worked flat and then arranged around a center. To create tall, dimensional petals, use elongated front post treble clusters for round 2 apex. Practice the tr3tog on scrap to get consistent height.
Round 3 :
Make a decorative picot edge: attach color, ch 1, sc around petal edges evenly (approx 20 sc), (ch 3, sl st in same st) at the apex to make a small picot, continue sc to end — fasten off
Round 4 :
Make 7 additional petals per flower repeating Rounds 1-3. For deep red pointsettias use main red; for alternate accent flowers make some petals in a slightly darker burgundy for depth.
Info :
Sew petals onto the flower center with a matching thread, slightly overlapping bases so petals radiate evenly. Use a template (circle) to maintain even spacing: 8 petals around a 16-20 stitch center circumference gives even placement.
— Poinsettia Center Puff Cluster (Make 3 per large flower) :
Round 1 :
6 sc in magic ring (6)
Round 2 :
Inc in each st (12)
Round 3 :
Ch 1, (make puff stitch over next st: yo, insert, yo pull through 3 loops repeat 3 times total, yo pull through all loops, ch 1) x 6 around forming 6 puff bumps (12 total height points) — sl st to join
Round 4 :
Fasten off leaving a long tail and pull center tight so puffs sit high. Sew to center of petals and add metallic gold thread or small seed beads if desired.
Info :
Use a tighter hook (3.0mm) for the puff center to create a dense, sculpted nub. Weave tail through the back and secure by sewing several times through the motif.
— Small Star Flower (Make 10-12) :
Round 1 :
6 sc in magic ring (6)
Round 2 :
Inc in each st (12)
Round 3 :
(1 sc, 1 inc) x 6 (18)
Round 4 :
Ch 2, skip next st, sl st in next, rep around to create 6 loops for petals (6 loops)
Round 5 :
Join yarn at each loop, working 8 dc in each loop to form full star petals (6 petals) — fasten off and weave ends
Info :
These star flowers are the cream/ivory accents visible in the runner. Make several in varying sizes by adjusting dc count per petal or using smaller hook for tighter petals.
— Small 3D Flower (Make clusters of 6) :
Round 1 :
Make a small magic ring with 5 sc (5)
Round 2 :
(Ch 3, sl st in next) x 5 to create loops for picot petals (5 loops)
Round 3 :
In each loop work (sc, hdc, 3 dc, hdc, sc) to form rounded petals; fasten off leaving tail for sewing (5 petals)
Info :
Sew small flowers into nooks between leaves and larger petals. Cluster several together for the dense look near the base of each large flower.
— Leaf (Make 24-30 assorted sizes) :
Round 1 :
Ch 15, sc in 2nd ch from hook, hdc in next, dc in next 3, hdc in next, sc in next, picot (ch 3, sl st in base), sc back along opposite side: sc, hdc, dc3, hdc, sc — do not fasten off
Round 2 :
Work 1 sc in each st around; at the center spine (apex) work 3 tr to form curl for realistic leaf apex. Fasten off
Round 3 :
Make additional veins: using surface slip stitches in contrasting forest green, work 3-5 lines from base to apex; secure ends
Info :
Make leaves in two sizes by changing initial chain to 10 (small) or 20 (large). Use BLO on the last round for a crisp rim if you prefer a folded edge.
— Veined Leaf (Make 12) :
Round 1 :
Ch 18, sc in 2nd ch from hook, hdc, dc next 5, tr next 3, dc next 5, hdc, sc — turn and sc back along opposite side to base, fasten off (approx 34 sts)
Round 2 :
With hook in front loop only, 1 sc in each st FLO (34) — creates a raised rim
Info :
Add surface FPDC and BPDC rows to create depth; a darker green for veins adds realism. Stiffen with a light spray starch if you want leaves more sculpted.
— Berry (Bobble) Cluster (Make many) :
Round 1 :
Ch 2, 6 sc in second ch from hook (6) — forms a berry
Round 2 :
Join in second berry adjacent to first by sl st, repeat to make clusters of 4-6 berries. Alternatively work small bobbles: (yo, insert, yo pull through 2 loops) x3, yo pull through all loops for a bobble
Info :
Work berries tight with small hook (2.75-3.0mm) to keep them dense and spherical. Sew clusters into gaps between petals and leaves as seen in the image.
— Small Gold Accent Flower (Make 8-10) :
Round 1 :
Make magic ring, ch 1, 8 sc in ring (8) — pull tight, sl st to join
Round 2 :
(Ch 3, sl st in next) x 8 to create 8 picot loops around
Round 3 :
Work 6 dc in every other loop to form tiny flower; fasten off — use metallic gold for shimmer
Info :
These tiny metallic flowers sit under larger petals and help break up large red areas with bright contrast.
— Decorative Scallop and Join Motif (Make 20-30 units to edge) :
Round 1 :
Ch 12, sl st to form a small loop; 12 sc around loop (12)
Round 2 :
(Ch 3, 5 dc in next st, ch 3, sl st in same st) x 12 to form scallops around — fasten off
Round 3 :
Join scallops along runner edges and between motifs using slip stitch joins and small picot connectors (work assembly section for exact joining map)
Info :
Use metallic gold for these scallops for the border sparkle shown in the photo. Vary the size slightly to create organic curves along the runner edge.
— Assembly Base Join (Working foundation chain between medallions) :
Round 1 :
Lay out medallions in desired order. Join yarn at edge of first medallion, ch 30 (or length needed) to reach next medallion edge, sl st into next medallion; repeat to join medallions with connecting chains
Round 2 :
Along chains work shell stitches: (5 dc in ch space, sl st) to create soft rope-like connectors. Attach additional small flowers and leaves along connectors by sewing or slip stitching into connector shells
Info :
Work this join loosely first to test alignment. You can sew connectors afterwards for added strength. Pin everything on a blocking mat to keep spacing consistent.
— Attaching Poinsettia Petals to Center :
Round 1 :
Arrange 8 petals evenly around a medallion center. With long tail from center sew petals in place using mattress or whip stitch through the back loops of the petal base and the center medallion rounds to secure.
Round 2 :
Sew each petal base overlapping previous petal by approx 40% so petals lock in place and create a full flower silhouette.
Info :
Reinforce by stitching through both petal bases along the circle once around; hide tails by weaving them under stitches and not cutting short until secure.
— Layering and Filling Gaps :
Round 1 :
Use small star flowers, tiny gold flowers, and berry clusters to fill gaps between large flowers and leaves. Sew each element with 2-3 small stitches; clip yarn but leave enough tail to weave.
Round 2 :
Make additional leaves in various sizes and overlay them around petals to replicate the dense foliage in the photo. Layer 2-3 leaves under each large flower for a natural look.
Info :
Place heavier motifs (large flowers) first, then add medium elements (leaves), finally small accents (berries, tiny flowers) to create depth. Pin and step back often to judge composition.
— Decorative Raised Veins on Petals and Leaves :
Round 1 :
Using contrasting darker yarn, embroider central veins with running stitch or use surface FPDC along center of each petal for definition. Typically 1-2 lines per petal are enough.
Round 2 :
On leaves, work 3-5 short FPDC veins radiating from base to apex to create the dimensional look in the image.
Info :
Secure embroidery with hidden knots on the back and weave ends thoroughly. Metallic thread used sparingly on petal tips or center veins looks elegant.
— Final Edge Scallop Attachment :
Round 1 :
With gold yarn work slip stitch along the outside edge of the composition to create anchoring points for scallops (1 sl st in every 2-3 sts around)
Round 2 :
Attach scallop motifs made earlier by sl st across top of each scallop into anchoring points; make spacing consistent (approx every 4th anchoring point)
Round 3 :
Where the scallops meet flower edges, add small connecting chains and picots to secure and smooth transitions
Info :
Adding this metallic scallop last tidies the border and visually frames the runner. Tie off securely and weave in all ends at this stage.
— Finishing Touches :
Round 1 :
Sew any loose pieces more securely, add small seed beads to centers of the tiny gold flowers if desired, and trim stray fibers.
Round 2 :
Block entire runner on a flat surface, pinning motifs into correct placement and steaming lightly if yarn permits (test a scrap first). Allow to dry fully.
Info :
Once dry, give the runner a final check for loose ends. For heavy use, consider sewing a lightweight cotton backing to the underside of the runner to hold pieces in place and protect the table surface.
— Technique Notes and Stitch Details :
Info :
Puff stitch: yo, insert hook, yo pull through, repeat 3-5 times according to instructions, then yo and pull through all loops to close puff. Keep consistent loop heights for uniform puffs. Bobble stitch: yo, insert, yo pull through twice, repeat 3-4 times into same st, yo and pull through all loops then ch 1 to close.
Info :
Front post and back post stitches provide raised ribs for veins and petal definition; practice on scraps before applying to petals. Use tapestry needle to sew pieces with hidden stitches and avoid bulky seams.
Info :
Throughout assembly check front view and side view to ensure motifs sit flat. Some petals may need gentle blocking with pins to curve correctly.
This festive poinsettia runner brings holiday warmth and handcrafted charm to your table—every petal, leaf and berry adds personality and texture. The modular construction lets you personalize length and density so you can create a subtle centerpiece or a lavish statement. Making it is a joyful, creative process that rewards patience with a heirloom-quality finished piece. 🧶🎄 Add a cup of cocoa and enjoy the cozy glow of your handmade holiday decor! ✨