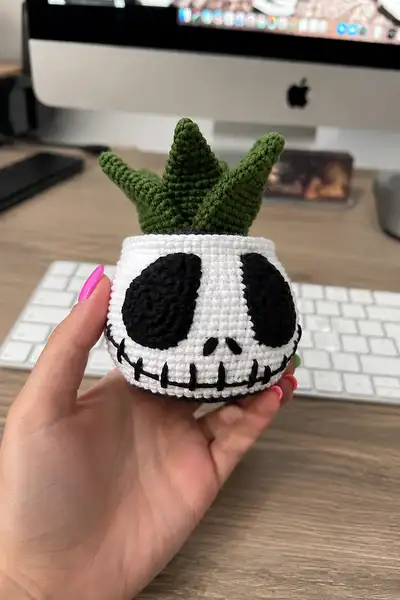
🧢 Beautiful ✨ Detailed πŸ’ Adorable

Skull Succulent Planter Amigurumi Pattern

Skull Succulent Planter Amigurumi Pattern
4.3β˜… Rating
5-7 Hours Time Needed
4.2K Made This
βœ‚οΈ

Intermediate Level

Ideal for those with basic crochet experience, featuring slightly more advanced stitches and techniques to expand your skills.

⏱️

Weekend Treat

Takes 5-7 hours, making it an enjoyable project to finish over a couple of days.

🧸

Cute Companion

An adorable friend to cherish, handcrafted with love to bring comfort and joy for years to come.

About This Skull Succulent Planter Amigurumi Pattern

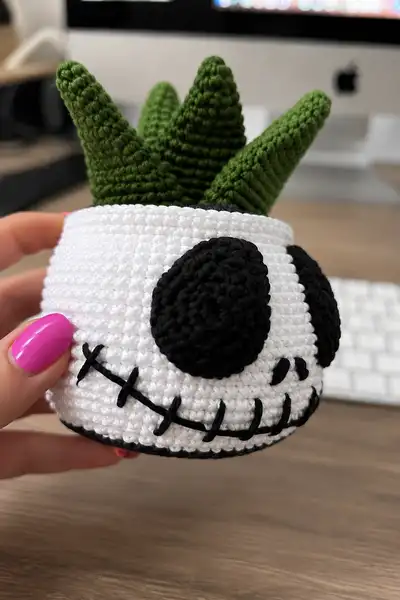
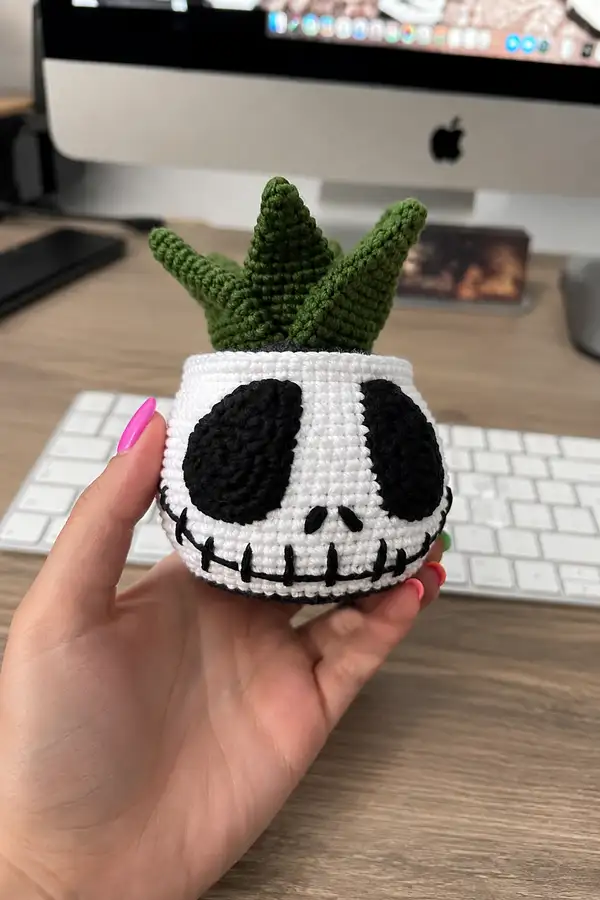
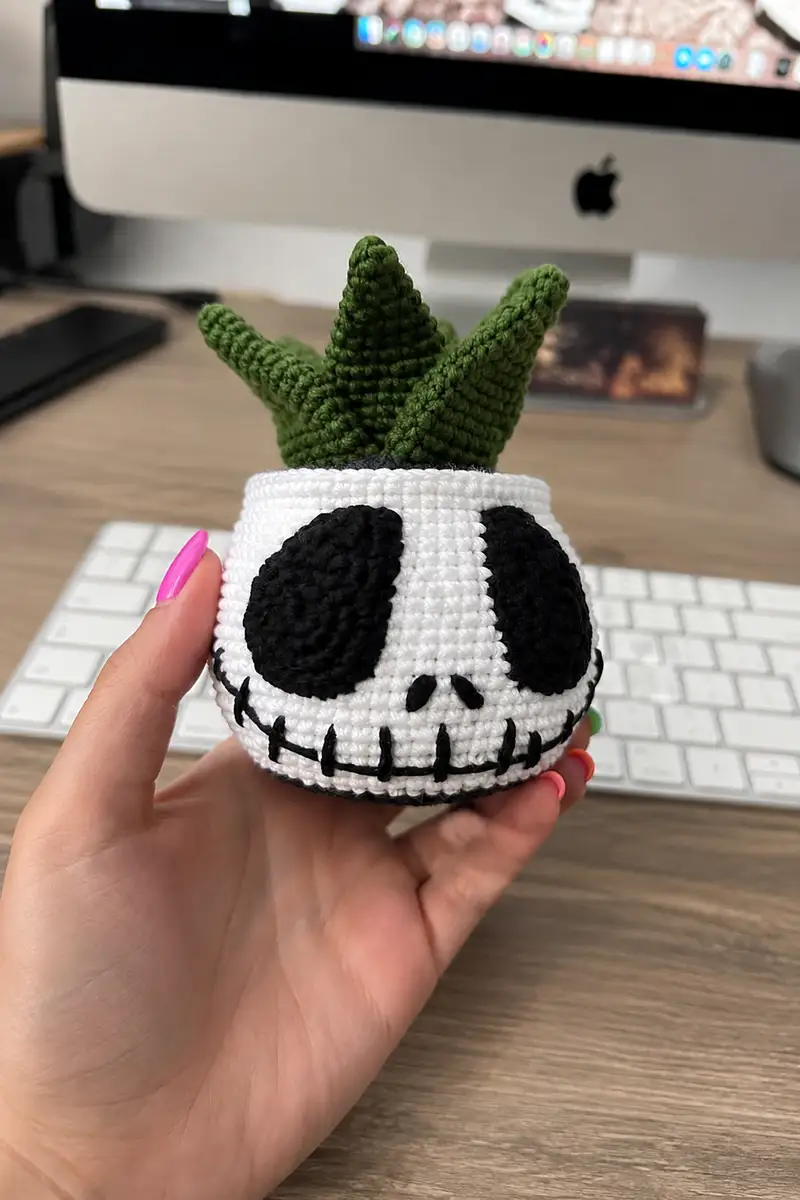
This pattern recreates a small skull-shaped planter amigurumi with a removable set of crocheted succulent leaves. The skull body is crocheted in white with a contrasting black rim and bold appliqued eye patches. Simple embroidered mouth and nose details give it a Jack-Skellington inspired grin. The five green, tapered succulent leaves are crocheted separately, lightly stuffed, and nested into the open top.

Skull Succulent Planter Amigurumi Pattern crochet pattern - detailed view of completed project

Designed to sit freely as a decorative object, the skull pot is intentionally hollow and unstuffed for a realistic planter look. The succulent leaves are removable so you can gift the skull and the plants separately or use the leaves to display on a shelf.

Why You'll Love This Skull Succulent Planter Amigurumi Pattern

I love this pattern because it combines cute spooky vibes with a tiny home-decor twist. The bold black eye patches and stitched grin are instantly recognizable and fun to embroider, while the soft stuffed succulent leaves add height and personality. This project is satisfying to assemble and looks great on a desk or windowsill.

Skull Succulent Planter Amigurumi Pattern step 1 - construction progress Skull Succulent Planter Amigurumi Pattern step 2 - assembly progress Skull Succulent Planter Amigurumi Pattern step 3 - details and accessories Skull Succulent Planter Amigurumi Pattern step 4 - final assembly and finishing

Switch Things Up

I absolutely loved creating this skull succulent planter pattern because it blends playful spooky style with simple construction that you can customize in so many ways. The basic pot shape is forgiving and the appliqued eyes and embroidered mouth let you add personality with minimal stitches.

You can switch things up by using different yarn colors: try an off-white or cream skull for a vintage look, or pastel greens and pinks for a softer vibe. For succulents, experiment with gradient greens, two-tone leaves, or make tiny blossoms by adding small bobbles in contrasting yarn at the leaf tips.

I also recommend trying different sizes by using sport or bulky yarnβ€”just adjust hook size and stitch counts proportionally. Adding a felt disc inside the base or a wrapped cardboard disk allows you to make a removable succulent bouquet or a permanent glued-in arrangement. Have fun making it your own!

Common Mistakes & How to Fix Them

βœ— Skipping stitch markers at round starts can cause misaligned facial features and uneven shaping; always mark your first stitch of each round βœ— Using a hook that is too large for amigurumi makes stitches loose and stuffing will show through; use one size smaller than yarn recommendation βœ— Not pinning appliques and embroidery before sewing can result in uneven, crooked facial placement; pin and check symmetry first βœ— Overstuffing succulent leaves makes them too rigid and hard to tuck into the pot; stuff lightly and shape with fingertips βœ— Forgetting to secure long tails after sewing can let seams unravel; weave tails through several stitches and knot when needed βœ— Attempting the embroidered mouth without reference markings may create an uneven smile; use a removable marker or pins to map stitches first

Skull Succulent Planter Amigurumi Pattern

This cute skull succulent planter combines spooky-applique charm with a plush crochet succulent tucked into an open skull pot. The pattern features a rounded white skull body with bold black eye patches and stitched-on mouth details, plus five stuffed green succulent leaves that tuck into the open top. The finished piece sits nicely on a desk or shelf and makes a playful handmade gift.

Intermediate 5-7 Hours

Materials Needed for Skull Succulent Planter Amigurumi Pattern

β€” Main Fabric

  • 01
    Worsted weight cotton or acrylic yarn (#4), approximately 120g in white (main skull color)
  • 02
    50-60g in black (#4) for eye patches, rim, and embroidery details
  • 03
    70-80g in medium green (#4) for succulent leaves
  • 04
    Small amounts (10-15g) in dark green/brown for optional pot soil details

β€” Tools Required

  • 01
    3.5mm (E) crochet hook for main work (use 1 size smaller if using squishier acrylic)
  • 02
    3.0mm (D) crochet hook for tighter succulents (optional)
  • 03
    Yarn needle for sewing pieces and embroidery
  • 04
    Scissors
  • 05
    Stitch markers (at least 3-4)
  • 06
    Polyester fiberfill for succulent leaves
  • 07
    Optional: small plastic pellets or scrap yarn for stability/weight in base
  • 08
    Pins for assembly and placement
  • 09
    Optional: tapestry needle and black embroidery thread for mouth details

Progress Tracker

0% Complete

β€” Skull Pot (Main Body) :

Round 1 :

6 sc in magic ring (6)

Round 2 :

6 inc (12)

Round 3 :

(1 sc, 1 inc) x 6 (18)

Round 4 :

(2 sc, 1 inc) x 6 (24)

Round 5 :

(3 sc, 1 inc) x 6 (30)

Round 6 :

(4 sc, 1 inc) x 6 (36)

Round 7 :

(5 sc, 1 inc) x 6 (42)

Round 8 :

(6 sc, 1 inc) x 6 (48)

Info :

This establishes a flat round base. Count carefully each round; your base should measure ~48 sts if using the recommended hook and yarn. If you prefer a slightly smaller pot, stop at 42 sts (round 7) and adjust the circumference of later rounds accordingly.

Round 9-12 :

1 sc in each st (48)

Info :

Begin working up the sides of the pot. Keep stitches tight so the inner stuffing or fingers are not visible. Do not stuff the main pot if you want it hollow; instead add optional weight at the base later.

Round 13-20 :

1 sc in each st (48)

Info :

At this height you will begin eye placement. The front center will be between two adjacent stitches on round 16. Mark the front center stitch with a scrap of yarn or a pin for reference.

Round 21-30 :

1 sc in each st (48)

Info :

The skull in the reference photos is short and round. Work an additional 10 rounds of even sc to reach a total height of about 30 rounds from the base, making a squat planter. If you want a taller pot, add more even rounds here in multiples of 2-4.

Round 31 :

1 sc in each st BLO (48)

Info :

Working this round in BLO creates a subtle ridge that will help the rim sit nicely. Keep track of your stitch markers; this ridge will be a reference line for embroidering the mouth later.

Round 32 :

1 sc in each st (48)

Round 33 :

1 sc in each st (48)

Round 34 :

1 sc in each st (48)

Info :

If you prefer an inner darker rim (as in the photo), change to black yarn at the start of round 35. Carry the white yarn inside or break and weave in later. To change color, fasten off white leaving a tail for weaving; join black with a standing sc.

Round 35 :

Change to black. 1 sc in each st (48)

Round 36 :

1 sc in each st (48)

Round 37 :

Change to white. 1 sc in each st (48)

Round 38 :

1 sc in each st (48)

Round 39 :

1 sc in each st (48)

Round 40 :

1 sc in each st (48)

Info :

Finish the pot wall at this height. This round sequence leaves a black inner rim and a white outer lip similar to the pictured planter. Fasten off and weave in any visible tails inside the pot. The opening should be wide enough to place the succulent leaves in and out easily.

Round 41 :

Optional decorative edge: join black with sl st, ch1, sc in each st around (48). Fasten off. (This adds a thin black rim to the outer edge.)

Info :

If you plan to add weight to the base for stability, place a small bag of poly pellets or a disk of cardboard inside the base before weaving in the last few tails. Do not fully stuff the pot; keep it hollow so leaves can be inserted.

β€” Eye Appliques (Make 2) :

Round 1 :

With black: 6 sc in magic ring (6)

Round 2 :

6 inc (12)

Round 3 :

(1 sc, 1 inc) x 6 (18)

Round 4 :

(2 sc, 1 inc) x 6 (24)

Round 5 :

(3 sc, 1 inc) x 6 (30)

Round 6 :

1 sc in next 8 sts, ch2, turn and work 6 sc along long edge to elongate oval, continue 1 sc across remaining 16 sts to join shaping (30)

Round 7 :

1 sc in each st around, placing extra sc into the ch2 ends to smooth (30)

Info :

These appliques are oval rather than perfectly round. To create an elongated shape, do the short oval technique on rounds 6-7 by chaining and working across the end as shown. You can shape slightly by adding 1-2 extra sc at the top and bottom edges if needed.

Round 8 :

Optional: sl st to finish and fasten off. Leave long tail for sewing.

Info :

Pin the appliques to the skull front centered on round 18 (count from base). With a 48-st circumference, place the left eye center approximately 8-10 sts left of the center front stitch and the right eye mirrored 8-10 sts to the right. Aim for roughly 12-14 stitches between the inner edges of the two appliques but adjust visually if you prefer a closer or wider look.

β€” Nose Embroidery :

Info :

Using black yarn and a yarn needle, embroider two small teardrop-shaped nostrils centered between the eye appliques on round 19-20. Each nostril can be formed by making a small satin stitch about 3-4 stitches tall and 1-2 stitches wide. Space them 2-3 stitches apart.

β€” Mouth Embroidery :

Info :

Map the mouth on the lower front of the skull across rounds 14-16 (approximately 12 stitches below the eye centers). Mark marker points for the ends of the grinβ€”about 4-5 sts to each side of center. Use backstitch or surface slip stitch to embroider a curved line. Then add vertical short stitches (6-8 stitches) evenly along the curve to represent the stitched teeth. Each vertical stitch should be 2-3 rows tall and positioned every 4-5 stitches along the curve. Secure and weave tails inside.

Info :

Use a removable stitch marker or pins to outline the curve before committing to embroidery. Work slowly and check symmetry by folding the skull front in half or comparing sides frequently.

β€” Bottom Rim / Base Trim :

Round 1 :

With black, attach at base edge and 1 sc in each st around (48)

Round 2 :

1 sc in each st BLO (48)

Info :

This small rim hides the join at the base and gives a finished look similar to the photo. If you want the skull to sit flat, add a small felt disc glued inside the base or use a round of cardboard covered with a scrap of yarn before closing off the base edge.

β€” Succulent Leaf (Make 5) :

Round 1 :

With medium green: 6 sc in magic ring (6)

Round 2 :

6 inc (12)

Round 3 :

(1 sc, 1 inc) x 6 (18)

Round 4 :

(2 sc, 1 inc) x 6 (24)

Info :

These leaves are tapered cones, worked in the round and then shaped. We make a slightly flattened cone so they tuck into the pot easily. Keep tension even to avoid holes showing stuffing.

Round 5-9 :

1 sc in each st (24)

Round 10 :

(3 sc, 1 dec) x 6 (18)

Round 11-13 :

1 sc in each st (18)

Round 14 :

(2 sc, 1 dec) x 6 (12)

Info :

Start stuffing the leaf lightly at round 11-12 so the tip becomes firm as you shape. Use small amounts of fiberfill and press with your fingers to maintain a smooth seam.

Round 15-18 :

1 sc in each st (12)

Round 19 :

(1 sc, 1 dec) x 4 (8)

Round 20 :

1 sc in each st (8)

Round 21 :

4 dec (4)

Info :

Do not fully close the leaf; fasten off leaving a 20-25 cm tail for sewing. Lightly stuff the lower bulb of the leaf so it will sit upright in the pot. If you want a curvier leaf, after stuffing, flatten slightly and sew a short running stitch along the back to create a crease for realism.

Round 22 :

Fasten off leaving long tail for sewing.

Info :

Make 5 leaves. For variation, make 2 slightly longer leaves by adding two extra rounds at the 24-st even section (Rounds 5-9). Place the longer leaves near the center of the arrangement so the silhouette is balanced.

β€” Leaf Surface Detail (Optional) :

Info :

Use surface slip stitch or a contrasting darker green to add a central vein along each leaf: run a yarn tail up the center and tack down with a few small stitches, finishing with a knot inside the leaf and weaving the tail through several stitches to hide it.

β€” Assembly & Final Shaping :

Info :

Before sewing appliques and leaves, block the skull slightly by stuffing with a balled scrap or by pinching into shape; this helps you visualize placement. The skull should remain hollow at the top to accept the succulent arrangement.

Info :

Sew appliques to the skull using long tails and mattress stitch for an invisible edge. Work through both skull fabric and applique, keeping tension even. Start at the top edge of the applique and work around, stuffing the applique very lightly with a thread or tiny fill if you want a slightly raised eye patch.

Info :

Embroider the mouth and nose as directed above, using a tapestry needle and black yarn or embroidery thread. Use a framing stitch for the long grin line, and small vertical satin or straight stitches for the teeth. Make sure stitches are neat and consistent in length.

Info :

Arrange succulent leaves inside the pot. Create a foam or cardboard insert disk (optional) to keep leaves upright: cut a small circle slightly smaller than the pot opening, wrap in scrap yarn, then sew or hot-glue leaves into the disk so they stand as a bouquet.

Info :

Alternatively, simply tuck the leaf bases into the pot and use a dab of hot glue on the inner rim to secure permanently. For a removable arrangement, avoid glue and rely on tight bases and snug arrangement to hold leaves in place.

Info :

Weave in all tails and trim. If desired, add a light blush to cheek areas using fabric-safe pastel or paint, testing on a scrap first.

Assembly Instructions

  • Attach the two black eye appliques to the skull front centered around rounds 18-19. Pin the left and right appliques first to ensure even spacing, then sew with matching black yarn using a mattress stitch. Keep stitches small and even.
  • Embroider the nostrils centered between the eyes on round 19-20. Use a satin stitch or small straight stitches, spacing nostrils 2-3 stitches apart, then secure and weave tail inside.
  • Map and embroider the mouth curve across rounds 14-16. Use backstitch for the curve and add short vertical stitches every 4-5 stitches along the curve to create a stitched-teeth look. Secure and weave tails through several stitches inside the pot.
  • Sew the base rim (black) in place if worked separately. Ensure it sits flush and the pot sits flat. Add a felt or cardboard disc inside the base if desired for extra stability.
  • Arrange succulent leaves into the open top. For a removable display, tuck leaf bases snugly and adjust positions. For a permanent display, create a wrapped disk of fabric or cardboard and glue the leaf bases to it, then insert.
  • Weave in and hide all remaining tails. Double-check all seams and embroidery for security. Optionally add a small weight disk into the bottom of the pot before final tail weaving to keep the planter from tipping.

Important Notes

  • πŸ’‘Use stitch markers consistently at the beginning of each round to avoid counting errors and maintain proper shaping
  • πŸ’‘Keep tension consistent; a slightly smaller hook than yarn label helps produce tight stitches for amigurumi and prevents stuffing from showing
  • πŸ’‘Stuff succulent leaves gradually and sparingly to allow slight flexibility when tucking into the pot
  • πŸ’‘Pin appliques and embroidery placement before stitching to ensure symmetrical facial features
  • πŸ’‘When changing colors, carry the unused yarn inside the work only for short stretches to avoid visible strands; otherwise break and weave in ends
  • πŸ’‘For a hollow pot, do not stuff the skull body; instead add optional weight at the base if needed for stability
  • πŸ’‘Embroider facial details on the RS before permanently attaching the leaves for easier access
  • πŸ’‘Weave all loose ends through several stitches and trim close to avoid snags when placing the planter on surfaces

This skull succulent planter is a fun mix of whimsical crochet and small-scale home decor that makes a delightful gift or desktop companion. Every stitch builds the playful expression and the removable succulent leaves give you styling options. Enjoy the assembly and take pride in the little details β€” the appliqued eyes and embroidered grin really make it pop. 🧢🌿 Whether on your shelf or gifted to a friend, this tiny planter brings personality and handmade charm. Happy crocheting! 🎁
You ask,

we answer.

FAQs

What is the finished size of this amigurumi?

Based on the specified materials and hook size, the finished piece will measure approximately 4-5 inches (10-13 cm) tall including succulent leaves and about 3.5-4 inches (9-10 cm) in diameter. Using different yarn weights will proportionally change the final size.

Can I use different yarn weights for this pattern?

Yes! You can use any yarn weight, but remember to adjust your hook size accordingly (generally 1-2 sizes smaller than the yarn recommendation for tight amigurumi fabric). Different weights will change the final size proportionally.

Do I need to use safety eyes or can I embroider them?

Both options work beautifully! This pattern uses appliqued eye patches and embroidered features for a flat, secure look. Safety eyes are not necessary and appliques are safer for young children.

How much stuffing will I need?

For the succulent leaves, approximately 10-20 grams of polyester fiberfill total is sufficient (light stuffing only). The skull pot itself remains hollow; if adding optional weight you might need 10-30 grams of poly pellets or a small disk of cardboard.

Can I make the leaves poseable?

Yes! Insert thin craft wire or pipe cleaner into the leaf base before stuffing to make it poseable. Secure wire ends by folding them and wrapping with a small piece of yarn, ensuring ends are not sharp or exposed.

What if my stitch count is off?

If you notice a counting error, it's best to unravel back to where the count was correct. Trying to compensate later often creates visible distortions. Using a stitch marker at round starts helps prevent counting mistakes.

How do I prevent holes when stuffing leaves?

Work tightly with consistent tension and use a small hook for the leaves. Stuff in small amounts, distributing fill evenly to avoid lumps showing through stitches.

Can I customize colors and details?

Definitely! Feel free to use any color combinations you love. Swap the skull color, make the eye patches a different hue, or create seasonal leaf colors to match holidays or decor.