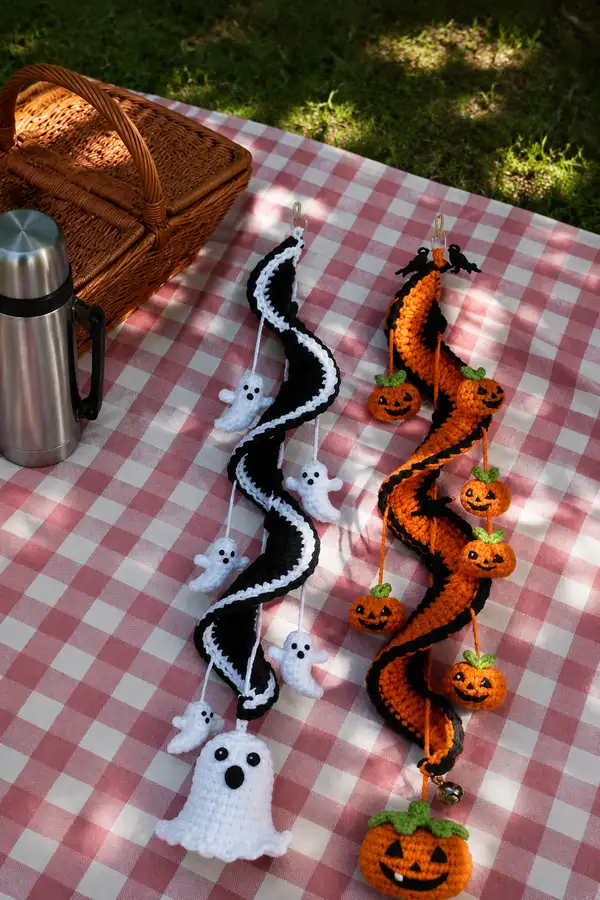
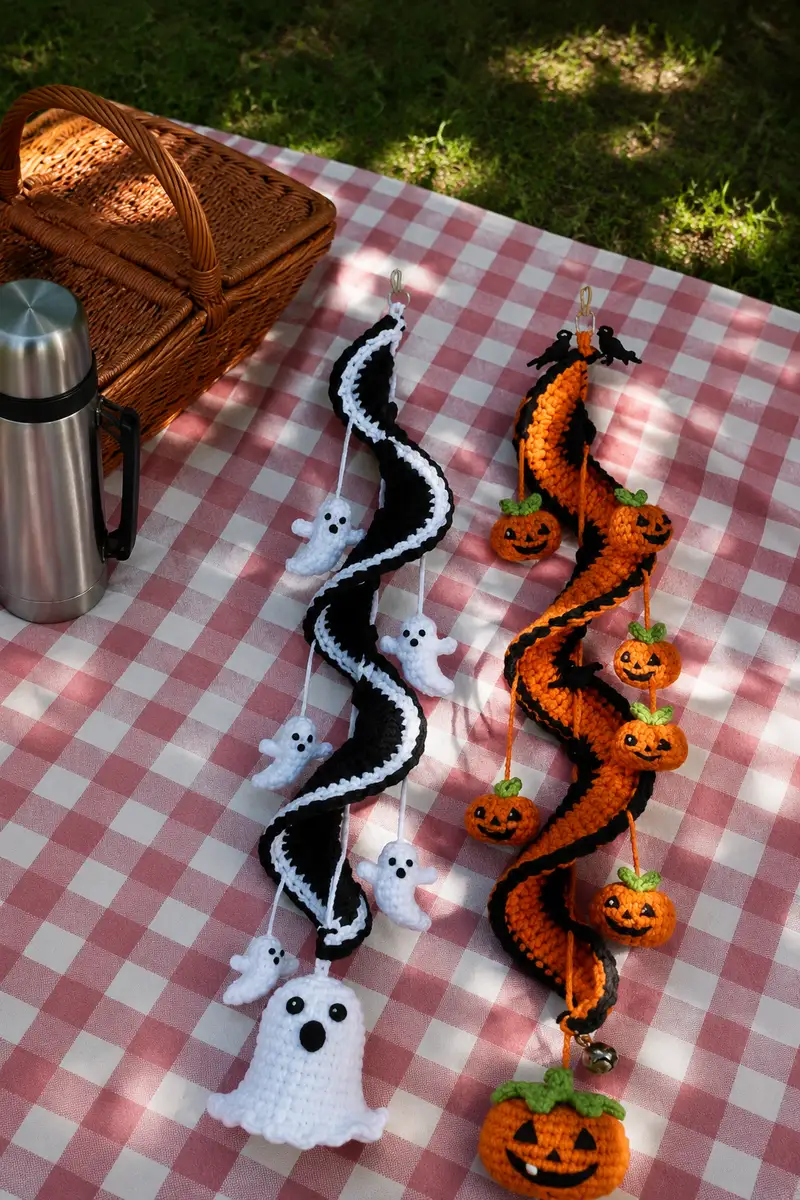
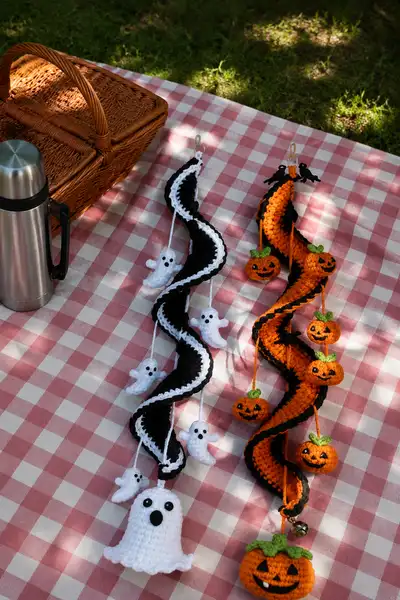
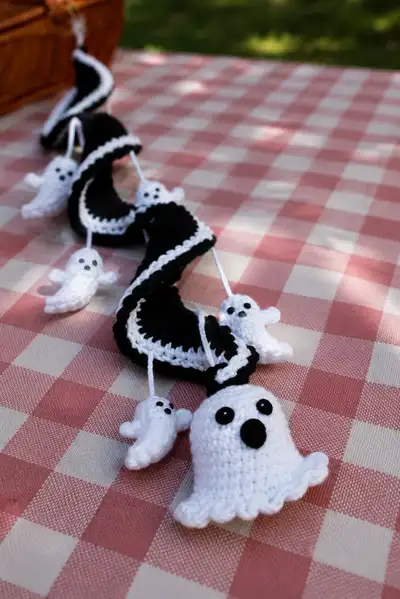
Create a whimsical spooky spiral garland featuring a curling spiral spine with dangling ghosts or jack-o-lanterns. This pattern shows two colorways — classic black-and-white ghost garland and orange-and-black pumpkin garland — with a large focal charm at the end. The finished decor is lightweight, portable, and perfect for hanging on doorknobs, picnic baskets, or as table decor.
Progress Tracker
0% Complete
— Spiral Core (make 2, one ghost version and one pumpkin version) :
Info :
Work the long spiral as a continuous tube in the round. The initial rounds create a wide tube that will remain roughly 48 stitches around. Alternating shaping every 6-10 rounds and adding ruffled edge rows creates the spiral twist. Make two identical cores, changing the contrast color for the edging and charms as desired. Use black as main for both spirals; change contrast to white for ghost garland and to orange for pumpkin garland where indicated.
Round 3 :
(1 sc, inc) x 6 (18)
Round 4 :
(2 sc, inc) x 6 (24)
Round 5 :
(3 sc, inc) x 6 (30)
Round 6 :
(4 sc, inc) x 6 (36)
Round 7 :
(5 sc, inc) x 6 (42)
Round 8 :
(6 sc, inc) x 6 (48)
Info :
After round 8 you now have a stable tube circumference of 48 stitches. For this spiral we will maintain 48 sts for many rounds to build length and then create local increases or decreases to cause a natural curl in the fabric. Work in continuous rounds (do not join) using a stitch marker to track the first stitch.
Round 9-18 :
1 sc in each st (48)
Info :
To encourage the tube to lie flat and allow it to twist into a spiral, work rounds 9-18 in BLO. This creates a subtle ridge on the outside. If you prefer a smoother spiral, work normally.
Round 9 :
1 sc in each st BLO (48)
Round 10-18 :
1 sc in each st (48)
Info :
Begin planning charm placement. On the finished piece charms are spaced approximately 8-10 inches apart. Choose four approximate attachment rounds along the length: near round 24, 36, 48 and 60 (numbers relative to start of long tube). Keep markers at those rounds for later attachment.
Round 19 :
1 sc in each st (48)
Round 20-23 :
1 sc in each st (48)
Round 24 :
(3 sc, inc) x 12 (60)
Info :
A local increase round like round 24 creates a slight bulge which later helps the tube take a curved, spiraling line. Stuff the tube lightly with fiberfill every 12-18 rounds if you want it to hold a curl. You can also insert a thin wire along the center length to adjust poseability; if you do so, thread wire before stuffing and ensure ends are folded and protected inside.
Round 25-30 :
1 sc in each st (60)
Round 31 :
(4 sc, dec) x 12 (48)
Info :
The decrease at round 31 helps the tube contract again, creating a ripple. Keep consistent tension so that the ripple pattern repeats along the tube to create a natural spiral when hung. If your tube becomes very floppy, add a bit more stuffing or use a slightly smaller hook next time.
Round 32-38 :
1 sc in each st (48)
Round 39 :
(2 sc, inc, 1 sc, inc) x 12 (60)
Round 40-46 :
1 sc in each st (60)
Round 47 :
(3 sc, dec) x 12 (48)
Info :
Continue repeating bulge and contraction intervals roughly every 12 rounds until you reach your desired overall length of about 70-90 cm (27-35 inches). For a table piece 60-80 cm works nicely; for doorways aim for 90-120 cm. Keep track of the round numbers where you want to add the small charms.
Round 48-58 :
1 sc in each st (48)
Round 59 :
(1 sc, inc) x 24 (72)
Round 60-64 :
1 sc in each st (72)
Info :
At this stage finish the main tube length. If you prefer longer or shorter, repeat the bulge/contract sequence until length is achieved. Fasten off leaving a long tail for sewing the end closed or adding a hanging loop. We will now add a decorative ruffle edge in the contrast color (white for ghost spiral, black for pumpkin spiral edge or vice versa).
Round 65 :
Join contrast color with sl st in any stitch around the tube circumference. Ch1, sc in same st and in next stitch, (hdc, dc, hdc) all in next stitch, sc in next 3 stitches. Rep around to form spaced scallops. Adjust repeat count to finish evenly. (Scaffold depends on 48-72 sts - approx 16 scallops)
Round 66 :
Work 1 sc in each stitch across scallops and top of tube to neaten join (same stitch count as Round 64)
Info :
For a crisp two-color ridge, you can add an additional single crochet round in main color worked in BLO to create a raised edge that contrasts against the ruffle. This creates a bold stripe that reads well from a distance.
Round 67 :
Change to main color and work 1 sc in each st BLO (same stitch count as previous round)
Round 68 :
Fasten off leaving a long tail for creating a hanging loop or attaching a split ring. Weave in the starting tail neatly into the inside of the tube.
Info :
Repeat the same construction for the second spiral core. For the ghost garland use black main with white ruffle. For the pumpkin garland use orange main with black ruffle. Ensure both spirals are approximately the same length to make a matched pair.
— Mini Ghost Charms (make 4 small ghosts + 1 large ghost per ghost spiral) :
Info :
Small ghosts are worked from a magic ring, with a slightly flared scalloped base to mimic a ghost's wavy skirt. The small ghosts in the photo measure about 3.5-4 cm tall and are attached on short cords to the spiral. The large ghost measures about 9-10 cm tall and serves as the focal charm.
Round 3 :
(1 sc, inc) x 6 (18)
Round 4 :
(2 sc, inc) x 6 (24)
Info :
At this point place safety eyes for the larger ghost. For mini ghosts you can embroider eyes later; however small 6mm safety eyes work well for the large ghost. Place eyes between rounds 4 and 5 approximately 4-6 stitches apart for mini and 8-10 apart for the large ghost.
Round 5 :
1 sc in each st (24)
Round 6 :
1 sc in each st (24)
Round 7 :
(3 sc, inc) x 6 (30)
Round 8 :
1 sc in each st (30)
Info :
For a small ghost (approx 3.5-4 cm) stop at round 10-12 and begin scalloped base. For the large ghost continue to round 14-16 for taller body and then create the ruffle base with larger scallops.
Round 9 :
1 sc in each st (30)
Round 10 :
(4 sc, dec) x 6 (24)
Round 11 :
(3 sc, dec) x 6 (18)
Round 12 :
For small ghost: (2 sc, dec) x 6 (12)
Info :
If making the small ghost, begin scalloped skirt now: ch3, sl st in next st, sc in next; repeat around to create small waves. Fasten off leaving tail for hanging cord. For the larger ghost follow rounds 12-16 before working the base.
Round 13 :
For large ghost continue: (2 sc, dec) x 6 (12)
Round 14 :
Scalloped base: *ch3, skip 1 st, sl st in next* repeat around to form 6 scallops. (Large ghosts: you may instead do (hdc, dc, hdc) in each of 6 base stitches for larger ruffles)
Info :
Stuff ghost lightly before closing scallop base. For a more puckered skirt, pull the tail tight and sew through the base so the scallops flare naturally. Attach hanging cord: leave a 12-18 cm tail when fastening off or attach a length of crochet chain sewn into the top of the head.
Finishing :
Embroider small eyes using black yarn or attach 6mm safety eyes for small ghosts and 10mm for large ghost. For the mouth create a small 'o' using black felt or embroidered oval for a surprised ghost look. Sew eyes securely and weave in ends.
— Large Ghost Focal Charm :
Info :
Large ghost measures roughly 9-10 cm tall. Use a 3.0mm hook and tighter tension for a neat finish. Insert safety eyes at rounds 6-7, about 8-10 sts apart depending on expression preference. Stuff firmly but allow the bottom ruffle to be floppy.
Round 3 :
(1 sc, inc) x 6 (18)
Round 4 :
(2 sc, inc) x 6 (24)
Round 5 :
(3 sc, inc) x 6 (30)
Round 6 :
1 sc in each st (30)
Info :
Place 10mm safety eyes between R5 and R6, approx 9 sts apart. Mark the front center and add a small felt or crocheted nose about 2-3 rounds below eyes. If embroidering, use black yarn and a blunt needle for small satin stitch eyes.
Round 7-10 :
1 sc in each st (30)
Round 11 :
(4 sc, dec) x 5 (25)
Round 12 :
(3 sc, dec) x 5 (20)
Info :
Begin stuffing head firmly now, using small amounts of fiberfill and pressing into crevices. Work evenly so the head keeps a rounded, plump form. Stuff more as you approach the base so the top remains stable and the skirt stays floppy.
Round 13 :
(2 sc, dec) x 5 (15)
Round 14 :
(1 sc, dec) x 5 (10)
Round 15 :
For skirt prep: *sc, ch3, sl st in next st* around 10 times to form 10 small scallops (adjust to fit evenly).
Info :
Fasten off leaving long tail for attaching a cord. Weave tail through top of head and use as hanging cord or crochet a small chain and sew into top for a neat hang. Secure knot inside and weave end through the inside, trimming close.
— Mini Pumpkin Charms (make 3-4 small pumpkins + 1 large pumpkin) :
Info :
Pumpkins are classic round amigurumi with slight height and stitched ribbing to create pumpkin segments. Use orange for the body, green for the stem and leaves, and black for face details. Mini pumpkins measure ~3.5-4 cm; large pumpkin ~8-9 cm. Work from magic ring.
Round 3 :
(1 sc, inc) x 6 (18)
Round 4 :
(2 sc, inc) x 6 (24)
Round 5 :
(3 sc, inc) x 6 (30)
Round 6-8 :
1 sc in each st (30)
Info :
For mini pumpkins stop at round 8 and begin decreases; for large pumpkins continue to round 10-12 to add height. Before closing, add stuffing fairly firmly so faces are visible and shape is round. To create ribs, you will pass yarn around the pumpkin and draw through to form vertical segments later.
Round 9 :
(3 sc, dec) x 6 (24)
Round 10 :
(2 sc, dec) x 6 (18)
Round 11 :
(1 sc, dec) x 6 (12)
Round 12 :
6 dec (6) - fasten off leaving long tail for closing and for stitching to the spiral cord
Info :
To create pumpkin ribs, thread a length of yarn (about 30-40 cm) in a yarn needle, insert at bottom center, bring up over the top and down the opposite side, repeating around 6-8 times to form vertical divisions. Pull evenly so the pumpkin forms natural segments. Secure tightly and weave the end inside the pumpkin. Add a small green stem made as a short tube: ch4, join, sc in each around for 3 rounds, stuff lightly, fasten off and sew to top. Add two small leaves by chain 5 and working back with sl sts and scs to shape a leaf.
Face Detail :
Embroider jack-o-lantern faces with black yarn or use felt. For small pumpkins, simple triangle eyes and smile look best. For the large pumpkin add more elaborate grin and teeth as in the photo. Secure embroidery with a small knot and weave into stuffing.
— Large Pumpkin Focal Charm :
Round 3 :
(1 sc, inc) x 6 (18)
Round 4 :
(2 sc, inc) x 6 (24)
Round 5 :
(3 sc, inc) x 6 (30)
Round 6-10 :
1 sc in each st (30)
Round 11 :
(4 sc, dec) x 5 (25)
Round 12 :
(3 sc, dec) x 5 (20)
Round 13 :
(2 sc, dec) x 5 (15)
Round 14 :
(1 sc, dec) x 5 (10)
Round 15 :
6 dec (6) - leave long tail for finishing
Info :
After stuffing, use the ribbing technique described for mini pumpkins to shape segments. Sew stem and leaves to top. Add embroidered face with black yarn; use felt if you prefer crisp shapes. Attach small bell at bottom for a gentle jingle if desired.
— Hanging Cords and Assembly Prep :
Info :
Create hanging cords for charms by making a small crochet chain in matching color: ch12-20 for small charms (length depends on desired drop). Attach one end by sewing chain into the top center of the charm, and the other end sew through a chosen round of the spiral core. Space charms as per markers placed earlier (approx rounds 24, 36, 48, 60).
Cord Option A :
Crochet chain: ch20, sl st back to first ch to form a neat cord. Fasten off leaving tail to weave into charm and spiral.
Info :
Alternatively use thin cotton cord or embroidery floss. Knot securely at both ends and sew through spiral wall several times for extra holding power. For heavy charms (large pumpkin/ghost) reinforce attachment with two sewing passes.
— Final Decorative Details :
Info :
Add small crocheted bats or leaves as accent pieces if desired. For bats use black yarn and work small flat amigurumi bat wings to tuck into the top of the spiral. For extra sparkle sew a small jingle bell to the bottom focal charm and hide the knot inside the stuffing.
Finishing Touches :
Weave in all ends into the inside of the tube and charms. Block lightly if desired by pinning the spiral into a soft curve and steaming carefully from a distance to help set the twist (do not press directly with iron; use steam only on acrylic-safe setting). Hang and enjoy!
This spooky spiral garland is an instant seasonal favorite — a playful mix of swirling texture and dangling charms that brings Halloween spirit to any space. Each twist reveals a tiny ghost or grinning pumpkin, and the large focal charm anchors the whole piece. I hope the detailed instructions help you enjoy every stitch as you make this cheerful, handcrafted decoration. 🎃👻🧶