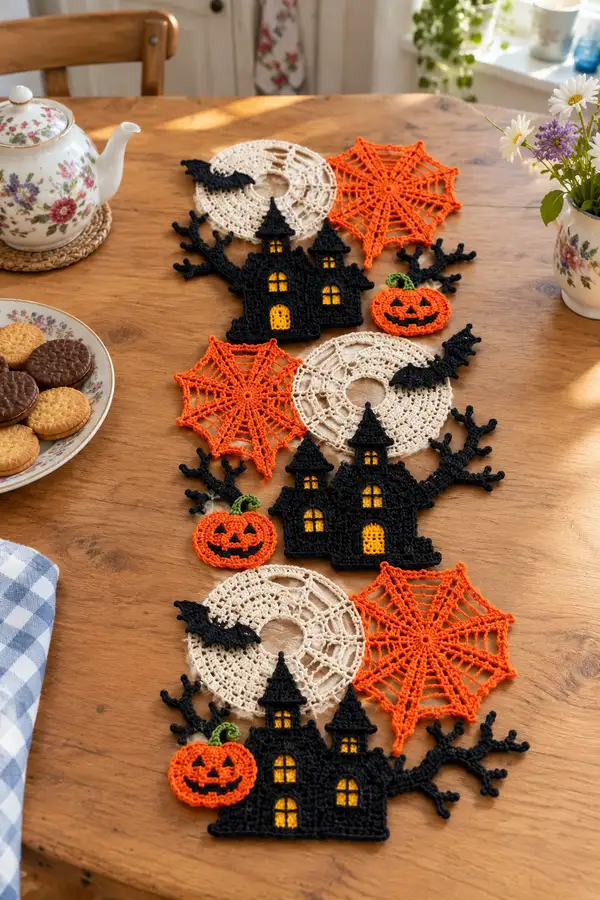
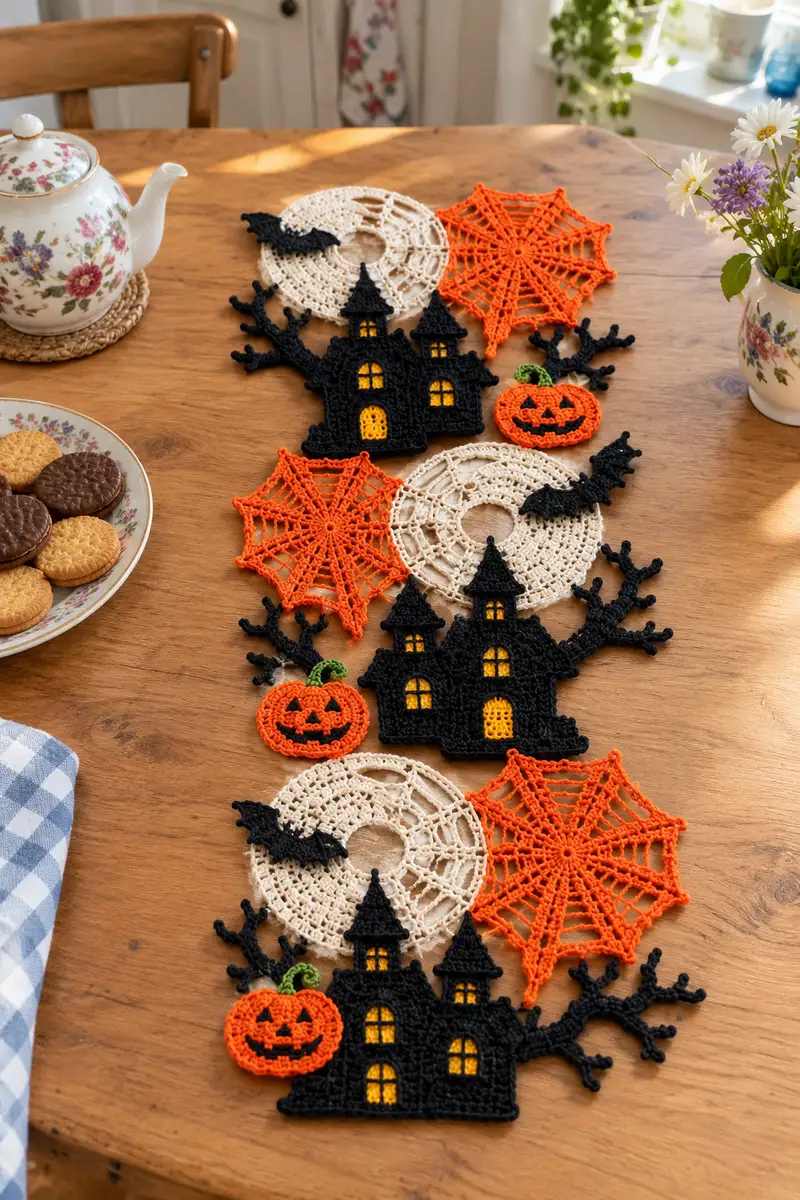
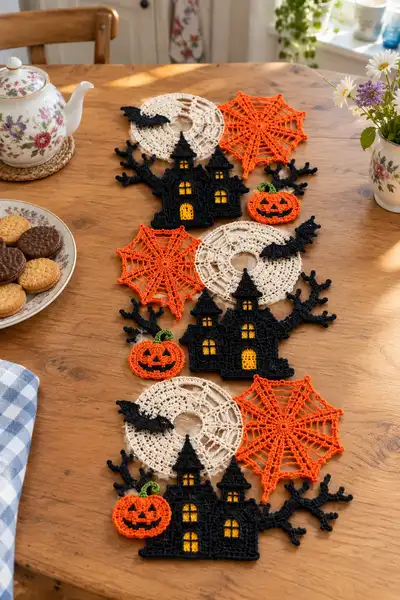
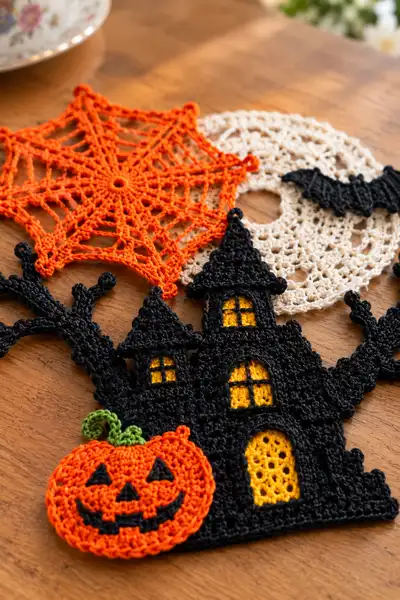
Create a charming Halloween table runner made from layered crochet motifs — haunted houses, jack-o-lantern pumpkins, lacy spiderwebs, moon doilies and flying bats. This pattern uses fine to DK-weight yarn for crisp detail and a light, flat finish perfect for tabletops. The motifs are crocheted separately and joined to form a repeating runner, with clear instructions for shaping, embroidery, and assembly.
Progress Tracker
0% Complete
— Haunted House (Make 3-5 for runner) :
Round 1 :
Using black yarn and 3.0mm hook. Work 6 sc in magic ring (6)
Round 2 :
Inc in each st around (12)
Round 3 :
(1 sc, inc) x 6 (18)
Round 4 :
(2 sc, inc) x 6 (24)
Round 5 :
(3 sc, inc) x 6 (30)
Info :
We are establishing a compact central foundation that will anchor the house base and allow shaping outward; keep tension firm for a crisp edge
Round 6 :
1 sc in each st around (30)
Round 7 :
Ch1, turn and work in rows now to establish a rectangular base that will form the first story. Work 16 sc across starting from next stitch, ch1, turn (16)
Round 8 :
Row 2 (right side): 1 sc in each st across (16)
Round 9 :
Row 3 (left side): 1 sc in each st across (16)
Info :
Working in short rows allows a straight base for windows and door inset; do not join each row—work back and forth on these 16 sts until told otherwise
Round 10 :
Row 4: 1 sc in each st across (16)
Round 11 :
Change to yellow yarn for window fill. Row 5: 1 sc in each st across (16)
Info :
Yellow windows are worked into the body of the house as a filler rectangle. Carry yellow behind black or change color and weave ends later. Leave approx. 6-8 stitches free at each side for frame
Round 12 :
Switch back to black yarn. Row 6: 1 sc in each st across (16)
Round 13 :
Attach work back to circular base: sl st across remaining foundation sts to position the house rectangle centered on top of the circular base (join every 2-3 sts to keep neat)
Round 14 :
With right side up, sc evenly across base stitches around the house edge to form the rear wall outline. Aim for total 48 sc around base perimeter (48)
Info :
At this point the piece becomes a flat silhouette; use tiny slip stitches to distribute shape evenly and avoid puckering—adjust stitch counts slightly if needed to keep edge smooth
Round 15 :
(3 sc, inc) x 12 (60)
Round 16 :
1 sc in each st around (60)
Round 17 :
(4 sc, inc) x 12 (72)
Round 18 :
1 sc in each st around (72)
Info :
These rounds build the silhouette area that will be carved to create turret and roof shapes. Use stitch markers to indicate center roof placement and turret edges
Round 19 :
BLO 1 sc in next 12 sts, dec, *1 sc in next 10 sts, dec* repeat across to form scalloped roof base shaping (66)
Round 20 :
1 sc in each st around (66)
Round 21 :
Work roof turret 1: ch1, turn and work 6 sc across a chosen cluster of 8 sts to form a tower front, then sc across 4 rows to create height (6 sts across rows). Fasten off leaving tail for sewing
Round 22 :
Repeat turret 1 shaping for turret 2 on a mirrored cluster. Create pointed roof by working 3 rows of dec at top: (2 sc, dec) across until 3 sts remain, sl st to finish
Info :
Turret pieces are small flat cones made by short-row decreases. Pin them in place on house top to ensure symmetry before tacking in position
Round 23 :
Form roof ridge: with black, join at one turret base, ch8, work sc back along chain to form a raised ridge; repeat two more ridges for visual peaks; fasten and weave ends
Round 24 :
Trim silhouette edges into jagged shapes with small picots: *sk1, sc, ch3, sl st into sc just made* around selected top and side stitches to create spiky branches and battlement shapes
Round 25 :
Edge reinforcement: 1 sc in each st around full silhouette working picot accents where required (approx. 120 sc total after shaping; adjust to match edges)
Info :
Count stitches as you go—if your edge is longer or shorter, adjust the number of sc between picots to maintain even spacing across the motif
Round 26 :
Window embroidery base: Using black yarn with a tapestry needle, outline small window frames over the yellow inset with a neat backstitch, creating crossbars and mullions (no stitch count)
Round 27 :
Door arch: With yellow inset behind and black frame in front, use a small oval of lace created from ch7, join into ring then work 12 dc into ring for door fill. Attach in center bottom opening with sl st and secure (12 dc)
Info :
This house is meant to be a flat silhouette; do not overwork three-dimensional shaping. Keep the back tidy by weaving ends flat so the runner sits smoothly on the table
Round 28 :
Final edging: Work 1 sc in each st around one last time to tidy edges and ensure the motif sits flat. Fasten off and weave in ends
— Pumpkin (Make 3-6) :
Round 1 :
Using orange yarn and 2.5-3.0mm hook. 6 sc in magic ring (6)
Round 2 :
Inc in each st (12)
Round 3 :
(1 sc, inc) x6 (18)
Round 4 :
(2 sc, inc) x6 (24)
Info :
We will flatten the pumpkin into a slightly oval motif using post stitches for ribbing that mimics pumpkin grooves—keep tension slightly loose to allow for post stitches
Round 5 :
1 sc in each st around (24)
Round 6 :
BLO: *1 sc in next 3 sts, (fpdc around next st) repeat across to create ribs* (24)
Round 7 :
Switch to front loop only (FLO) and repeat 1 sc in each st to flatten the interior (24)
Round 8 :
Work 1 sc in each st while lightly pulling to form a slight oval. Do not stuff — keep flat (24)
Round 9 :
Facial cutouts: Using black yarn, embroider triangular eyes and nose. For eyes, use small triangular satin stitch shapes approx. covering 4-6 sts each; nose uses 3 sts. Mouth: chain 8, use surface slip stitch to create grin and attach ends to sides of pumpkin
Round 10 :
Stem: With green yarn, ch6, join to form small ring. Work 6 sc into ring, then work 2 rows of sc while decreasing at the top to create curl (6 then 4). Attach to top center of pumpkin and sew firmly
Info :
Pumpkins remain flat but slightly padded by post stitches giving dimensional ribbing; keep embroidery neat and symmetrical for consistent expressions across pumpkins
Round 11 :
Edge clean-up: 1 sc around pumpkin in orange to finish (24). Fasten off and weave ends
— Spiderweb (Make 3-5) :
Round 1 :
Using bright orange and 2.5mm hook. Ch4, join with sl st to form ring. Ch3 (counts as dc), 11 dc into ring, join (12 dc)
Round 2 :
Ch4 (counts as tr and ch1), *tr into next dc, ch1* around, join with sl st to top of ch4 (12 tr, 12 ch1 spaces)
Round 3 :
*In each ch1 space: (1 sc, ch5, 1 sc) into space creating long loops* around to form radial spokes (12 loops)
Info :
These ch5 loops create the large triangular spiderweb geometry. Keep loops even—use stitch marker at center radial to track beginning of round
Round 4 :
Working in loops: Join at base of first ch5 loop, *sc into base, (ch4, sc into next loop base)* repeat to create second concentric ring (24 sc total around bases)
Round 5 :
Switch to smaller decorative picot points: *ch3, sl st into outer chain at tip to make point* around at outermost tips (12 picots)
Info :
Blocking is important for web motifs — pin outer points wide and steam lightly or wet-block to keep web flat and star-shaped
Round 6 :
Edge tidy: sc around central ring and along spokes to firm the web. Fasten off and weave in ends
— Moon Doily (Make 3-5) :
Round 1 :
Using cream yarn and 3.0mm hook. Ch4 join into ring. Ch3 (counts as dc) and 11 dc into ring, join (12 dc)
Round 2 :
Ch4, *dc into next dc, ch1* repeat around, join (12 dc, 12 ch1)
Round 3 :
Into each ch1 space work (1 sc, ch3, 1 sc) to make lacy loops (12 loops)
Round 4 :
Round of dc: 2 dc in each loop space to expand (24 dc)
Info :
Moon centers are intentionally open to suggest a ring moon. Keep rounds flat and even—block each doily on a circle template if possible to preserve consistent size
Round 5 :
Space shell round: *sc in next 2 sts, ch5, sk next 2 sts* around (12 ch5 spaces)
Round 6 :
Work sc around entire outer edge, making 3 sc into each ch5 to stabilize (36 sc)
Round 7 :
Final tidy: sc around once more in BLO to create a slight ridge for joining (36)
Info :
These moon doilies provide neutral anchors in the runner. If you prefer a solid moon, fill center by working additional rounds of dc before shell rounds
— Bat (Make 6-8) :
Round 1 :
Using black and 2.5mm hook. Ch6 sl st to form small ring. Work 10 sc around ring (10)
Round 2 :
Make wing expansion: into next 3 sts work (hdc, dc, tr) to create one wing peak, skip 1 st and repeat on opposite side to mirror (approx. 16 sts after wing shaping)
Round 3 :
Join wing tips with picot: ch3, sl st into tip to form small ear points at wings. Fasten off and leave tail for sewing
Info :
Bats are small silhouettes intended as accents. Make a template to ensure consistent wing spacing when sewing between motifs
— Branches (Make 3-4 long pieces) :
Round 1 :
Using black and 2.5mm hook. Ch20, sl st to join into a ring (do not twist). Work 1 round of sc into each ch (20)
Round 2 :
Form major branch: sc across 6 sts, ch6, join back 3 sts with sl st to create fork, continue sc across remaining sts (20)
Round 3 :
Create smaller twigs: at chosen fork stitches work ch4, sl st into adjacent space to simulate twig. Repeat along branch for natural look
Info :
Branches should remain flat but have a lacy, irregular outline. Make several variations with longer or shorter forks so the runner reads naturally along its length
Round 4 :
Edge with 1 sc around each branch edge to tidy (approx. 40 sc after forks). Fasten off
— Joining & Edging (Final assembly rounds) :
Round 1 :
Lay out motifs in desired sequence (house, moon, web, pumpkin, house repeat). Pin motifs to blocking board in final arrangement. The runner in photo repeats a pattern of house/moon/web/pumpkin
Info :
Take time to test multiple arrangements — you can leave small gaps between motifs or overlap elements (pumpkin overlapping house edge, branches tucked under) to create depth
Round 2 :
Whip stitch join method: With black yarn and tapestry needle, join houses to nearby branches and moons by weaving in and out of outer edge stitches using small, evenly spaced whip stitches. Aim for 4-6 stitches per 2cm of seam
Round 3 :
Edge unifying border: once all motifs are tacked into position, work a continuous sc border along the entire runner length by joining motifs as you go. Starting at one end, pick up the outermost edge of each motif and work 1 sc for every visible sc edge, sl st across joins to move to the next motif. Maintain consistent tension for a neat linear border
Info :
Use matching color for the border (black recommended) to visually tie all motifs together. If you prefer a lighter border, use cream for a lacy contrast
Round 4 :
Add small decorative picot points at runner edges: *sc, ch3, sl st in base sc* around entire outer edge every 8-10 sc to create a subtle scalloped finish
Round 5 :
Final finishing: Weave in all ends neatly on the back, trim any stray fibres, and block the whole runner again to ensure flatness and clean joins
Info :
After joining, steaming gently over a cloth will settle joins without flattening textured details like spiderwebs and picots
— Optional Embellishments & Finishing :
Round 1 :
To enhance window glow, place a small square of lightweight yellow felt behind window openings and stitch in place from the back using small whip stitches
Round 2 :
For extra dimension on spiderwebs, use a strand of metallic thread and couch along one or two radial spokes with small stitches to catch light
Info :
Consider using a removable fabric adhesive square under motif centers if you plan to store runner between seasons; this keeps pieces flat and prevents shifting
This Halloween runner brings together vintage lacy doilies and spooky silhouettes for a playful seasonal centerpiece. Layered motifs create depth and charm while remaining light enough to drape beautifully across a table. Enjoy the meditative rhythm of small motifs and the satisfaction of assembling them into a long, dramatic runner. 🧶🎃 Add a few candles (battery-operated) and your table is ready for a cozy, spooky evening!