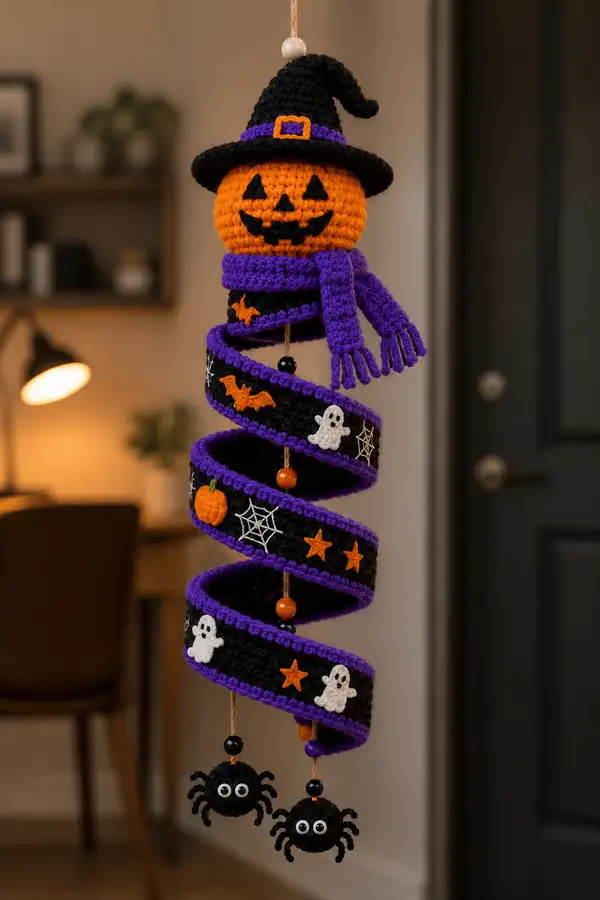
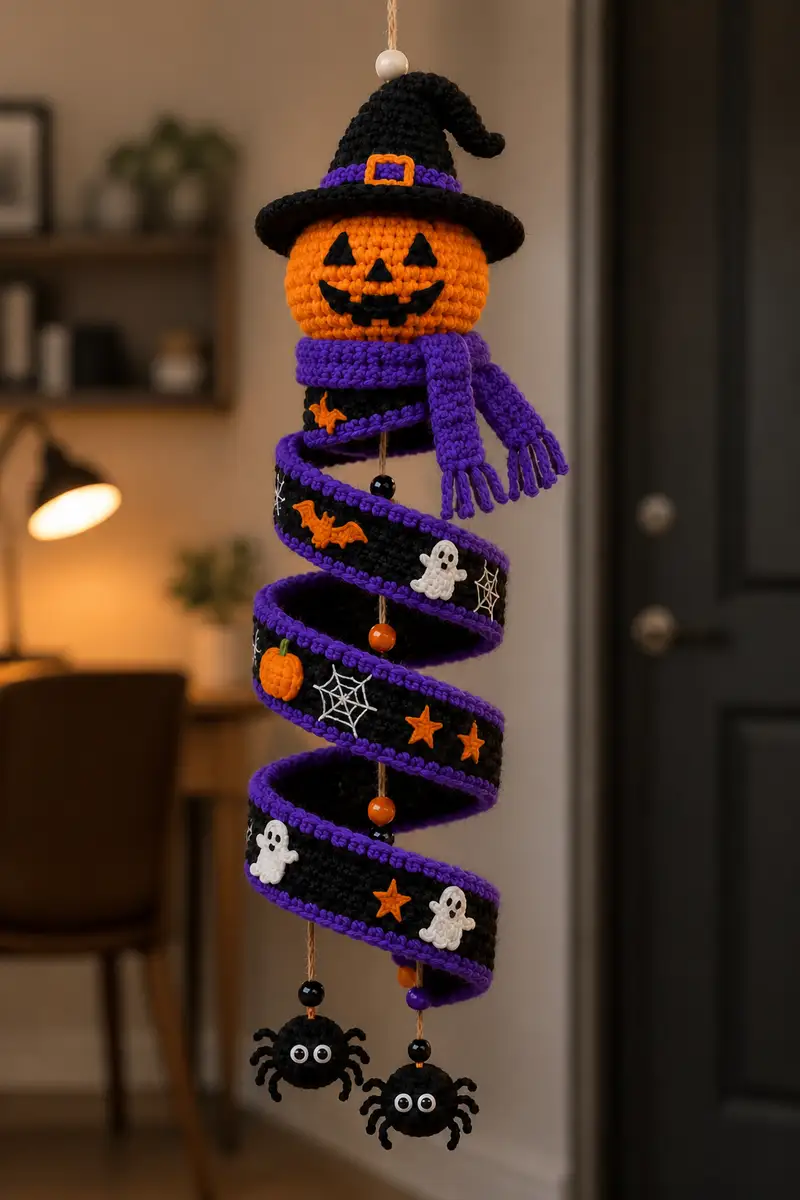
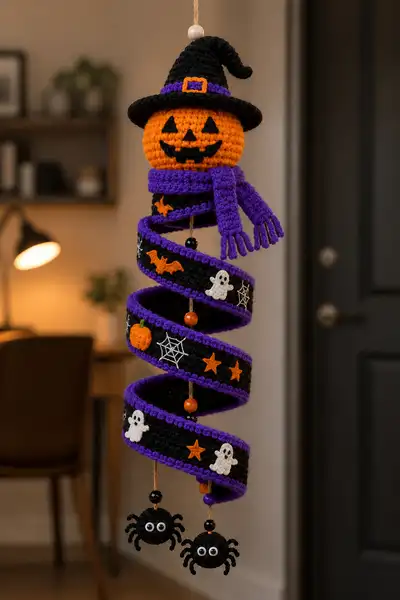
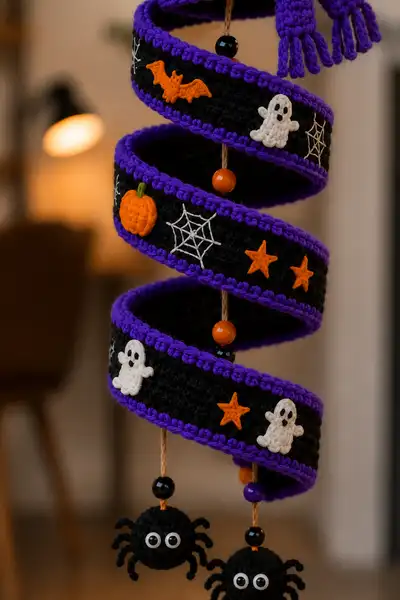
Create a whimsical Halloween hanging spiral featuring a smiling pumpkin head in a witch hat, a cozy purple scarf, a long spiraled ribbon banded in purple, playful appliques (ghosts, bats, pumpkins, stars, webs) and two dangling crocheted spiders. This decorative mobile blends simple amigurumi shaping with crochet appliques and beads for a festive, eye-catching seasonal accent. Ideal for home decor, doorways, or a fun holiday gift.
Progress Tracker
0% Complete
— Pumpkin Head :
Round 1 :
6 sc in magic ring (6)
Round 3 :
(1 sc, inc) x 6 (18)
Round 4 :
(2 sc, inc) x 6 (24)
Round 5 :
(3 sc, inc) x 6 (30)
Round 6 :
(4 sc, inc) x 6 (36)
Round 7 :
(5 sc, inc) x 6 (42)
Round 8 :
(6 sc, inc) x 6 (48)
Round 9-14 :
1 sc in each st (48)
Info :
Place safety eyes between rounds 12-13 approximately 8-10 stitches apart depending on desired expression. If embroidering face later, temporarily mark eye placement with pins to visualize mouth alignment.
Round 15 :
(6 sc, dec) x 6 (42)
Round 16 :
(5 sc, dec) x 6 (36)
Round 17 :
(4 sc, dec) x 6 (30)
Info :
Begin stuffing the head firmly but not overpacked - the pumpkin should keep a slightly rounded profile. Add a small amount of stuffing now and continue in later rounds to shape the pumpkin ribs.
Round 18 :
(3 sc, dec) x 6 (24)
Round 19 :
(2 sc, dec) x 6 (18)
Round 20 :
(1 sc, dec) x 6 (12)
Info :
Fasten off leaving a long tail to close and sew the opening. Add final stuffing and shape so the head has a gentle flattened base (this will help attach the hat brim). We will add subtle vertical ridges using surface slip-stitch or front loop rounds in the next section.
Round 22 (Optional Ridge 1) :
Join yarn at top of head and work 48 sc around in FLO to create a slight ridge (48)
Round 23 (Optional Ridge 2) :
Repeat 48 sc in FLO to deepen the ridge (48)
Info :
To emphasize pumpkin ribs: using a contrasting length of yarn or tapestry needle, embroider vertical lines from top center down toward the base in 6-8 evenly spaced segments. Make small tucks at the top to create a stem area if desired.
Face Embroidery :
Using black yarn, embroider two triangle eyes and a triangle nose centered between rounds 11-13. For the smile: create a jagged tooth line spanning rounds 11-14 with small satin-stitch fills to mimic carved jack-o-lantern teeth. Secure ends inside head.
— Witch Hat :
Round 1 :
6 sc in magic ring (6)
Round 3 :
(1 sc, inc) x 6 (18)
Round 4 :
(2 sc, inc) x 6 (24)
Round 5 :
(3 sc, inc) x 6 (30)
Round 6 :
(4 sc, inc) x 6 (36)
Round 7-12 :
1 sc in each st (36)
Info :
This section builds the cone-shaped crown. To get a slightly tapered witch hat, in round 10 and round 12 perform a small decrease of 6 sts spread evenly (for gentle taper) if you prefer a narrower top. Otherwise keep straight walls.
Round 13 :
(4 sc, dec) x 6 (30)
Round 14 :
(3 sc, dec) x 6 (24)
Round 15 :
(2 sc, dec) x 6 (18)
Info :
Stop before the crown closes completely; you may want to leave a small opening to attach to the top of the pumpkin with sewing, or insert a small piece of cardboard to stabilize the brim shape.
Brim Start (Join) :
Work 60 sc evenly around the base of the crown to create a wide brim (60)
Round 16 :
1 sc in each st (60)
Round 17 :
(4 sc, inc) x 12 (72)
Round 18 :
1 sc in each st (72)
Info :
To give the brim a firm edge, work one round in BLO using a slightly tighter gauge or a smaller hook. Optionally insert a thin cardboard circle into the brim between rounds 16-18 for extra stiffness, slipping it inside before final rounds are closed.
Round 19 :
Switch to purple yarn and join for hat band: 1 sc in each st for one round (72)
Round 20 :
Using yellow/gold yarn, embroider or crochet a small buckle: 6 sc in magic ring, sl st to join, fasten off and sew to front center of the band.
Info :
Stuff the crown lightly if you want a rounded top; otherwise leave it soft to let it flop a bit. Sew the hat base to the pumpkin top through a few stitches and secure firmly. Hide knots inside the head.
— Scarf :
Round 1 :
Using purple yarn, fsc 40 (or an even number matching desired length for wrap) and join into round without twisting (40)
Round 2-12 :
1 sc in each st around (40)
Info :
Work until scarf length measures about 25-30 cm when laid flat. The pictured scarf is wrapped around the neck twice. Add extra rounds if you want a longer scarf. Keep tension slightly loose so scarf drapes naturally.
Fringe :
Cut 5 strands of purple yarn 8 cm long for each fringe cluster. Fold in half and use a crochet hook to pull loop through edge and knot to secure. Add 6-8 fringe clusters on each scarf end and trim evenly.
Info :
To attach scarf to head: wrap around neck area (between rounds 17-19 of head) and sew a few stitches under the scarf to hold it in place. Alternatively glue discreetly on the inside for a very secure hold.
— Spiral Ribbon (Main Body) :
Info :
This long spiraled ribbon is made as one continuous tube (a round-joined long strip) worked in black with purple edge rounds. We will create a foundation chain to reach desired length, join into a loop, then work sc rounds building height, finishing with purple edging rounds. The project pictured uses about 6 coils; aim for total length about 180-220 cm depending on coil size.
Module Preparation :
Work a foundation chain of 200 (or make multiple smaller foundation chains and join them until you reach the total length desired). Join the chain into a loop being careful not to twist (200)
Round 1 :
Working into each chain around, 1 sc in each chain (200)
Round 2-16 :
1 sc in each st (200)
Info :
Rounds 1-16 build the main height of the strip; feel free to work more rounds if you want taller coils. Keep one stitch marker at the start of each round to keep track since the round is long. If your stitch count is different because of gauge, maintain consistent stitch count for every round.
Round 17 :
Switch to purple yarn and work 1 sc in each st around (200)
Round 18 :
1 sc in each st BLO for a defined purple ridge (200)
Info :
For a neat edge on both sides: fold strip in half lengthwise and work one round of slip stitches along each side edge in purple, or simply work purple sc rounds at both top and bottom edges by turning the strip and working rows across the width before joining for the next round. The sample uses a purple edge on both top and bottom; ensure symmetrical finishing.
Repeat Module :
To create the spiral look, you may work the long strip as one continuous length and then coil it onto the hanging cord. If you prefer modular control, create 6 modules each 33 chains long joined end-to-end; each module uses the same set of 18 rounds described above. Join modules invisibly using sl st or mattress stitch to achieve the full 200ch length.
Round 19-40 :
Continue working 1 sc in each st (200) to reach desired strip height/length (add or reduce rounds in multiples to control coil depth)
Info :
When assembling, coil the strip around a central cord leaving even spacing between coils. Use a few long stitch anchors through the strip and cord to hold shape while maintaining a floating spiral effect.
— Spiral Edge Reinforcement and Coiling Tricks :
Round 41 :
Switch to purple and work a finishing edge by inserting hook in outermost edge stitch and working 1 sc in each stitch to create a decorative border (200)
Round 42 :
Fasten off and weave in ends. Repeat a matching purple ridge on the other long edge if not done earlier.
Info :
To make each coil sit apart and create a spiral, use a central hanging cord threaded through the middle of the strip and add beads between coils for spacing (see assembly). Adjust bead placements and coil tightness to vary spacing. Steam-block lightly if you need to relax stitches, but avoid over-steaming acrylic yarn.
— Applique Ghost (Make 4-6) :
Round 1 :
Using white yarn, 6 sc in magic ring (6)
Round 3 :
(1 sc, inc) x 6 (18)
Round 4 :
Work 18 sc in a flat row then fold to shape a body and use short rows to create arms: ch 2, turn and sc 2 into ch (creates arm), return to body and continue sc to finish shape. (approx 18 total worked as small flat applique)
Info :
Hand embroider tiny black eyes and mouth to create expressions. Attach ghosts to the black strip spaced evenly, sewing from the back so stitches are invisible on the front.
— Applique Pumpkin (small) :
Round 1 :
Using light orange yarn, 6 sc in magic ring (6)
Round 3 :
(1 sc, inc) x 6 (18)
Round 4 :
Work 18 sc in a small oval shape flattening the base and using a few ss to create a slightly puckered look. Sew a small green stem (ch 4, sc back along chain) to the top.
Info :
Stitch small pumpkin to the strip using matching yarn and add tiny embroidered segments if desired to mimic pumpkin ribs.
— Applique Bat :
Round 1 :
Using orange or black yarn, 6 sc in magic ring (6)
Round 3 :
Create two small flat wing shapes: ch 6, sc back across chain to form wing, attach to body and repeat on other side, then fasten off and sew wings slightly flared.
Info :
Appliques are intentionally small and flat to sit on the ribbon without distorting the spiral. Make extras for variety and scatter them around the coils.
— Embroidered Spider Web :
Info :
Using white thread or thin yarn, draw a small circle on the strip where you want the web. Stitch spokes from a center point to the outside edge (5-6 spokes) then connect with small loops between spokes using an overcast/whip technique to form a web. Secure at the back.
— Stars and Small Decorations :
Star :
With orange yarn ch 5, sl st into first to make ring, *ch 3, sl st in ring*, repeat 5 times to create 5 points then weave back through centers to tighten and shape. Sew onto strip.
Info :
Make 6-10 stars in various sizes. Place them thoughtfully so the visual weight is balanced around the spiral.
— Spider Body (Make 2) :
Round 1 :
6 sc in magic ring using black yarn (6)
Round 3 :
(1 sc, inc) x 6 (18)
Round 4-5 :
1 sc in each st (18)
Round 6 :
(1 sc, dec) x 6 (12)
Info :
Stuff lightly before final decreases so spider is round but slightly soft. Fasten off leaving long tail for sewing onto the bottom cord. Sew on small safety eyes or embroider white/black eye dots centered on the face.
Legs (Make 8 per spider) :
With black yarn and a small hook, ch 10, sc back along chain leaving tail to sew. Bend each leg into a gentle curve when attaching. Attach four legs each side of the body spaced evenly. Use a dab of glue at the base of each leg for extra security if desired.
Info :
For sturdier legs, insert thin wire inside each crocheted leg or twist pipe-cleaner inside before final knotting. Bend slightly for a cute posed look.
— Hanging Cord and Bead Spacers :
Info :
Cut a length of cord/twine about 150-200 cm long depending on desired overall drop. Starting at the top: string a decorative bead, tie a strong knot, then pass cord through center of spiral strip near the top coil (through the inner loops created earlier) and continue downward, adding larger beads between coils for spacing. Tie beads on cord to hold coil positions approximately every 25-35 cm depending on coil diameter.
Bottom Spider Attachment :
At the bottom of each lower coil thread separate short cords (approx 15-20 cm) for the two spiders, string alternating beads for a playful look and knot securely above each spider. Sew or hot-glue spider body to cord finger-tight above final bead, then wrap and stitch securely around cord through spider bottom to keep it centered.
Info :
Make sure knots are neat and hide tails by weaving into neighboring stitches. Test hang and adjust bead spacing so the spiral hangs evenly and beads rest between coils rather than slipping through gaps.
— Final Assembly and Finish :
Step 1 :
Position the pumpkin head at top of the central cord. Insert the cord into the very top center of the head and anchor with a tight knot inside the head. Sew a few invisible whip stitches from head base to cord to secure. Add a bead above the head on the cord as a stopper.
Step 2 :
Attach the hat to the pumpkin by matching the hat base to the head top; sew through a few stitches around the base of the hat into the head to prevent shifting. Hide ends inside the head.
Step 3 :
Wrap and position the scarf around the neck and secure with a couple of hidden stitches at the back. Let fringe hang to one side as pictured.
Step 4 :
Thread the spiral strip over the cord, coil it into a gentle spiral and secure positions with strategically placed sewing anchors through the strip and cord at 6-8 points along the length. These anchor stitches should be hidden under appliques if possible.
Step 5 :
Sew appliques to the strip using matching yarn. Place ghosts, stars, pumpkins and bats on alternating coils. Embroider webs in spare spaces. Balance colors to keep visual weight symmetric.
Step 6 :
Attach the two spiders to the very bottom as described earlier. Add final beads and a loop at the top of the cord for hanging. Trim and weave in all yarn ends securely inside pieces to finish neatly.
Info :
If the spiral droops too much: add thin wire inside the spiral tube near each coil to encourage spring and maintain the shape. Glue or stitch wire ends securely away from view. For outdoor display, consider sealing wooden beads with a waterproof finish.
This delightful Halloween spiral brings together a cheerful jack-o-lantern, a floppy witch hat, and playful dangling spiders into a whimsical hanging decoration! Each stitch builds personality—embroidered faces and tiny appliques add charming details that make the piece pop. I hope stitching this pattern brings you as much playful satisfaction as hanging the finished spiral brings to your autumn decor. 🧶🎃🕷️