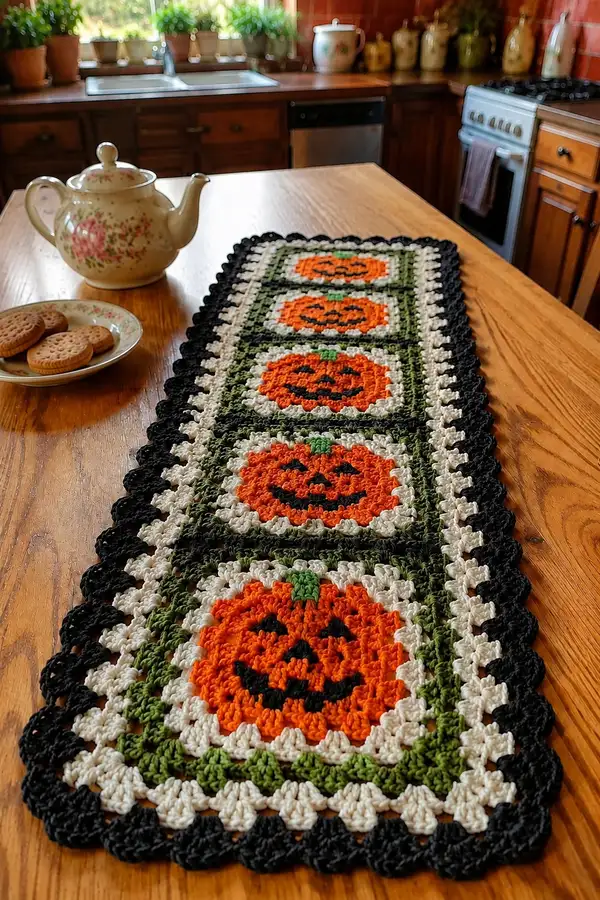
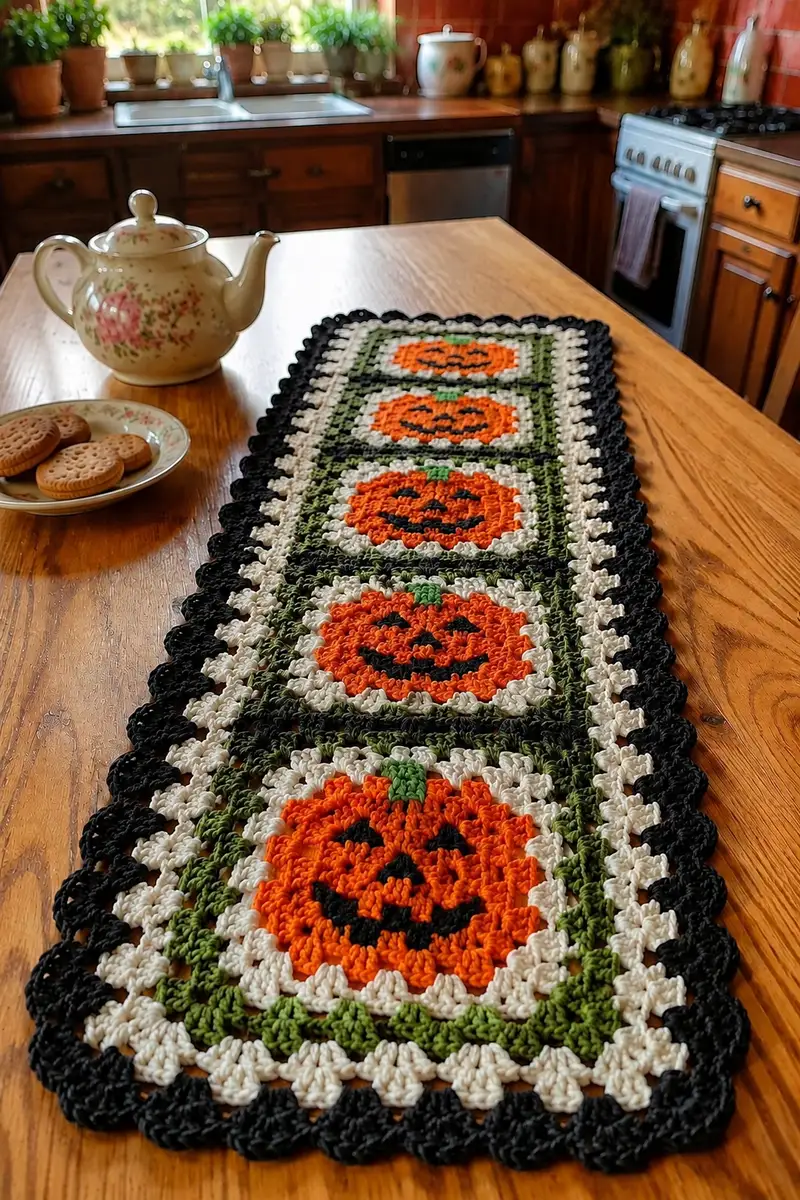
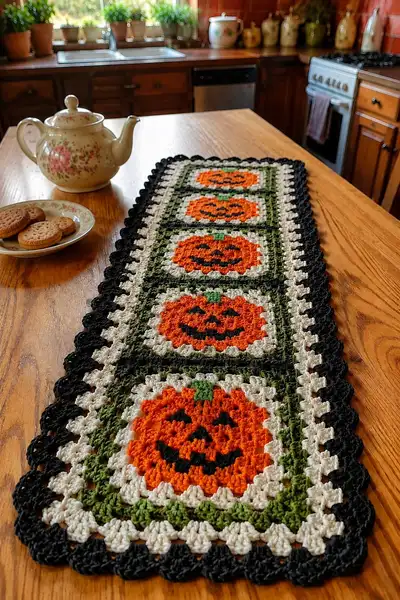
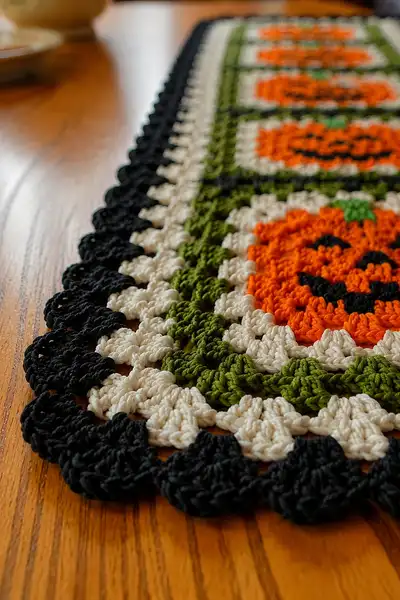
A long, charming Halloween table runner made from repeated pumpkin granny motifs in bright orange, cream, olive green and black. This runner features five smiling jack-o-lantern squares joined with contrast green sashing and finished with a scalloped black border for a crisp, vintage-inspired look. Perfect for a dining table centerpiece or mantel accent—detailed, step-by-step instructions guide you through each motif, joining step and edging.
Progress Tracker
0% Complete
— Pumpkin Motif (Make 5 or as many as you want to lengthen runner) :
Round 1 :
Using orange yarn. Make a magic ring, ch2 (counts as first dc), work 11 dc into ring, pull tight. Join with sl st to top of ch2 (12 dc)
Round 2 :
Ch2, 1 dc in same st, *1 dc in next st; rep from * around to end (12 dc) — this round evens your foundation, do not increase
Round 3 :
Ch2, (1 dc, inc) around evenly: *1 dc in next st, 2 dc in next st; rep from * 6 times total (18 dc)
Info :
Maintain even tension to keep round flat. Use a stitch marker at the beginning of each round to help keep track of round starts.
Round 4 :
Ch2, *(2 dc in next st, 1 dc in next st)* repeat 6 times (24 dc)
Round 5 :
Ch2, *(3 dc, 2 dc in next st) x 6* (30 dc)
Info :
At this point the pumpkin circle is taking shape. If you prefer a slightly smaller pumpkin, stop here and move to the pumpkin face embroidery step later.
Round 6 :
Ch2, *(4 dc, 2 dc in next st) x 6* (36 dc)
Round 7 :
Ch2, 1 dc in each st around (36 dc) — even round to stabilize the circle
Round 8 :
Ch1, switch to black yarn for facial embroidery placement rows: 1 sc in each st around to create a tight surface for embroidery (36 sc)
Info :
Change to black yarn by finishing last orange stitch with black and carrying orange behind where comfortable. This sc round creates a firm surface for later embroidered eyes/mouth. Alternatively, use tapestry crochet for face shaping if desired.
Round 9 :
Ch1, 1 sc in next 4 sts, sl st to create small indent where jack-o-lantern mouth will begin; work 1 sc in next 4 sts (36 sc) — this round marks middle face row, do not fasten off
Round 10 :
Switch back to orange yarn: ch2, 1 dc in each st around (36 dc)
Info :
If you prefer to embroider the face instead, place safety pins or washable markers at approximate positions: eyes at about 1/3 and 2/3 of the width, mouth centered below. This helps when the square later converts to a granny square.
Round 11 :
Ch2, *(5 dc, 2 dc in next st) x 6* (42 dc) — gentle outward increase to ensure pumpkin fills the square area
Round 12 :
Ch2, 1 dc in each st around (42 dc)
Round 13 :
Change to green for small stem. Ch1, sc in next 4 sts, ch2, turn; working back-and-forth along a small section of the round make 6 sc rows to form a short stem (approx 3 rows of 6 sc), fasten off and weave in ends. This creates a tiny raised stem at top of pumpkin.
Info :
Stem placement: choose one stitch at top center of pumpkin circle. If you plan to convert the circle to a square immediately, bury the tail toward the future corner to hide ends.
Round 14 :
Return to orange. Ch2, 1 dc in each st around for 2 rounds (42 dc) to smooth the area after stem insertion
Round 15 :
Ch1, switch to black and use surface embroidery with black yarn to stitch two triangular eyes and a smiling mouth: use satin fill for triangles and a simple backstitch / chain stitch for mouth. Secure and weave ends. (Face placement over rounds 6-10 centered)
Info :
Embroidery tip: Use a blunt tapestry needle and stretch the orange piece slightly when embroidering to avoid puckering. Keep stitches small and even.
Round 16 :
Fasten off orange leaving a 6-8 inch tail that you will use later to join this motif to background rounds. Weave in extra ends now or leave the tail to be buried in joining seams.
— Square Conversion & Inner Background Rounds :
Info :
Now we will convert the circular pumpkin into the first set of granny-style square rounds so each pumpkin sits in a square frame. Work these rounds around the pumpkin circle, treating the previous rounds as a float you will work around. Use cream/ivory for the immediate background so the pumpkin pops.
Round 1 (Square Round A) :
With cream yarn join at any point along the outer orange round with sl st, ch3 (counts as first dc), *2 dc, ch2, 3 dc all in the same position to form first corner.* Move along the orange circle and place groups of (3 dc) separated by ch1 spaces approximately every 7-8 stitches to create 4 rough corner points. Aim for 4 corners spaced evenly. (Corner groups: 4 corners, and 3-dc groups between corners — stitch count variable depending on spacing)
Info :
The first square round will be uneven because we are approximating a circular shape into corners. Don't worry if numbers don't look square at first; the next rounds will even it out. Use fewer or more 3-dc groups between corners to balance side stitch counts.
Round 2 (Square Round B) :
Ch3, 2 dc into same ch2 corner sp, *ch1, (3 dc) in next ch1 sp; rep across until you reach ch2 corner sp; in corner: 3 dc, ch2, 3 dc.* Repeat this around, join with sl st to top of ch3. After this round each side should have an even number of 3-dc clusters (aim for 12 clusters per side). Count clusters and adjust if one side feels short.
Round 3 :
Ch3, (3 dc) in each ch1 sp across each side, and in each ch2 corner work (3 dc, ch2, 3 dc). (Maintains square with consistent cluster counts per side)
Info :
After three rounds of granny clusters, your pumpkin should be centered inside a neat square of cream clusters. If your pumpkin appears off-center slightly, shift the starting join point and try again on the next motif — minor variance is acceptable and will be hidden by the sashing.
Round 4 :
Change to olive green for the immediate sashing frame. Join with sl st to any ch1 space on a side, ch3, 2 dc in same space, *ch1, (3 dc) in next ch1 sp* across to corner, (3 dc, ch2, 3 dc) in corner; repeat around. Join with sl st to top of ch3. (This creates a green frame one round thick)
Round 5 :
Ch3, 1 dc in each st across side clusters, in corners work (3 dc, ch2, 3 dc). After this round your square should measure approximately 5.5" to 6" depending on yarn and tension — this is a good check for gauge. If your squares are too small, add an extra rounding of cream before the green frame.
Round 6 :
Change to cream: join in any ch1 sp on a side and work 2 rounds of standard granny cluster pattern: ch3, work (3 dc) in each ch1 sp and (3 dc, ch2, 3 dc) in corners. This builds the finished square body. At the end of these two rounds you should have a square with three distinct color rings: pumpkin orange center, cream inner background, olive green frame, then cream outer background.
Info :
We recommend making 5 pumpkin squares for the runner pictured (length depends on your table). Make an extra square or two to practice joining technique and to account for blocking shrinkage.
Round 7 :
Fasten off, leaving 6-10" tail for joining. Weave in the rest of ends. Repeat motif to create required number of pumpkin squares. Make one motif at a time, blocking each flat before joining for best results.
— Joining Squares & Sashing (Long Runner Construction) :
Info :
Squares are joined with an olive green joining strip that acts like a sashing between motifs horizontally. We will join squares with a single crochet seam worked through the back loops of adjacent cream rounds to give a subtle ridge.
Step 1 :
Lay squares right sides up in final order. With olive green and yarn needle or hook, align two adjacent squares and count clusters along the edges; insert hook through back loop of cluster on square A and back loop of corresponding cluster on square B.
Round J1 :
Using 4.0 mm hook and olive green: Join with sl st at corner ch2 space, ch1, sc through both loops of next cluster on both squares across the side (sc seam), sc in each cluster across until the next corner, sc in corner ch2 spaces through both layers, continue along entire seam. Fasten off and weave. (Number of sc equals number of clusters on that side — typical 12 sc per side)
Info :
To make seams unobtrusive, use a contrasting olive that blends with the frames. If you prefer less visible joins, use cream, but note sashing contrast will be lost.
Round J2 :
For horizontal runner: Join all squares in a row using the same sc through both layers method. After joining 5 squares you will have one long strip. We recommend blocking the strip flat before adding the outer border rounds.
Round J3 :
If you want a wider green divider between squares, add one or two rounds of olive green granny clusters linking across the seam before the sc join. Work (3 dc) clusters across seam spaces with ch1 between clusters to make a visible sash.
Info :
Check alignment frequently; shifting by one cluster during joins will create a visible skew over several squares. Pin and baste if needed before permanent joining.
— Runner Wide Field Rounds (Create unified rectangular field around motifs) :
Round 1 :
With cream yarn join at any mid-edge on one long side of joined strip, ch3, 2 dc in same ch1 sp to start the first round of outer field. Work (3 dc) clusters evenly around the entire long strip, creating corners as (3 dc, ch2, 3 dc) at each corner. Aim for equal distribution along the long edges — typically you will be adding 8-12 clusters per side depending on gauge.
Round 2 :
Ch3, 3 dc in each ch1 sp across and (3 dc, ch2, 3 dc) in corners. Join with sl st. This evens and squares the runner's outer field.
Info :
Because the runner is long, maintain a flat workspace as you add rounds to avoid ripples. Blocking after every 2-3 rounds helps keep edges square.
Round 3 :
Change to olive green: ch3, work 2 rounds of olive green clustering (3 dc clusters) around the field to create a consistent double-frame that echoes the sashing between pumpkins. Corners remain (3 dc, ch2, 3 dc).
Round 4 :
Change to cream: Work 3 rounds of cream granny clusters. On the last cream round ensure ch1 spaces line up evenly; if necessary add or skip a 3-dc cluster to keep counts even and sides straight.
Info :
Measure your runner as you progress. The pictured runner with five pumpkins measures approximately 42-48 inches long by 8-9 inches wide depending on yarn and tension. Adjust rounds to achieve the width you want.
Round 5 :
After cream rounds, join black yarn at any corner ch2 space with sl st. Ch1 and sc evenly around through back loops only of the outermost clusters to create a crisp turning row and to anchor the scalloped edge that follows. Typical sc count will be 4 sc per cluster set across sides — count and keep even.
Info :
This sc round in black provides a strong contrast and reserve line for the scalloped edge. Work tightly so scallops have a defined edge.
— Black Scalloped Edge (Final Decorative Border) :
Round S1 :
With black yarn and 4.0 mm hook, join with sl st to any sc. Ch1, *skip next sc, in next sc work (5 dc) shell, skip next sc, sl st in next sc* repeat around. Work shells directly into sc round. In corners, work (5 dc shell, ch2, 5 dc shell) to give generous corner scallops. Join with sl st to top of first shell.
Info :
Shell count and spacing determines the visual rhythm. If shells are too sparse, work 4 dc shells instead of 5 dc to tighten spacing. Keep shells consistent all the way around.
Round S2 :
Optional depth: For a more pronounced scallop, after S1 work another round of shells staggered: sl st into middle of a shell, ch1, (5 dc) in same middle st to create a two-tier shell. Repeat in each shell center around. Fasten off and weave ends.
Info :
Two-tier scallops add a vintage, lacy feel like the pictured runner. Use single-shell if you prefer a flatter edge. Block scallops individually to encourage shells to hold a nice rounded profile.
Round S3 :
Weave in all tails neatly along the back of the runner. If you carried yarn inside any long floats, secure those tails now. Trim any stray ends.
— Alternative Edging Options (Customization Info) :
Info :
If you prefer a crocheted fringe, replace scallops with a fringe made of 4-strand tassels spaced every 4 clusters. For a tighter finish use a picot round: sc around then *ch3, sl st in third ch* to create tiny points.
Option A - Picot Edge :
After black sc round: ch3, sl st in third ch every 2 sc around; make corner adjustments by doing ch3, sl st into corner twice. Fasten off and weave in ends.
Option B - Double Shell (Alternative) :
After S1: sl st to center of shell, ch1, (dc, tr, dc) to form a pointed center inside each shell. This creates a scallop with a pointed interior for extra texture.
Info :
Try each option on a swatch before committing to the full runner. Swatches let you compare how edges drape and whether you need more or fewer rounds to match pictured proportions.
— Finishing, Blocking & Care :
Info :
Block finished runner flat: pin to blocking mat at desired rectangle, spray lightly with water and allow to dry overnight. For cotton yarn, wet-blocking is best to open the stitch texture and flatten seams.
Step :
Weave in all ends using a yarn needle. Secure joints where needed with tiny whipstitches on the back for durability. If you expect heavy use, sew additional reinforcement across each seam under the runner's top clusters with matching thread.
Care :
Hand wash cold or gentle machine wash in garment bag on gentle cycle. Reshape while damp and air dry flat. Cotton yarns may stiffen after wash—soften with a gentle fabric softener when rinsing if desired.
Info :
For storage, fold gently with tissue paper to protect scalloped edges and avoid heavy creasing. Keep away from bright sunlight to prevent yarn fading during storage.
This Halloween table runner turns a handful of granny-inspired motifs into a charming, cohesive centerpiece you’ll bring out every October. The smiling pumpkins are playful and nostalgic, while the layered scalloped border finishes the piece with a handmade flourish. I hope you enjoy stitching each pumpkin and watching the runner grow — it’s a delightful seasonal project that’s both decorative and functional. 🎃🖤🧶