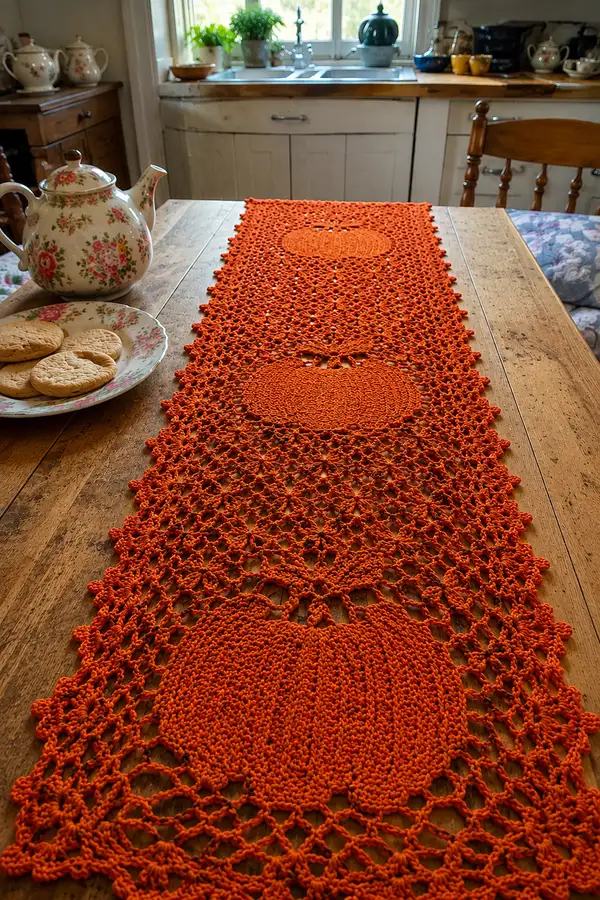
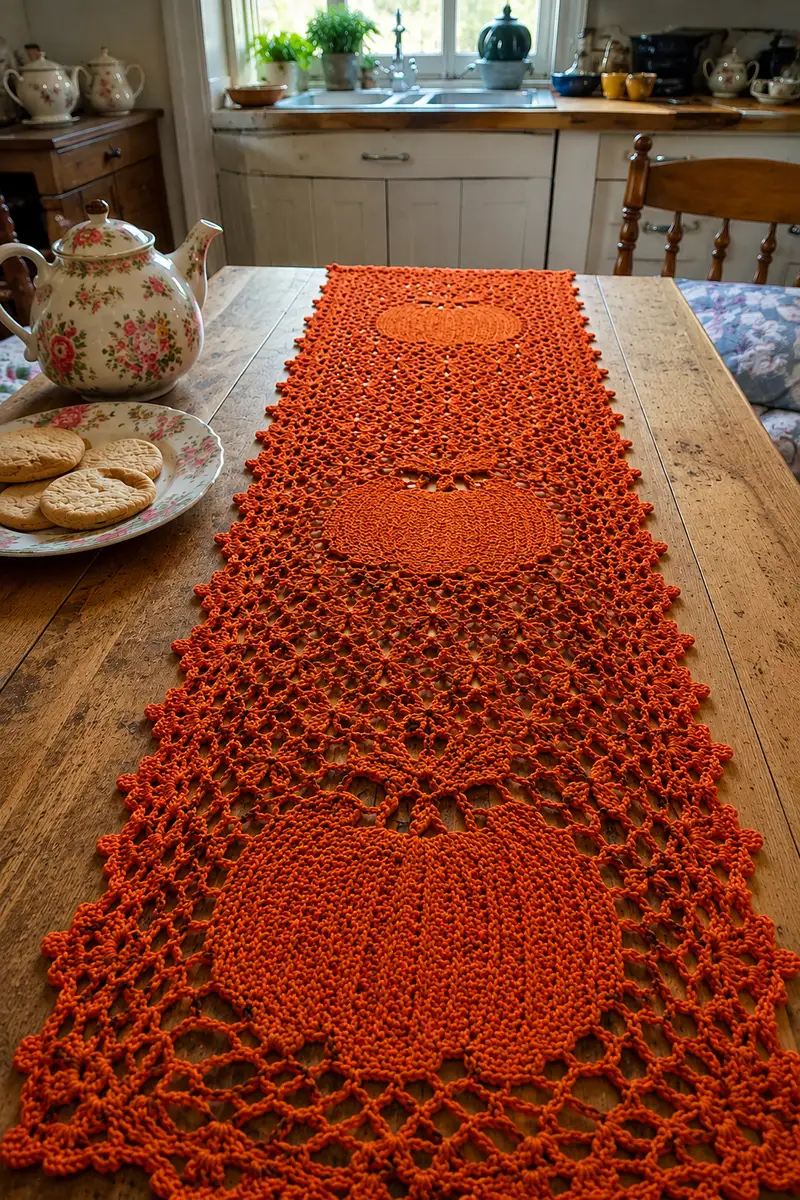
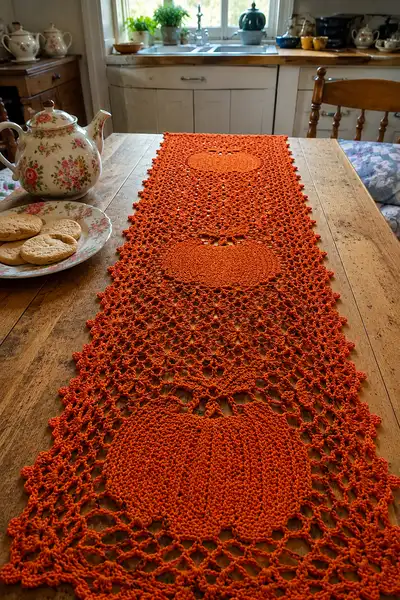
A deep-orange lace table runner featuring three flat pumpkin medallions connected by a delicate openwork lattice. This elegant autumn accent is crocheted in mercerized cotton for crisp stitch definition, with a scalloped bobble edge and repeating mesh panels that drape beautifully down a dining table.
Progress Tracker
0% Complete
— Special Notes :
Info :
Pattern is written for one pumpkin medallion unit and one mesh panel repeat. Make 3 pumpkin medallions and join with mesh panels. Work in continuous rounds for pumpkin medallions (no turning) and in joining rounds/rows for mesh. Gauge is not critical but influences finished dimensions. Use 3.5mm hook for crisp stitch definition.
— Pumpkin Medallion (Make 3 identical) :
Round 1 :
6 sc in magic ring (6)
Round 3 :
(1 sc, 1 inc) x 6 (18)
Round 4 :
(2 sc, 1 inc) x 6 (24)
Round 5 :
(3 sc, 1 inc) x 6 (30)
Round 6 :
(4 sc, 1 inc) x 6 (36)
Round 7 :
(5 sc, 1 inc) x 6 (42)
Round 8 :
(6 sc, 1 inc) x 6 (48)
Round 9 :
(7 sc, 1 inc) x 6 (54)
Round 10 :
(8 sc, 1 inc) x 6 (60)
Info :
At this point you have a round disk. To shape the pumpkin into a slightly flattened oval, we will create controlled increases and later subtle decreases on opposing sides. Count your stitches at the end of the round to confirm 60 sts.
Round 11 :
1 sc in each st (60)
Round 12 :
1 sc in each st (60)
Round 13 :
1 sc in each st (60)
Round 14 :
Change to BLO for subtle ridge shaping. 1 sc in each st BLO (60)
Round 15 :
1 sc in each st (60)
Round 16 :
(6 sc, inc) x 8 (68)
Round 17 :
1 sc in each st (68)
Round 18 :
(7 sc, inc) x 8 (76)
Round 19 :
1 sc in each st (76)
Info :
We now have a larger round. To create the flattened oval pumpkin look, we'll increase around the two central quarters and keep the sides slightly shorter. Imagine dividing the round into 4 segments; rounds 20-24 selectively increase two opposite segments.
Round 20 :
(3 sc, inc) x 12 (88) - work increases across the segments you want to bulge (front and back), leaving side segments unchanged by distributing increases evenly within those quarters
Round 21 :
1 sc in each st (88)
Round 22 :
(4 sc, inc) x 12 (100)
Round 23 :
1 sc in each st (100)
Round 24 :
(5 sc, inc) x 12 (112)
Info :
Now the disk has grown; we will flatten slightly by decreasing two opposite arcs to form the pumpkin lobes effect. Work decreases on two opposite quarters while keeping the other quarters in even rounds to create the side indentation typical of pumpkins.
Round 25 :
(8 sc, dec) x 8 (96) - distribute 8 dec evenly around the two opposite quarters to pull in the sides
Round 26 :
1 sc in each st (96)
Round 27 :
(6 sc, dec) x 12 (84)
Round 28 :
1 sc in each st (84)
Round 29 :
(4 sc, dec) x 12 (72)
Round 30 :
1 sc in each st (72)
Info :
At this point the medallion should read as a flattened, oval pumpkin. If it appears too circular, work one more targeted decrease round across the two side-quarter arcs to deepen the indentation. Keep the center fairly flat by maintaining even rounds.
Round 31 :
(2 sc, dec) x 18 (54)
Round 32 :
1 sc in each st (54)
Round 33 :
1 sc in each st BLO to create a faint ridge defining the pumpkin's top (54)
Round 34 :
Work a decorative concentric round: *ch1, sk 1 st, sc in next* around to give a subtle textured ring (54)
Round 35 :
Optional embroidered vein anchors: using contrasting yarn, embroider 6 shallow radiating veins from center to edge spaced evenly (do not disrupt outer rounds)
Round 36 :
Fasten off and weave in ends. Make 3 pumpkin medallions total following identical rounds. Block flat to shape, pinning gently to emphasize the flattened oval if needed.
— Mesh Lace Panel (Make 2 long panels to connect 3 pumpkins) :
Info :
Mesh panels are worked as long rectangular strips that will be joined to the pumpkins in the join-as-you-go step. Each mesh panel begins with a foundation chain whose length is a multiple of 8 plus 4 for edge symmetry. For this runner make foundation chain = 120 chains (adjust length if you want wider/narrower). Using 3.5mm hook.
Round 1 :
Ch 120, turn, sc in 2nd ch from hook and each ch across (119 sc) - foundation row (119)
Round 2 :
Ch4 (counts as tr), sk1, *tr in next ch, ch2, sk2* repeat across, ending with tr in last st, ch1, turn (creates first open diamond anchors)
Round 3 :
Ch1, sc in first tr base, *ch5, sc in top of next tr* across (creates chain-5 loops forming mesh) - keep loops consistent
Round 4 :
Ch3 (counts as dc), *5 dc in each chain-5 loop, ch1, sl st in next sc base* repeat across. This creates raised clusters that become the lattice intersections
Round 5 :
Ch1, sc in base, *ch7, sc in top of next cluster* across (lengthens diamond to match lace in photos)
Info :
From here the mesh pattern repeats in bands. Each band is 4 rounds tall (foundation of chains, loop row, cluster row, loop-extending row). Repeat bands until desired length plus allowances for joining to pumpkins. Count bands: for pictured runner, make 18 bands between pumpkins and 6 bands at each end; adjust to taste.
Round 6 :
Ch3, *5 dc in each ch7 loop, ch1, sl st into next sc base* across
Round 7 :
Ch1, sc in base, *ch7, sc in next cluster top* across
Round 8 :
Ch3, *dc between the 5-dc cluster groups to form diagonal stitches creating diamond outlines* across
Round 9 :
Repeat Round 6 (5 dc clusters in each ch7 loop) to reinforce lattice (this deepens the texture seen in the photo)
Round 10 :
Ch1, sc in base and into spaces to keep edge even (work evenly across), prepare to shift to slightly narrower mesh for the area that will butt against a pumpkin edge
Info :
Measure the panel width and mark center points for pumpkin placement. The pumpkins will sit centered across the panel width; leave an unjoined gap (approx 6–10 bands) between each pumpkin for the photo-perfect negative space.
Round 11-30 :
Repeat the 4-round mesh band sequence (Round 6-9) for 20 rounds (5 full bands) then adjust to 18 more bands as needed to reach the desired spacing between pumpkins. Keep stitch counts even across each repeat and measure periodically to maintain consistent width.
Round 31 :
When approaching the zone that will align with the pumpkin edge, work anchoring loops: ch1, sc in every other sc across to create small anchoring points (this provides places to join pumpkin medallion edges)
Round 32 :
Ch3, dc across into sc and into chain spaces to create a stable edge for joining (count should match width and maintain the diamond pattern alignment)
Round 33-60 :
Continue repeating mesh band sequences until your panel measures the length needed to connect one pumpkin to the next, including allowances for three pumpkin placements and the end panels. For the pictured runner this equates to approximately 40 mesh band rounds total across each long panel (totaling 10 bands x 4 rounds each).
Info :
Keep the mesh tension even and avoid pulling too tightly when making the chain loops; they must remain open to show the lace diamonds. If your chain-7 loops become smaller, loosen up and try a slightly larger hook for future panels.
— Join-As-You-Go Pumpkin to Mesh (Repeat for each pumpkin location) :
Info :
You may either sew pumpkins to the mesh panels using mattress/whip stitch, or join-as-you-go using slip-stitch anchor points. The instructions below describe a join-as-you-go approach to produce a flat, neat seam that matches the look in the photographs.
Round 1 (Join Pass) :
Position pumpkin medallion over the marked panel center. With right sides facing up, align the pumpkin outermost sc round (Round 34 above) with the mesh anchoring round (Round 31 above). Insert hook into chosen sc on pumpkin and corresponding loop on mesh, sl st to join, ch1, sl st into next pumpkin st and next mesh anchor, repeat around the selected half circumference until pumpkin is secured at two tension points (approx 24 sl st joins total depending on gauge)
Round 2 (Secure) :
Working around the remainder of the pumpkin edge, pick up on both pumpkin and mesh edges with sc stitches evenly spaced: *sc in pumpkin st, sc in mesh space* around until circumference is attached. Aim for even spacing (approx 54-72 sc depending on pumpkin rounds) and do not stretch mesh; ease the pumpkin edge to fit.
Info :
If your pumpkins are slightly smaller than the mesh opening, you can add a connecting row of ch3 loops worked from the pumpkin edge to reach the mesh. If pumpkins are larger, block them gently to reduce diameter or remove one increase round from the pumpkin before joining.
— Center Connector Strip (Between pumpkins) :
Round 1 :
After joining each pumpkin to each long panel, create the central connecting strip between the two long panels by working a 6-band wide strip that mirrors the mesh. Begin from the mesh edge at the pumpkin and ch across the gap, joining the two panels with sc and chain loops to replicate the diamond lattice across the center (measure to match photo gap)
Round 2-20 :
Work repeating mesh bands (as per Mesh Lace Panel Rounds 6-9) across the connector strip until the three pumpkins are connected with consistent negative space between them. Ensure diamonds line up vertically between the top and bottom mesh panels.
Info :
When joining the two side panels through the center connector, use an even number of chains to maintain diamond symmetry; adjust by ±2 chains if needed before you begin the band repeats.
— End Panels (Short mesh ends beyond first and last pumpkin) :
Round 1 :
Extend the mesh pattern beyond the outer pumpkins to form attractive ends. Repeat mesh band pattern for approximately 6 bands on each end (24 rounds) to reproduce the length shown in the photograph.
Round 2-24 :
Repeat mesh band Rounds 6-9 for each band. Keep ends symmetrical so the scalloped border will match on both ends.
Info :
Measure your runner as you work. If you prefer a longer runner, add additional mesh bands evenly across the three panel sections so pumpkins remain evenly spaced.
— Scalloped Bobble Edge (Work around entire perimeter) :
Info :
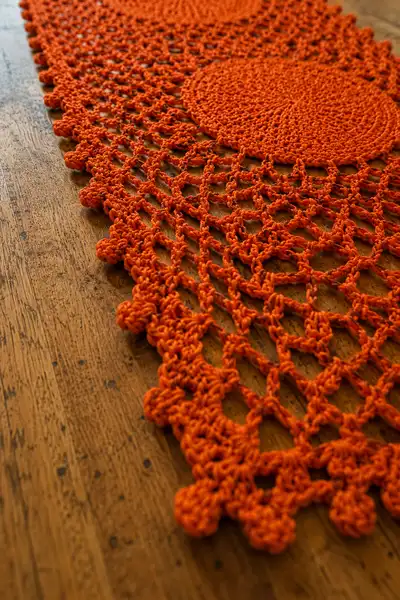
Edge pattern creates the distinctive bobble scallop seen in the close-up photo. Work around both long sides and both ends. Edge is worked in rounds with an even number of repeats so scallops align with diamonds below.
Round 1 :
With right side facing, join yarn at any corner. Ch1, sc evenly around the entire perimeter, working 3 sc in each corner to keep it flat. Count your perimeter sts then proceed to scallop pattern (perimeter st count will vary by panel width)
Round 2 :
Scallop foundation: *sk 2 sc, 5 dc in next sc, sk 2 sc, sl st in next sc* repeat around. Adjust spacing so scallops sit centered over diamond points.
Round 3 :
Picot-bobble round: Into each 5-dc scallop base work: (sc, ch3 picot, sc, bobble) then sl st to join to base between scallops. Bobble: (yo, insert, pull up loop) x4, yo and draw through all loops, ch1 to close. This yields tiny rounded bobbles around the scallop edge as visible in the photo.
Round 4 :
Edge finish: Working in backbone, sc around to tidy edges; weave in ends and block scallops outward using pins to open each scallop and define bobbles.
Info :
For very crisp bobbles, switch to 3.0mm hook for Round 3 to pull the bobbles tighter. Be consistent across all scallops for a uniform look.
— Finishing Touches and Blocking :
Info :
Wet-block the runner by gently soaking in lukewarm water, roll in towel to remove excess moisture, then pin to blocking mat to desired rectangular dimensions (approx 12 x 48 inches for this example). Use T-pins to open scallops and slightly flatten pumpkin medallions so they sit flush with the mesh.
Round 1 :
After blocking, check joins and tidy any loose ends by weaving through a few stitches on the wrong side. If any pumpkin sections sit proud, press gently with a steam iron from the wrong side over a cloth to relax fibers (test on scrap first).
Info :
Final measurement will vary by yarn and tension. If you wish to scale the runner, increase or decrease foundation chain length for mesh panels in multiples of 8 and add or remove mesh bands to change length.
This pumpkin lace table runner brings vintage charm and autumn warmth to any table setting. The combination of bold medallion pumpkins and delicate openwork mesh is both eye-catching and elegant. As you join the motifs and watch the runner grow, the rhythmic lacework becomes truly meditative — a perfect project for a cozy crafting day. 🧶🍁 Enjoy blocking and styling it on your favorite wooden table; it makes a lovely seasonal centerpiece or a handmade gift for friends. 🎃