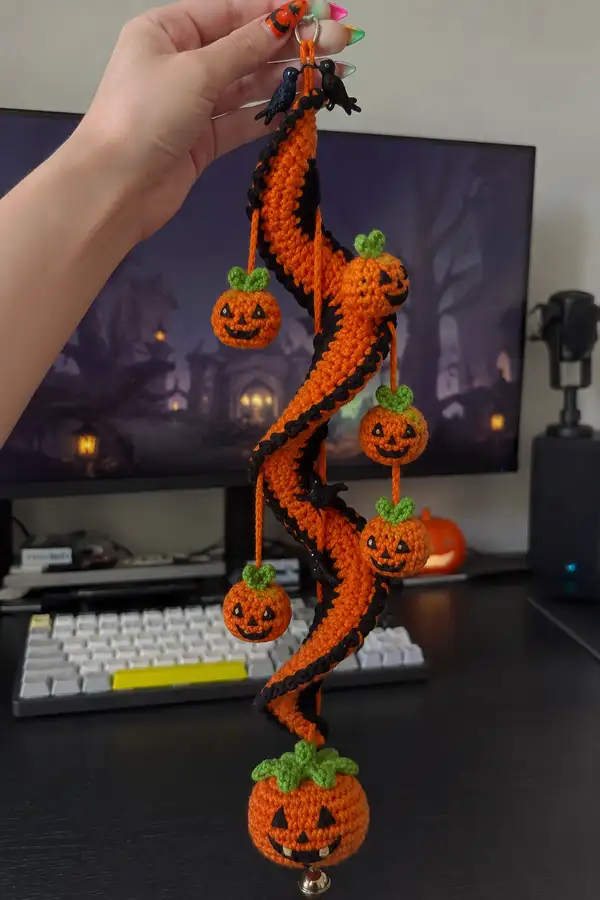
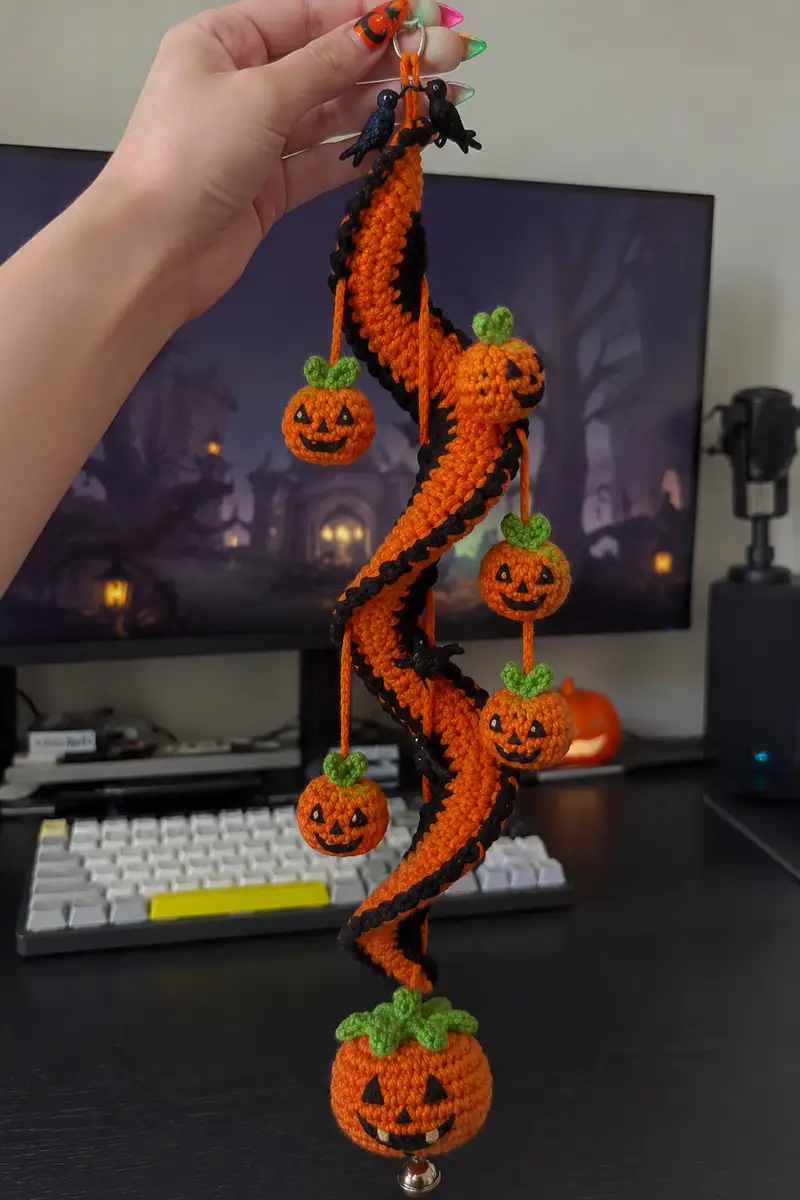
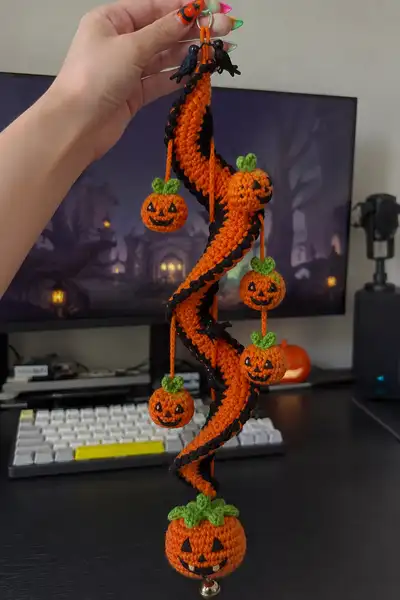
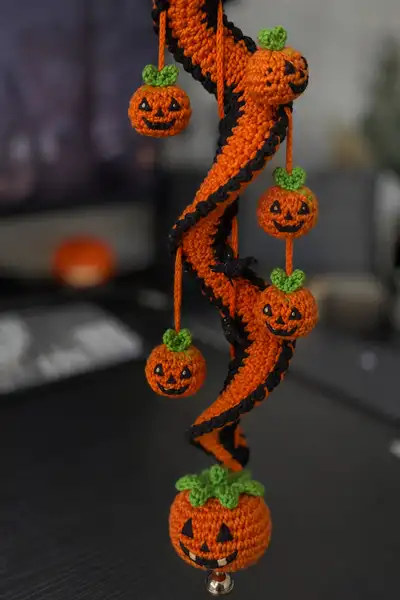
Create a Halloween-ready hanging spiral garland full of tiny jack-o'-lanterns and a cheery base pumpkin. This pattern uses bright orange, black edging and tiny green leaves to capture classic spooky charm. The finished piece hangs in a graceful twisted spiral with six dangling mini pumpkins and a jingly bell at the base. A perfect seasonal decoration or gift — playful, compact, and full of handcrafted detail.
Progress Tracker
0% Complete
— Materials & Gauge :
Info :
This project is worked tightly to avoid stuffing showing through. Gauge is not critical for a decorative hanging piece, but with worsted weight yarn and a 2.5 mm hook you should have solid, slightly firm stitches. The finished spiral measures approximately 30-35 cm (12-14 in) long when relaxed and 45-55 cm (18-22 in) when pulled into a long S-shaped spiral; final length depends on how tightly you twist and shape the tube.
— Main Spiral Tube :
Round 1 :
6 sc in magic ring (6)
Round 3 :
(1 sc, inc) x 6 (18)
Round 4 :
(2 sc, inc) x 6 (24)
Round 5 :
(3 sc, inc) x 6 (30)
Info :
The tube will be worked mostly in continuous rounds without joining to form a long cord-like tube. Use a stitch marker to mark the first stitch of each round. For a wider tube, increase in the early rounds to 36 sts (add one additional rep per round) — the pictured spiral uses a snug 30-st circumference for a compact twist.
Round 6-15 :
1 sc in each st (30)
Info :
Work even rounds to build length. Every 10 rounds you may insert a small bit of stuffing or place a short piece of florist wire if you want the spiral to hold sharper curves; otherwise leave tube hollow for a lightweight hanging ornament.
Round 16-25 :
1 sc in each st (30)
Round 26 :
(4 sc, inc) x 6 (36)
Info :
A slight increase here creates a gentle swell to help the spiral curve naturally. If you prefer a completely even ribbon, skip Round 26 and continue at 30 sts.
Round 27-36 :
1 sc in each st (36)
Round 37 :
(4 sc, dec) x 6 (30)
Round 38-50 :
1 sc in each st (30)
Info :
At this point the tube should be long enough to give at least 5-6 curves when twisted; continue repeating even rounds until you reach desired length. The photos show a long tube of roughly 70-90 rounds total to allow multiple spiral turns. For this pattern continue to Round 70 to match the pictured length.
Round 51-60 :
1 sc in each st (30)
Round 61-66 :
1 sc in each st (30)
Info :
Before you add the black edge, decide where the hanging pumpkin cords will attach. Mark 6 evenly spaced rounds along the tube where you will secure the hanging strings: e.g., around rounds 10, 22, 34, 46, 58, 66 from the top. Mark the stitch where you want to attach each cord so they line up along the spiral when twisted.
Round 67-70 :
1 sc in each st (30)
Info :
Fasten off orange yarn leaving a long tail for weaving if you have finished your tube length. We will now add a decorative black edge along both sides of the flattened tube: this edge creates the contrasting spiral ridge seen in the photos. Alternatively you can work the black border while still on the hook by crocheting a row of sc along one 'side' of the tube seam — the following edge method is worked flat after the tube is complete.
Info :
Method A (preferred): With orange tube lying flat, insert hook into the side stitches at the round-ends along the tube to make the black border. You will work a continuous line of slip stitches and then single crochet edging along one side, then rotate and repeat for the other side so the black forms a raised ridge that visually spirals when the tube is twisted.
Edge Round 1 :
Join black yarn at one end edge. Ch1, sc evenly along the side edge into the row ends, working approximately 1 sc for every round-end stitch across the length — aim for 70 sc along the edge (count your rounds: number of edge sc should equal number of tube rounds). Turn.
Edge Round 2 :
1 sc in each st BLO (70) — this gives a slight ridge that will sit raised when the spiral is twisted
Edge Round 3 :
1 sc in each st (70). Fasten off leaving a long tail for sewing if desired
Info :
Repeat the same edging on the opposite side of the tube so you have black ridges on both sides. When you twist the tube into an S-spiral, the black ridges will form the black stripe that appears to run down the center of the spiral in the photo. You may also use a single black edge if you prefer a subtler stripe.
— Hanging Cord (Make 6) :
Info :
These cords attach mini pumpkins to the spiral. Use the orange yarn left over. Make 6 cords of varying lengths (approx 7-12 cm each) so pumpkins hang staggered. Alternatively chain to your desired length and join with a sl st to make a neat loop for sewing into tube.
Round 1 :
Ch 30 (or desired length for a 12 cm cord with worsted yarn), sl st to last ch to make a tube (optional) or leave as a single chain for a slimmer cord
Info :
If you want a thicker cord, work 1 sc in each ch back along the foundation chain and slip stitch the chain edges together to form a narrow cord. Make 6 cords and set aside, leaving a 10-15 cm tail to sew to a pumpkin.
— Mini Pumpkin (Make 6 identical) :
Round 1 :
6 sc in magic ring (6)
Round 3 :
(1 sc, inc) x 6 (18)
Round 4 :
(2 sc, inc) x 6 (24)
Round 5 :
(3 sc, inc) x 6 (30)
Info :
You can make the mini pumpkins small and compact using 30 sts circumference — this yields pumpkins about 2.5-3 cm diameter when using worsted yarn with a 2.5 mm hook. If using thinner yarn, add two rounds of increases to reach 36 sts for a slightly larger ball.
Round 6-9 :
1 sc in each st (30)
Info :
Begin stuffing lightly at the end of Round 8. Use small amounts of fiberfill to achieve a plump sphere without overstuffing which will make the pumpkin look stretched.
Round 10 :
(3 sc, dec) x 6 (24)
Round 11 :
(2 sc, dec) x 6 (18)
Round 12 :
(1 sc, dec) x 6 (12)
Info :
Fasten off leaving about 8-10 cm tail. Pull tail through remaining 6 sts and close the opening. Weave tail inside and use it to sew the pumpkin onto the hanging cord. Before fully closing, embroider face features or use tiny felt triangles for eyes and mouth. Embroidered features: with black embroidery thread, make two small triangle eyes and a crescent smile. Use tiny white stitches to add tooth highlights if desired.
Round 14 :
Leaf & Stem: With green yarn ch 4, sl st in 2nd ch from hook, hdc, sc—sl st into center to form small leaf. Make 2-3 leaves and secure to pumpkin top (use green tails to sew). Optional: make a short stem by chaining 3 and sc back along chain.
Info :
Sew the hanging cord tail to the top center of the pumpkin, then sew the leaves over the attachment point to hide the join. Ensure the cord is secure by stitching through the pumpkin body a few times before trimming the tail.
— Base Pumpkin (Large) :
Round 1 :
6 sc in magic ring (6)
Round 3 :
(1 sc, inc) x 6 (18)
Round 4 :
(2 sc, inc) x 6 (24)
Round 5 :
(3 sc, inc) x 6 (30)
Round 6 :
(4 sc, inc) x 6 (36)
Round 7-11 :
1 sc in each st (36)
Info :
At Round 11 begin stuffing the larger pumpkin firmly to create stable base weight. Insert a small bell or heavy bead at the bottom center before finishing closing to provide weight and jingle. Ensure the bell is wrapped in a little fiberfill to avoid rattling too loud and to protect stitches.
Round 12 :
(4 sc, dec) x 6 (30)
Round 13 :
(3 sc, dec) x 6 (24)
Round 14 :
(2 sc, dec) x 6 (18)
Round 15 :
(1 sc, dec) x 6 (12)
Info :
Fasten off leaving long tail. Thread tail through remaining 6 stitches and pull tight to close. Use the tail to sew the base pumpkin to the bottom tip of the spiral tube, sandwiching the bell inside so it sits centered. Embroider a larger jack-o'-lantern face using black yarn for eyes and a toothy grin; add small cream stitches for teeth if desired.
Round 17 :
Green leaves & stem for base pumpkin: With green yarn chain 6, sl st back along chain to make a ruffled leaf strip (6 sl st). Make 4-5 of these leaf pieces and sew to the top of the big pumpkin to create a leafy crown. For the stem make ch4, sc back along chain and sew to center.
Info :
Because the base pumpkin supports the entire spiral, sew it securely to the end of the tube: stitch firmly through several tube rounds and into the base pumpkin interior. If you want extra stability, insert a short dowel or wrapped wire from the base pumpkin into the spiral tube before final sewing.
— Small Leaf Attachment (Make 6) :
Round 1 :
With green yarn ch 4, sl st in 2nd ch from hook, hdc in next ch, sc in last ch, sl st into base to create small leaf (3-st leaf)
Round 2 :
Repeat to make a set of 2 leaves for each pumpkin top; sew leaves over cord attachment point
Info :
Use small stitches to secure leaves so they lay flat and hide the cord join neatly. Make 6 small leaf pairs for the hanging pumpkins and 4-5 for the base crown.
— Tiny Crow Charm (Optional, Make 2) :
Round 1 :
Ch 5, sl st to join into ring (5)
Round 2 :
Work 5 sc in ring (5)
Round 3 :
(sc, inc) x2, sc (7)
Round 4 :
1 sc in each st (7)
Round 5 :
Shape a little beak: ch 2, sl st into next st, fasten off and weave end to form a tiny beak and tail. Use black yarn and embroider a single seed bead eye. Sew crow onto spiral edge as an accent.
Info :
These are tiny embellishments and may be formed instead from novelty charms or purchased small crow beads. Sew them securely to the black ridge so they appear perched on the spiral edge.
— Assembly Prep :
Info :
Arrange your spiral flat on a table. Decide on the final twist direction — the pictured spiral gently curves in an S-shape. Twist the tube along its length and pin curves in place. Use the previously marked attachment points to position hanging cords and pumpkins. Before you sew anything permanently, hold the tube vertically and place each pumpkin along the twist to check spacing and visual balance.
Info :
Tip: If you want the spiral to hold a dramatic arch, insert a thin piece of florist wire or coat-hanger wire along the interior of the tube and bend to desired shape. Wrap the wire in a small strip of leftover yarn or tape to avoid poking through stitches. Re-check all positions before final sewing.
— Sewing Pumpkins to Tube :
Info :
Sew each hanging cord to the tube at your marked stitches using the tail from the cord. Make several passes through the tube and cord to secure. After each cord is sewn, hang the pumpkin and adjust its height to create a cascading balanced look. Space pumpkins so they alternate sides when the spiral is viewed in 3D.
Round 1 :
Using long tail from mini pumpkin, thread needle and stitch through the top center of the pumpkin into the marked tube stitch; repeat 5-6 times to secure then weave tail into inside of pumpkin and trim.
Info :
For a neat finish, sew the cord onto the inside of the tube (through the orange rounds) and then tack a small black border stitch over the join so the seam is hidden by the black ridge when viewed from the side.
— Final Edge Touches & Face Embroidery :
Info :
Embroider facial details on each pumpkin with black embroidery thread. For small pumpkins use two triangular eyes and a curved smile. For the base pumpkin, make a larger toothy smile and add small cream stitches for teeth. Use backstitch for smooth lines and tiny satin stitches to fill triangle eyes if desired.
Round 1 :
With black embroidery floss, stitch triangle eyes and a smile. Knot on the inside and weave ends into the pumpkin center so knots do not show on the exterior.
Info :
Make faces before final stuffing and closing when possible — this gives more control when stitching shapes. If the pumpkin is already closed, poke a blunt needle through and embroider carefully in small sections.
— Final Assembly & Hanging Loop :
Round 1 :
Sew the base pumpkin to the bottom tip of the spiral using the base pumpkin’s long tail. Make at least 10-12 secure stitches through the tube and pumpkin to create a strong join (36-st tube to base).
Round 2 :
Attach a hanging loop to the top end of the tube by chaining 20 and sewing both ends into the topmost round; reinforce with several whip stitches.
Info :
Optionally add a small jump ring at the top for hanging on a hook or keyring. Tuck any remaining tails inside the tube or weave them into the base pumpkin to hide them completely.
— Finishing Touches :
Info :
Check all joins and trim or weave any stray ends. Slightly steam-block the orange sections (lightly steam from a distance — do not press) to even stitches if necessary. Make sure the bell and any beads are well secured inside the base pumpkin.
Info :
Play with the spiral shape after assembly: you can tighten or relax the spiral twist to alter how the pumpkins hang and how prominent the black ridge is visually. If you added floral wire, bend to desired curves; if not, the natural tension in the crocheted tube will hold gentle curves well.
This whimsical spiral garland brings Halloween charm with every twist and tiny pumpkin smile. The long braided orange tube and contrasting black ridge create striking movement while the dangling jack-o'-lanterns add playful personality. The pattern is modular, so you can add more pumpkins, swap colors, or make it mini for a keyring. Enjoy the rhythmic repetition of the pumpkins and the satisfying assembly as everything comes together — it's a lovely make for the season! 🧶🎃