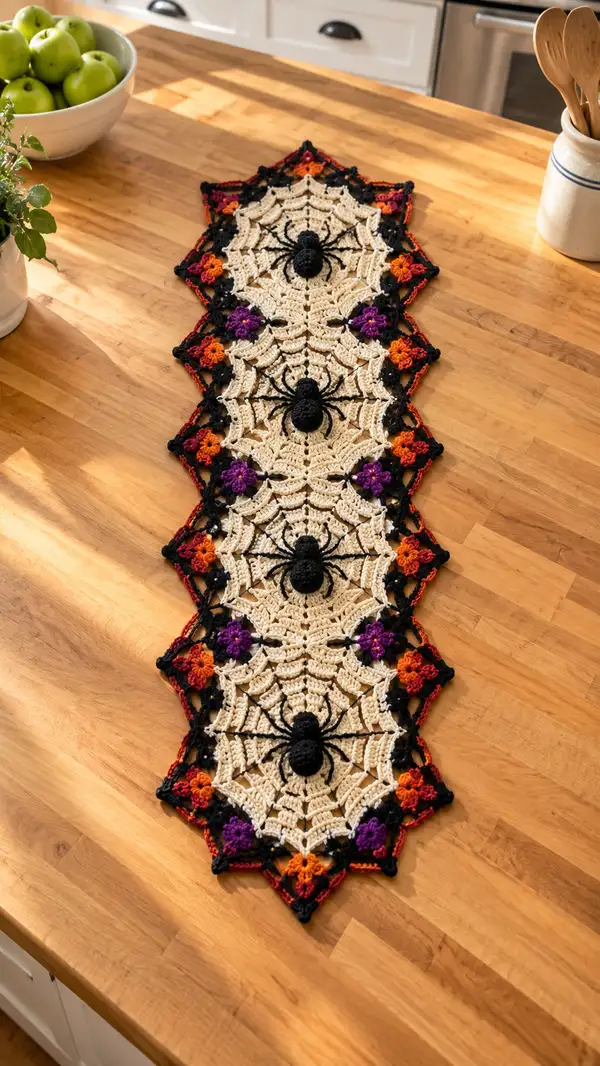
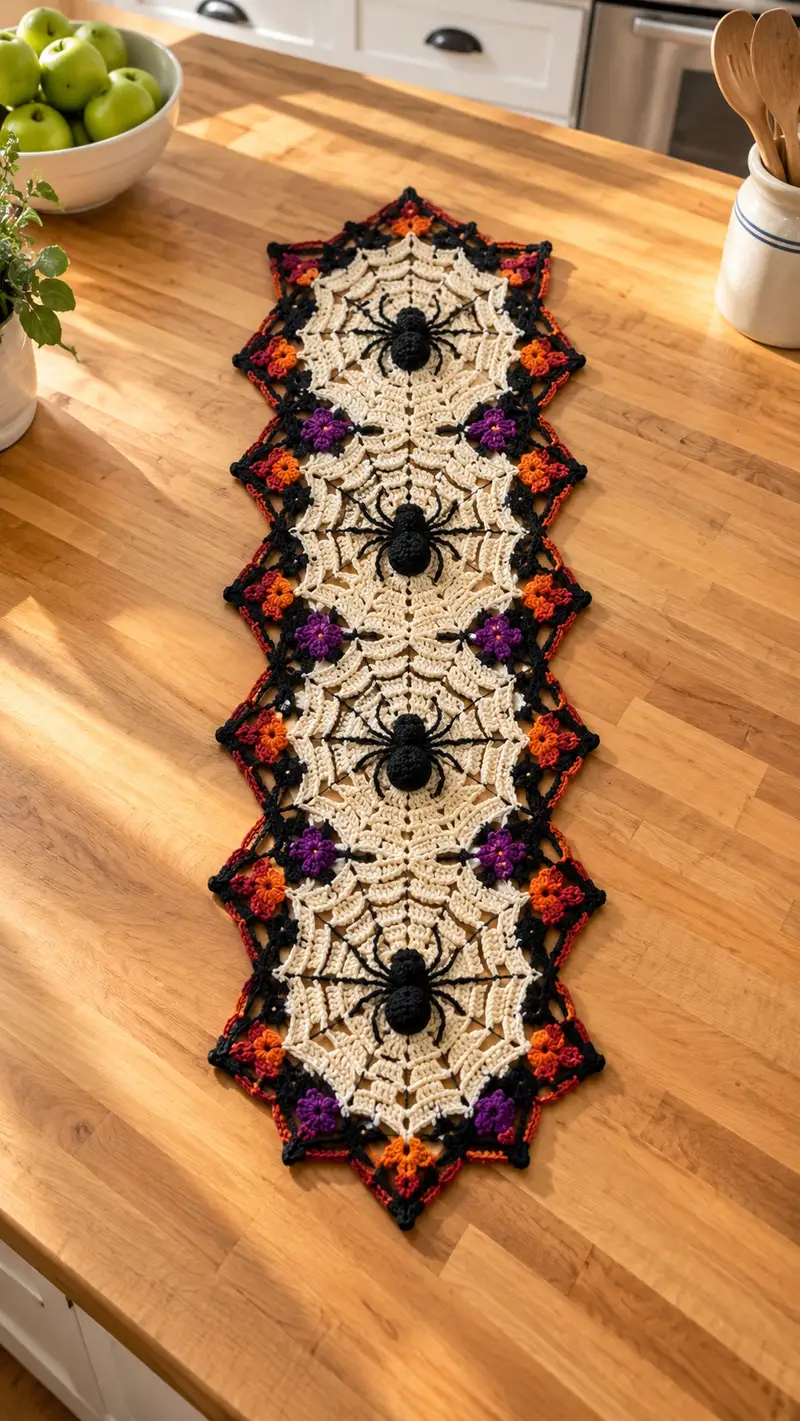
Create a dramatic Halloween table runner featuring three joined spiderweb motifs with dimensional black spiders and colorful floral accents. This runner uses cream for the web centers, black for spider bodies and web outlines, and pops of orange and purple flowers around the edges. The finished piece is decorative, flat, and designed to sit along a table or buffet, adding seasonal flair with textured clusters and a bold scalloped border.
Progress Tracker
0% Complete
— Pattern Notes :
Info :
Work motifs flat in continuous rounds where indicated; use a stitch marker at round start. Block each motif flat before joining to ensure neat edges and matching points. When changing colors, join in last yarn-over of the previous round for cleaner joins.
Info :
Lengths and final size: finished runner in sample measures approximately 12 in (30 cm) wide across widest points (point to point) and 44 in (112 cm) long including border and 3 motifs joined. You can add or subtract motifs to adjust length.
— Spider Body (make 3) :
Round 1 :
6 sc in magic ring (6)
Round 3 :
(1 sc, inc) x 6 (18)
Round 4 :
(2 sc, inc) x 6 (24)
Round 5 :
(3 sc, inc) x 6 (30)
Round 6 :
(4 sc, inc) x 6 (36)
Round 7 :
1 sc in each st (36)
Round 8 :
1 sc in each st (36)
Info :
Start spider body with black yarn. Use a 3.5–4.0mm hook to make a firm fabric. Stuff lightly after round 9 and more firmly after round 12 to achieve a slightly raised, squat body for sewing down to the web center.
Round 9 :
(4 sc, dec) x 6 (30)
Round 10 :
(3 sc, dec) x 6 (24)
Round 11 :
(2 sc, dec) x 6 (18)
Round 12 :
(1 sc, dec) x 6 (12)
Info :
At this point you will have a small ball. Fasten off and leave 8-10" (20-25 cm) tail for sewing. Make a second slightly larger oval for the abdomen by repeating rounds 1-12 but stopping at round 11 so the abdomen is a bit larger; you will have two shapes: smaller cephalothorax (6-13) and larger abdomen (6-12).
Round 14 :
Re-join to the larger abdominal piece (if making a 2-part body) or continue to shape into an oval by working an additional 6 sc evenly around opposite side to elongate (if working a single piece) (approx 18-24). Adjust stuffing accordingly.
Info :
Sew the smaller cephalothorax to the larger abdomen using the long tail and whip or ladder stitch. Make sure the seam is centered and secure. Stuff to shape so the two parts read as a classic rounded spider body.
Round 15 :
Make 8 legs: Attach yarn at body sides (spacing evenly), ch9 for each leg, [sl st in 3rd ch from hook, sc next 3 ch, hdc next 3 ch], sl st to join base. Repeat for 8 legs total (4 each side). Legs are worked by surface crochet or sewn directly into body base depending on preference.
Info :
Leg shaping: after chaining, you may work back along the chain with sc and hdc to create a slightly angular jointed look. Bend legs and flatten with a few stitches at base to secure pose. Trim and weave ends into body.
— Web Motif (make 3) :
Round 1 :
8 sc in magic ring (8)
Round 3 :
(1 sc, 1 inc) x 8 (24)
Round 4 :
(2 sc, 1 inc) x 8 (32)
Round 5 :
(3 sc, 1 inc) x 8 (40)
Round 6 :
(4 sc, 1 inc) x 8 (48)
Round 7 :
1 sc in each st (48)
Round 8 :
1 sc in each st (48)
Info :
Rounds 1-8 create a solid circular disc. Use cream yarn here to form the web center. Keep rounds even and place stitch marker at start of each round to maintain orientation of web spokes later.
Round 9 :
*Ch 6, sl st into next st* across to create 8 longitudal chain loops that will become spokes (work 8 times) — after completing loops, sl st to join. Maintain 48 base st anchors by skipping evenly.
Round 10 :
Working into chain loops: in each ch-6 loop work (sc, ch3, sc) to define 8 open spokes. Fasten off and rejoin cream yarn at first spoke for next round if necessary.
Info :
These first open spoke chains will form the radial lines. Pin motif flat so spokes radiate evenly; this makes following lace rounds much easier and helps create a neat hex/rounded shape for later joins.
Round 11 :
Join cream. Round pattern: [ch5, dc3tog over next 3 open sections, ch5, sl st into top of next anchor sc] repeat around to begin building the web arches (48 anchors remain as reference but your working pattern forms visible open arches).
Round 12 :
1 sc in each existing anchor sc and top of spoke join points (48) — this round stabilizes the motif for the lace rounds to follow
Round 13 :
*Ch7, sl st in next anchor sc, ch7, sl st in next anchor sc* around (creates larger arches between spokes) — secure with slip stitch; count evenly so you have 8 larger arches
Round 14 :
Working into each arch: (sc, hdc, dc, tr, dc, hdc, sc) across each arch to build the web scallops; repeat across 8 arches
Info :
If you want prominent raised web lines, use sl st or surface crochet in black to trace the radial spokes now. Surface crochet following each spoke from center outwards gives a crisp black outline for later spider placement.
Round 15 :
1 sc in each st around established round to even out the shape; aim to preserve roughly 48 established working points from previous anchors
Round 16 :
Change to BLO for 1 round: 1 sc in each st BLO around (48) to create a defined ridge where the black join will later sit
Round 17 :
Switch to black yarn. Working in the ridges and along spoke anchors, surface crochet (sl st) along each spoke from center outwards to create the black radial lines. Work evenly 8 spokes. Fasten off and weave end to back.
Info :
Placement for spider body: the surface-crocheted black radial lines create a natural cross where you will sew spider bodies. Make a small central area with a little extra whipstitch to anchor the 3D spider body later.
Round 18 :
Rejoin cream to start building outer web rings. *Ch6, skip 3 stitches, sl st in next* repeat around forming chain-spaces between scallops (8 spaces)
Round 19 :
In each chain-space work (sc, ch3, sc) to begin the open-web net. This creates 16 small chain arches around the motif.
Round 20 :
Round of dc shells: in each chain arch work (dc3, ch2, dc3) to build greater openness; space evenly around (16 shells)
Info :
These shell rounds create the lace that resembles a web. Take care to keep stitch counts even; pin shell edges outward to maintain a smooth hexagonal outline with 6 main points.
Round 21 :
Work 1 sc in each dc and ch space across (approximately 96 points depending on shell stitch counts) — this evens work and prepares for point shaping.
Round 22 :
To form points: *[sc, ch4, sc] in the center stitch of every second shell, skip previous shell center* — you will create 6 outer point loops
Round 23 :
Work a decorative point: in each ch4 loop work (sc, hdc, dc, tr, picot, tr, dc, hdc, sc) to create a pronounced point (6 points)
Round 24 :
1 sc in each st around to tidy the round; fasten off cream and weave in ends on backside.
Info :
Block motifs flat immediately to set points and web arches. Pin each point to the blocking mat and steam lightly or wet-block to shape. Allow to dry fully before joining.
— Flower Motif (small accent, make 12) :
Round 1 :
6 sc in magic ring (6)
Round 2 :
Ch2, (hdc, ch2) x 6 into ring — fasten and pull tight to create six petals; join and switch color if desired (flower center)
Round 3 :
Rejoin contrasting petal color in any ch-2 sp, (sc, ch3, 2 dc, ch3, sc) in each ch-2 around to form 6 petals. Fasten off and weave ends.
Info :
Make equal numbers of orange and purple flowers to alternate around the border. These are worked small and sewn into border gap points where motifs meet.
— Joining Motifs (work between motifs) :
Info :
Lay three blocked web motifs in a straight row overlapping the outer points so that each motif shares a point with the next. Use black yarn and whip stitch or single crochet join to attach motifs through the outer point loops and shell anchors. Join motifs securely but avoid bulking the join area.
Round 1 :
With black yarn, position motif A and B; join at 3 shared anchor points by inserting hook into corresponding stitches on both motifs, sc through both loops to make a neat join. Make 6 sc joins across the overlapping area (approx number depends on motif alignment).
Round 2 :
Repeat join between motif B and C. Fasten off and weave long tails along the seam for extra security.
Info :
Where motifs meet, insert a small orange or purple flower into the corner and stitch through the join to lock the flower in place and hide the seam. Space flowers symmetrically.
— Border and Outer Edging :
Round 1 :
With black yarn, join at any outer point and work 1 sc evenly around the entire joined runner edge, working 2 sc in each point tip to reinforce (work counts variable; keep edges even)
Round 2 :
Work shell edging: *skip 2 sc, (dc3, ch2, dc3) in next sc, skip 2 sc, sc in next* repeat around to form a scalloped border
Info :
Increases at corners: where motifs create sharper points, increase shells to keep the border smooth. Count shells as you go to keep symmetry across both long sides of runner.
Round 3 :
Change to variegated red/orange yarn: work 1 round of picot edging in FLO — *sc in next, ch3, sl st in 3rd ch (picot)* spaced one picot between each shell to add a bright outer edge
Round 4 :
Return to black yarn for a final finishing round: 1 sc in each st, adding a slip stitch into each picot to flatten slightly (approx final tidy round)
Info :
Weave in all ends along the backside and use a small amount of fabric glue at knots if you want extra security. Lightly steam-block the entire runner once the seams and edges are secure to settle stitches and flatten the runner for display.
— Alternate Longer Runner Option :
Info :
To lengthen, work additional web motifs and join them in the same manner. For a shorter centerpiece, make two motifs only or reduce outer border rounds to minimize length. Keep joining technique identical for consistent alignment.
— Stitch Count Reference & Troubleshooting :
Info :
If a round seems off by a few stitches, recount the anchor stitches and compare to the base 8 or 48 anchors used earlier; most irregularities occur when chain arches are misplaced. Unravel back to the last correct round and rework for best-looking symmetry.
Info :
Always pin the motifs to your blocking board before joining to ensure points match and the web spokes line up visually. Small adjustments in seam placement will correct minor spacing differences.
This spiderweb table runner combines delicate lacy rounds with bold, dimensional spiders for the perfect Halloween accent. Each motif is a small crochet scene — block them, join them, and finish with a scalloped border to create a dramatic runner that will steal the show at any seasonal table. I loved making each flower pop with orange and purple while the black spiders add spooky texture and charm. 🕷️🧶 Display it proudly and enjoy the compliments — happy stitching! 🎃