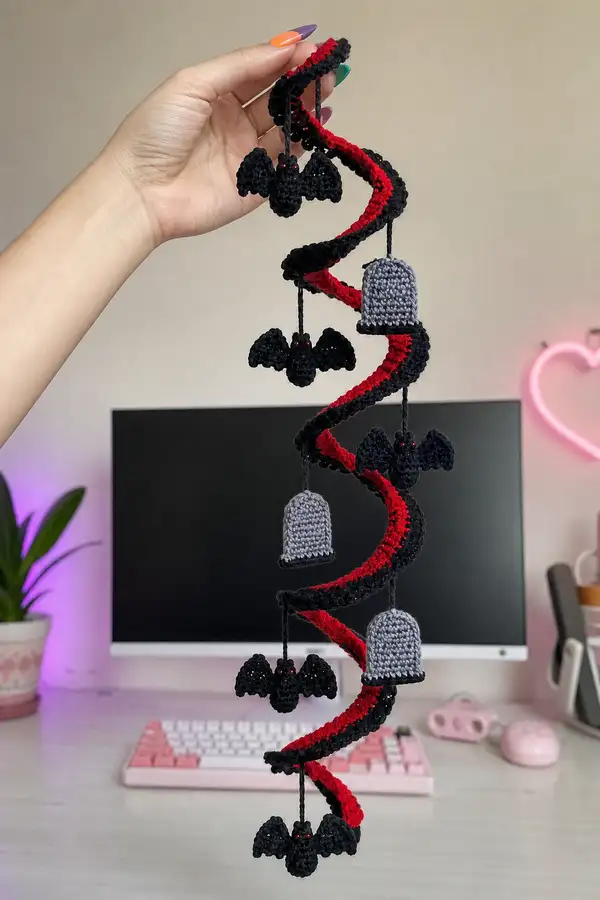
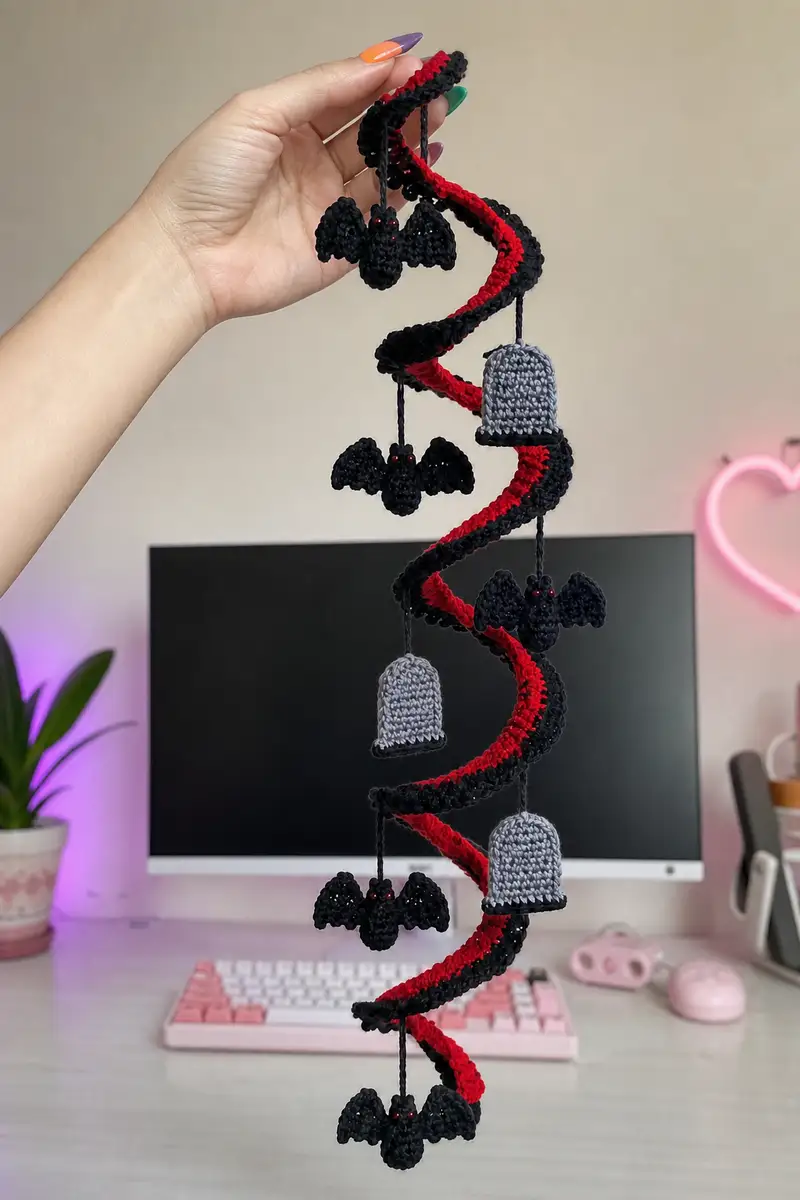
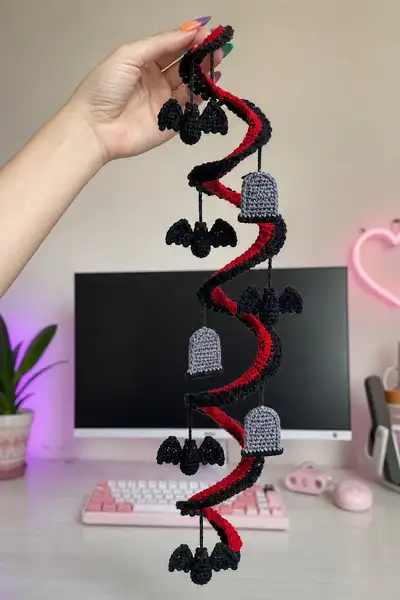
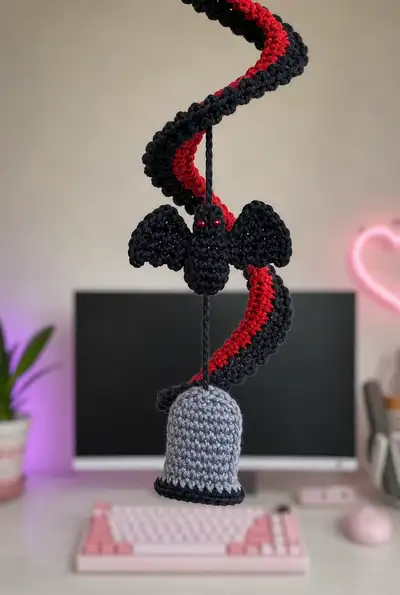
A long, dramatic spiral garland in bold red and black, dotted with tiny crocheted bats with beaded eyes and gray tombstone bells. This hanging mobile features a ruffled scalloped edge, alternating color stripes, and several dangling motifs for a layered Halloween look. Perfect for doorways, windows, or a spooky mantel display.
Progress Tracker
0% Complete
— Overview & Gauge :
Info :
This pattern is worked in separate motifs: one long spiral strip, six small bats, and three tombstone bells. Tension should be fairly tight to avoid gaps and to keep the hanging motifs lightweight. Sample gauge: 12 sc x 10 rows = 4 inch square using 3.25mm hook. Adjust hook if your gauge differs.
— Spiral Base (long flat strip worked in rows) :
Round 1 :
Ch 13, sc in 2nd ch from hook and in each ch across (12)
Round 2 :
Ch 1, turn, sc in each st across (12)
Round 3 :
Ch 1, turn, sc in each st across (12)
Round 4 :
Ch 1, turn, sc in each st across (12)
Round 5 :
Ch 1, turn, sc in each st across (12)
Info :
These first 5 rows set the width of the spiral. If you prefer a wider spiral, increase starting chain by multiples of 2 and adjust subsequent rows accordingly. Keep tension even.
Round 6 :
Change to red yarn. Ch 1, turn, sc in each st across (12)
Round 7-10 :
Continue in red: ch 1, turn, sc in each st across (12)
Info :
We alternate color blocks to produce a red core stripe. You can make stripes longer or shorter. Carry the unused color along the edge or fasten off to avoid long floats.
Round 11-15 :
Change to black. Ch 1, turn, sc in each st across (12)
Round 16-20 :
Change to red. Ch 1, turn, sc in each st across (12)
Info :
From here on work alternating color blocks: 5 rows red, 5 rows black, repeat. Each block is 5 rows to build visual striping. Use slip knot color change at end of last sc of the row for a neater edge.
Round 21-25 :
Black block: ch 1, turn, sc across (12)
Round 26-30 :
Red block: ch 1, turn, sc across (12)
Info :
Continue alternating color blocks until the strip reaches desired length. For the sample garland, make 70 total rows to achieve a long spiral; you can make fewer rows for a shorter garland. Measure approximately 65-75 rows for a dramatic spiral about 60-80 cm long when twisted.
Round 31-35 :
Black block: ch 1, turn, sc across (12)
Round 36-40 :
Red block: ch 1, turn, sc across (12)
Round 41-45 :
Black block: ch 1, turn, sc across (12)
Info :
Check strip flatness periodically. If the strip curls strongly, add one extra sc at one short edge every 10 rows to balance tension. Minor curl helps the spiral hold its shape once twisted.
Round 46-50 :
Red block: ch 1, turn, sc across (12)
Round 51-55 :
Black block: ch 1, turn, sc across (12)
Round 56-60 :
Red block: ch 1, turn, sc across (12)
Info :
At this stage your long strip should be the length you want. For a sample garland with 3 tombstones and 6 bats spaced evenly, aim for 65-75 rows. Fasten off leaving a long tail if you plan to graft ends together to form a continuous spiral or create a hanging loop.
Round 61-65 :
Black block: ch 1, turn, sc across (12)
Round 66-70 :
Red block: ch 1, turn, sc across (12)
Info :
Fasten off and weave in tails. Before adding scalloped edge, gently block and straighten the strip: pin out on a flat surface and steam lightly or wet-block, then allow to dry to set gentle curve for spiral twist.
Scalloped Edge (make 2 long edges) :
Join black yarn at one short edge with sl st, ch 1, evenly sc along the long side working into the side loops of each row - count 70 side-by-side stitches if you had 70 rows (sc around side edge). When you reach the long outer edge (the opposite short side), continue sc along the other long side in the side loops. (Total stitches around both long sides depend on number rows; you will have one sc per row per side.)
Round A :
Once edge sc are in place, work 1 sc in next st, *skip 1, 5 dc in next st, skip 1, 1 sc in next st*; rep across to create scallops (counts will vary depending on edge length, keep scallop repeats even). Finish with sl st, fasten off. (Scallop creates ruffled edge when spiral is twisted.)
Info :
For a neat scallop, work the 5 dc into the same stitch to make rounded bumps. If your scallops are too large, reduce to 3 dc; if too small, increase to 7 dc. Maintain symmetry by mirroring scallops on both edges.
— Bat Motif (make 6 identical bats) :
Info :
Each bat is a small flat amigurumi with a rounded body and two wings worked into a single flat piece. Use black yarn and two small red beads for eyes. Make 6 bats for sample garland; adjust number and spacing as desired.
Round 1 :
With black, mr, 6 sc in MR (6)
Round 3 :
(1 sc, inc) x6 (18)
Round 4 :
1 sc in each st around (18)
Info :
This creates the rounded bat head/body. After Round 4 we will create a flat flange where wings attach. Keep the piece relatively flat; stuffing is optional (tiny bit only) to keep head rounded.
Round 5 :
Start left wing: ch 1, turn, sc in next 6 sts (6), ch 2, sc in next 6 sts (6) — work will be flat and then wings are formed into shaped arches
Round 6 :
Wing shaping: On first 6 st section for left wing: (sc, hdc, 3 dc, hdc, sc) across to shape wing tip; slip to next body st, repeat mirrored for right wing: (sc, hdc, 3 dc, hdc, sc) (total shape: two wings with scalloped tips)
Round 7 :
Work small scallop across bottom of wings: along bottom edge of each wing work *sc, hdc, 2 dc, hdc, sc* to give a slightly scalloped wing edge. Join to body center with sl st and fasten off leaving tail for hanging cord. (Wings are flat and attached to body center.)
Info :
Stitch counts for wings depend on how many sts you worked in the earlier ch sections. The pattern above is intentionally descriptive; aim for symmetrical wings extending three to four rows from the center. If you prefer a simpler bat, work wings as triangular shapes made from 6 sc rows decreasing to 1 sc.
Round 8 :
Embellish head: sew two small red beads for eyes just above where wings meet the body. Secure beads with thread and knot tightly. If making child-safe items, embroider eyes instead of using beads.
Round 9 :
Make hanging tail: Attach a 15 cm length of black yarn to the top middle of bat body using a tight whipstitch. Fasten off and weave in ends. Repeat to make 6 bats.
Info :
If you want more 3D heads, add a very small pinch of stuffing before closing the center after Round 4. Too much stuffing will flatten the wings; small is best.
— Tombstone Bell Motif (make 3) :
Info :
Tombstones are dome-shaped bells in gray with a black rim. They are worked in rounds like a small bell and stuffed very lightly so they hang nicely. Make 3 for the sample garland at varying heights.
Round 1 :
With gray, mr, 6 sc in MR (6)
Round 3 :
(1 sc, inc) x6 (18)
Round 4 :
(2 sc, inc) x6 (24)
Round 5 :
1 sc in each st around (24)
Info :
These rounds create a smooth dome. Keep rounds even and do not stuff yet. We will add a decorative rim and a tiny amount of stuffing before finishing.
Round 6 :
(3 sc, inc) x6 (30)
Round 7-9 :
1 sc in each st around (30)
Round 10 :
(3 sc, dec) x6 (24)
Info :
Begin to slightly reduce to form the lower curve of the tombstone. At the end of Round 10 place a small amount of stuffing into the dome — just a thin layer to give shape but keep it light for hanging.
Round 11 :
(2 sc, dec) x6 (18)
Round 12 :
(1 sc, dec) x6 (12)
Round 13 :
Change to black yarn for rim. Ch 1, sc in each st around (12)
Round 14 :
Work one round of *sc, 2 sc in same st, sc* as a tiny decorative lower rim, or work 2 rounds of sc in BLO to create a raised edge. Fasten off leaving a long tail for sewing. (12)
Info :
Weave the tail through the base stitches and pull to close slightly if needed. Tombstones should be light — avoid heavy stuffing. Make three tombstones in the same size for uniform look or vary slightly for a handcrafted feel.
— Hanging Cord & Spacer Chains :
Round 1 :
Cut a length of black yarn for each motif: bats = 15-20 cm each, tombstones = 20-30 cm each depending on desired spacing. You can single-chain (ch 20) or braid three strands together for a thicker cord.
Round 2 :
To make a neat cord: cut three 40 cm lengths, fold in half, and tie at top to create a loop for hanging; braid the three strands down to desired length (approx 15-30 cm) and knot at end, leaving a small tail to attach to motif.
Info :
For an elegant look, twist cords tightly and secure ends with a knot and a little dab of fabric glue. For a rustic look, leave cords fluffy. Ensure cord ends are secured through the motif using a needle or whipstitch.
— Assembly & Spacing Guide :
Info :
Plan positions before sewing: space motifs evenly along one edge of the spiral so they hang inside the spiral curve. For a spiral of 70 rows with 9 motifs (6 bats + 3 tombstones), roughly place a motif every 7-9 rows. Use pins to mark positions along the strip before attaching cords.
Round 1 :
Attach each motif cord to the underside of the spiral strip at pinned positions. Use the tail from motif to stitch into the back side of the strip; tie securely and weave ends inside the strip. For the tombstones, stitch through the black rim to anchor the cord.
Round 2 :
After attaching all motif cords, gather the top 8-10 rows and form a hanging loop: fold the top of the strip by 3-4 rows and sew the edges together using mattress stitch to create a sturdy loop notch for a hanging hook. Reinforce with extra stitches.
Info :
To make the spiral twist naturally, gently twist the strip while hanging it on a hook. Adjust motif positions by sliding knots slightly along cords to achieve balanced visual weight. Trim any long tails and weave them into the back of the strip for a clean finish.
— Optional Reinforcements & Finishing Touches :
Info :
If your spiral droops, insert a length of thin plastic or floral wire along the top folded seam before closing to give structure. For a stiffer spiral, work the outer scallop with a smaller hook (2.75mm) to create a tighter ruffle. Add light spray starch to set the shape if needed.
Round 1 :
Check all bead attachments for security; if using safety eyes, mount before stuffing and lock washers firmly. If the garland will be hung outdoors, use a weather-resistant yarn such as acrylic and secure knots with fabric glue.
Info :
Final inspection: hang the garland and check symmetry. Move motifs and rebalance if certain sides appear heavier. Weave all remaining tails into the back of the spiral strip and clip close. Enjoy your finished mobile!
Completing this garland is such a satisfying mix of small, quick motifs and a long sculptural strip that really steals the show. 🧶 The contrast of the black scalloped edge with the bright red stripe gives a playful Halloween edge that looks great in any doorway. Adding the tiny bead eyes and lightweight tombstones makes this piece feel handcrafted and whimsical. Happy stitching — hang it up and enjoy the spook-tacular vibes! 🎃🖤