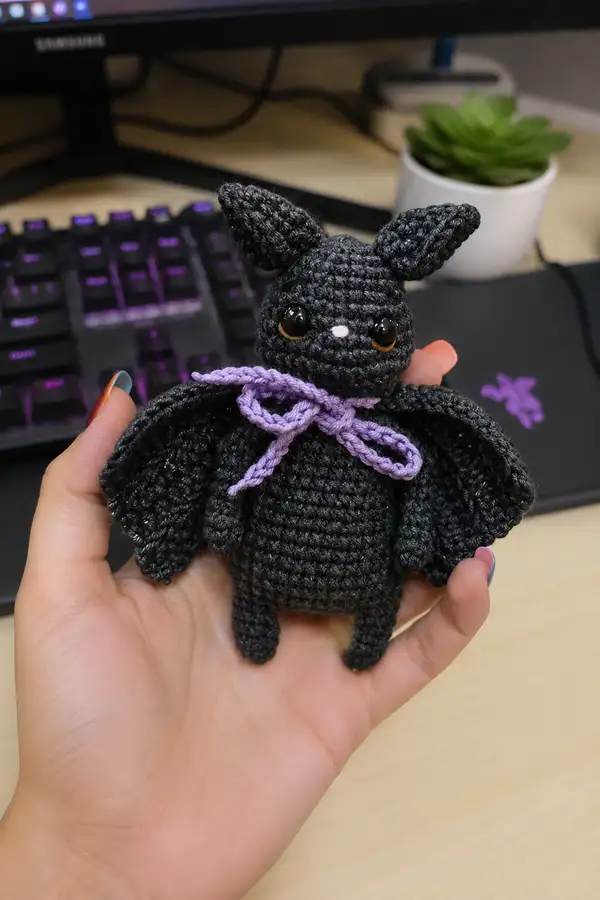
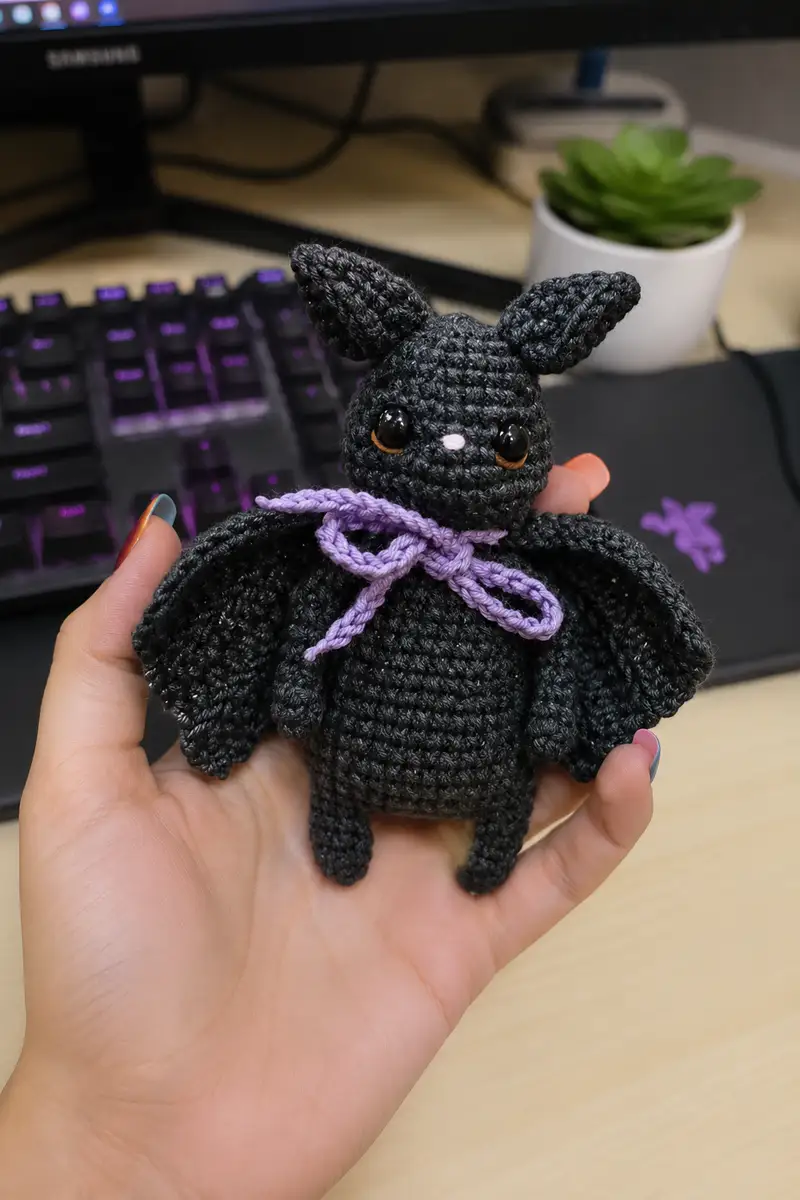
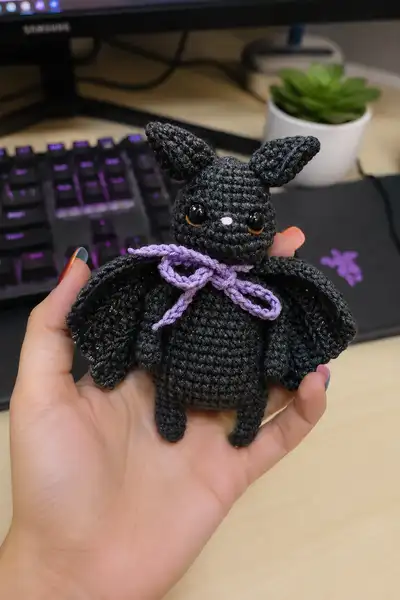
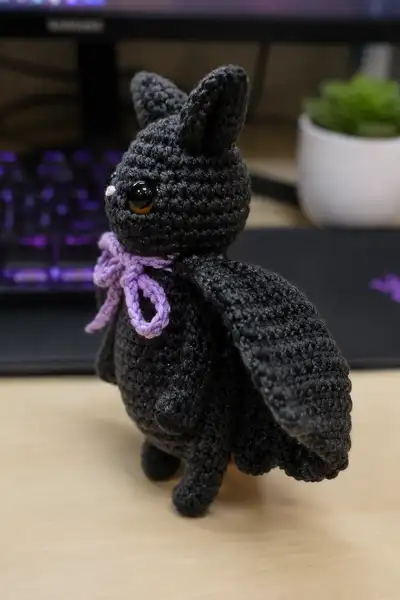
Create an irresistibly cute palm-sized bat perfect for Halloween or year-round cuddles. This pattern recreates the dark charcoal bat with big amber safety eyes, perky ears, little pink nose, and a scalloped cape-like pair of wings tied with a lavender bow. Detailed round-by-round instructions walk you through head, body, limbs, ears, wings and finishing for a polished handmade friend.
Progress Tracker
0% Complete
— Notes :
Info :
This pattern is written in continuous rounds for amigurumi. Use a stitch marker to mark the first stitch of each round and move it up every round. Tight tension is recommended so stuffing does not show through the stitches. If you want a slightly larger bat, use bulkier yarn and a bigger hook; all counts will remain the same but final size increases proportionally.
— Head :
Round 1 :
6 sc in magic ring (6)
Round 3 :
(1 sc, inc) x 6 (18)
Round 4 :
(2 sc, inc) x 6 (24)
Round 5 :
(3 sc, inc) x 6 (30)
Round 6 :
(4 sc, inc) x 6 (36)
Round 7 :
(5 sc, inc) x 6 (42)
Round 8 :
(6 sc, inc) x 6 (48)
Round 9 :
1 sc in each st (48)
Round 10 :
1 sc in each st (48)
Info :
Place safety eyes between rounds 13-14 approximately 12-14 stitches apart (measuring along the round). For the pictured look, mark eye centers about 6-7 stitches from either side of the front center. Pin eyes, step back and compare symmetry before locking washers.
Round 11 :
1 sc in each st (48)
Round 12 :
1 sc in each st (48)
Round 13 :
1 sc in each st (48)
Round 14 :
1 sc in each st (48)
Round 15 :
1 sc in each st (48)
Info :
Attach safety eyes now if using. For a slightly sleepy look, place eyes one or two stitches lower; for very wide-eyed, place them a touch farther apart. Embroider a tiny pink nose centered between the eyes on round 14-15 using a few small satin stitches.
Round 16 :
(6 sc, dec) x 6 (42)
Round 17 :
(5 sc, dec) x 6 (36)
Round 18 :
(4 sc, dec) x 6 (30)
Info :
Begin stuffing the head firmly but not overpacked. Use small amounts of fiberfill and push into the round shape, filling small crevices near the eyes and top of head first. Keep marker at round start to help maintain counts.
Round 19 :
(3 sc, dec) x 6 (24)
Round 20 :
(2 sc, dec) x 6 (18)
Round 21 :
(1 sc, dec) x 6 (12)
Info :
Fasten off leaving a long tail (about 20-25cm) for sewing to the body. Use the tail to close the remaining hole using a yarn needle and the ladder stitch. Finish stuffing to firmness desired before fully closing. Set head aside for assembly.
— Body :
Round 1 :
6 sc in magic ring (6)
Round 3 :
(1 sc, inc) x 6 (18)
Round 4 :
(2 sc, inc) x 6 (24)
Round 5 :
(3 sc, inc) x 6 (30)
Round 6 :
(4 sc, inc) x 6 (36)
Round 7 :
1 sc in each st (36)
Round 8 :
1 sc in each st (36)
Info :
If you'd like the body slightly oval, work one round of alternating dec/inc on opposite sides to flatten slightly; for a plumper cylinder keep even rounds. This bat's body is a rounded cylinder with the top slightly narrower for the neck.
Round 9 :
1 sc in each st (36)
Round 10 :
1 sc in each st (36)
Round 11 :
1 sc in each st (36)
Info :
Start counting the rounds carefully for leg and arm placement. In the sample, legs are attached roughly centered on the bottom and arms sit at about round 10-12 along the body side. Mark positions with pins before sewing.
Round 12 :
1 sc in each st (36)
Round 13 :
1 sc in each st (36)
Round 14 :
(4 sc, dec) x 6 (30)
Round 15 :
(3 sc, dec) x 6 (24)
Info :
Stuff the body moderately firm. For stability when standing, pack a little more fiberfill toward the bottom to give weight to the base. Do not completely close the bottom yet; leave a large tail for attaching legs and finishing.
Round 16 :
(2 sc, dec) x 6 (18)
Round 17 :
(1 sc, dec) x 6 (12)
Info :
Fasten off leaving a long tail for joining to the head or for final closing if you prefer to sew legs on separately. In our assembly we will attach the head first then sew legs into the bottom opening for stability.
— Legs (Make 2) :
Round 1 :
6 sc in magic ring (6)
Round 3 :
(1 sc, inc) x 6 (18)
Round 4 :
1 sc in each st (18)
Info :
These are short stubby legs; they are worked in the round and left unstuffed or lightly stuffed. If you want them sturdier for standing, add a bit of stuffing and a small felt disc in the base.
Round 5 :
1 sc in each st (18)
Round 6 :
1 sc in each st (18)
Round 7 :
(2 sc, dec) x 4, 1 sc x 2 (14)
Round 8 :
1 sc in each st (14)
Round 9 :
(1 sc, dec) x 4, 1 sc x 2 (10)
Round 10 :
1 sc in each st (10)
Info :
Fasten off leaving a long tail for sewing to the bottom of the body. Make both legs identical and place them symmetrically at the bottom front opening of the body. Sew through rounds 1-3 of the body to secure firmly.
Round 11 :
Work a short invisible decrease row to flatten the base lightly if needed, then fasten off (optional)
— Arms (Make 2) :
Round 1 :
6 sc in magic ring (6)
Round 3 :
1 sc in each st (12)
Round 4 :
1 sc in each st (12)
Info :
Arms are short and rounded like little mitts. Stuff them very lightly (or not at all) so they feel soft and tuckable under the wings. If you plan to position arms outward, add a short piece of wire and fold the ends to avoid poking through.
Round 5 :
(2 sc, dec) x 3 (9)
Round 6 :
1 sc in each st (9)
Round 7 :
1 sc in each st (9)
Round 8 :
Work 1 row of invisible decreases to narrow the top slightly (3 dec) leaving 3 sts, then fasten off leaving a long tail for sewing
Info :
Sew arms to the body on rounds 9-11 of the body, slightly forward of the wing seam so they peek out when wings are draped. Sew securely with multiple passes through both arm and body rounds.
— Ears (Make 2) :
Round 1 :
6 sc in magic ring (6)
Round 3 :
(1 sc, inc) x 6 (18)
Round 4 :
(2 sc, inc) x 6 (24)
Round 5 :
1 sc in each st (24)
Info :
Switch to a slightly smaller hook for a sharper ear point if desired. Fold the ear in half vertically and sew a couple of stitches at the base to create a slight point and allow the ear to cup forward like in the photos.
Round 6 :
1 sc in each st (24)
Round 7 :
(3 sc, dec) x 6 (18)
Round 8 :
(2 sc, dec) x 6 (12)
Round 9 :
(1 sc, dec) x 4, 1 sc x 4 (8)
Round 10 :
Fasten off leaving long tail for sewing. Slightly stuff ear base very light to hold shape if desired.
Info :
Sew ears to head top at about rounds 4-6 of the head, angled slightly forward (ears point at about 10 o'clock and 2 o'clock from front center). Reinforce base stitching so ears hold position.
— Wing Halves (Make 2) :
Info :
Each wing is worked flat in rows and then edged and joined to the body. The wing shape is slightly scalloped to mimic a cape. Work in continuous rounds or rows as described; the wing in the sample is broad and curves naturally when sewn into the side-back of the body.
Row 1 :
Ch 18, sc in 2nd ch from hook and across (17)
Row 2 :
Ch 1, turn, sc across (17)
Row 3 :
Ch 1, turn, (sc 5, inc) x 2, sc 3 (19)
Row 4 :
Ch 1, turn, sc across (19)
Row 5 :
Ch 1, turn, (sc 6, inc) x 2, sc 5 (21)
Row 6 :
Ch 1, turn, sc across (21)
Row 7 :
Ch 1, turn, (sc 7, inc) x 2, sc 7 (23)
Row 8 :
Ch 1, turn, sc across (23)
Info :
At this point the wing is wide. Continue building length by adding uniform rows of sc; the pictured wing has approximately 12-16 rows total to create a generous cape effect. Keep edges neat; you will scallop the edge later.
Row 9-14 :
Ch 1, turn, sc across (23) repeat for 6 rounds or until desired wing length (23)
Row 15 :
Ch 1, turn, (sc 3, (hdc, dc, hdc) in next st, sc 3) across to create scallops along the edge - work 3 scallops per wing spacing evenly
Row 16 :
Ch 1, turn, sc across entire row including scallop stitches to even out (23)
Info :
Work an outer border of single crochet in the round around the wing to create a clean edge and a little stiffness. Use BLO on the final body-attachment row to create a ridged seam for sewing if desired.
Round :
With the wing flat, work 1 sc around perimeter (including ends) to neaten edge. Slip stitch to join and fasten off leaving long tail for sewing to body.
Info :
Repeat wing for second side. For the cape effect you can make the wings wider and overlap slightly in the center back. If you prefer a single cape, make two halves and join them along the center back seam before edging.
— Wing Attachment & Underwing Detail :
Info :
When attaching wings, sew each wing to the sides/back of the body from about round 6 down to round 12 to create a cape drape. Use whip stitch or mattress stitch and hide tail by weaving. Reinforce seam by stitching across the top edge into the body rounds and head bottom round for secure hold.
— Bow Cord :
Info :
Make a simple chain cord with lavender yarn to tie around the neck. For a cord that matches the sample, ch 60 (or adjust length) and fasten off. Use a tapestry needle to thread ends back through a few stitches and knot to secure. Tie a bow around the neck and tuck ends under stitches or secure with a tiny tack stitch.
— Small Nose Embroidery :
Info :
Using light pink yarn and a yarn needle, make a tiny satin stitch nose centered between the eyes on the head around round 14-15. Use 3-4 small stitches to build a soft oval nose. Knot and weave ends into the back of the head to secure.
— Final Assembly :
Info :
Place the head on top of the body opening and pin around to check positioning (usually center of head to center of body opening). Using the long tail left on the head, whip stitch through the top rounds of the body (rounds 1-4) evenly around. Pull tight to secure and hide the seam by weaving the tail through nearby stitches.
Info :
Sew legs to the bottom of the body, spacing them evenly about 6-8 stitches apart for stability. Sew arms to body at about rounds 9-11 on the sides so they peek under the wing edge. Attach ears to head top as earlier described. Pin wings on symmetrically; sew along the wing base into the body rounds 6-12 keeping stitches small and secure. Tuck the bow cord under the wing seam or tie around the neck and tack in place with a couple of stitches to keep it from slipping.
Info :
After assembly, check seams and add extra reinforcement where needed. Smooth out surface with your fingers or a little steam from a distance to even stitches (do not press directly). Weave in all ends and trim close to the work. Optionally, add a small dab of fabric glue where the bow meets the neck for extra stability.
— Troubleshooting & Tips :
Info :
If your head seems too small or too large relative to the body, adjust stuffing levels before sewing. You can also add 1-2 extra rounds of even stitches to the head or body to change proportions slightly. For perfect symmetry, lay both wings flat and compare before sewing. Use a row counter or note app to track your progress through the many even rounds.
Info :
For child-safe toys, embroider the eyes instead of using safety eyes and ensure all attachments are secure. If making multiple bat sizes, keep same proportions by increasing initial increase rounds to add more diameter before working the even rounds for height.
— Pattern Summary (Round Counts Overview) :
Info :
Head rounds: 1-22 (approx 22 rounds). Body rounds: 1-18 (approx 18 rounds). Legs: approx 10 rounds each. Arms: approx 8 rounds each. Ears: approx 10 rounds each. Wing halves: approx 16-20 rows each plus border. This yields roughly 110-150 rounds/rows across the entire toy depending on exact wing length and edging choices. Count includes shaping and info-guided adjustments for an accurate build.
Info :
Use this pattern as a basis for many variations: smaller eyes, different bow colors, embroidered fangs or a tiny top hat for more Halloween flair. Enjoy the process and keep your tension consistent for best results.
This tiny Halloween bat is a sweet, compact project that brings together simple shaping and charming details to create a lovable companion. With big amber eyes, perky ears, and a draped scalloped wing cape, it has an irresistible personality in a palm-sized package. Whether you make a whole flock or a single gift, the construction is satisfying and quick to complete. Happy stitching — may your crochet hooks be swift and your yarn tangle-free! 🧶🦇