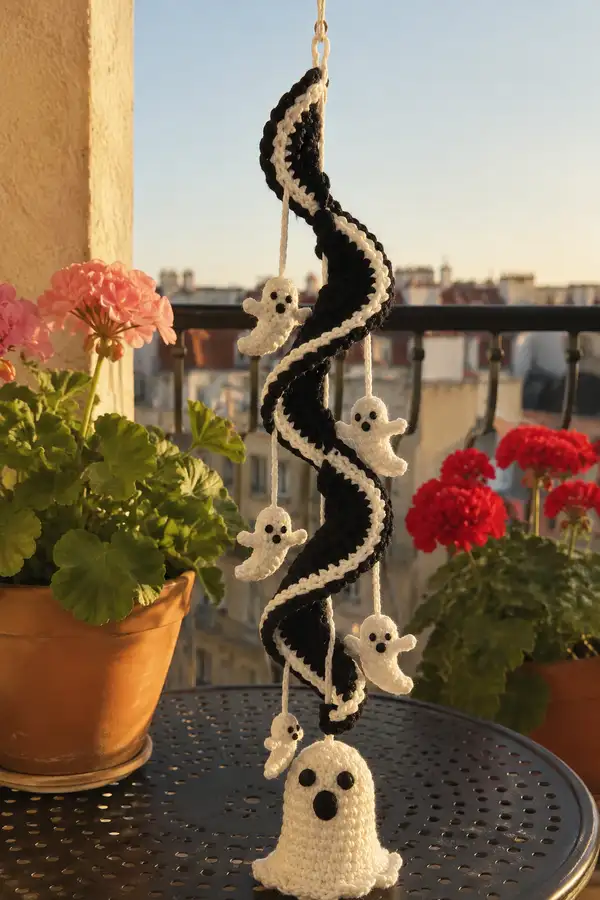
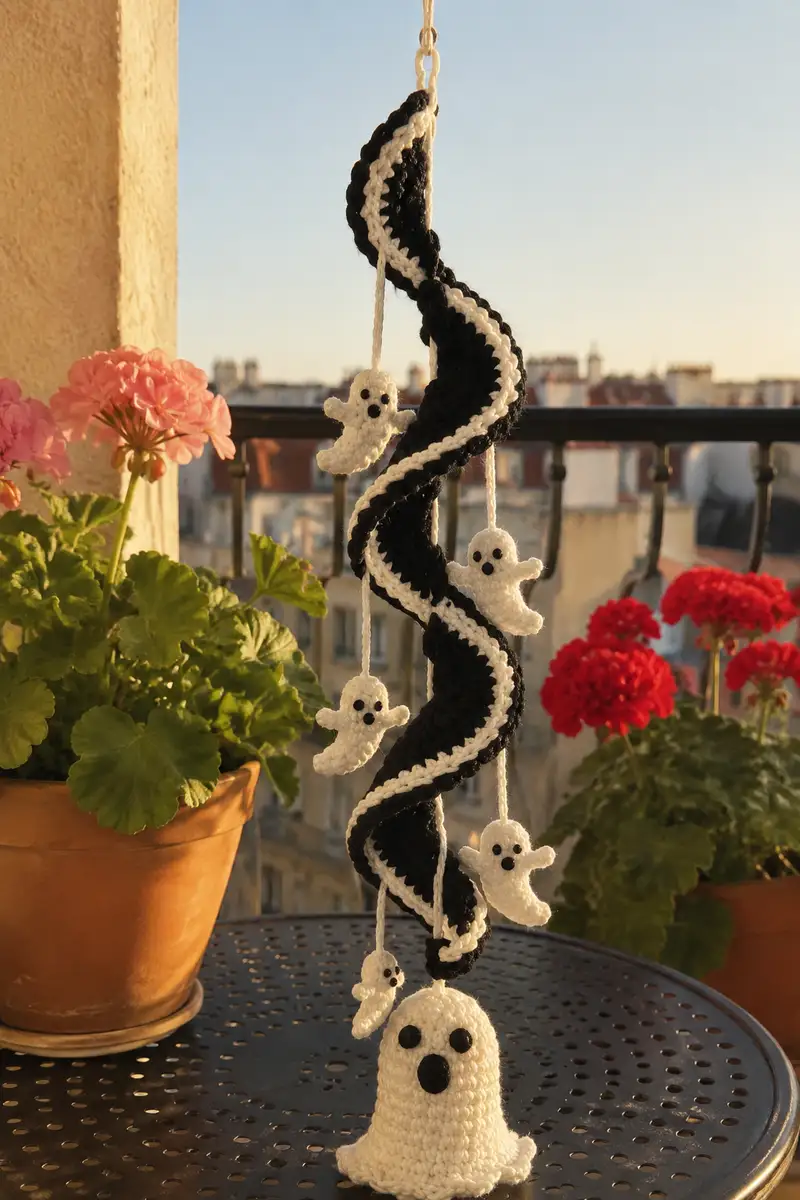
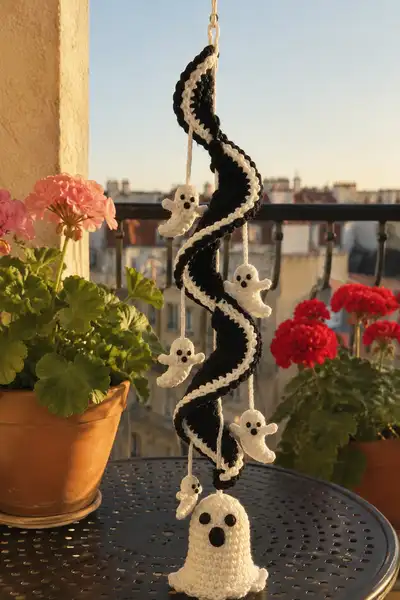
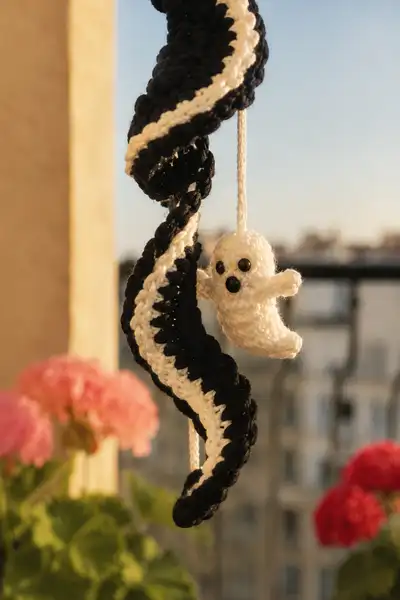
Create a dramatic black-and-white spiral garland dotted with tiny hanging ghosts — a perfect Halloween decoration. This pattern builds a long twisted spiral ribbon with a crisp white trim and multiple small crocheted ghosts that dangle from cord loops. The design finishes with a larger bell-shaped ghost base to weigh and anchor the garland for a pretty, swaying display.
Progress Tracker
0% Complete
— Materials & Gauge :
Info :
Gauge is flexible for decorative projects. Using worsted weight yarn and a 3.5 mm hook produces a spiral approximately 35-40 cm (14-16 in) long when twisted and stretched as in the photo. Adjust chain foundation for longer or shorter spirals. Work tightly for small ghosts so stuffing does not show.
— Spiral Panel (Black) — make 1 :
Round 1 :
Ch 60. 1 sc in 2nd ch from hook and across the chain (59sc). 3 sc in last ch to turn around (3). Continue along opposite side of foundation chain working 1 sc in each ch across (59sc). Join with sl st to first sc to form a closed oval (total = 59+3+59+3 = 124 sc)
Info :
We are creating an oval tube by crocheting along both sides of a long foundation chain to avoid long flat rows. Count carefully across both sides to reach the total 124 stitches.
Round 2 :
Work evenly 1 sc in each st around (124)
Round 3 :
Work evenly 1 sc in each st around (124)
Round 4 :
Work evenly 1 sc in each st around (124)
Round 5 :
Work evenly 1 sc in each st around (124)
Info :
These first rounds consolidate the base. Keep tension even. Use stitch marker at start of each round. This width will be the core of the spiral — if you prefer a wider spiral increase your foundation chain by increments of 6 and recalculate.
Round 6 :
Work evenly 1 sc in each st around (124)
Round 7 :
(7 sc, inc) x 16 around (140)
Round 8 :
1 sc in each st around (140)
Round 9 :
1 sc in each st around (140)
Round 10 :
1 sc in each st around (140)
Info :
After a slight increase at round 7 the oval is now a little wider. From this round forward we will form the length of the spiral by continuing even rounds to create a long tube. Each round adds height. The filmed project used 36 even rounds after shaping; adjust for desired length.
Round 11 :
1 sc in each st around (140)
Round 12 :
1 sc in each st around (140)
Round 13 :
1 sc in each st around (140)
Round 14 :
1 sc in each st around (140)
Round 15 :
1 sc in each st around (140)
Info :
If you want the spiral tightly tubular, use a 3.0 mm hook for the panel; however, the pattern assumes 3.5 mm to keep fabric springy so the spiral twists visibly when assembled.
Round 16 :
1 sc in each st around (140)
Round 17 :
1 sc in each st around (140)
Round 18 :
1 sc in each st around (140)
Round 19 :
1 sc in each st around (140)
Round 20 :
1 sc in each st around (140)
Info :
At this stage the panel has length; count rounds to match how long you want the spiral. The photographed garland used 36 rounds after the increase; I give instructions to work to Round 40 then add a white border and join for twist.
Round 21 :
1 sc in each st around (140)
Round 22 :
1 sc in each st around (140)
Round 23 :
1 sc in each st around (140)
Round 24 :
1 sc in each st around (140)
Round 25 :
1 sc in each st around (140)
Info :
If making multiple spirals for a longer hanging decoration, crochet additional panels and stitch them end-to-end along one side before applying white trim.
Round 26 :
1 sc in each st around (140)
Round 27 :
1 sc in each st around (140)
Round 28 :
1 sc in each st around (140)
Round 29 :
1 sc in each st around (140)
Round 30 :
1 sc in each st around (140)
Round 31 :
1 sc in each st around (140)
Round 32 :
1 sc in each st around (140)
Info :
When you have reached the desired length (photo length is approximated by working to Round 40) fasten off leaving a long tail for seaming later. Block the panel lightly if your yarn benefits from blocking to make the twist cleaner.
Round 33 :
1 sc in each st around (140)
Round 34 :
1 sc in each st around (140)
Round 35 :
1 sc in each st around (140)
Round 36 :
1 sc in each st around (140)
Round 37 :
1 sc in each st around (140)
Round 38 :
1 sc in each st around (140)
Round 39 :
1 sc in each st around (140)
Round 40 :
1 sc in each st around. Fasten off leaving 30 cm (12 in) tail for assembly (140)
— White Border Panel — make 1 :
Info :
The white border will be sewn to one long edge of the black panel to create the striking edge seen in the spiral. This is a narrow oval made to match the black panel's edge; it is smaller and will be worked longer to create a raised edge.
Round 1 :
Ch 16. 1 sc in 2nd ch from hook and across (15 sc). 3 sc in last ch. Continue on opposite side of foundation chain 1 sc in each ch (15). 3 sc in first ch to join (total 15+3+15+3 = 36)
Round 2 :
1 sc in each st around (36)
Round 3 :
(4 sc, inc) x 6 (42)
Round 4 :
1 sc in each st around (42)
Round 5 :
1 sc in each st around (42)
Info :
Work the white border long enough to run the full length of the black panel; as you approach the desired length, leave a long tail for sewing. The border can be slightly shorter so it hugs the edge; positioning during assembly will determine final coverage.
Round 6 :
1 sc in each st around (42)
Round 7 :
1 sc in each st around (42)
Round 8 :
1 sc in each st around (42)
Round 9 :
1 sc in each st around (42)
Round 10 :
1 sc in each st around. Fasten off leaving at least 30-40 cm (12-16 in) of tail for sewing along the edge (42)
— Small Ghost (Make 5 identical) :
Round 1 :
mr, 6 sc in ring (6)
Round 3 :
(1 sc, inc) x 6 (18)
Round 4 :
(2 sc, inc) x 6 (24)
Info :
Place a stitch marker to mark the start of each round. The first four rounds form the top of the ghost head. Keep stitches tight; use the 3.0 mm hook if you prefer denser fabric for small parts.
Round 5 :
1 sc in each st around (24)
Round 6 :
1 sc in each st around (24)
Round 7 :
1 sc in each st around (24)
Info :
At round 5-7 the ghost body forms. Decide now where you will place the eyes — the beads in the photo sit between rounds 5 and 6 about 6 stitches apart. If using safety eyes, secure now before stuffing.
Round 8 :
(3 sc, dec) x 6 (18)
Round 9 :
1 sc in each st around (18)
Round 10 :
Start left arm: ch 5, sl st in 2nd ch from hook and across (4 sl st), turn to join to body by working 1 sl st into next body stitch to anchor. Continue around body working 1 sc in each remaining st (18)
Info :
Arms are crocheted as short chains anchored to the side for a simple wing appearance. Alternatively you can crochet small semicircles and sew them on later. Work the same arm sequence on both sides in round 10 positioning them symmetrical about the body center.
Round 11 :
(2 sc, dec) x 6 (12)
Round 12 :
1 sc in each st around (12)
Round 13 :
(1 sc, dec) x 4 (8)
Round 14 :
1 sc in each st around (8)
Round 15 :
4 dec (4) — fasten off leaving tail for sewing (4)
Info :
Stuff lightly through rounds 11-14 using small bits of fiberfill to give the ghost a soft plumpness but still let it hang easily. Small ghosts should be lightly stuffed. Sew any small gap closed using tail and needle.
Round 16 :
Optional: Embroider a small mouth with black yarn centered below bead eyes or sew on a tiny black bead for mouth. Weave in ends.
— Small Ghost Arm Variation (Optional detailed wing) :
Round 1 :
Make 2 tiny wings per ghost. Ch 6, 1 sc in 2nd ch, 1 hdc in next ch, 2 dc in next ch, 1 hdc, 1 sc in last ch. Fasten off leaving tail for sewing.
Info :
Sew the tiny wings to each side at round 6-7 of the ghost body for a rounder arm shape like the larger photo ghost.
— Large Bell Ghost Base — make 1 :
Round 1 :
mr, 6 sc in ring (6)
Round 3 :
(1 sc, inc) x 6 (18)
Round 4 :
(2 sc, inc) x 6 (24)
Round 5 :
(3 sc, inc) x 6 (30)
Info :
The bell ghost forms as a hollow dome that flares at the base. Keep rounds neat and use the stitch marker to know where a round starts — it is critical for symmetric increases and even shaping.
Round 6 :
1 sc in each st around (30)
Round 7 :
1 sc in each st around (30)
Round 8 :
(4 sc, inc) x 5 + (3 sc, inc) x 1 to keep even (36)
Round 9 :
1 sc in each st around (36)
Round 10 :
1 sc in each st around (36)
Info :
At this point the dome is nearly full size. Insert a few small bits of stuffing to keep the dome from collapsing as you continue to shape the bell and before the flared edge rounds begin.
Round 11 :
(5 sc, inc) x 6 (42)
Round 12 :
1 sc in each st around (42)
Round 13 :
(6 sc, inc) x 6 (48)
Round 14 :
1 sc in each st around (48)
Round 15 :
(7 sc, inc) x 6 (54)
Round 16 :
1 sc in each st around (54)
Info :
Now begin the bell flare at round 17 by working in FLO to give a subtle ruffle. This creates the scalloped lower edge seen in the photo.
Round 17 :
1 sc in each st FLO around (54)
Round 18 :
(1 sc, inc) x 27 (81) — creates flare
Round 19 :
1 sc in each st around (81)
Round 20 :
*sc in next 3, 3 dc in next st* rep around to create scallop edging (approx 20 scallops depending on tension). Fasten off leaving long tail for sewing and hanging (approx 81)
Info :
Sew on two small black beads for eyes and a slightly larger bead for the mouth/aperture. If using crochet for mouth, make a small oval applique and sew it centered between eyes. Stuff the dome moderately before final closure; the bell in the photo is lightly stuffed so it flutters.
— Hanging Cord Loops — make 5 (for small ghosts) + top loop :
Round 1 :
With white yarn ch 30 (or desired length of drop). Fasten off leaving tail to sew. Repeat for each small ghost and one long loop for the top of the garland. For a thicker cord, crochet a chain, then work sl st into each ch to make a rounded cord.
Info :
Be consistent with cord length to produce balanced hanging. The photo shows variable lengths; you can stagger for a whimsical look. Reinforce attachment points by backstitching at both ends.
— Assembly & Joining White Border to Black Spiral :
Info :
Lay the black panel flat and place the white border along one long edge. The raised white should align so when the panel is twisted the white forms a visible stripe. Use pins to position and count stitch intervals so the border seam sits neat and even.
Round 1 :
Use the long tails to whipstitch the white border to the black panel along one long edge with a yarn needle. Make small even stitches, catching the edge loops of both panels. Continue until full length is attached.
Info :
When the border is secured, twist the strip into a spiral: fold the panel in half lengthwise, then rotate the top half relative to the bottom about 360–720 degrees depending on how tight you want the spiral. Pin sections as you go to hold twist, then use mattress stitch along the opposite long edge loosely to hold spiral shape without flattening.
Round 2 :
Stitch the backside seam at 2–3 cm intervals to maintain the twist. Fasten off tails and weave ends inside the spiral.
Info :
If you prefer a looser spiral, let the seam be flexible and use lightweight wire threaded through the tube near the spine to preserve twist. Be sure to cushion wire ends to prevent poking out.
— Attaching Ghosts & Top Loop :
Round 1 :
Decide positions for five small ghosts along the spiral: top, upper-middle, mid, lower-middle, and near bottom so there is visual rhythm. Use pins to mark locations on the outer edge of the white trim.
Round 2 :
Sew the top of each hanging cord to the inside (or seam) of the spiral using the tail from the cord or separate yarn. Tie a small knot on the inside and secure with a few stitches. Allow the ghosts to hang freely from the cord.
Round 3 :
Sew the large bell ghost to the very bottom: feed the bottom loop of the long spiral seam through the top of the bell ghost and secure with strong whipstitches so the bell hangs centered and provides a little weight.
Info :
Check overall balance by hanging the garland and adjusting distances. If dangling ghosts twist the spiral unevenly, shift their positions slightly. Add or remove small beads on cords to fine tune weight distribution.
— Final Finishing Touches :
Round 1 :
Weave in all loose ends using yarn needle; tuck them inside the spiral or inside ghost openings so threads are hidden. Check all bead eyes are fixed and glue if necessary for extra security.
Round 2 :
Block lightly if desired: mist with water and shape the spiral on a protected flat surface until dry to make the twist permanent. Do not over-wet small ghosts with bead eyes in place.
Info :
Hang the garland by the top loop over a curtain rod, window latch or door knob. For outdoor display, use durable yarn such as acrylic for weather resistance and consider adding a removable hook at the top.
This Halloween spiral garland brings a playful, moving focal point to any window or doorway — its bold black-and-white twist and tiny ghost charms are irresistibly charming. The step-by-step structure makes assembly satisfying and creative, and you can easily personalize length and number of ghosts. Hang it, sway it, and enjoy the way the little ghosts bob in the breeze! 🧶👻